Elements provides several tools to apply and add color. The Paint tools are just an example of these. Paint allows you to add color using brushes, just like you would with a real paint brush. You can either add color to existing images or use it in a way similar to MS Paint and create your own brand new images. It can be a lot of fun.
Whenever you use an Elements paint tool, you have the option to select brush size, opacity, airbrush effects, and the blend of the paint.
Throughout the rest of this article, we're going to discuss the methods you need to know to use the paint tools and apply them to your images.
Introduction to Paint
With the paint tools, you can change the color of a pixel in an image. Both the Brush tool and the Pencil tool work like real-life brushes and pencils and allow you to apply strokes of color.
You get the option of deciding how each tool will apply color, whether it is the brush size, gradually, with soft edges, with different blending properties, or with different shaped brushes. You can also airbrush just like you would in real life.
The Brush Tool
When you use the Brush tool, you can apply strokes of color. You can also use it to airbrush color onto an image.
The Brush tool is located in the Tools panel and looks like this: .
.
Let's start out by learning how to use the brush tool.
- First, select a foreground color that you want to use as the paint color.
- Select the Brush tool in the toolbox by clicking on it once.
- Select the options that you want to use with the Brush tool in the Tool Options panel.

In the Tool Options panel, you can:
-
Select the brush tip width, size, and opacity.
-
Select either Brush or Airbrush mode to specify how the paint blends with the existing colors and pixels, and opacity.

To use the Brush tool, simply click and drag your mouse cursor over the areas you wish to paint.
The Pencil Tool
Use the Pencil tool to create freehand lines. Unlike the Paint tool, the Pencil tool created hard edges that resemble those that a pencil would make. You can use the Pencil tool on existing images or create new ones.
The Pencil tool is located in the Tools panel and looks like this:
You can now use the preset panel at the bottom of the window to set the options for your pencil, just as you did with the paintbrush.
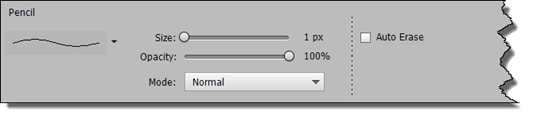
The Pencil tool also includes the Auto Erase feature (shown above on the right). When you use the Auto Erase feature, Elements uses the background color in areas that already contain the foreground color. If you begin in an area that doesn't contain the foreground color, then Elements will use the foreground color.
To use the Pencil tool, click and drag on the image with the Pencil tool active.
The Impressionist Brush
The Impressionist Brush is a fun little tool. You can use this tool to take a photograph and turn it into an image that looks like it was painted by hand.
Take a look at the image below.
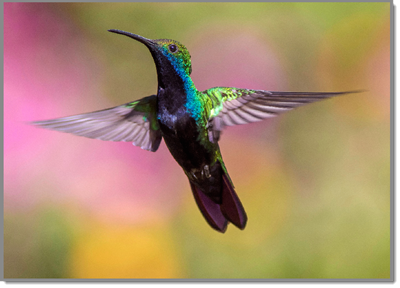
Using the Impressionist Brush, we're going to convert into a painted image rather than a photograph.
Here are the results:
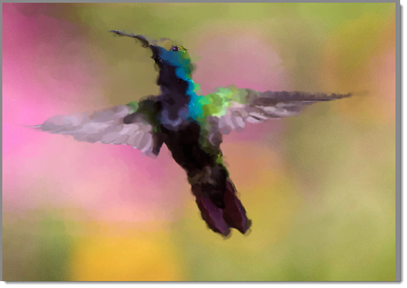
You can use the Impressionist Brush the entire image or just part of an image.
To use the Impressionist Brush, click on the Brush tool, then select the Impressionist Brush from the Tool Options panel.

Next:
- Use the preset panel to set your options as you did with the Brush tool.
- Click and drag over the areas of the image where you want to apply the Impressionist Brush.
Color Replacement Tool
Perhaps you want to change a specific color in your image. Maybe you have a photograph of a red rose and want to make it yellow instead. Using the Color Replacement tool, you can do that quickly and easily.
Here's how.
The Color Replacement tool is located in the Tool Options panel for the Brush tool. It looks like this: .
.
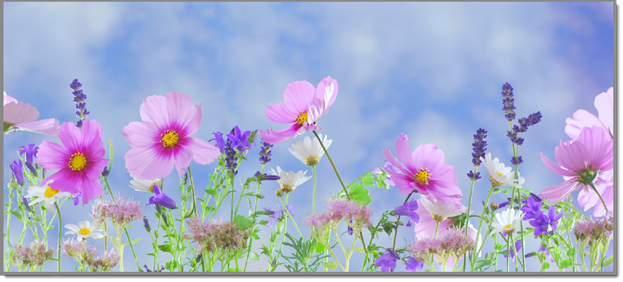
To show you exactly how to use this tool, we're going to take the flowers in the picture below and change their color to red.
The first thing we're going to do is select a brush tip from the Tool Options panel.

Then, we'll set the mode. It's best to use Color.

For limits, we have two choices.
-
Contiguous replaces the colors that are contiguous with the colors underneath your pointer.
-
Discontinuous replaces the sample color when it appears under the pointer.
We're going to leave it as it is and use contiguous limits.

For Tolerance, we'd want to select a low percentage if the color is similar to the one we're going to replace it with. We'd raise the percentage for a broader range of colors.

We want the areas that we change to have a smooth edge so they blend better, so we're going to keep Anti-Alias enabled. If we disabled it, then our changes would stand out more and have rougher edges.

Now, let's select a new foreground color to replace the color of one of the flowers.

We're going to click the color in the image that we want to replace, then drag the brush over the flower to replace the color. Don't expect to be able to use the Color Replacement Brush perfectly at first. It takes a steady hand and mouse control. The more you practice, the better you will get.
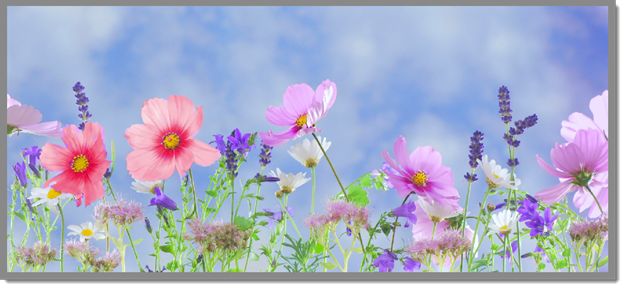
We have now changed the color of two of the flowers in the picture.
Blending Modes
Simply put, blending modes control how a color applied by a brush blend with the colors that already exist in the image.
You have to take into consideration:
- The base color, or the color that already exists in the image.
- The color that you are applying
- The color that will be produced as a result of the blend.
We can use the snapshot above as example. We changed the color of the flower. Originally, the inside part of the petal was an light yellow color. When we added the red color, the inside became a light pink.
Elements gives you Blending Modes to choose from that will directly affect how the base color and added color blend together.
The Blending Modes are:
-
Normal paints each pixel to make it the resulting color.
-
Dissolve does the same, but the result color depends on the opacity of the base color or the blend color at any location. It works best with the brush tool, using a large brush.
-
Behind only paints the transparent part of a layer.
-
Clear paints each pixel. It makes it transparent.
-
Darken selects either the base or the blend color. It selects whichever is darker as the result color. Pixels that are darker than the blend color do not change.
-
Darker Color does not produce a third color like the Darken blend can. It displays the lower value color.
-
Multiply multiplies the base by the blend color. The result is always darker.
-
Color Burn darkens the base color to reflect the blend color.
-
Linear Burn darkens the base to reflect the blend by reducing the brightness.
-
Lighten chooses the lighter color � either the base or the blend. The result is pixels darker than the blend are replaced. Those lighter than the blend do not change.
-
Screen multiplies the inverse of the blend and base. The result is always lighter.
-
Color Dodge brightens the base color to reflect the blend.
-
Linear Dodge does the same as Color Dodge except it increases the brightness.
-
Lighter Color displays the higher value color. It does not produce a third color.
-
Overlay mixes the base color with the blend color to show the lightness or darkness of the original color.
-
Soft Light darkens or lightens the colors based on the blend color. The result is a diffused spotlight on the image.
-
Hard Light is more of a harsh spotlight on the image.
-
Vivid Light burns the colors. Increases or decreases the contract, depending on the blend color. If the blend color is light, then image is lightened.
-
Linear Light burns the colors by decreasing the brightness.
-
Pin Light replaces the color depending on the underblend color.
-
Hard Mix turns colors to white, black, red, blue, yellow, green, magenta, and cyan.
-
Difference subtracts the blend color from the base color or vice versa. It depends which has the greater brightness.
-
Exclusion has a similar effect to Difference, but lower contrast.
-
Hue has a result color with the luminance of the base color and the hue of the blend color.
-
Saturation has a result color that has the luminance and hue of the base color, but the saturation of the blend color.
-
Color has a result color with the luminance of the base, but the hue and saturation from the blend color. This one is useful for monochrome images and for tinting.
-
Luminosity has a result color with the hue and saturation of the base, but the luminance of the blend.
Whenever you use a tool that lets you specify the blending mode you want to use, you'll see it the present panel for that tool. It will be listed as Mode.
The Eraser Tool
The Eraser tool erases pixels in an image as you move over them with the eraser. However, if you're working in a background layer , erased pixels turn to the background color.
You can find the Eraser tool on Tools panel. It looks like this:
To use the eraser, simply click on the Eraser tool in the Tools panel, then go to the Tool Options panel to set your preferences.
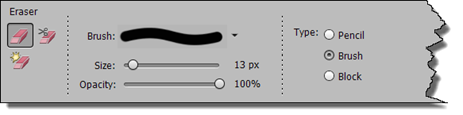
The options found in the Tool Options panel are the same as with the Brush tool. The only difference is that the Eraser tool is used to erase.
Let's erase part of the picture below to show you exactly how the Eraser tool works.

We kept the default options for the Eraser Tool in the Tool Options panel, then dragged the eraser over the part of the picture that we wanted to remove.
This is the result:
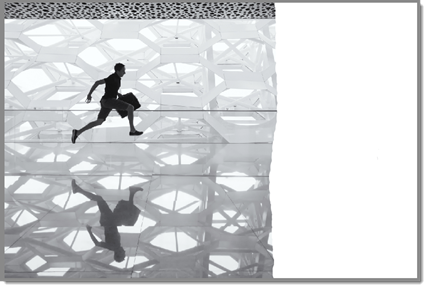
As you can see above, we erased the right side of the image.
The Magic Eraser Tool
When you use the Magic Eraser, the pixels you erase become transparent. The only exception is if you're working in layers. If you're working in layers, they become the background color.
The Magic Eraser is located with the Eraser tool. Just select Magic Eraser in the Tool Options panel for the Eraser tool. It looks like this:
-
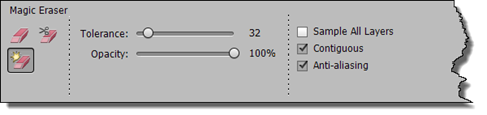
Tolerance is the range of colors you want to erase. A low tolerance erases pixels with a similar color value to the pixel you click.
-
Anti-alias gives the erased areas a smooth edge.
-
Contiguous erases pixels that are contiguous to the one you click. You can choose to erase contiguous pixels or similar pixels on the current layer.
-
All Layers. Deselect this option if you only want to remove pixels from one layer.
-
Opacity determines the strength of the erasure. If you want to completely erase the pixels, select 100%. Otherwise, they are lightened and faded to match the opacity level that you set.
Let's use the Magic Eraser to show you an example.
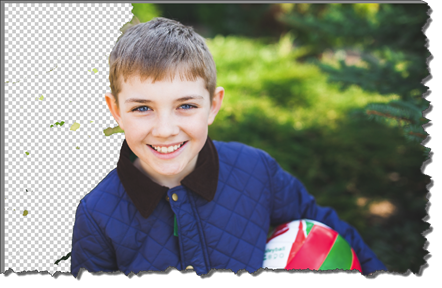
As you can see in the snapshot above, we've started to erase the background of the image. The Magic Eraser erased all contiguous pixels of a similar color value. All it took was one click.
If the Magic Eraser erases too much of the image, click Undo and reset the tolerance, then try again. Sometimes finding the right amount of tolerance takes time and practice.
Use the Magic Eraser when you want to erase a large area that contains the same color or very similar colors. It's a lot quicker and easier than using the Eraser.
Background Eraser Tool
You can use the Background Eraser tool to do just as its name implies. You can erase the backgrounds of images while keeping the foreground intact. The erased area becomes transparent.
The neat part is that, even if you accidentally drag the eraser over the foreground object, it won't be erased as long as the color isn't a similar value.
The Background Eraser tool comes in handy when you're working in layers and only want to keep the foreground object in a layer before merging it with other layers. But more on that later. For now, let's learn how to use the Background Eraser tool.
The Background Eraser tool is located in the Tool Options panel with the Eraser tool. It looks like this:  .
.
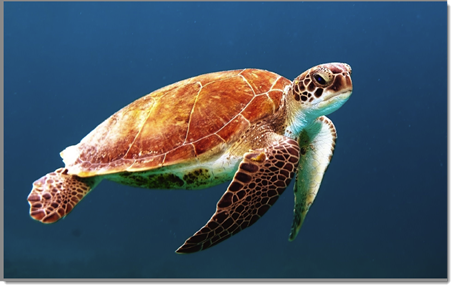
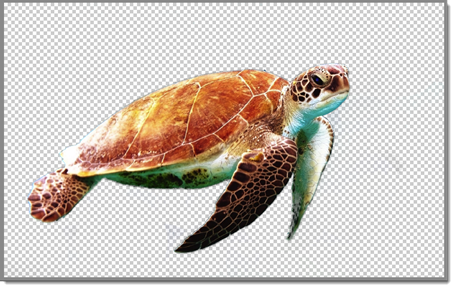
We're going to erase the background of the photo below using the Background Eraser tool.
First, we are going to go to the Tool Options panel and set our preferences for the tool.
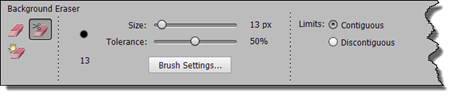
These are all options we've worked with already in this article, so they should be familiar to you.
To use the Background Eraser tool, drag your mouse over the background area. As you drag your mouse, you will notice that the cursor becomes a circle with crosshairs inside the circle. Move the crosshairs over the background colors you wish to erase. Do not let the crosshairs move over any area you do not want to erase � or foreground colors. You can adjust the brush size if needed for more accuracy.
As you can see in the snapshot below, we've erased the background of the image.
Brush Preset Manager
Earlier in this article, we learned about the width of the brush tip as well as the pixels of the brush stroke. But when we learned that, we learned it using the same brush that provided the same strokes. The strokes just had different thicknesses and width.
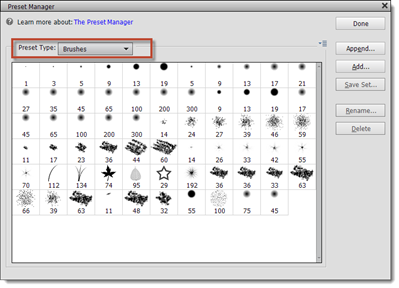
However, Elements also provides several different brush types that you can use. To view the different types of brushes, go to Edit>Preset Manager.
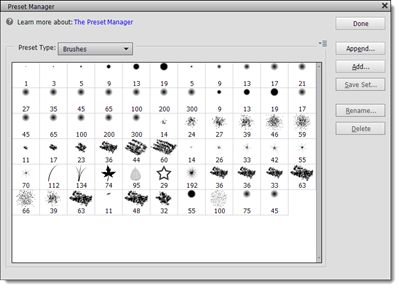
In the picture above, you can see for yourself the different brush types. If you want to use one of them, simply click on the one you want then click the Done button.
You can also select new color swatches, gradients, or patterns by making a selection from the Preset Type dropdown list.