In movie making programs such as Final Cut Pro X, keyframes are used to create animation. Keyframes allow you to animate special effects. For example, you can make a title move across a frame. You can even make a clip resize as it moves across a frame.
However, before you start to think that keyframes are a complicated thing, let us assure you that they are not. Keyframes are simply points where you set values in order to create animation. The first keyframe that you add to a clip starts the animation. You will add a second keyframe to end the animation.
Let's use the example of clip moving across the frame. You set a keyframe for the clip as is, then move the clip. Once you have moved the clip, you set another keyframe. Final Cut Pro X then interpolates the values so that the clip moves smoothly across the frame, from the first to the last where you entered the values.
Setting Keyframes
Keyframes allow you to create animation and other special effects. That said, however, simply adding a keyframe to a clip will not automatically add animation or a special effect to your clip.
Keyframes are used in conjunction with other tools available in Final Cut Pro X, such as the Transform, Crop, and Distort tools.
In this article, we are going to discuss the various tools you can use to create special effects in your project. Once you have learned how to use those tools, we will start to apply keyframes to create animation.
Transforming Clips
The first tool we are going to discuss is the Transform tool. The Transform tool in Final Cut Pro X gives you the ability to resize, rotate, and move a clip within its frame.
To see how the Transform tool works, first select a clip in the Timeline.
You can also select a range of clips within a video by going to the toolbar, then selecting the Range Select tool.

When you use the Range Selection tool, the skimmer may get in the way of selecting a range. You can disable the skimmer by clicking the button on the upper right hand side of the Timeline to disable video and audio skimming.
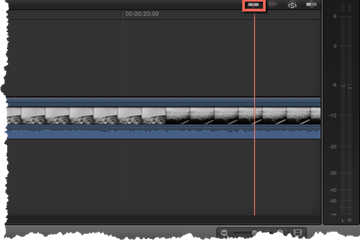
The button to the right looks like a waveform. You can click it to turn audio skimming off.
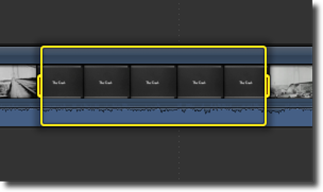
Select your clip or range of clips, as we have done below.
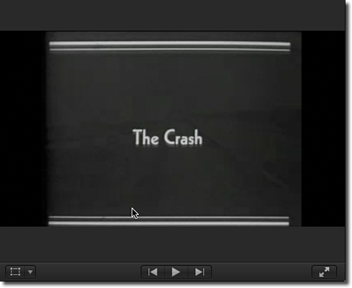
Now, take a look at the Viewer. Your selected clip is displayed there.
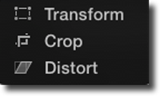
The Transform tool is circled below.
Click the triangle to see the pop up menu, and select the Transform tool.
When you look at your clip in the Viewer, you can see handles appear around it.
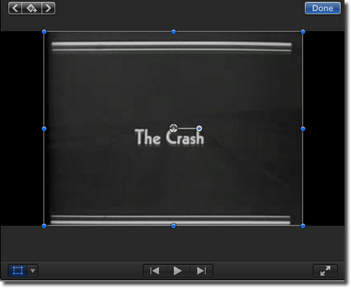
Let's learn what these handles do:
-
The blue handles located in the corners will allow you to resize the clip, but keep the aspect ratio. In other words, it will not become distorted.
-
The blue handles in the middle of each side allow you to drag in to make the image narrower � either by width or height. These adjustments will affect the aspect ratio.
-
The white circle in the center of your clip is the rotation anchor point. You can rotate your clip around this point, or you can drag the rotation point to move it to another area on the clip.
-
The blue handle that is next to the rotation anchor point is the handle you use to actually rotate the clip.
To move the clip, click and drag inside the clip.
Apply any transformation effects to the clip, then click the Done button in the upper right hand corner of the viewer.
Flipping a Clip
The Transform tool can be used to flip a clip � or flip the clip so it faces in the opposite direction.
To flip a clip, select the clip in the Timeline. It should then be displayed in the Viewer.
Next, go to the Inspector to the right of the Viewer, and click Video at the top to access the Video Inspector.
Go to Transform in the Video Inspector.
Go to Scale.
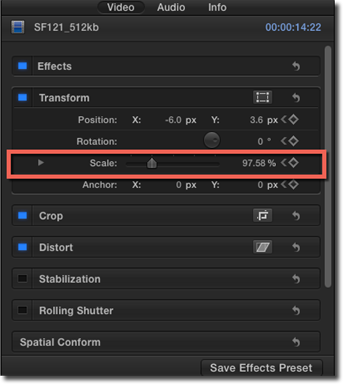
Click the triangle to the left of the word Scale.
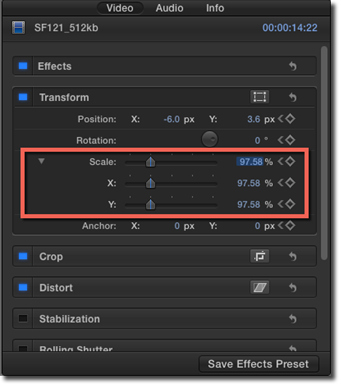
For the X value, type -100.
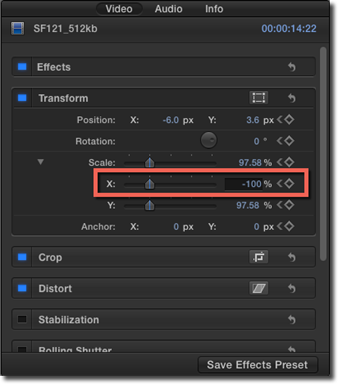
Hit Return.
Cropping Clips
When you crop a clip or image, you cut away the outer edges of the clip or image. The clip or image's size is reduced as a result. The remaining area of the clip after the crop will be expanded to fill the frame.
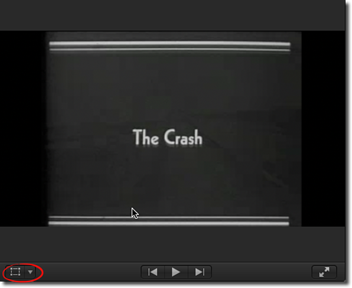
To crop a selected clip in Final Cut Pro X, select the Crop tool, which is located with the Transform tool in the Viewer.
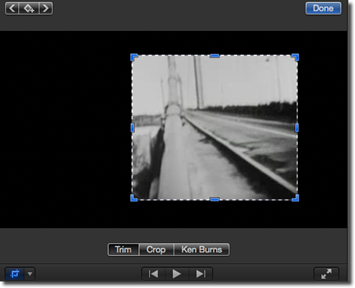
As you can see, the Crop tool is now active in the lower left corner of the Viewer.
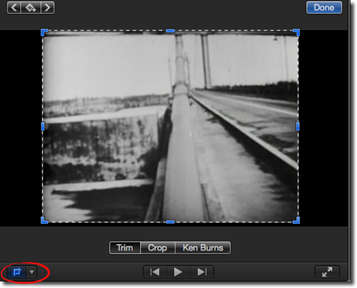
You can also now see three options below your clip. These options are Trim, Crop, or Ken Burns.
Click Crop.
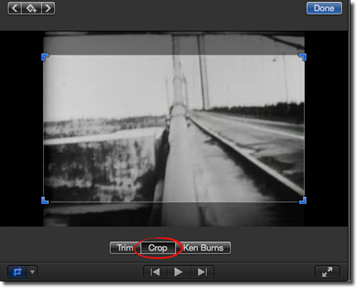
There are four blue handles that appear on the clip when you select the Crop option. These handles allow you to drag in to crop the image while keeping the aspect ratio.
Adjust the handles to crop the image, then click the Done button in the upper right hand corner of the Viewer.
Trimming Clips
When you trim a clip in Final Cut Pro X, you trim away the edges so that you can see the clip beneath it.
In Final Cut Pro X, the Trim tool is located with the Crop tool in the Viewer. When the Crop tool is selected, the Trim tool will appear as an option below the clip, as pictured below.
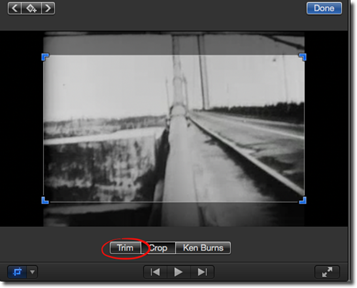
With the Trim tool selected, you will see blue handles at each corner of the clip, as well as on all four sides.
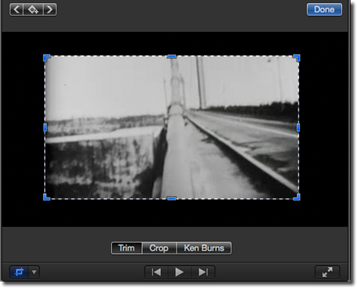
To trim the clip, drag a handle inward on the clip. This will not resize the image. It just trims away the edge on which you are dragging.
At the top of the Viewer window, you can see the number of pixels you are trimming away:

You can also click Option+Drag to trim from the center. This trims equally from opposite corners or edges.
Click Shift+Drag to maintain the aspect ratio.
Click Option+Shift+Drag to keep the aspect ratio and trim from the center.
The Ken Burns Effect
The Ken Burns effect gives you the ability to zoom in and pan inside an image or clip to create movement. When applied to video, the effect is applied to the entire duration of the clip. It also includes an ease-in and ease-out effect at the start and end of the clip. The Ken Burns effect cannot be applied to a portion of a clip or a range of clips.
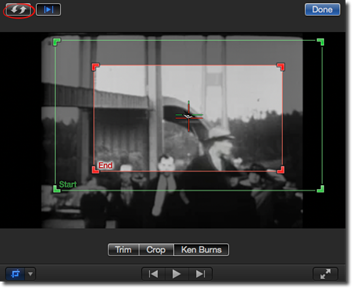
The Ken Burns effect is located with the Crop tool. If you select the Crop tool in the lower left hand corner of the Viewer, you will see the Ken Burns effect as an option below the displayed clip.
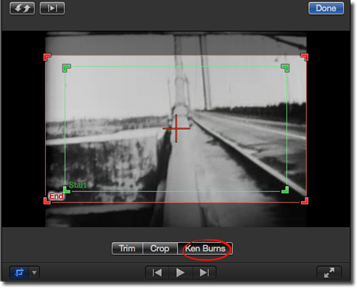
The green rectangle in the clip above shows where the move begins, and the red shows where the move ends.
You can click the reversal button (circled below), and the red and green rectangles will switch places.
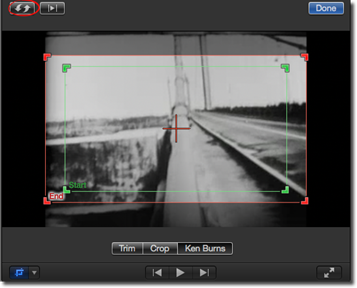
Click the green rectangle, then adjust the green handles to where you want the motion to start. Next, click the red rectangle, then adjust the red handles for where you want it to end.
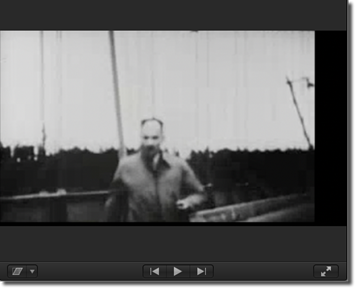
In the shot below, we start out with a wide shot, then zooming in.
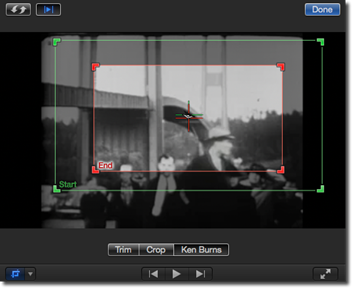
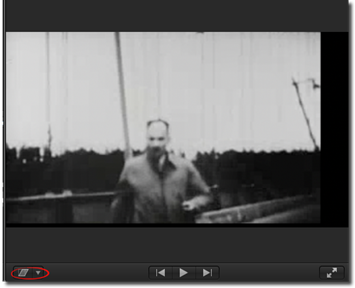
Click the Preview button (circled below) to preview the animation.
Click the Done button when you are finished.
Distorting Clips
When you distort a clip, you can create a skewed look or even add a 3D perspective to a clip. You do this by dragging individual corners of the clip until you achieve the look that you want.
To add the Distort effect to a clip, start out by selecting the clip.
Next, go to the Viewer, and choose Distort from the Transform pop up menu.
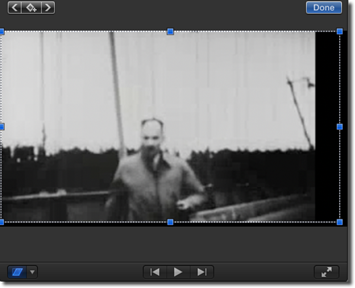
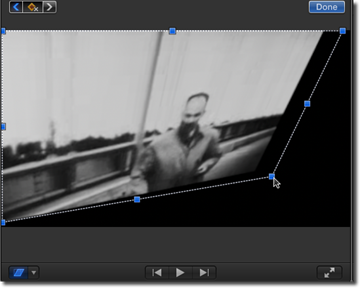
You will see blue handles appear around the clip in the Viewer when you click on the Distort effect button.
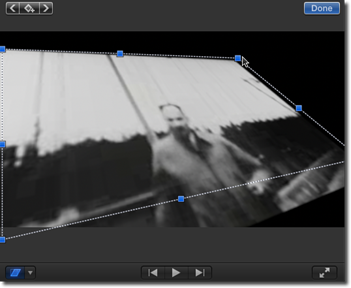
Drag any of the corner handles to give the clip a 3D perspective, as illustrated below.
Drag the handles in the middle of the sides to create a skewed look.
Drag inside of the clip to adjust the position.
Click Done when you are finished.
More on Keyframes and Interpolation
At the beginning of this article, we discussed how keyframes are used in Final Cut Pro X to animate special effects. At that point, we explained that keyframes are simply points where you set values in order to create animation. The first keyframe that you add to a clip starts the animation. You will add a second keyframe to end the animation.
The properties or parameters of your clip will change between the first keyframe and the second keyframe to complete the animation. Final Cut Pro X will interpolate the values between the first keyframe and the second keyframe to create a smooth animation.
Interpolation is the process that fills in the unknown data between two values. This happens when are animating effects, as we talked about in the last section. Interpolation in Premiere Pro is used to animate movement, audio levels, image adjustments, color changes, transparency, etc.
The type of interpolation used in Final Cut Pro X will depend on the effect you want to achieve.
-
Temporal Interpolation is used for motion. It applies the selected interpolation method to changes in motion. The default interpolation for temporal is linear.
-
Spatial Interpolation applies the selected interpolation method to changes in shape, such as if corners are rounded or angled. The default interpolation technique is linear, but sometimes it can be Bezier.
-
Linear Interpolation will create an even paced change from one keyframe to another.
-
Bezier Interpolation will allow the rate of change to either accelerate or decelerate based on the shape of the Bezier curve.
For example, we can see the interpolation types for an effect by right clicking on the line that connects two keyframes, as shown below.
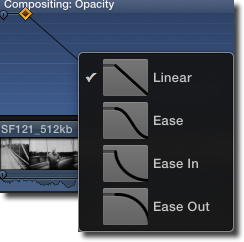
For some effects, you can even adjust the timing.
-
Ease. Starts and ends slowly. Accelerates in the middle.
-
Ease In. Starts quickly, slows as it approaches the end keyframe.
-
Ease out. Starts slowly, then speeds up as it approaches the end keyframe.
Keyframes can be set in the Timeline or in the Viewer. If you set keyframes in the Timeline, you will have to display the Video Animation Editor for the clip. We will teach you both methods in this article.
Using the Animation Editor
To add keyframes using the Animation Editor, first select your clip, then go to Clip>Show Video Animation.
The Animation Editor appears in the Timeline, as shown below.
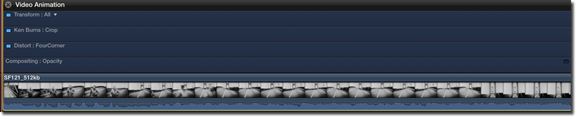
Each effect has its own section in the Animation Editor.
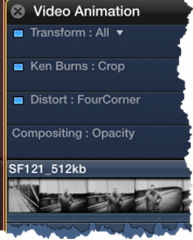
The effects with a triangle next to them have more than one parameter, meaning that you can add keyframes to achieve variances of the effect.
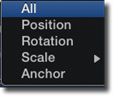
For example, with the Transform effect, you can also use keyframes to animate position, rotate the clip, scale the clip, or anchor the clip. The anchor points for a clip can be adjusted in order to create customized rotation effects.
To add keyframes to your clip, select the effect that you want to add in the Animation Editor.
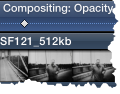
We are going to choose Compositing>Opacity to adjust the opacity in our clip and create a fade-out effect using keyframes.
Press Option+Click at the location on the horizontal effect control where you want to place the first keyframe.
Notice that the keyframe shows up as a white diamond.
If you want, you can use the playhead and move it to different locations in your clip so you can place the keyframe exactly where you want it.
The white diamond we just added represents the first keyframe, or the beginning of the animation. We can click on the keyframe and drag it left or right to move it in the Timeline.
Next, we are going to add a second keyframe.
Option+Click to add the second keyframe.
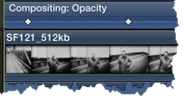
Next, go to the far right side of the Animation Editor, and click the box that appears to the far right of the Compositing: Opacity Effect.

Here is a close up of the box.
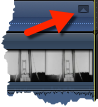
This expands the Compositing area.
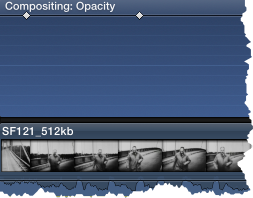
The second keyframe is where our animation will end. We need to adjust the parameters for the Opacity effect in order to create the animation.
To do this, we drag the keyword down. This reduces the opacity.

Our clip now goes from 100% opacity to 0% opacity. Final Cut Pro X will create this animation evenly over time, starting with the first keyframe and ending with the second.
You can add as many keyframes as you want for an effect. To navigate between keyframes, press "Option" to go to the next keyframe, and "Option ;" to go to the previous keyframe.
You can even add more than one effect. For example, you could have the clip rotate as the opacity changed. You would simply create keyframes for the opacity, then keyframes for the rotation.
Let's go ahead and make the clip rotate as it fades.
As you can see below, we have added two keyframes for Transform: Rotate.
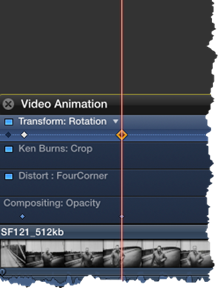
When we worked with opacity, we were able to click on the box to the far right to enlarge the Compositing: Opacity section in the Animation Editor.
This box does not exist with Transform: Rotation.
Instead, we added our first keyframe to mark the beginning of the animation. We added our second keyframe by moving the playhead to the location where we wanted it, then clicking Option+Click.
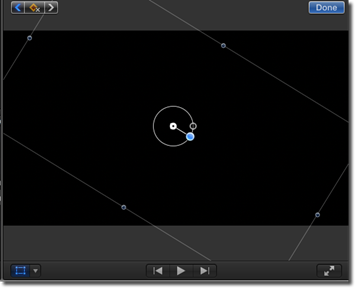
Next, we are going to go to the Viewer.
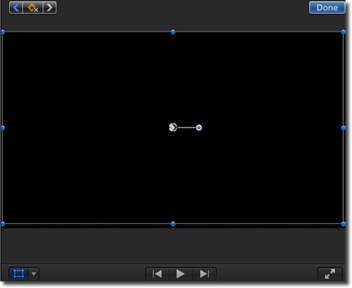
We can use the blue rotation handle in the center of the clip to rotate it.
Now, we can go back to our Timeline and play our clip from the beginning to see both animations take place.
Using the Audio Animation Editor
To start, select the audio clip whose audio you want to adjust.
Next, go to Clip>Show Audio Animation.
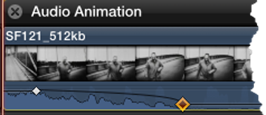
Just as we did with the Video Animation Editor, Option+Click to add a keyframe, as we have done below.
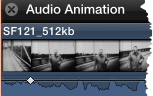
Now, add a second keyframe.
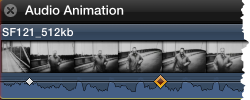
Drag the second keyframe up or down to adjust the volume.
Adding Keyframes using the Viewer and Video Inspector
You can keyframe three different effects in the Viewer: Transform, Crop, and Distort. With Crop, you can also keyframe the Ken Burns effect, as well as trimming.
Let's show you how to keyframe the Distort effect using the Viewer and Video Inspector.
To start with, position your playhead in the Timeline where you want to add your first keyframe, then go to the Viewer. The clip will be displayed there.
Go to the lower left hand corner of the Viewer, and select the Distort tool.
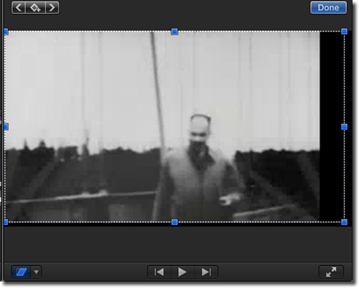
To add a keyframe, click the keyframe button.

NOTE: The arrows to the left and right of the keyframe button will allow you to go back to the prior keyframe or forward to the next keyframe.
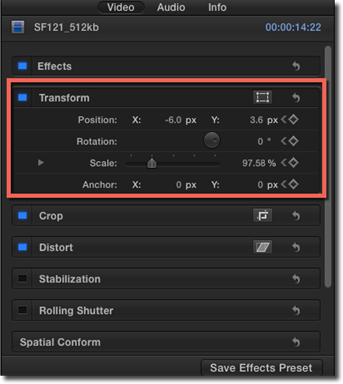
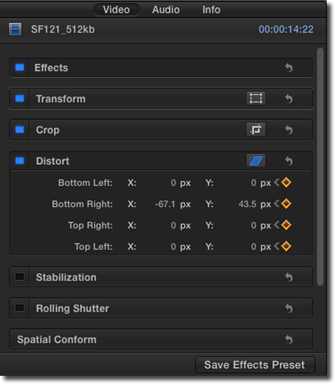
If we now look at the Video Inspector, we can see the parameters for the Distort effect.
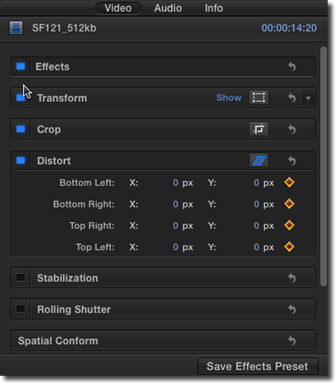
We can also see we have added a keyframe for those parameters.
Now, use the playback controls in the Viewer to advance the clip to where you want to place the second keyframe.
Click the Keyframe button again.
Now, you can either use the handles on the clip in the Viewer to distort the image.
You can also adjust the parameters for the Distort effect in the Video Inspector.
Click Done in the Viewer when you are finished to apply the changes to your project.