It is safe to say that you are familiar with the use of titles and transitions. Indeed, they are an important part of every television show, feature film, or educational documentary. Titles tell us the name of the film, who is in it, and sometimes, in the case of foreign films or closed captioning, what an actor is saying. Transitions are often used to create a passage of time or change of scenery or of circumstance. Generators, on the other hand, are rarely seen by the average film goer or TV viewer. They are often used to create placeholder clips during film production, and to create timecode counters.
Transitions
Transitions are effects added between clips. They help ease the flow of the video from clip to clip by making it smoother.
NOTE: Transitions should only be used when your project is nearly complete. The reason for this is that they affect trimming and motion-related effects.
You will find all transitions in the Transition Browser. To access it, click the Transitions button on the toolbar.
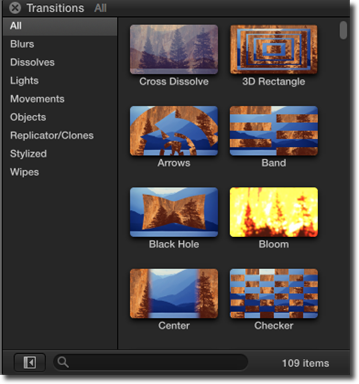
The Transitions Browser is divided into two sections. On the left, transitions are organized into categories. On the right, you will find the transitions themselves.
You can move your mouse over a transition to see a sample of it. Move the mouse back and forth to use the skimmer, and see it animated.
Things to Know about Transitions
Before we work more with transitions, there are a few things you need to know.
- A cut is a transition without a transition effect and occurs when two clips abut each other on the Timeline.
- Whenever you apply a transition effect, Final Cut Pro uses frames from the two clips to create it.
- Transitions should be used for major scene changes. Do not overuse them.
- The mood of the project should be taken into account when adding a transition. Use a transition that matches the mood.
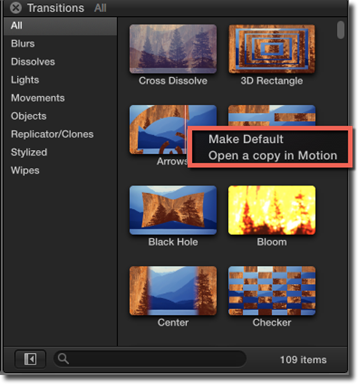
Setting a Default Transition
The default transition in Final Cut Pro is a 30-frame cross-dissolve, but you can change it easily. To do so, go to the Transition Browser.
Click on the transition that you want to make the default transition.
Control-click on the transition and select Make Default.
Adding a Transition
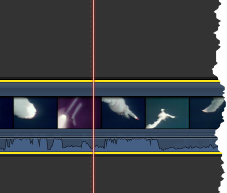
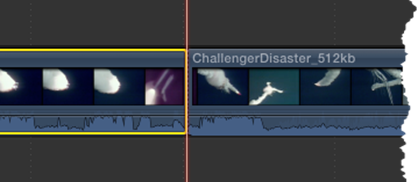
To add a transition, drag it from the Transition Browser, and drop it onto the intersection between two clips. This intersection is called the "edit point."
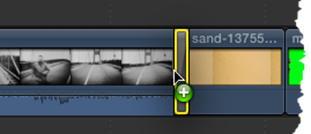
If you drag a transition and just drop it onto a clip, it will automatically create a transition on both ends of the clip.
You can apply transitions to several clips at once. To do so, select all the clips you want to add the transition to, then double-click the transition in the Transition Browser.
Setting Default Duration
The default duration for a transition is one second. If you need to change this go to Final Cut Pro > Preferences.
Choose Editing.
Use the Duration slider to set the length in seconds.
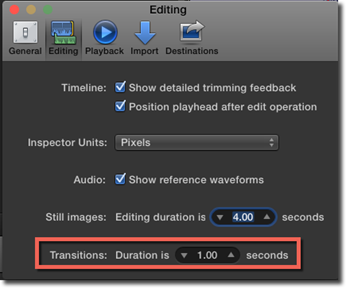
NOTE: Some transitions have an ironclad duration. Changing the default will not affect them.
Deleting a Transition
To delete a transition, click on the transition and press Delete. Deleting a transition will not leave a gap.
Replacing a Transition
To replace one transition with another, drag a transition from the Transition Browser and place it on the transition you want to replace. Final Cut Pro replaces it for you.
Changing the Duration of a Transition
The easiest way to change the duration of a transition is by clicking the edge of the transition in the Timeline and then dragging it. Dragging outward, away from the edit point, makes the transition longer.
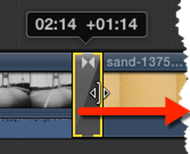
Dragging inward makes it shorter.
Alternatively, you can click on a transition in the Timeline and go to Modify > Change Duration. Enter a duration in the Dashboard and hit Return.

Adding Audio Transitions
If a clip has audio attached to it, Final Cut Pro will automatically insert a crossfade transition whenever you apply a video transition to it.
If the audio is detached, you will have to insert a crossfade transition manually.
To do so, select the edge of the audio clip in the timeline.
Now go to Edit > Add Cross Dissolve.

How to Create a Camera Freeze Frame Effect
In this section, we are going to put the skills we have learned together to create a simple but effective camera freeze frame effect.
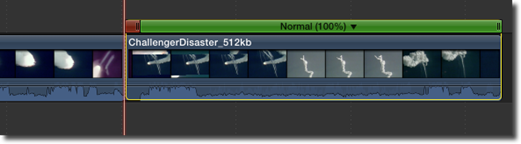
Choose a clip and move it from the Event Browser into the Timeline.
Now move the play head to a point you want to freeze.
Next, split the clip by clicking Command+B.
Select the second half of the clip.
Now we are going to create a "hold segment."
Hit Shift+H on your keyboard. A two-second segment is automatically added to the clip.
A retiming bar will appear above the clip. The red part represents the hold segment.
Click and drag the edge of the red bar to adjust its duration.
Click the Transitions button in the Toolbar. Choose Lights in the category section in the Transition browser. You can choose any one of the options.
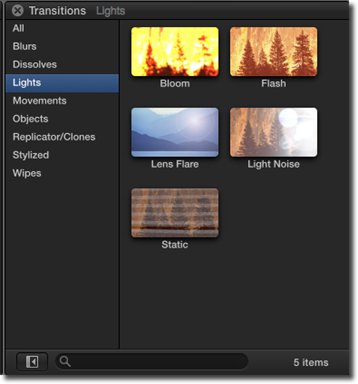
We are going to choose Flash.
Drag it onto the edit point between the two clips.
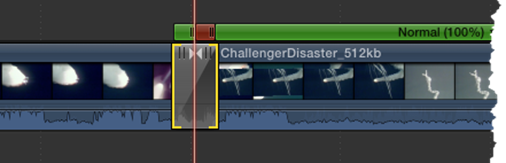
You are going to want to adjust the length of the transition, but just remember, we just want a quick flash, like that from a camera.
Now we are going to add a sound effect. Click the Music and Sound button in the Toolbar. At the bottom of the Music and Sound browser, click the search area and type "Camera."
You will find a file called Camera Shutter.caf created by Apple, Inc.
Drag it into the timeline and position it under the start of your freeze frame.
That's all there is to it.
Titles
Titles are inserted into your movies using the Titles browser. To access it, click the Titles button on the toolbar.

The Titles browser is almost identical to the Transitions browser. On the left, titles are organized into categories. On the right, you can move your mouse over a title to see a sample of it.

Adding a Title to your Clip
To add a title to your project, move the playhead to a point in the Timeline where you want the title to appear. Double-click the title in the Titles browser.
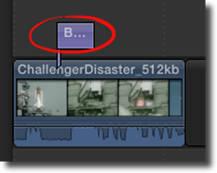
The title appears as a connected clip, connected to the primary storyline.
You can also add a basic title in the lower third of the screen. These are used for things like closed captioning or informational notes in documentaries.
To add one, go to Edit > Connect Title > Basic Lower Third.
You can insert a title between two clips in the timeline by dragging the title from the Title Browser to the edit point.
To replace a clip in the Timeline with a title, drag the title from the Titles browser onto the clip, then choose Replace.
Entering Text in your Titles
You can easily edit text in the Viewer.
To do so, select the title clip in the Timeline.
Go to the Inspector. Click Text at the top of the Inspector if you need to, then type the text for the clip in the Text field.
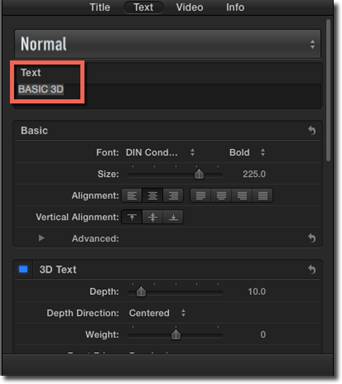
You can also change the font, size, alignment, etc. in the Inspector.
Deleting Titles
To delete a title, select it in the Timeline and press the Delete key on your keyboard.
How to Adjust Opacity your Titles
You can easily adjust the opacity of your titles. Do so, simply double-click the title clip in the Timeline. Click Video at the top of the Inspector window.

Move the opacity slider until you are satisfied with the results.
Generators
Generators are predefined clips you can add to your projects. They can be used to create such things as placeholder clips, timecode counters, shapes, and backgrounds. Use generator clips can be moved or altered in length just like any other kind of clips.
Generator clips can be found on the Generator Browser. To view the Generator Browser, click on the button on the toolbar.

The Generator Browser is nearly identical to the Effects browser. On the left, generators are broken down into categories.
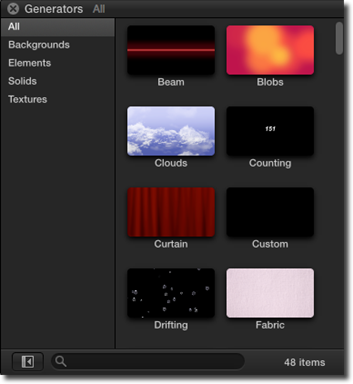
On the right, you will see the generators themselves. Move your mouse over a generator to see its animation.
Inserting a Placeholder Clip
Placeholders are used when the actual clips are not available. The advantage of using a generator is that you can configure it to represent what the shot should be. You can use it to indicate a close-up, or a conversation between two people, and more.
To add a placeholder clip to your project, move the playhead to the point in the Timeline where you want it to appear.
Next, click the Generators button in the toolbar. Locate the generator called Placeholder and double-click on it.
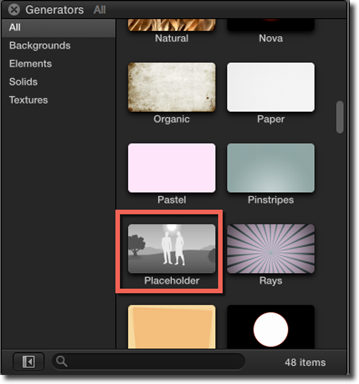
Navigate to the Timeline and click on the clip you just created to select it. Now you can configure the clip in the Inspector. These are the options you can change:
-
Framing � This represents the type of shot. Options are: Longshot, Medium Long Shot, Medium Shot, and Close-Up.
-
People � Choose up to five people to appear in the clip.
-
Gender � You can select Men, Women, or Men and Women
-
Background � This represents the shot's location. Options are: Office, Suburban, Rural, Mountains, Pastoral, Downtown, Distant City, Beach, Urban, Limbo, None, Black, Grey, White.
-
Sky � Choose a time of day: Clear Night, Cloudy Night, Sunny Day, Cloudy Day, Sunrise/Sunset, None
-
Interior � yes or no.
You can also add text to your clip by typing it into the View Notes section.
Creating a Timecode Counter
A timecode is useful in communicating a specific location in your movie. To insert one into your project, click the Generators button in the toolbar. Locate the Timecode generator in the Browser under the Elements category.
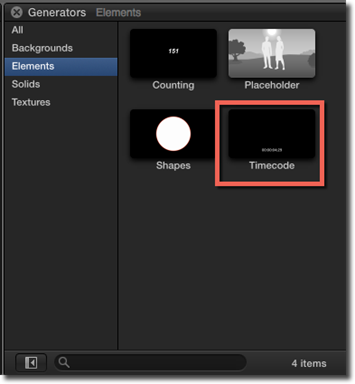
Drag it into the Timeline, above the primary storyline.
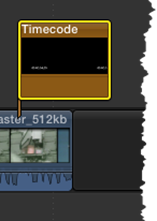
Ordinarily, timecode counters are placed at the start of a video, but in Final Cut Pro, they can be placed anywhere in the Timeline. They can even be adjusted to any length.
To configure the Timecode generator, select it and go to the Inspector. Click Generator at the top.
You can choose a format, a font, and even a color. You can also enter a label for it.

Inserting a Shape Generator
Shapes are graphical elements you can add to your project. Usually they are animated, but they do not have to be. There are any number of shapes available, including circles, stars, arrows, and more.
To insert a Shape, go to the Generators Browser by clicking the Generators button in the toolbar.
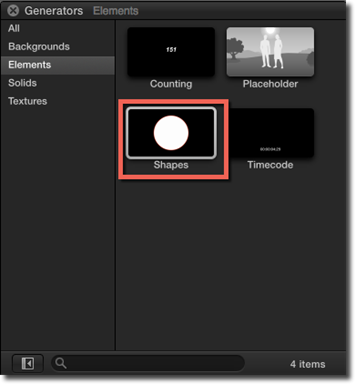
Now drag the Shape generator into the Timeline.
The default shape is a white circle, but you can change this easily in the Inspector.
You can also use the Transform tools to change its size, position and rotation. To do so, select the shape, and then click the Transform effect button in the lower left corner of the Viewer. The shape will have a square bounding box around it. Use the points in the bounding box to change size of the shape, or to distort it. The handle can be used for rotation.
In the Inspector, you can include and configure a drop shadow.
Inserting a Background Generator
Background generators can be used with titles and other effects. Some are solid colors and textures, but some are animated.
To create a background generator, move the playhead to the correct point in the Timeline. Click the Generators button in the toolbar and locate the background to be used. Double-click on it.
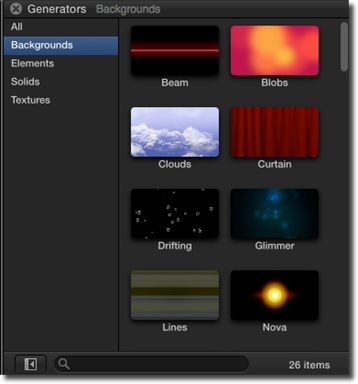
Use the Inspector to configure the background to your tastes.