
In Adobe Edge, symbols are simply elements that are grouped together. Some or all of the elements within a symbol can and may be animated. Symbols are found in the Library panel.
In this article, we are going to learn about symbols and how to:
-
Animate elements that will become part of a symbol
-
Create a symbol
-
Edit a symbol
-
Add triggers to loop a symbol's animation
-
Add instances of a symbol
-
Recognize nested animations in a timeline
-
Select and edit playback options for an instance of a symbol in the timeline
About Symbols
Symbols are essentially groups of elements that contain animation.
To make this easier to understand, let's remember how we grouped elements. When we grouped elements together, the different elements essentially became the same element. If we selected one of the elements in the group, we selected them all. If we moved on, we moved them all. When we create a symbol, we are � in a matter of speaking � grouping the elements.
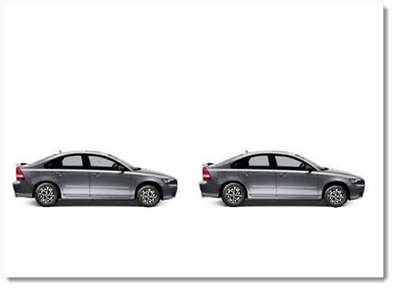
However, that does not mean symbols are just grouped elements, because they're not. Typically, a symbol represents an element on your Stage. In the snapshot below, we have a car. This car is made up of three symbols: the body, then the two wheels. Whereas we might group objects just to maintain relative location or spacing, symbols actually create elements that are on the Stage. In this example, the element is a car.

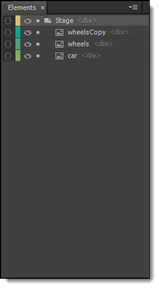
These elements that comprise our symbol are found in the Elements panel.
In addition to a symbol containing elements, it also contains animation. The animation is applied to the individual elements that make up the symbol. In our example of the car, the wheels are animated so they appear to be rolling.
Animations that occur within symbols are called nested animations. They are called nested animations because they occur independent of the timeline. Instead, they are part of the symbol itself. Just as the elements are essentially grouped together, so is the animation.
That said, it's helpful to also think of it this way. You animate the elements that make up a symbol. This animation is called a nested animation because the animation plays out within the symbol. It does not require keyframes on the timeline. Although the symbol appears in the Timeline panel, it does not have an animation span.
Once you create a symbol, however, you can add animation to the entire symbol using keyframes or the Pin tool. This is because you are animating the entire symbol rather than the elements that make up the symbol.
Let's learn to create a symbol.
Animating the Elements in a Symbol
The first step in creating a symbol is placing the elements that will be part of the symbol on the Stage, as we have done below.

Place the elements as you want them to appear.
Next, select an element that you want to animate. We are going to select the back wheel.

You animate an element that's part of a symbol in the same way that you create any other animation in Adobe Edge Animate. You either use the Pin tool or you create keyframes.
Since we want the tire to appear as if it's rolling, we are going to edit the rotate property in the Properties panel. We are going to do this by using keyframes.
Let's start by making sure the playhead is at 0:00.
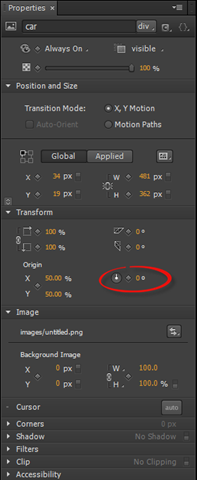
Next, we go to the Properties panel, then the rotation property, as circled below.
To add a keyframe, click the black diamond. The keyframe now appears in the timeline at 0:00, where we placed our playhead. This is our beginning keyframe. It is also where the animation begins.
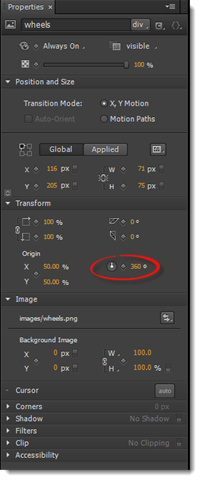
Now we can place the ending keyframe. We do this by first dragging the playhead to where we want the animation to stop.

Then, we go back to the Properties panel. We change the value for the rotate property to 360 so the wheel makes a complete rotation.
If we look at the Timeline panel, we can see the animation span between the two keyframes.

We have now animated the back wheel. We can push the spacebar to preview it.
Next, let's animate the front wheel. We could do that by following the same steps we took to animate the front wheel, but that would be more time consuming than it needs to be.
Instead, we can copy the animation for the back wheel and paste it in the Timeline panel for the front wheel.
To do this, move the playhead to 0:00.
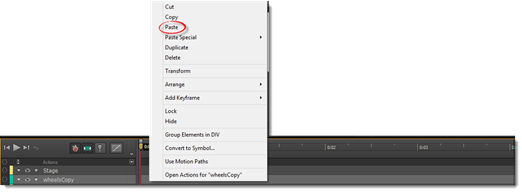
Right click on the animation span for the back wheel, then select Copy.
As you can see, our back wheel is selected on the Stage.

Next, select the front wheel in the Timeline panel.
Right click in the Timeline and select Paste.
The animation is pasted into the timeline.

We now have the elements for the symbol in place, and we have added the animation. It's time to take the final step and create the symbol.
Creating a Symbol
Creating a symbol is simple. Once you have the elements in place and the animation added, you're ready to take the final step and tell Edge Animate to create the symbol.
Start by selecting all elements that are part of the symbol. We will select the car body and two wheels.
Use CTRL+Click to select multiple elements.
Next, go to Modify>Convert to Symbol.
You will then see the Create Symbol dialogue box.
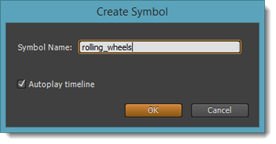
Enter a name for the symbol. Do not use spaces.
Click OK.
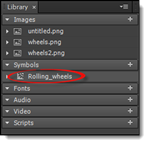
The symbol then appears in the Library panel:
Editing Symbols
Double click a symbol on the Stage to edit it.

As you can see above, the area around the Stage goes black. This is the symbol editing mode. You now have access to the elements and properties that make up the symbol.
You can edit the individual elements. You can also edit the animation, take away the animation, or add more animation.
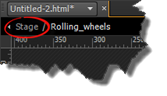
To exit the symbol editing mode, double click outside of the symbol on the Stage.
You can also double click Stage at the top left corner of the Stage area, above where the horizontal and vertical rulers meet, as shown below.
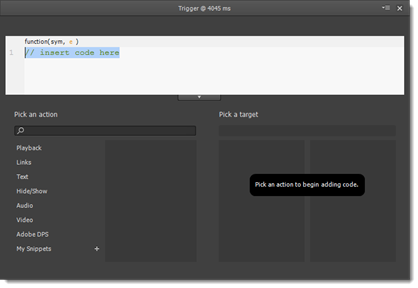
Adding Triggers to Symbols to Loop Animation
When you loop an animation, you play it over and over again. Earlier in this article, we created a four second animation. If we looped the animation, once the animation finished at four seconds, it would automatically go back to the beginning and play again.
To make your symbol � or nested animation � loop, double click the symbol on the Stage. This will put you in symbol editing mode.
Next, move the playhead to the end of the symbol's animation, as we've done below.

Click the Insert Trigger button in the Timeline pane. We circled it in red:
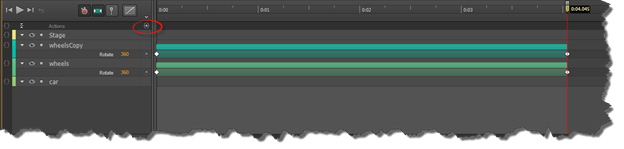
A panel will appear over the timeline that looks like this:
At the top of this panel, you will see trigger@4045s. 0:04.45 is the exact point in the timeline where the trigger will be inserted.
Now, move the cursor to the end of the script shown in the white box. Because the script has // before the words "insert code here," we know that this is a comment.
Hit Enter. This will add a new line.
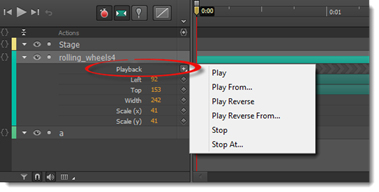
Click Playback in the left column below the white box.
You will then see additional options:
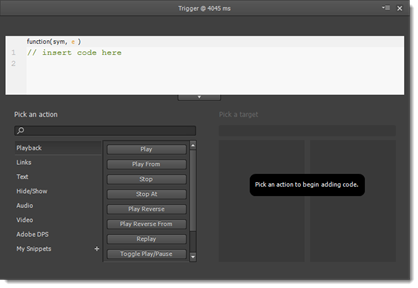
Choose Play From, as circled below.

You will now see additional code in the panel:
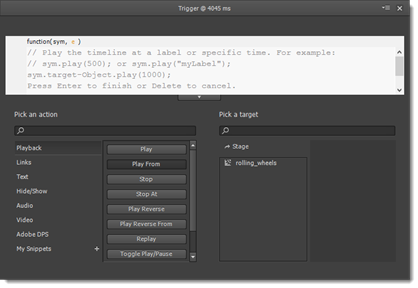
Notice that what has been added are more comments. The comments tell you what the code will do. The snippet of code will "play the timeline at a label or specific time." It then shows you the code that will make it happen. In other words, this is the snippet of the code that will actually loop your animation:

The number 500 represents the location on the timeline where the playhead will move once the animation is played. The time listed is measured in milliseconds.
However, this is just an example. We need to add the code.
Under the Pick a Target column, double click a target. We want to apply the trigger to our symbol, so our symbol will be the target.
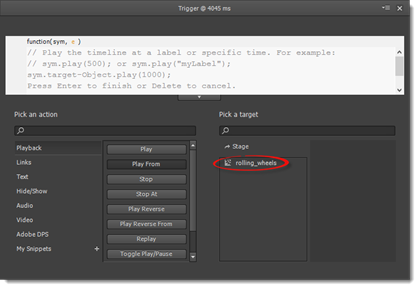
When you double click the target, the code is added to the white box. You can edit this code. In fact, Edge Animate automatically selects the number that represents the location on the timeline where the playhead will go once the animation plays.
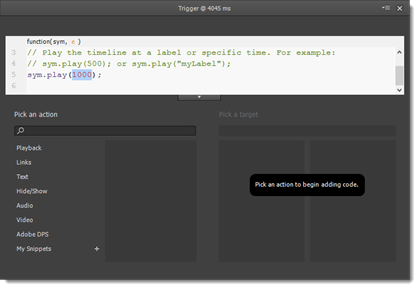
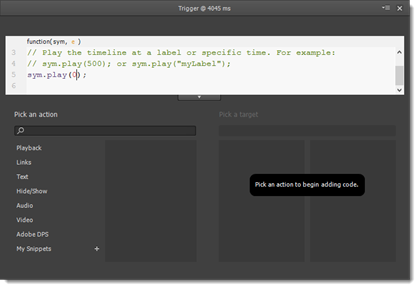
Right now, it's 1000. We need to change that to 0, which represents 0:00 on the timeline.
Once you've changed the number, you can "X" out of the panel.
You can then exit out of the symbol editing mode by clicking outside of the symbol on the Stage.
The animation will loop when played in a browser window.
Adding Symbol Instances
The great thing about creating symbols from animated elements is that symbols only take a matter of seconds to duplicate.
Let's say you want to add an exact copy of the symbol that's currently on the Stage:

You can do this by adding another instance of the symbol.
To do this, go to the Library panel.
Drag the symbol to the Stage.
In the snapshot below, we added another instance of the rolling_wheels symbol.
You can add as many instances of a symbol as you like.
To edit an instance of a symbol, double click on the instance to enter the symbol editing mode. You can then edit the individual elements in the symbol or the animation. You can even add additional animation.
Click outside of the symbol on the Stage to exit the symbol editing mode.
Editing Playback Options for Nested Animations
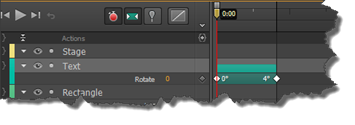
You can see the green bar in the snapshot below that represents an animation.
Editing the playback options for a nested animation is a little different.
Nested animations appear in the timeline as a dark gray band with light gray arrows.
We have circled the band with gray arrows in our timeline below. It represents the length of the nested animation.

In the snapshot above, you can see the nested animation. That animation is part of our symbol and plays within the symbol.
Nested animations play automatically by default. As we can see in our timeline, the nested animation plays for the duration of the composition.
If we wanted to change the duration of the nested animation, stop the nested animation from playing, play it in reverse, etc., we can do so by setting the Playback options.
Stop a Nested Animation from Playing
To stop a nested animation from playing, move the playhead to 0:00.
Go to the symbol in the Timeline panel
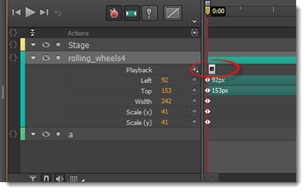
Click the plus (+) sign to the right of Playback Options (listed beneath your symbol as shown below).
Select Stop.
A Stop icon appears in the lane of the nested animation.
Play a Nested Animation
Now that we have stopped a nested animation from playing, let's say that we want it to start playing at 0:01.
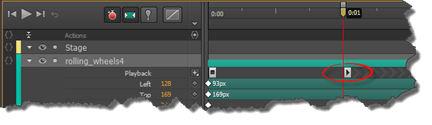
To do this, drag the playhead to 0:01.
Click the Playback Options again (as we did when we stopped the nested animation from playing).
Select Play.
The Play icon is placed in the lane of the nested animation.
Using Playback Options you can also make the nested animation play from a certain point, play in reverse, play in reverse from a certain point, and stop at a certain point on the timeline.
Edit a Playback Command
To delete a playback command, click on the command's icon in the timeline. Press Delete. If you want to delete all playback commands for an instance of a symbol, simply select the Playback lane in the Timeline panel, then press Delete.
If you want to move a command to a different point in the timeline, drag the icon for the command. Place it where you want it to be on the timeline.


