Compositing is defined as combining two images in a scene and making it appear as if they were shot together.
Keying is also known as greenscreening or chromakeying. It involves replacing a color in an image with parts from a background image. Typically, the color green is replaced with a background image. Greenscreening is used for network news during weather forecasts.
Final Cut Pro X offers two keyer effects. Keyer is the chromakeyer effect. Luma Keyer generates mattes based on the lightness of the image. You can remove white or black areas, plus decide if grey areas should be partially transparent.
Using the keyer effects in Final Cut Pro X is not difficult. However, here are some things you can do to make it even easier for you:
- Use a camera that has a raster sensor.
- Use a camera that does not interpolate to attain HD resolution. HDV cameras do this.
- Use a camera with a high ISO starting value.
- Use the camera with no gain.
- When you record your footage, record in progressive instead of interlaced format.
- Record at the highest bitrate.
- Make sure the background is evenly lit.
- If you are filming one subject, such as a person, use a tripod L bracket and mount the camera vertically for higher resolution and higher pixel density around the subject.
For keying, you will record your subject with a certain color background, usually green. You will want to make sure the subject does not wear any green so parts of the wardrobe are not cut out.
Using the Keyer Effect
The best way to learn to use the chromakeyer effect is to show you how to work with it in Final Cut Pro X.
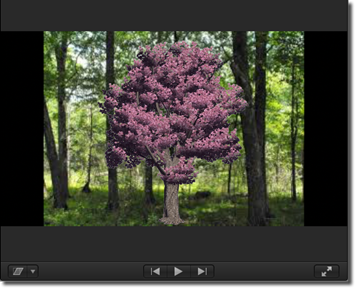
Below is a clip of a purple tree that was shot in front of a greenscreen. We want to make it so that the tree is keyed over a forest scene. In other words, we want to take the tree from this clip and combine in with a clip of a forest.
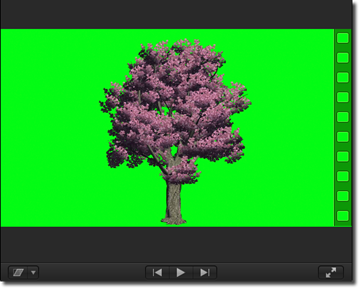
The clip shown above is the foreground clip, or the clip that will be on top. The clip with color that you want to remove will always be the foreground clip � or the one on top.
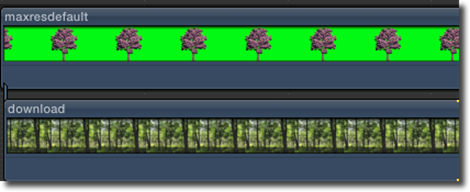
Next, drag the background clip � or the one that will be on bottom, and connect it below the foreground clip.
In the snapshot below, you can see that our two clips are connected.
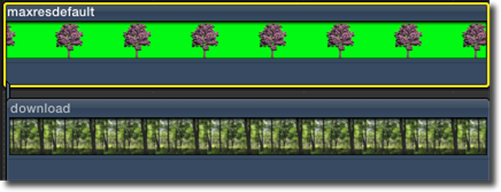
Select the foreground clip in the Timeline.
Now, click the Effects button in the toolbar.

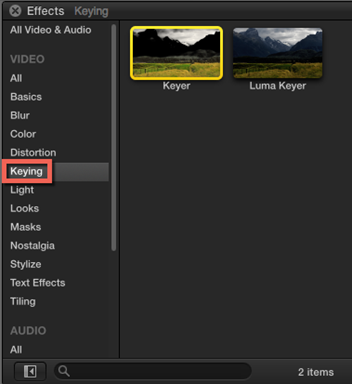
In the Effects browser, select Keying from the left hand side, then the Keyer effect, as shown below.
You can then drag the effect to the foreground clip.
To see the keyer effect on your foreground clip, use the skimmer to move through the clips, or playback the connected clips.
When we look at the Viewer, we can see purple tree has been keyed over the forest.
Modifying the Keyer Effect
Once you have applied the keyer effect, you can then modify it to improve it.
To do this, select the foreground clip in the Timeline, then select the Select tool in the toolbar.

Next, go to the Viewer and Video Inspector.
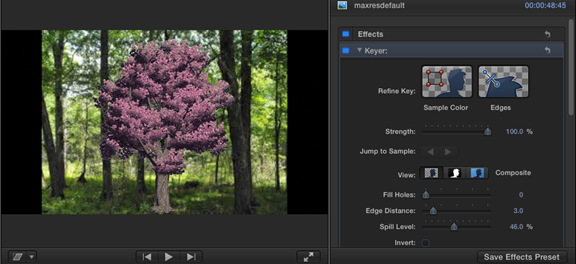
To remove any green that still may be showing in the foreground clip, click on the Sample Color thumbnail in the Video Inspector. Go to the Viewer, and draw a rectangle where the green color needs to be removed.
To refine other areas, click the Edges thumbnail in the Video Inspector, then draw a line across the area in the Viewer. You can use this to further refine hair or reflections in the foreground image.
You can also adjust the Strength slider to adjust the strength of the keyer effect.
The Luma Keyer Effect
The Luma Key effect will allow you to place a foreground clip over a background clip, then remove parts of the foreground clip based on the luminance levels. Typically, black will become transparent and you will get to decide what to do with grey.
You use this effect when the foreground image does not have the greenscreen, but you still need to remove parts of it. As we stated in the last paragraph, by default, the Luma Key effect will make the darkest parts of the image (black) transparent. However, you can adjust the settings to remove light colors instead.
Let's show you how it works.
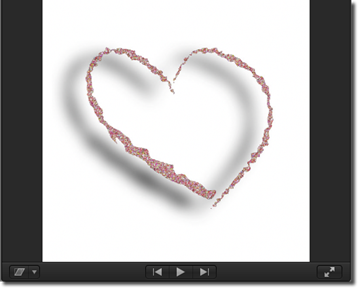
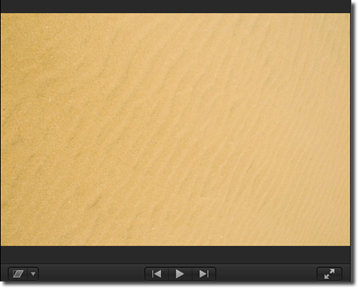
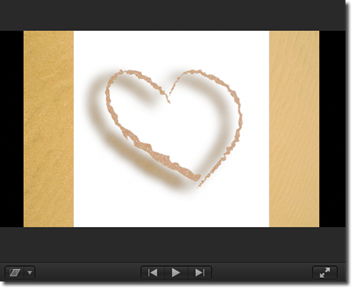
For this example, we are going to remove the white background of the foreground image (shown below).
So we can place it over the background image:
To accomplish this, the first thing we are going to do is drag our foreground image to the primary storyline in our Timeline, then connect the background image below it.
Our Timeline looks like this:
Next, we are going to click the Effects button on the toolbar to open the Effects Browser.
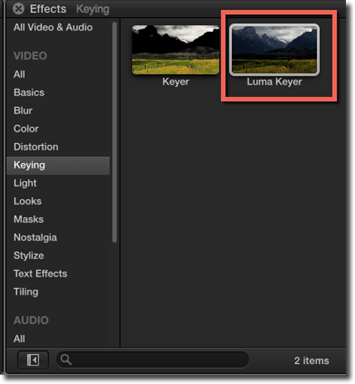
Choose Keying from the list of video effects on the left, then the Luma Keyer effect on the right.
Drag the Luma Key effect to your foreground image.
Move the playhead to the beginning of the Timeline to playback the clip in the Timeline. In the Viewer, you will see that the Luma Key did not quite remove the white background. We already warned you that this would happen since the Luma Key, by default, makes dark colors transparent.
To fix the foreground image, go to the Viewer and Video Inspector.
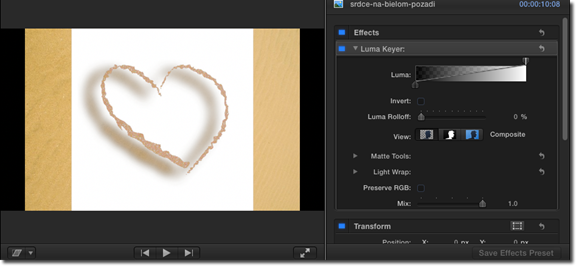
Put a checkmark in the Invert checkbox.

If you need to adjust the white and black values to make white or black more or less transparent, drag the handles below the slider.
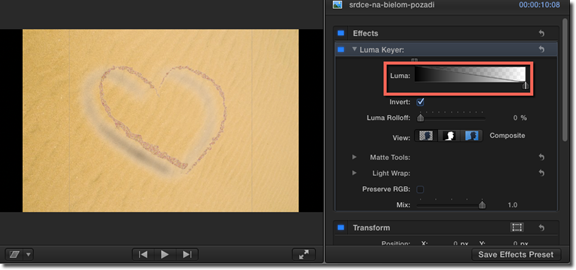
If you want to soften the edges of the foreground image, adjust the Luma Rolloff slider.
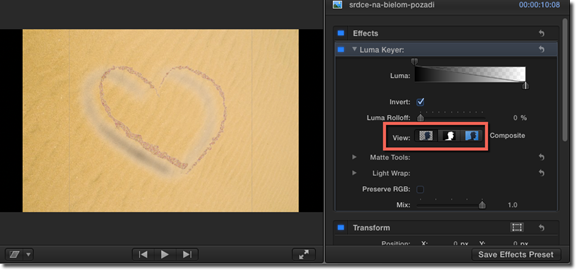
You can also use the View options to help you fine-tune the effect. The middle icon in the View section is Matte. This is usually the best view to use when fine-tuning the Luma Key effect.
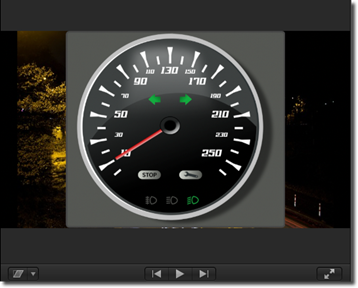
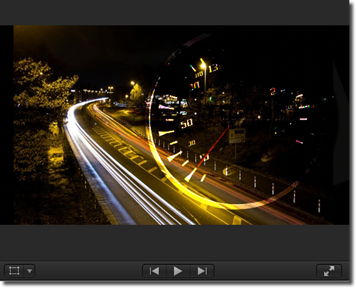
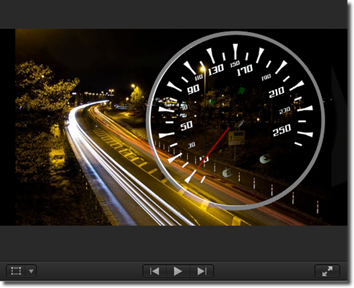
Now let's combine two images when the foreground image has a black background.
Take a look at our Timeline below. You can see we have added our foreground image to the primary storyline, then connected the background image below it.
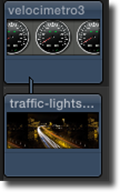
Our foreground image is a speedometer. The background image is of a road at night.
If we look at the Viewer, this is what we see:
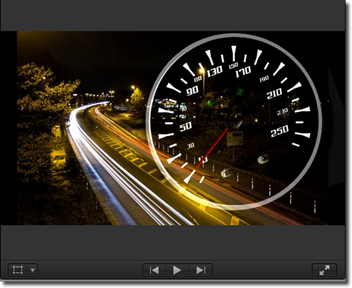
We are going to select the foreground image in our Timeline, then go to the Effects Browser.
Once again, we choose Keying on the left, then Luma Keyer.

To apply the Luma Keyer effect, we drag it to the foreground image in the Timeline.
Now, take a look at our combined clips in the Viewer.
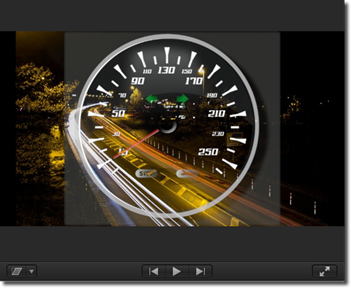
As you can see, we still need to fine tune the Luma Key effect.
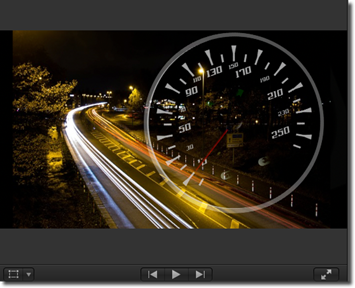
We will do this by going to the Video Inspector, and adjusting the Luma Rolloff.
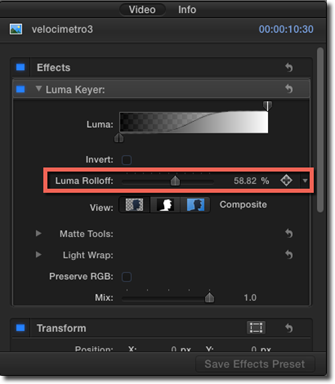
By moving the slider to the right, we made transparent the entire background of the foreground image.

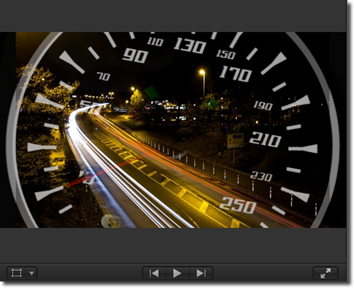
Using the Transform Tool to Adjust Keyed Clips
Once you have the keyer effect applied to your foreground clip, you can then use the Transform tool to move the foreground image so that it's placed where you want it on the background image.
To do this, select the foreground image in the Timeline, then select the Transform tool in the Viewer.

The blue handles appear around your foreground image.
We changed the size. Then moved and rotated our foreground image.
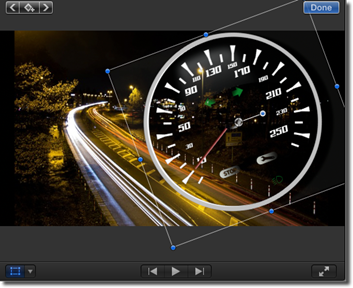
Click Done when you are finished.
About Blend Modes in Final Cut Pro X
Blend modes, also known as composite modes, allow you to combine textures of two clips based on their color values.
In Final Cut Pro X, there are five different blend mode categories that will blend clips based on:
1. Alpha Values
2. Lighter Gray-Scale Values
3. Mid-Tone Gray Values
4. Darker Gray-Scale Values
5. Color Values
Just as when we applied the keyer effects, the blend mode that you choose will be applied to the top � or foreground � clip.
To use the blend mode to combine two clips in Final Cut Pro X, first add the foreground clip to the primary storyline in the Timeline. The bottom clip � or background clip � should be connected below the foreground clip, as shown below.
Next, go to the Video Inspector.
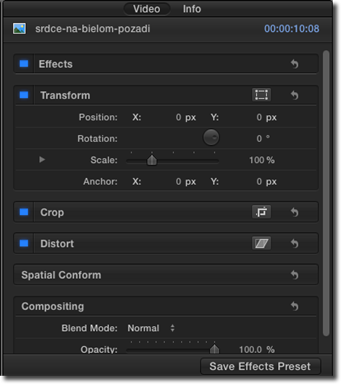
Go to the Compositing section of the Video Inspector, and choose a Blend Mode.
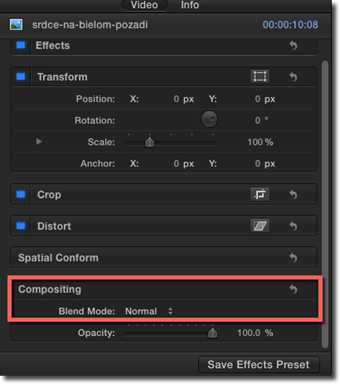
Click the triangles to the right of the Normal Blend Mode.
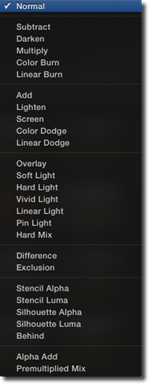
Below, we've chosen Color Dodge to apply to our connected clips:
This is Pin Light:
And this is Linear Light.
In the Compositing section of the Video Inspector, you can also adjust the opacity level of the foreground image to make it more or less transparent.
We are going to reduce the opacity in our foreground image.
Take the time to experiment with the different blend modes to see the effects they have on your clips.
Place the playhead at the beginning of the clip to which you have applied a blend mode to see the effect it has on the clip and your project.
Here is our finished clip after applying the Luma Effect key, the Linear Light blending mode, then reducing the opacity and using the Transform tool:
Exporting and Sharing Projects
Now that you have created your project, it is time to export it out of Final Cut Pro X so that other people can view and enjoy your movie. Final Cut Pro X offers you several preconfigured export settings (called destinations) that allow you to export your project as a QuickTime movie, as well as to Apple devices, Facebook, YouTube, and the list goes on.
You can see the destinations by going to File>Share in Final Cut Pro X.
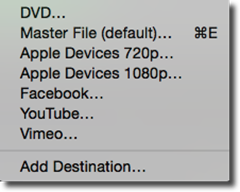
The destinations listed here should be self-explanatory for the most part.
-
DVD allows you to burn the project to a standard-definition DVD.
-
Master File allows you to export your project as a QuickTime movie.
-
Facebook, YouTube, and Vimeo allow you to publish your project to these sites. You may need an account on these sites.
-
Apple Devices 720p allows you to export your project to iPhones and iPods.
-
Apple Devices 1080p allows you to export to iPad.
You can also add your own customized destination by clicking Add Destination.
Sharing a Project
It should go without saying that you can share your project in its entirety. However, you can also share clips, ranges of clips, and roles. When you share roles, if you want to be able to easily export the same roles from other clips or projects later, you can save the settings as a preset.
To share a project, a clip from a project, or a range of clips from a project, first do one of the following:
-
Select a project from the Project Library. In versions of 10.1 and later, the Project Library is housed with the Event Library. You will find your projects stored in events.
-
Select the clip or range of clips from the Event Browser.
We have selected our project in the Event Library.

Next, go to File>Share.
Choose a destination. We covered the different destinations earlier in this article.
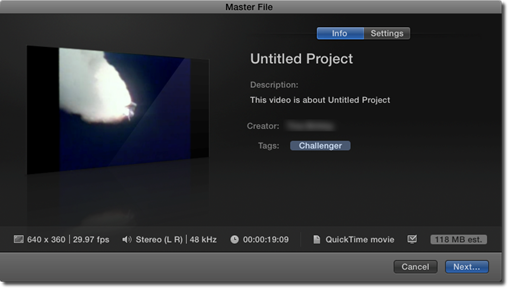
For this example, we are going to choose Master File.
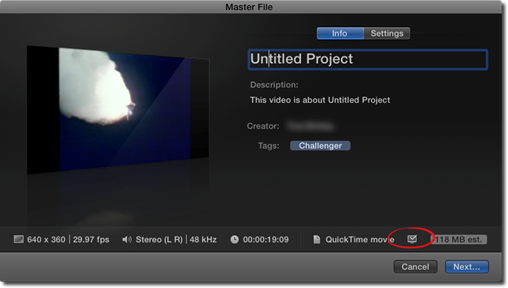
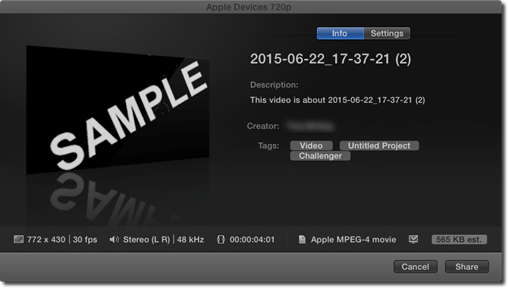
You will then see the Share window.
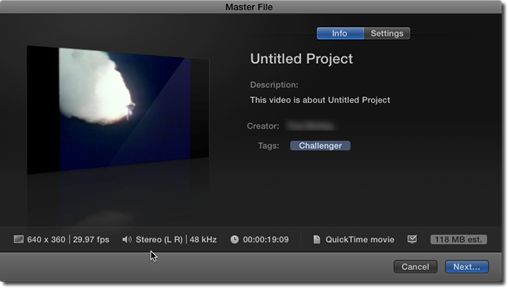
If you want to view the project, you can move your mouse over the video image to skim it.

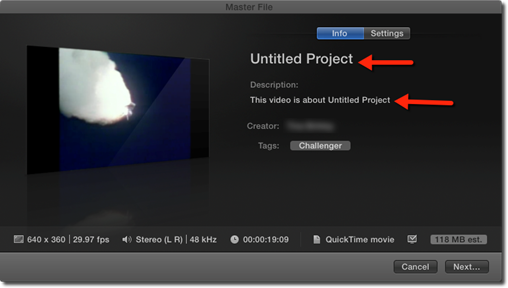
On the right hand side of the Share window, you can change the attributes for the video, such as the title and description.
Simply click on the title of description to change either one. You will then see the cursor, and you can enter in your new title/description.
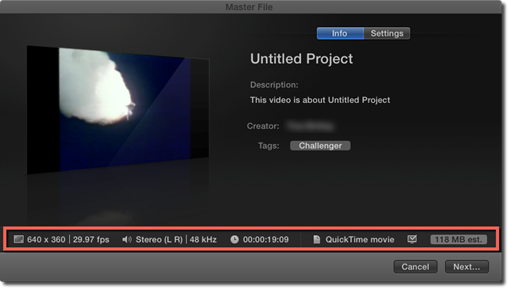
At the bottom of the Share window, you can see the frame size and rate, channels, sample rate, duration, the file type after export, and the size of the file.
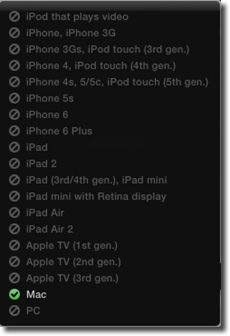
Some destinations will even let you view a list of devices that will be able to play your exported project.
To see these destinations, click on the Compatibility icon, circled below.
You will then see a list of compatible devices.
Next, let's take a look at the destinations settings by clicking Settings.
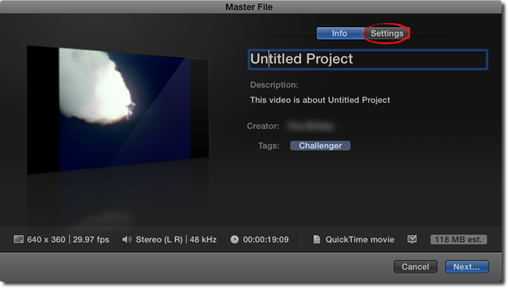
You will then see the settings for your chosen destination.
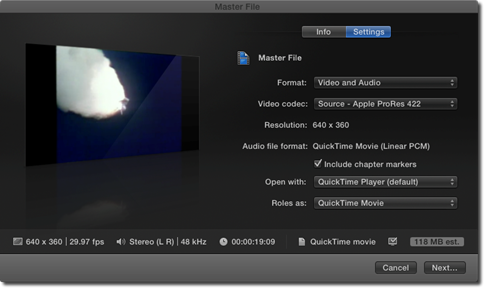
If you change these settings, the changes that you make will be saved as the new default settings for the destination.
Now, click the Next button in the lower right hand corner.
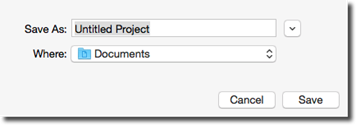
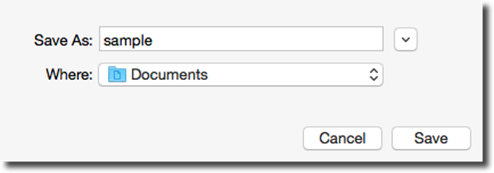
Enter a name for the exported file, then select a location where you want to save it.
Click the Save button.
Final Cut Pro X transcodes your project in the background. You can continue to work in Final Cut Pro X while this is going on.
When the transcode is complete, you will see this pop-up box.
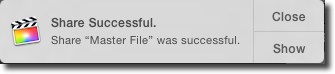
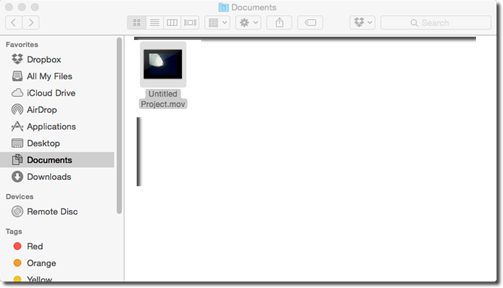
This lets you know that you successfully exported your project. You can click Show to see the exported project in the location you chose.
Exporting to an iPod
Exporting your project to an iPod is as simple going to File>Share, then selecting the Apple Devices 720p destination.
If you want to view the project, you can move your mouse over the video image to skim it.
At the bottom of the Share window, you can see the frame size and rate, channels, sample rate, duration, the file type after export, and the size of the file.
Click the Settings button at the top of the Share window.
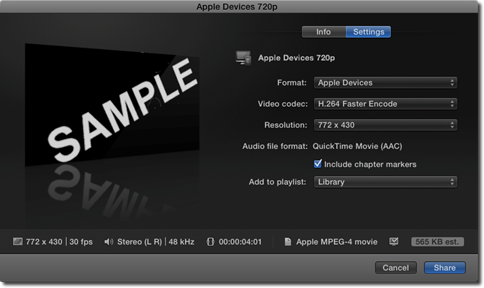
The default settings appear in the Share window. You can then adjust the settings if you need to do so.
-
Format. The default format is for Apple devices 720p. If you are indeed exporting to iPod or iPhone, it is recommended that you leave it at this format.
-
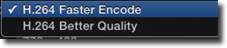
Video Codec. Choose between faster encoding � or a higher quality encoding.
-
Resolution. You might not be able to adjust the resolution.
-
Audio File Format. The default audio file format is selected by default.
You can also select if you want to include chapter markers, as well as what playlist to which to add the exported file.
Click the Share button when you are finished.
Exporting to iPad
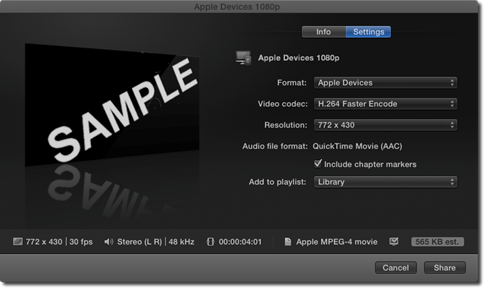
To export to iPad, go to File>Share, then choose the Apple Devices 1080p destination.
When the Share window opens, click the Settings button, as pictured below.
If you want to view the project, you can move your mouse over the video image to skim it.
At the bottom of the Share window, you can see the frame size and rate, channels, sample rate, duration, the file type after export, and the size of the file.
Adjust the settings just as you did for the Apple Devices 720p destination, then click Share.
Sharing Roles
Roles can be exported as media stems. You can export dialogue, music, and sound effects as media files that are independent of the entire project. You can export video and audio together as a QuickTime file, or you can export them separately.
Let's learn how to export roles.
To start, select a clip or a range of clips either in the Event Browser or the Timeline.
Next, go to File>Share>Master File.
Click the Settings button as we did in the last section.
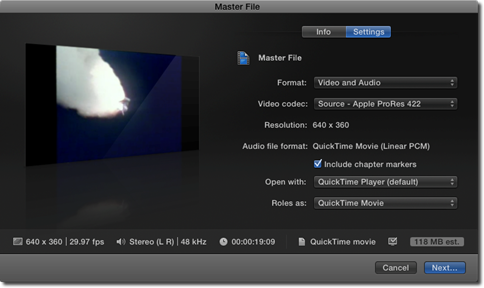
Now, select the following settings:
-
Format. Choose the mastering format you want. Right now, it is video and audio in our snapshot above. As you can see, we can also choose just video or just audio.
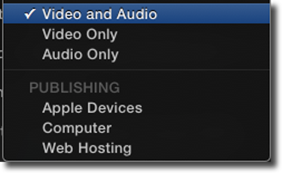
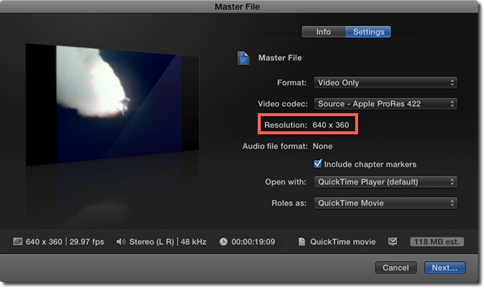
We are going to select Video Only.
-
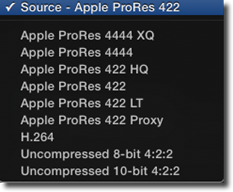
Video Codec. If you do not select Audio Only, you will then have to select a Video Codec. The source codec is selected for you by default; however, you can choose another codec if you wish.
-
Resolution. The source footage resolution is already there for you. You can choose another resolution if you want.
-
Audio File Format. If you have selected Audio Only or Video and Audio, the format of your source file will be displayed here. Based on the format of your source media, you may be able to change the format.
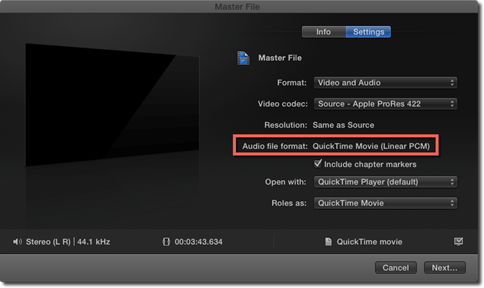
-
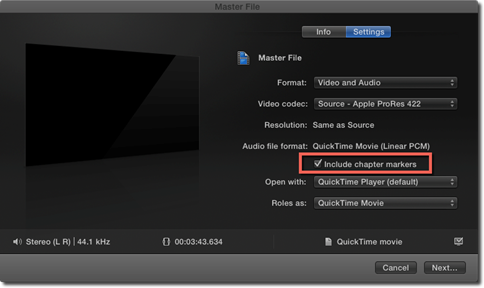
Include Chapter Markers. Keep this box checked if you want to include the chapter markers.
-
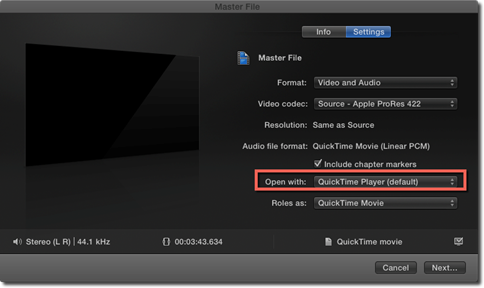
Open With. Decide how you want to open the file once you have exported it.
-
Roles As. Select how you want the roles exported. You can export them as:
QuickTime Movie. All the roles in the project are exported as a single QuickTime movie.
Roles as Multitrack QuickTime Movie. Exports only the roles selected as a QuickTime movie.
Rules as Separate Files exports each selected audio and video roles as a separate file.
Video Roles Only as Separate Files exports each selected video role as a separate file.
Audio Roles Only as Separate Files exports each selected audio role as a separate file.
Once you have selected how to export the roles, you then have to select the roles to be exported. Click either the Add Video File or Add Audio File buttons to add video and audio files. You do not have to do this if you have selected QuickTime movie.
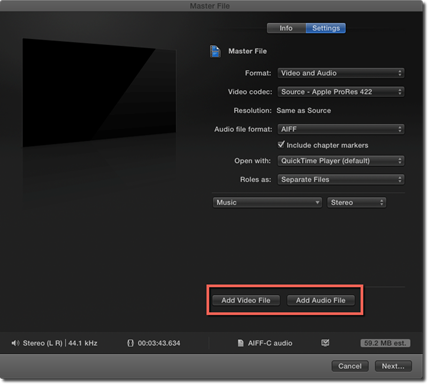
NOTE: When adding audio roles, you can choose the channel format.
When you are finished, click the Next button.
Enter a name for the file, then choose a location where it will be saved.
Click the Save button.
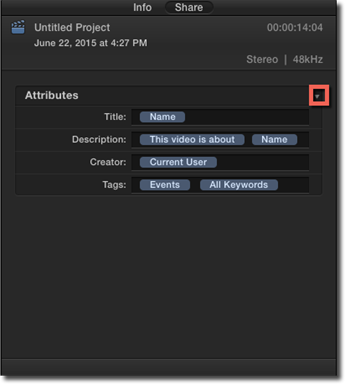
About Share Attributes
Share attributes are the metadata from the clips and the project that are exported with the files.
You can see the share attributes for a clip or project in the Share Inspector, pictured below.
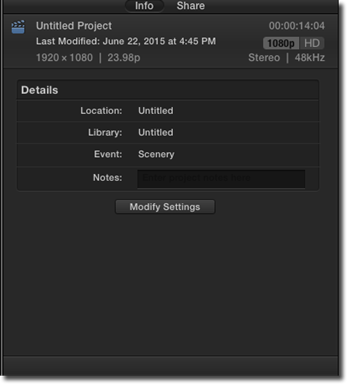
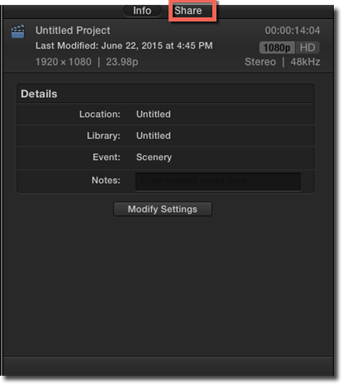
To view the Share Inspector and the share attributes, select a clip or project, then click the Inspector button on the toolbar. Remember, the Inspector button looks like this:

Click the Share button at the top of the Inspector Pane.
If you do not see the attributes, click Show to the right of the word Attributes.

You will then see the attributes fields:
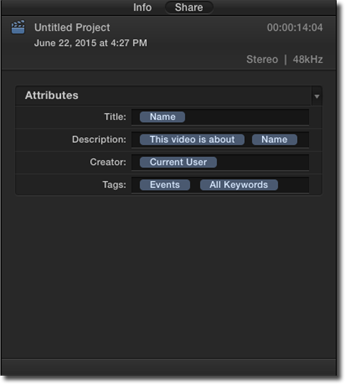
You can type text in any attribute field.
Modifying Attribute Fields
Click the triangle to the right of Attributes to view your options for modifying the attribute fields listed in the Inspector.
You will then see this pop up menu:
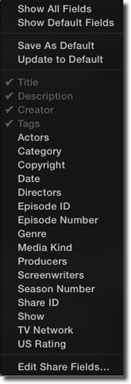
To add an attribute field, click on the field so a checkmark appears next to it.
Exporting Using Compressor
When you choose a destination for your project's output, you are given several options.
Below are setting options for exporting to Master File � or a QuickTime movie.

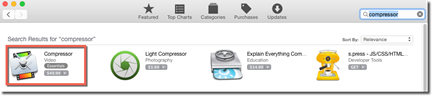
However, you can also customize your export settings using Compressor. Compressor is by Apple's definition a "professional transcoding application designed to work directly with Final Cut Pro to create highly customized export settings."
To send a project to Compressor, select your project, then go to File>Send to Compressor.
You must buy Compressor from the Apple App store in order to use it.