
Just like formatting a document, formatting an email requires effective font and paragraph formatting. Some email clients only allow you to make basic formatting changes, but Outlook lets you change colors, add images and create paragraphs just like you can make in a word processing document.
Formatting Outlook Text
If you work with any other Microsoft Office applications, you will recognize the formatting menu at the top of your Outlook window. This menu is enabled when you type content in the body of the Outlook email interface. Click the "New Email" button to open a new window where you can create an email. At the top of the Outlook window, you'll find the menu where each formatting feature is shown.
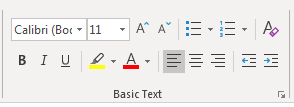
(The "Basic Text" menu contains formatting options)
This menu will be grayed out if you haven't typed any content in the body section of your email. Type any content in this section of the window and highlight it. When you highlight text, only the highlighted content will have any of your formatting choices applied.
The first text box (where "Calibri" is shown in the image) is a dropdown. Click the arrow to the right of the font name and a dropdown displays several font choices. The number of font choices depends on the number of fonts installed on your computer. A Windows computer has a font directory that contains fonts available to applications. Some applications install their own fonts, which then makes them available to you in Outlook and other Microsoft Office applications. For instance, if you install Adobe products, many of these products install their own fonts. You'll find these fonts in the Outlook font dropdown labeled with "Adobe." This is just one example, but you could have several fonts listed in the Outlook dropdown from other applications.
You should avoid choosing an uncommon font when you format your email text. When a recipient reads your email, any uncommon font that isn't installed on the recipient's computer won't be available. This means that the recipient's computer will choose the appropriate font, and the automatic computer choice might not fit with your formatting and layout. For this reason, it's better to choose a common font that's installed across all Windows computers.
The dropdown to the right of the font dropdown is the selected size of the font. The default size is 11 points, but you can make the font size smaller or larger by selecting a different size. You can also type in a value for the font size in this dropdown box if it's not shown in the dropdown. The "A" buttons to the right of the font size dropdown are one-click ways to increase or decrease the size of text. The A with the up arrow with increase text size. The A with the down arrow will reduce text size. Highlight text and click these buttons until you reach the intended size of your font. This is a quick way to change font size without using the dropdown.
The "B," "I," and "U" buttons under the font text box bold, italicize and underline content respectively. With your text highlighted, click the "B" button and Outlook changes the text formatting to bold. The "I" button italicizes the highlighted content. The "U" button underlines highlighted content.
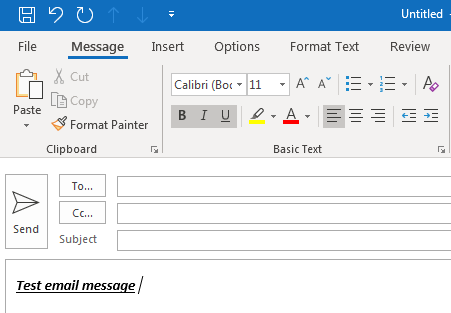
(Text with bold, underline and italicize applied)
IN the image above, a test email message has all three formatting options applied. Notice that the buttons for all three are highlighted. The highlighted button style is how you know that text has one of these three formatting options. You can toggle the format of highlighted text by clicking these buttons. When a button is gray, the format is turned on. When it isn't grayed, you know that the format is turned off.
The final text formatting option is the highlighter and text color buttons. These buttons are directly right of the bold, italicize and underline buttons. By default, the highlight color is yellow, but you can choose other colors by clicking the arrow button to the right of the button.
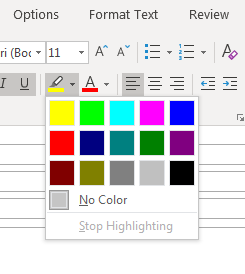
(Outlook highlight color options)
By clicking a color, the highlighter color will change. When you highlight content in an email (or any content created in a Microsoft Office application), the color overlay is much more transparent. The color only highlights content instead of making it harder to read. When you highlight text, you should choose one opposite of the main text content. Normally, you write content in black text, so yellow makes this content stand out. Should you use black coloration with your highlighter, it can make the text hard to read.
Similar to the highlight option, you can also change the color of your font. Click the arrow next to the "A" button to the right of the highlighter and several color options are shown.
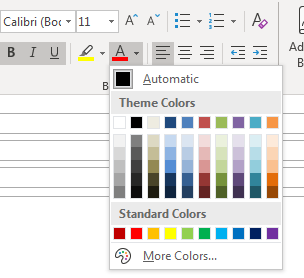
(Font text color options)
The font color choices are more numerous than the highlight colors, because you can have dark and light fonts in an email message without making it difficult for the reader to view the text. If you click the "More colors" option, you can manually type a color in its hexadecimal form. Hexadecimal color codes can be found online, and they are universal codes that tell applications the exact color in different shades.
Formatting Paragraphs
Formatting paragraphs is similar to formatting text. The buttons for formatting paragraphs are on the right of the font styles.
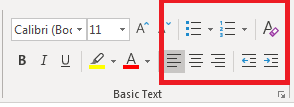
(Paragraph formatting options)
The top two buttons are for creating lists. The first creates a bullet list. The second creates a numbered list. When you create lists, Outlook automatically indents the list so that it stands out against other text in your content.
The main paragraph formatting options are below the lists. The first set formats paragraphs to either left, center or right. By default, paragraphs are automatically set to left justify. This means text is aligned to the left of the window. However, you can change it to center in a recipient's window or align it to the right of the window.
The final two paragraph formatting options let you increase or decrease the indent on a paragraph. By default, there is no indent, but you may want to indent a paragraph for content such as a quotation. You can use these buttons to add an indent or decrease it. Click the button with the right arrow to increase the indent. Click the button with the left arrow to decrease the indent.
The final button of importance clears all formatting in your email message. This is a quick way to remove formatting when you want to reset email styles.
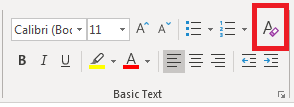
(Clear styles button)
Highlight any text in the body of your email and click the "Clear Styles" button. All styles will be removed, and you can start over with formatting your email. If you have any complex styles added to your email, you should use this option with care. It removes all styles, so you will be forced to reapply each style again.