We will start with basic animations in this article, then move onto more complex animations later.
In this article, we'll discuss how to:
-
Use the Pin tool to create animations
-
Alter the duration of an animation
-
Make elements appear and disappear on the Stage
-
Create a scale animation
-
Create a fade
-
Work with timeline options
-
Zoom in and out on the timeline
-
Replace images
-
Copy and paste animations
-
Use easings
Reviewing Keyframes
They are so important to using Edge Animate that we should take a minute to review them again before going any further.
Keyframes appear as diamonds in the Properties panel and on the timeline. Each keyframe marks a point in time where there is a change in the element's property. We had two keyframes. The first keyframe was the beginning point of the rotation. Next, we moved the playhead forward to a different location, then rotated the object. Since there was a change in the element's properties (it was rotated), another keyframe was added.
In all animation that you create in Edge Animate, you will at least need two keyframes. You will need a beginning and ending keyframe. Animation that appears between two keyframes is represented by a colored bar between those keyframes.
Using the Pin Tool to Create Animation
The Pin tool is used to create from and to keyframes with a single edit. In other words, you can create beginning and ending keyframes by simply editing a property of an element.
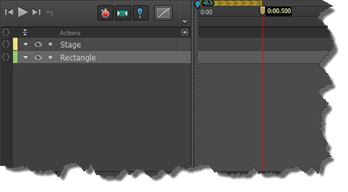
The Pin tool is located in the Timeline panel. It is circled in the snapshot below.

The advantage of the Pin tool is that you don't have to move the playhead around as we did when we created animation and motion. You only have to move it once. The Pin tool will create the source (or beginning keyframe for you) as you create the destination (ending keyframe).
Let's learn how it works.
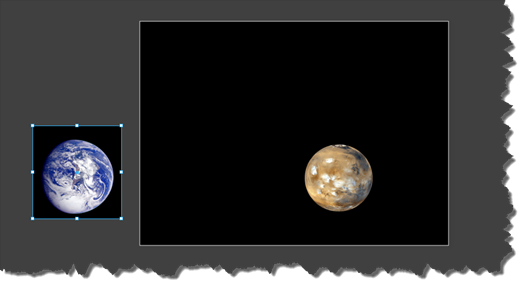
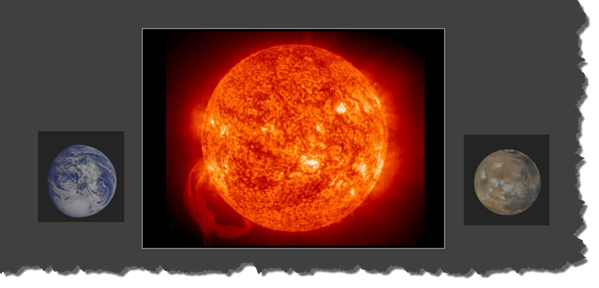
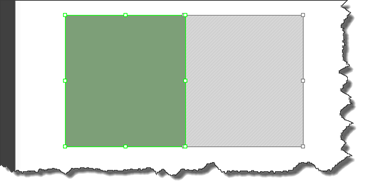
In the snapshot below, you can see the elements on the Stage.
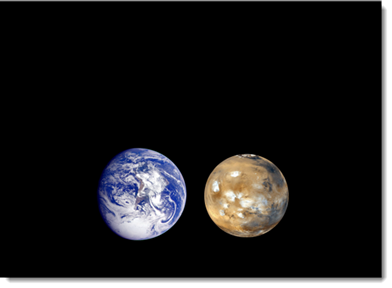
We want to animate the elements. We want them to move in toward each other from opposite sides of the Stage.
To do this, we click on the Pin tool in the Timeline panel.
Note that when we do this, a little blue pin appears above the playhead in the Timeline.
We are going to click, then drag the blue pin to the 0:01 mark.
The blue bar at the top of the timeline lets us know that Edge will create an animation that ends at the 0:01 mark.
Now, we click Shift+drag to move the left element off the left side of the screen.
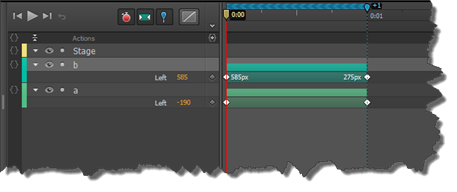
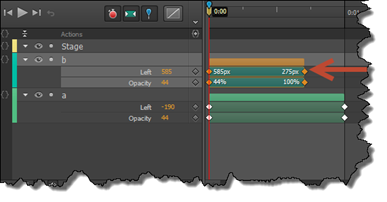
If we look at the timeline, we can see that Edge has automatically created the properties. The animation starts with the element off the Stage. The element moves on Stage as the animation plays. The animation reaches its original location when the playhead gets to 0:01.
Now, let's use Shift+drag to move the other element off the right side of the Stage.
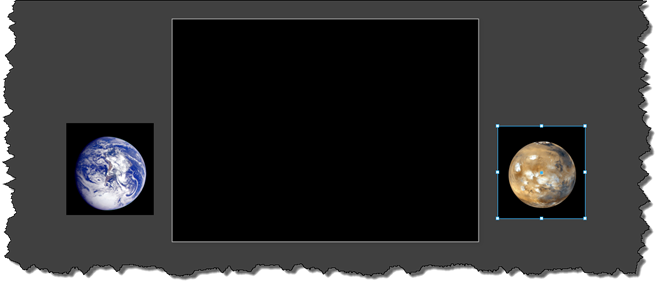
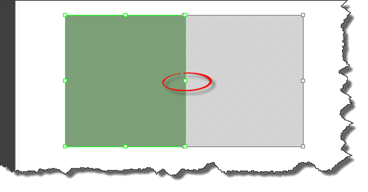
If we look at the timeline, we can see that we have two animated elements:
Click the play button in the Timeline panel to preview the animation.
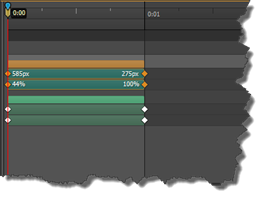
Now we can change other properties for our elements. This will add more animation to the elements as they move onto the Stage.
For example, we could change the opacity properties for the elements by following these steps:
1. Move the playhead back to 0:00. Make sure the Pin tool is still activated.
2. Use Shift+Click to select both elements.
3. Go to the Properties panel and adjust the Opacity slider. The value you set it to will be the beginning opacity value. The ending opacity value will be the original opacity value of the elements.
Altering the Duration of an Animation
Being able to alter the duration of animation will be critical to successfully working with Edge Animate. For that reason, we are going to cover it again.
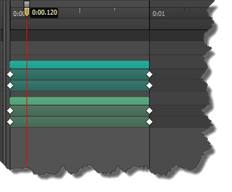
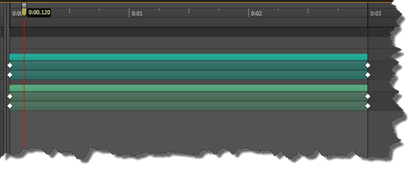
In the timeline below, we can see all our animations marked by keyframes. Each animation has a bar that appears between the beginning and ending keyframe.
To shorten the length of a duration, drag the ending keyframe in toward the beginning keyframe.
To add time to an animation, drag the keyframes further apart.
If you want to add an exact amount of time to an animation, there is an easier way to do that than dragging keyframes.
Move the playhead so it's where you want to add additional time. This should be somewhere between two keyframes.
Next, go to Timeline>Insert Time.
Specify the amount of time you want to add to the composition. We want to add two seconds.
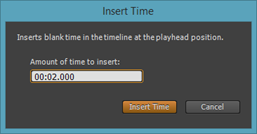
Click Insert Time.
NOTE: Remember, inserting time will slow down the animation.
Making Elements Appear and Disappear on the Stage
By turning the Display property off and on for an element, you can make an element invisible or make it appear. If the Display property is on, the element is visible. If it's off, the element is invisible.
Here's how to do it.
Select the element on the Stage.
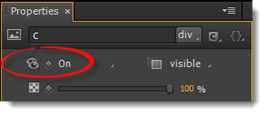
We are selecting the sun. Note that the sun element covers up our other elements, which is why we want it to disappear.
We are going to move our playhead to 0:00. We want the sun visible at the beginning of the composition.
Next, go to the Properties panel. Click the keyframe (diamond) next to the display property. By default, it says Always On, but when you click the keyframe, it will say ON, as shown below.
Now, move the playhead to the location where you want the element to become invisible.
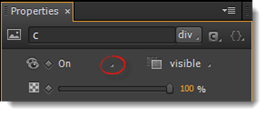
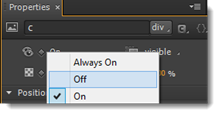
Go back to the Properties panel. Click to display dropdown menu for the Display property by clicking the triangle.
Select OFF from the dropdown menu.
Creating Animation by Adjusting Scale Properties
You can animate an element so that it gets smaller as the composition plays by adjusting the scale properties. Remember, the scale is a percentage of an object's original size. To adjust the scale properties, we will use the Pin tool, as well as the Transform tool.
Let's learn how to do it.
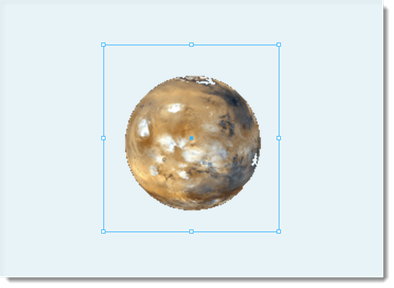
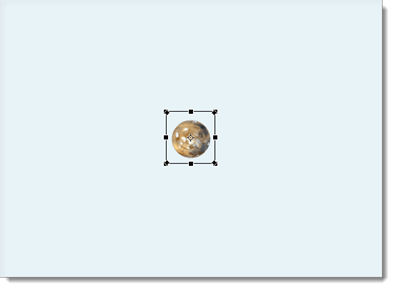
We are going to make the planet in our composition grow smaller.
We are going to start by moving the playhead to 0:00, then clicking the Pin tool in the Timeline panel.
Next, we will drag the playhead to 0:02. Notice that we left the blue pin in place at the beginning.

Make sure the element is selected on the Stage, then click on the Transform tool in the Tools panel.
Using the handles on the bounding box, shrink the size of the element.
Hit the spacebar to preview the animation.
NOTE : You can also make an object grow larger and smaller by using key frames and the height and width properties for the element.
To change the point of transformation, move the crosshairs that appear in the center of the element, just as you did when you moved the point of rotation.
Creating a Fade
When you create a fade, you make an element slowly appear or disappear on the screen. You create a fade by going to the Opacity property for an element in the Properties panel and adding a keyframe.
Once you've added the first keyframe, you drag the playhead to the location where you want the ending keyframe, then adjust the opacity level using the slider.
For this example, we are going to use our planet again.
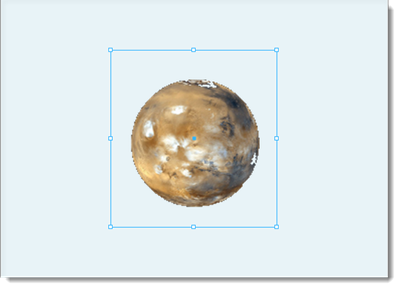
Notice that we have selected our planet using the Selection tool. We have also moved our playhead to 0:00.
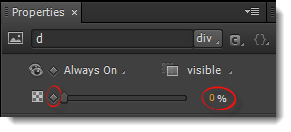
Let's go to the Properties panel. Since we want to make our planet fade INTO view (instead of out of view), we are first going to adjust the Opacity slider to 0%.
Next, click the diamond by the Opacity slider to add the beginning keyframe.
Going back to the Timeline panel, we are going to move the playhead to 0:02.
To make the element fully visible at this point in the composition, we then go back to the Properties panel again and adjust the Opacity slider to 100%.
The ending keyframe is added:

Exploring Animation Options
In Edge Animate, animation involves changing the properties of an element and marking those changes using keyframes. Once you master the Properties panel, as well as using keyframes, you will find that animations are not hard to create. In fact, Edge Animate makes it really simple. The program even provides additional options to save you time and make working on your composition even easier.
In this article, we are going to learn about:
-
Viewing the timeline when you have multiple elements and animation
-
Replacing images in your composition
-
Copying and pasting animations
-
Applying eases to elements
-
Clipping animations
-
Animating shadows
Options for Viewing the Timeline
Now that you know how to create animations in Edge Animate, you can create a lot of animations. As a matter of fact, you can add twenty elements to the Stage, then animate every single one of them if you want.
The only problem is that when you have that many elements � and that many animations � it can be hard to find the element you need to view or the animation you need to edit in the timeline --when you need it. In the next two sections, we are going to show you two ways to make viewing your timeline easier, especially when your compositions are large.
Collapsing Elements on the Timeline
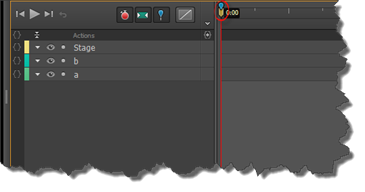
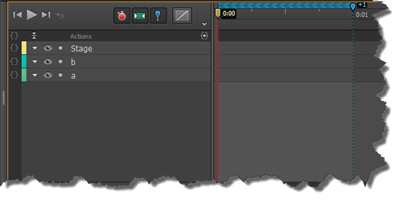
When you have several elements on the Stage, you may not be able to see all the elements in the Timeline panel. To fix this problem, you can collapse lanes that you aren't using.
As you can see in the snapshot below, we have lanes for the Stage, then each of our two elements.
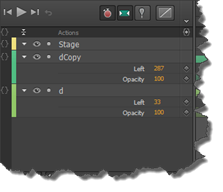
By clicking any of the downward facing triangles to the right of the lanes, we can collapse the lanes.
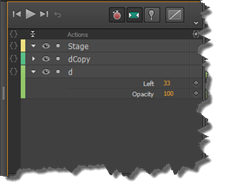
In the snapshot above, we collapsed the lane for the dCopy element.
Zooming in and Out of the Timeline
As your animations grow longer, you may not be able to see the animation for all elements on the timeline. For example, our timeline only shows six seconds of the composition. If you have animations that occur after six seconds (as shown below), you won't be able to see them without using the slider at the bottom of the Timeline panel. That's fine, and it works, but you're still not able to see all of your animations.

When you zoom out on the timeline, you are able to see the bigger picture. Instead of six seconds, you can see a lot more. The opposite is also true. You can also zoom in to see particular elements or animations close-up.
To zoom so the timeline fits the window, click the Zoom Timeline to Fit button. This button is located at the bottom right corner of the Timeline panel, as shown below.

It looks like this: 
As you can see, the timeline is shrunk so you can see the entire length.
To zoom out on the timeline, click 

This button is located to the right of the Zoom Timeline to Fit button.
To zoom in on the timeline, click  . This is located to the far right of the Zoom Timeline to Fit button.

Replacing Images
Remember that images that appear in your composition come from the Library panel. The Library panel lists the images by name; however, it does not store those images. It stores the location of those images. The location is typically an image folder. The location for the image is what is actually placed in your composition. This means that you can easily change an image in your composition on the Stage.
To do this, select the element that represents the image you want to change.
Go to the Properties panel.
Click the Change Image Source button, as circled below.
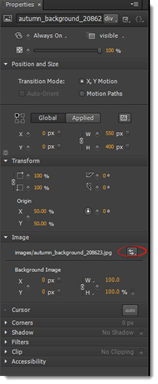
You will then see the Library Assets window appear by your mouse cursor. This window contains other images that are listed in the Library panel.
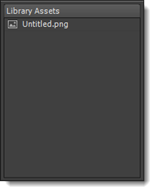
Choose the image that you want to replace the current image.
Copying Animations
If you want to use a particular animation in more than one part of your composition, you can do so by copying and pasting the animation. Using the timeline, you can copy a single property change for an element. You can also copy multiple changes.
To copy an animation, Shift+Click on the keyframes you want to copy.
Right click, then select Copy from the context menu.
Pasting Animations
To paste an animation, select the element in the timeline where you want to paste the animation.
Move the playhead to the point in the timeline where you want the animation to appear.
Right click, then choose Paste from the context menu.
You can also use special paste options when using paste. These options give you the ability to control how the animations are applied. To see the special paste options, right click in the timeline where you want to place the animation, then choose Paste Special.
The four types of special paste options are:
-
Paste Transitions to Location . This is the default paste. It pastes the animation so that animations end at the target.
-
Paste Transitions from Location . This pastes the animations so they start at the current target.
-
Paste Inverted . This pastes animations so they end at the current target, then switch directions.
-
Paste All . This ages the animations and the element from which you copied the animation as well. In other words, it creates a duplicate element and animation in your timeline.
Applying Eases to Elements
Easing is the rate of change (motion) of an element over time. An element may accelerate. It may decelerate. It can also bounce, oscillate, zig-zag, etc. While keyframes let Edge Animate know where an animation begins and ends, easing is how your element gets from one keyframe to the next. Without it, your animation will be smooth and linear. There won't be any acceleration or deceleration � or bouncing.
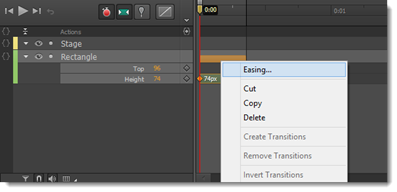
Select an element in the Timeline panel, then right click the on the animation span for that element.
Choose Easing from the context menu, as shown below.
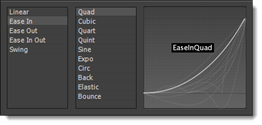
You will then see the types of eases available.
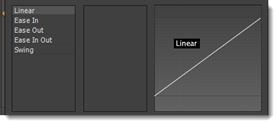
The first column (shown above) displays the types of eases available. The second column displays the motion paths for the easing.
Let's choose Bounce.
Click outside of the easing menu to close it. You can then preview your animation by hitting the spacebar.
Clipping Animations
By definition, clipping is an animation effect used to veil or unveil elements on the Stage. You can make the element appear from left to right or top to bottom. You do this using the Clipping tool.
The Clipping tool is found in the Tools panel. It looks like this: 
To use the Clipping tool, click on it in the Tools panel, then click on an element on the Stage.
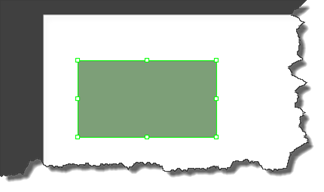
As you can see, the bounding box around the element is green when the Clipping tool is selected.
Next, click and drag on the handles (the squares) on the bounding box. This selects the area that you want clipped.
The gray area with the diagonal lines (barely visible) will be the area that is clipped � or veiled.
Next, go to the Timeline panel. Make sure the Pin tool is activated.
Drag the playhead to determine the length of this animation.
Since you are using the Pin tool, you will see the yellow bar with arrows in it.
Now go back to the Stage.
We already clipped � or veiled � part of the element. Let's unveil it.
Grab the middle selector, as circled below.
Drag it over the gray area so that the element is unclipped.
You can now play your animation by hitting the spacebar.
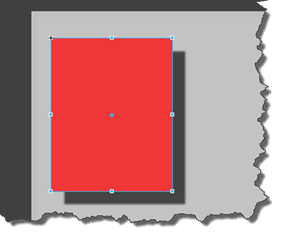
Animating Shadows
Now we are going to learn how to animate those drop shadows.
In the snapshot below, we have a rectangle element. You can see the slight drop shadow that we've added to it. The drop shadow appears on the left and bottom sides of the rectangle.
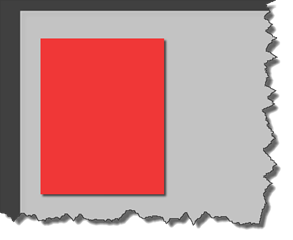
We want to expand the shadow as the animation plays out. To do this, we will edit the shadow properties.
The properties for this drop shadow appear in the Properties panel under Shadow.
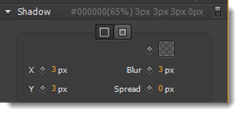
We will need to adjust the X and Y coordinates to make the shadow expand.
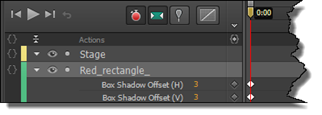
We do this by first adding beginning keyframes for both the X and Y coordinates. We click the diamond beside the X coordinate, then the diamond beside the Y coordinate.
If we look at our timeline, we can see the keyframes have been added:
Next, we move the playhead to the location where we want the animation to end.
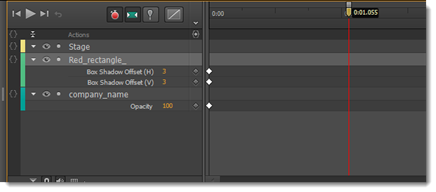
Now we go back to the Properties panel and adjust the values for the X and Y coordinates.
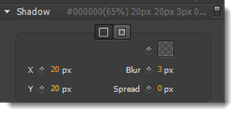
If we look at the timeline, we can see our ending keyframes.
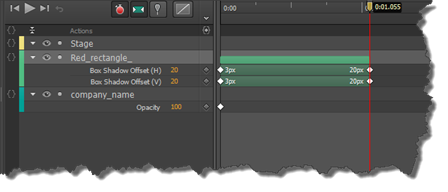
Our animation is complete.