Interactive compositions require the viewer's participation in some fashion. The viewer may be asked to click a button, move their mouse over a button, or even move their mouse cursor off a button. In Edge Animate, JavaScript is used to create interactivity in your compositions.
In this article, we will learn about:
-
JavaScript, jQuery, and the Edge Animate API
-
Timeline triggers
-
JavaScript syntax
-
Events and actions
-
Creating a one-click button
About JavaScript
JavaScript is a scripting language that adds interactivity to web pages. It is a safe bet that you have encountered JavaScript on web pages that you have visited. Most pull down menus, check boxes, and even search boxes were created using JavaScript. That said, don't worry if you don't know a thing about how to write JavaScript. Edge Animate makes it easy.
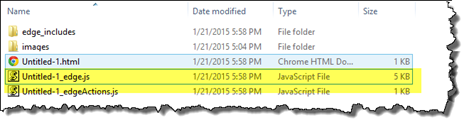
The JavaScript code for your composition is found in text documents that are stored with your other composition files. These documents have the file extension .js. Of course, the "js" stands for JavaScript. Take a look at the files for our composition. You can see the two .js files.
Introducing JQuery
jQuery is a JavaScript library that makes it easier to use JavaScript. By taking some of the tasks that require lines and lines of JavaScript code and making those same tasks require only one line of code, jQuery can make the most complicated things simple to do. jQuery is a JavaScript framework, not another coding language. It helps bring structure to the code and make it so that it's organized.
About The Edge Animate API
The Edge Animate API, or Application Programming Interface, also provides built-in JavaScript functions that you can use. With use of the Edge Animate API, you don't have to worry about writing a line of JavaScript.
Together with JavaScript and jQuery, the Edge Animate API gives you control over the level of interaction in your composition. Of course, the Edge Animate API will be your first method of control since it contains built-in functions. Next is jQuery. Finally, there is JavaScript that allows you to create the interaction that you need for your composition. If you want, you never have to use more than the Edge Animate API for creating interactivity in your composition. However, if you want to get more creative and adventurous, both jQuery and JavaScript are there for you.
Exploring Timeline Triggers
JavaScript is incorporated into your composition using actions, triggers, and events.
1. Actions are what Edge Animate can do, such as loading a hyperlink to changing a property of an element.
2. Triggers are actions placed in the timeline. The playhead will reach the trigger, and the action takes place.
3. Events are things that happen. Edge Animate can respond to these events with an action. For example, a viewer clicks on a mouse button. This is an event that will cause an action to take place.
Triggers are the easiest way to add code to your composition. We already added a trigger when we worked with symbols, so you should already have an idea as to how they work.
Here are some things you should know about triggers:
-
They are automatically executed.
-
You can place as many triggers in the timeline as you wish.
-
Triggers must have at least 1/1000th of a second between them on the timeline.
Let's learn to create a loop using a trigger.
A loop means that an animation or a composition continues to play. Once the animation or composition reaches a certain point, it will return to the beginning and play again. For example, we could make an image of the earth make a complete rotation during a 3-second composition. If we created a loop, we could make it so when the playhead reached the end of the composition, it returned back to the beginning and played again.
In the composition below, the clouds move across the sky and the car drives across the Stage. We want this to play over and over again.

Move the playhead to the end of the composition in the timeline.
Click the Insert Trigger button, as circled below.

You will see this panel:
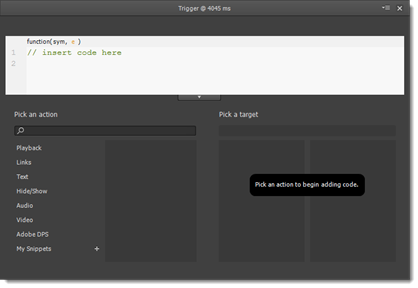
We are going to follow the exact same steps we did when we inserted a trigger in our symbol.
In the white box, place the cursor at the end of "insert code here." Press Enter.
Next, click Playback in the Pick an Action column.
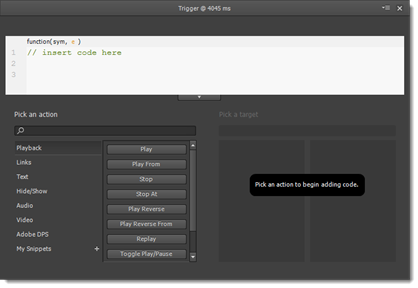
Click Play From.
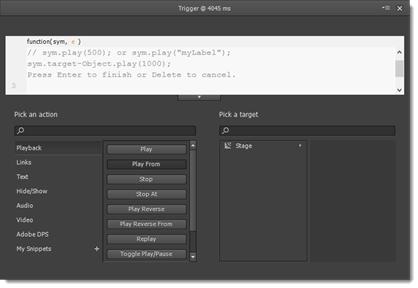
Double click Stage under Pick a Target.

As you can see above, it's set to play at 1000.
Change the 1000 to 0 so it plays from the beginning.
You can now X out of the panel.
If you go to File>Preview in Browser, you can watch your composition loop.
Understanding JavaScript Syntax
Syntax is the grammar of a programming language. With JavaScript, the syntax is comprised of punctuation and words that work together behind the scenes to create the visuals on the Stage.
Although you do not have to know how to write JavaScript code, being able to understand the syntax will go a long way to helping you understand the scripts and what each line of a script is telling a web browser to do or display.
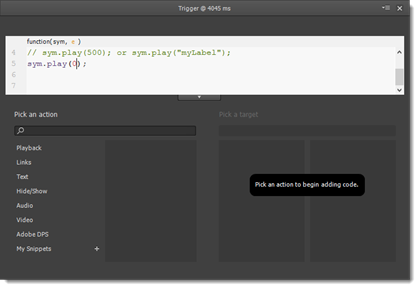
When creating a loop, we saw the code below:
sym.play(0)
In JavaScript code, "sym" represents symbol. Keep in mind that we are talking about symbol as it relates to JavaScript. The Stage is a base-level symbol. Other symbols that you may create are built off of the Stage, so to speak. They are still symbols, but what you must realize is that JavaScript sees your Stage as a symbol � the root symbol. In the example, the sym was the Stage. If you remember, we chose the Stage as our target. It was the symbol we wanted to script to target. The base-level symbol (or root symbol) contains everything in your composition, including animations and elements.
The dot after "sym" is an operator. It allows you to access different commands. The commands are for the object you identified before the dot. However, objects can also be text and animations. Objects have properties. Properties describe the objects. They also have methods. Methods are things they can do. The method for our code shown above is play.
The parentheses that follow a method contain arguments. There is only one argument for the play method. That's the location in milliseconds where the method takes place. However, some arguments may not even contain numbers. They may contain true or false.
Comments are marked by // at the beginning. Comments can be used to let you know what is taking place with the code.
A semicolon is used to tell you that it's the end of a complete statement and a line of code. Whereas periods are the ends of sentences, semicolons are the end of a statement in JavaScript code.
Reviewing Triggers, Events, and Actions
Earlier in this article, we named the three ways that JavaScript is incorporated into your composition.
Let's review the three ways again:
1. Actions are what Edge Animate can do, such as loading a hyperlink to changing a property of an element.
2. Triggers are actions placed in the timeline. The playhead will reach the trigger, and the action takes place.
3. Events are things that happen. Typically, events are performed by viewers. Edge Animate can respond to these events with an action. For example, a viewer clicks on a mouse button. This is an event that will cause an action to take place.
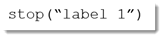
We already discussed triggers. Triggers are placed at a certain location in the timeline. When the playhead reaches that location, an action takes place. In the example earlier in this article, the composition looped when it reached the location where we placed the trigger.
Now we are going to discuss events. In doing so, we are going to learn to create an interactive button. The event will be when a viewer clicks on that button. We will also specify the action that will take place when that event happens.
Creating an Interactive One-Click Button
A button is a visual aspect of your composition that a viewer can interact with. Typically, viewers single click buttons to go to another web page or to submit information. However, buttons don't necessarily have to be clicked on. You can also have rollovers, rollouts, and double clicks. Edge Animate can also provide touch events for compositions designed for mobile devices.
For the article, we are going to learn to create a single click button.
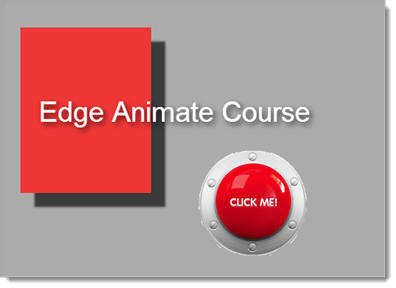
The first step is to select the graphic or image that you will use for the button. In the snapshot below, we have dragged the image of our button onto the Stage.

Once you drag the image from the Library panel to the Stage, it will appear as an element in the Elements panel.
Next, select the element in the Timeline panel, then click the Open Actions button, as circled below.
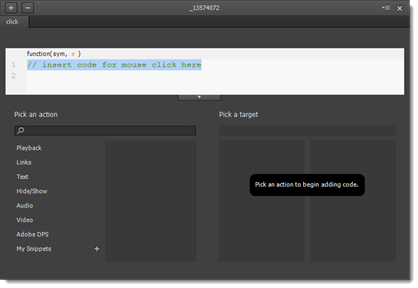
You will then see the following panel:
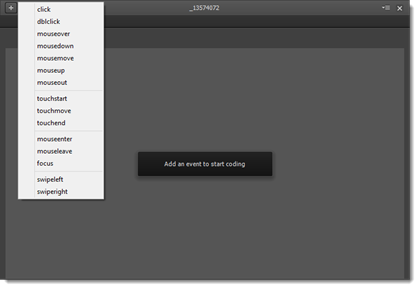
Select Click. A single click is the event that will cause the action.
When the viewer single clicks on the button, we want to take them to a different website. Let's learn how to do this.
Adding a Hyperlink
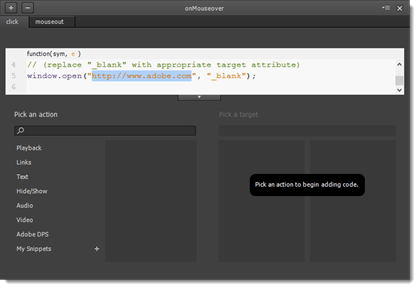
A hyperlink is the address of a website on the worldwide web. You can add hyperlinks to your composition so that viewers can click on it, then go to the address of the website you specified. To do so, you will use this JavaScript statement:
window.open()
This method loads the URL in a new browser window or the same browser window. You can decide which you want it to do.
To do this, start by moving the cursor in the white box to line 2 in the script panel. Then, under the Pick An Action column, pick Links.
You will then see this in the panel:
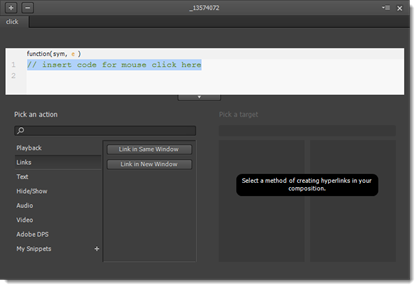
Click the button that says Link in New Window.
In the white box, enter the URL of the website that you want the viewer to be taken to upon a single click. We entered the URL for Google, as shown below.
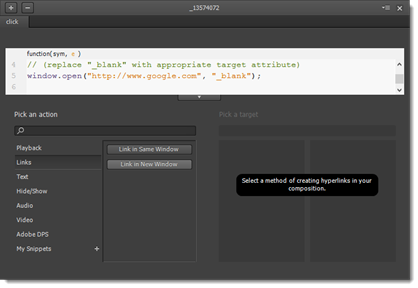
You can now "X" out the panel.
Creating Interaction in Edge Animate Part II
Creating interactive elements in Edge Animate involves using JavaScript and jQuery.
In this article, we're going to explore:
-
The Code panel
-
Creating labels
-
Using labels as references
-
Creating visual feedback
-
Changing the mouse cursor
-
Adding HTML content
The Code Panel
The script panel is where you added code to create interactive elements.
The Code panel is where you go to see all the code for your composition. This includes all the elements and all the animation. You will use the Code panel more and more as you start to add interaction to your compositions; therefore, inputting code to create events and actions. You can view code, check for errors, and edit the code in the Code panel.
To view the Code panel, go to Window>Code.
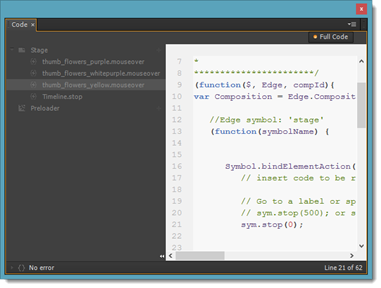
The Code panel is pictured below:

Click the Full Code button at the top right of the panel to toggle between full code and non-full code mode.
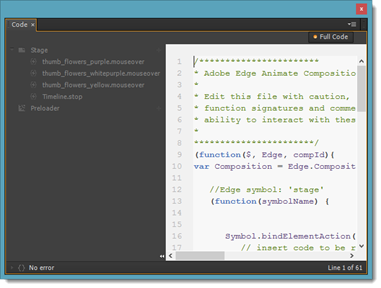
When you are in Full Code mode, you can see the code for the JavaScript file for the composition.
If you go back to non-full code mode, you can click on an element on the left hand side of the panel, then view the code for that element on the right hand side, as shown below.
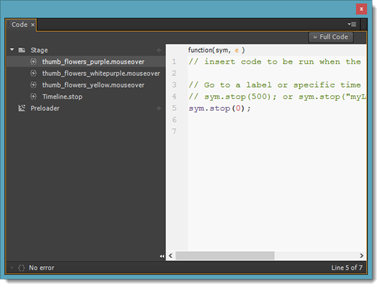
In the above snapshot, you can see how we've clicked on "thumb_flowers_purple.mouseover on the left. The code appears on the right.
You can also click on the Plus button. This appears to the right of Stage when you hover your mouse above Stage, as shown below.
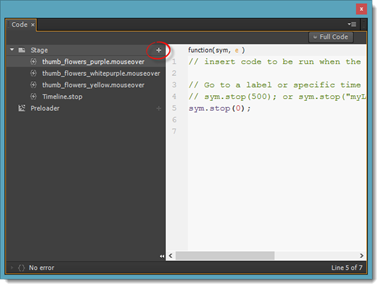
When you click on it, you'll see a menu that allows you to add an event to the Stage, to any element on the Stage, or to the timeline.

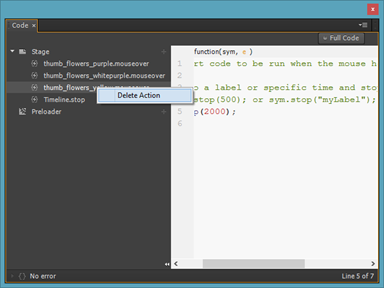
To delete an element or trigger, right click on it and select Delete from the menu, as shown below.
If there are any errors in your code, Edge Animate will let you know at the bottom left corner of the panel. Since we don't have any errors, we see No Error.

If there were an error, Edge Animate would tell you where the error occurred. If you looked at the code, a red dot would appear by the line of code that contains the error.
Take a look at the example below.
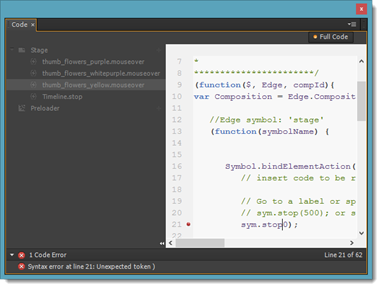
In the snapshot above, we can see there is a syntax error at line 21.
If we look at line 21, we can see a parenthesis is missing.
Let's correct the error.
When we do, the error message goes away.
NOTE: If you make any change to the script when in either full or non-full code mode, the change are saved in the composition.
Creating Labels
Thus far, we have used time (in milliseconds) to reference a point on the timeline when creating JavaScript code. The problem is that if you need to increase or decrease the length of an animation, you will also need to adjust the time in the code. To get around this problem, you can use labels instead of time in your arguments. Labels represent points on the timeline. They can also move with your animation. That means if you need to increase or decrease the length of an animation, the labels move also.
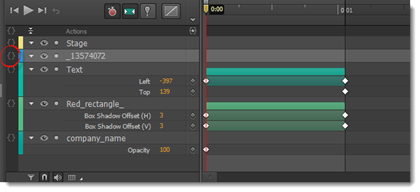
To create a label, click the downward arrow in the Timeline panel. We have circled it in red below.

A text field will open up to the right of it.
Enter a name for the label. The name you enter should represent what appears at this point in the timeline to help with organization of your composition.
Hit Enter.
-
To rename a label, double click it, then enter the new name.
-
To move a label, drag it to a new place on the timeline.
-
To delete a label, select the label, then press Delete on your keyboard.
-
To copy/paste a label, select the label, right click, then select Copy or Paste.
Using Labels as References
Now that we have created labels, we can go back to our JavaScript and use the labels instead of the time references.
To do this, go to the Code panel by going to Window>Code.
Click the Full Code button.
Find the millisecond time (found in parentheses) that you want to replace with a label.
Enter the name of your label in quotation marks. In other words, it should look like this:
Quotation marks let JavaScript know that it is a string instead of a variable.
Exit the Code panel when you're finished.
Creating Visual Feedback
Visual feedback lets a viewer know that certain parts of your composition are interactive. A hyperlink may change colors when the mouse passes over it. A button may as well. Again, these things let a viewer know that you want them to interact with the page � and that they can.
Let's learn to add visual feedback to the button we created in the last section.
The first thing to decide is what kind of visual feedback you want to appear when a viewer moves their mouse over the button.
We have decided that our button will become a little darker in color, so we have imported another version of the button image that's darker than the original.
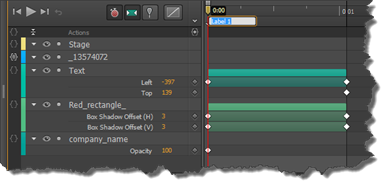
When you're ready to add the visual feedback to the composition, move the playhead to the point where you need it to be. Since our button occurs at the beginning of our composition, we are going to move the playhead to 0:00.
Next, we are going to move the new version of the button onto the Stage, placing it directly over the original version.

You only want the new version to show when someone moves their mouse over the button. This means we want to hide the new version.
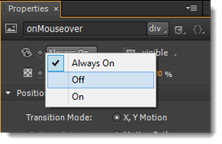
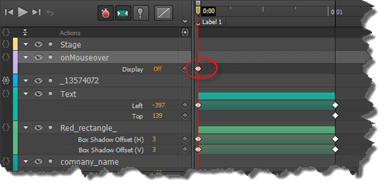
To do this, change its Display property to Off in the Properties panel.
A new keyframe is inserted into the timeline.
The original image already contains a click event. When a viewer clicks on the button, it takes them to a web page. We will have to edit this so we can add a mouseover event.
Click the Open Actions button for the original image of the button.
You will then see the script panel.
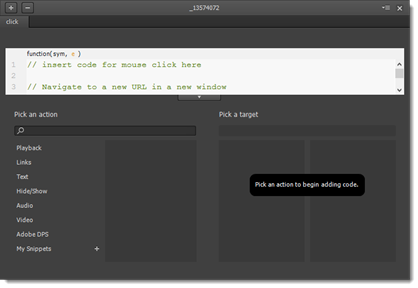
Click the + button in the upper left hand corner.
Select Mouseover.

Move your mouse cursor to line 2, then select Hide/Show from the Pick An Action column.
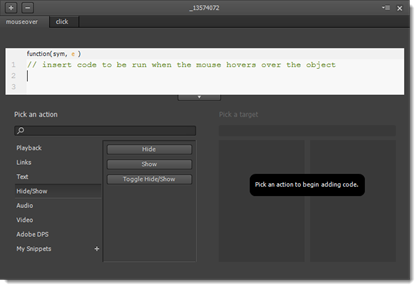
Click Show.
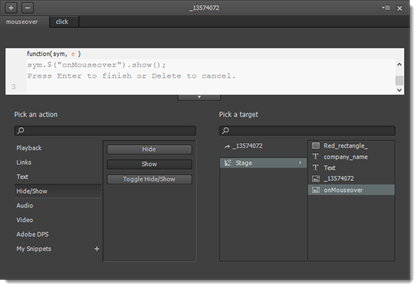
Click on the original image name in the Pick a Target column, then select the new version in the column that appears to the right.
Double click on the new version of the button.
You can then "X" out of the script panel.
Go to File>Preview in Browser. Mouse over the original image in your browser window, and you will see the button change when a mouse moves over it.
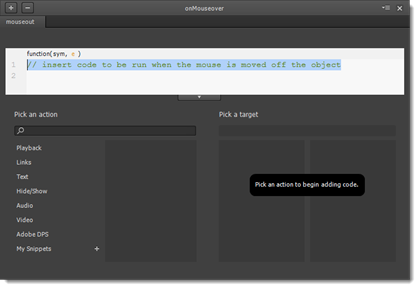
However, it does not change back. To make that happen, click the Open Action button for the new version of the button.
The script panel will open.
Select Mouseout for the time of event.
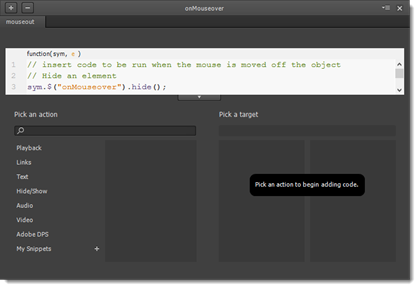
Move the cursor to the second line of script, then choose Hide/Show in the Pick an Action column.
Select Hide. We are selecting Hide because we want to hide the new version of the button when the mouse moves off it.
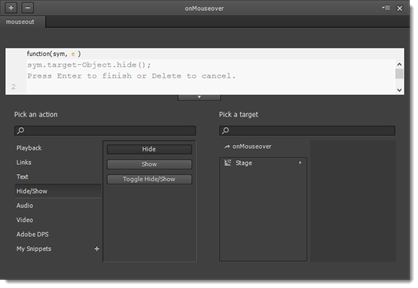
Click on the name of the button in the Pick a Target Column.
You will then see the name of the original image.

Double click on the name of the button again in the column that appears.
Go to File>Preview in Browser. Try to click on the button. When you do this, you will notice that you can no longer click on the button to be taken to a new web page. This is because you need to move the Click action from the original button element to the new one.
Click the Open Actions button beside the original button element.
Click on the Click tab, then click the Minus sign (-) at the top left of the script panel. Remove the Click event.
"X" out of the script panel.
Now, click the Open Actions button for the new button element. Click the Plus (+) sign, and select Click.
Click Links>Link in New Window.
Enter the URL for the site in the white box.
Close the script panel when you're finished.
Go to File>Preview in Browser. Your visual feedback is now complete and functional.
Changing the Mouse Cursor
In addition to visual feedback, you can also make the mouse cursor change when it moves over an interactive element.
Here's how to do it.
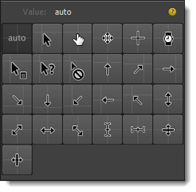
Select the new version of the button. Go to the Properties panel and turn the Display property On.
In the Cursor section of the Properties panel, click the cursor option to the far right, then choose a pointer icon.
Turn the Display option back to off for the new version of the button.
Adding HTML Content
In the last section, we learned how to add a hyperlink to a button. However, what if you just want to insert a hyperlink into text -- or create placeholder text on the Stage that is replaced with the actual text when displayed in a browser window? To do that, you will use html().
Replacing Text
The html() method sets the contents of a text element. It can be used to replace the content of a text box on Stage with new content in the browser window. You can also use it to include HTML tags in text, but first let's teach you to use it to replace text.
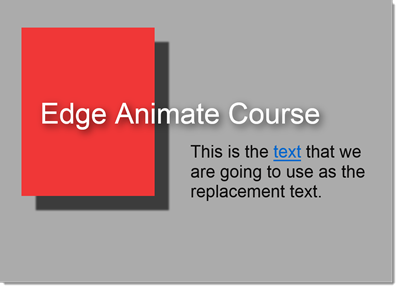
On our Stage pictured below, we have created a text element with filler text.
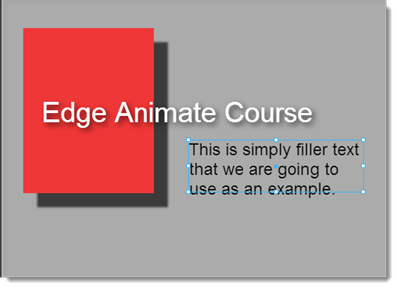
We have named the text element "body."
We are going to replace this text with different text.
To do this, we first go to the Timeline panel and click the Open Actions button for the Stage element.
In the script panel, we select compositionReady as the event.
On line 2, enter:

Please note that "body" is the name of our text element. Yours may be different.
"X" out of the script panel when you're finished.
If you go to File>Preview in Browser, you'll see the text you entered into the script panel displayed in your composition.

Creating a Hyperlink within Text
You can also turn a word or section of text within a text element into a hyperlink. For example, in the snapshot below, if we wanted to turn the word "text" into a hyperlink, we could do so.

Click on the Open Actions button beside the Stage in the Timeline panel.
Since we want to turn the word text into a hyperlink, we will write the code around the word text, as shown below:

This is how it looks in the script panel:

When we preview our composition in a browser window, we can see the hyperlink: