Design and layout are only the beginning of designing a website. Your visitors need something to read so that they stay on your site and click through to look at all your pages. Although Muse CC allows you to add video and audio to your web pages, text is still a part of your website that will be critical to its success. That said, knowing how to place text on your website using Muse CC, then knowing how to format it will be two of the most important things.
For this article, go back to Plan view and double click on your Home page to open it up in Design view.
Add Text to a Page
Adding text to a page in Muse CC is easy.
Click on the Text tool in the main toolbar.
It looks like this:  .
.
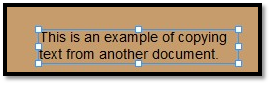
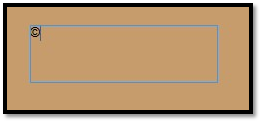
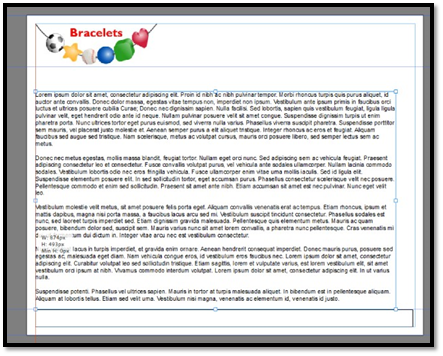
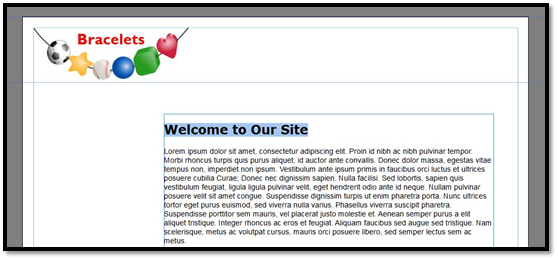
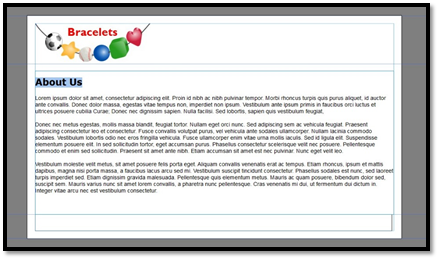
Next, click and drag on the page to create a text box.
You can see ours outlined in blue below.
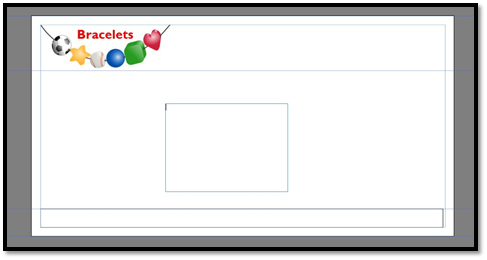
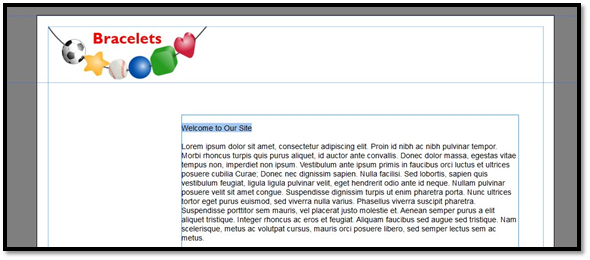
Before you add text, select a font from Control bar

You'll want to choose a web safe font.
You can change the size of the text if you want by changing the value in the box to the right of the font type (shown below). The current font size is 14.

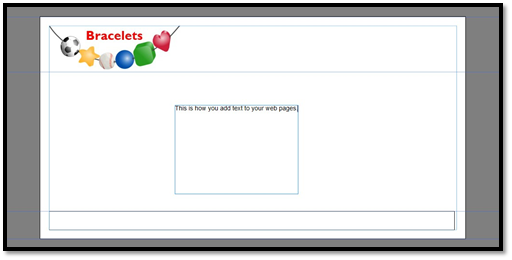
Now you can type your text into the text box. If needed, the text box will automatically resize itself to accommodate the text that you type.
 Remember to use keywords in your text as they occur naturally. Don't try to add keywords. By keeping your page limited to one or two topics, keywords will occur automatically as you type in content.
You may need to click the text box again to select it, or click within the text box to see the cursor before you start typing.
Import Text from Other Programs
You can also import text in other programs into Muse CC and onto your page.
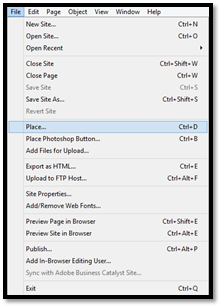
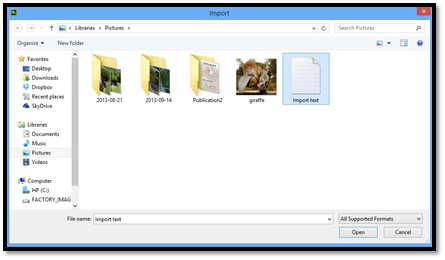
To do this, click File in the Menu bar, then Place (File>Place).
Select the file that you want to import. Please note that Muse CC does not import formatting, so if you are importing a Word document, it should be saved in .txt or plain text format.
Click Open.
You'll then see the Loaded Text icon in Muse CC.
Click to create the text frame.
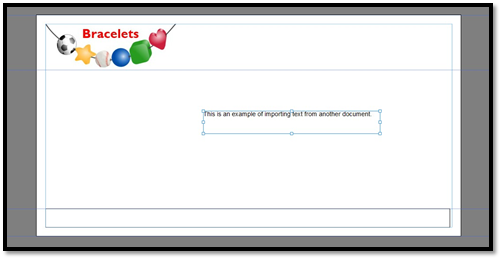
You'll then see the text from the document appear in the text box.
Paste Text
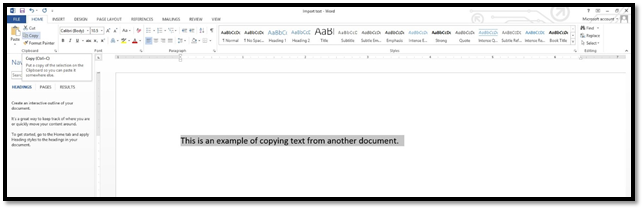
You can also copy text from another file, then paste it into Muse CC.
To learn how to paste text, open a Microsoft Word document. Select some or all of the text that you want to paste in Muse.
Now, click the Copy button in Word.
Go to Muse and create a text box, then click Edit on the Menu bar, then paste (Edit>Paste).
You can paste from any word processing or text-based program. Just remember that Muse doesn't recognize formatting from other programs. If you paste from Excel, you'll paste unformatted text.
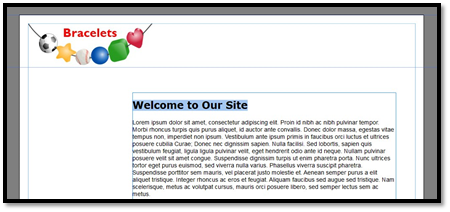
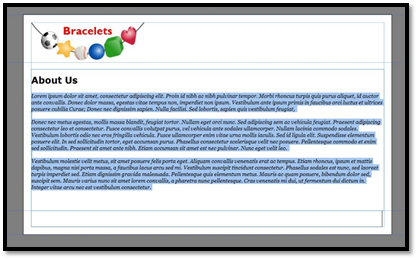
Placeholder Text
You can use placeholder texts in text boxes until you enter the real text. You might do this if you were creating a layout and wanted to dedicate certain areas of your web page to text. You could simply draw text boxes without placing text in them; however, placeholder text allows you to see the full effect of your design � even though you haven't added text in.
Lorem Ipsum is the most popular type of placeholder text. If you've ever used a website template, then you've seen Lorem Ipsum used for placeholder text in the past.
Using Lorem Ipsum for your placeholder text is easy. Open a web browser and go to www.lipsum.com.
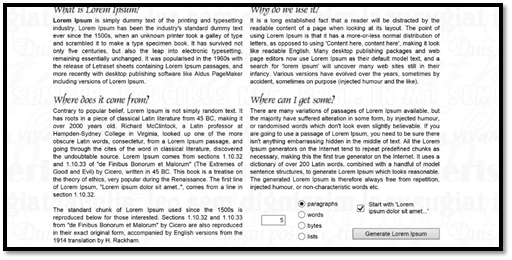
Decide how many paragraphs or words you need for placeholder text, then click the Generate Lorem Ipsum button.
Next, select the text, then right click on it and choose Copy.
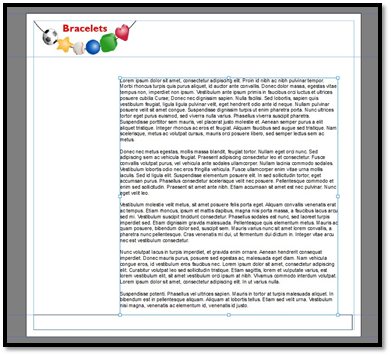
Go back to Muse CC. Select the Text tool on the main toolbar. Create a text box on your page.
Select Edit on the Menu bar, then click Paste (Edit>Paste).
Resizing Text Boxes
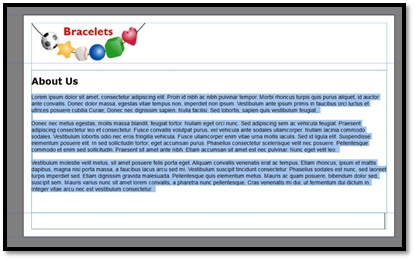
You can easily resize text boxes, and the text within them will be shifted to adjust to the new size or shape of the box.
To resize a text box, click on the text in the text box to select the text box. It will have a blue border around it when it's selected.
Next, click on the Selection tool  in the main toolbar.
You'll then see white handles appear on the corners and sides of your text box.
Click and drag on these handles to resize the box. However, you should remember that Muse CC will not let you reduce the size of a text box if it means that all the text will not be shown.
Special Characters
Special characters are simply characters other than letters or numbers that you can insert into documents and web pages. These characters include symbols, such as the copyright and trademark symbols.
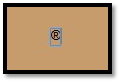
Insert a Copyright Symbol
Copyright symbols appear at the bottom of web pages, typically in the footer. They appear as a c with a circle around it.
Let's learn how to create a copyright symbol in Muse CC.
Go to the Text tool, then click within a text box.
Next, press and hold the Alt key on your keyboard, then type 0169 on the numeric keypad to create the copyright symbol.
You must use the numeric keypad. The numbers that appear above the letter on your keyboard will not work to create the copyright symbol.
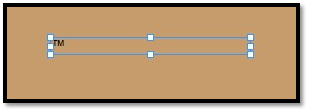
Copying Symbols from Word
You can also copy and paste symbols from Microsoft Word.
To do this, open MS Word. Using that program, insert the trademark symbol into your document, as pictured below.

Select and copy the symbol in MS Word.
Now, return to Muse CC.
Click Edit>Paste.
The symbol will be pasted into an active text box (one that is selected and appears with a blue border). If a text box is not selected, Muse CC will create a textbox and paste your symbol into it.
Copying a Symbol from Your Computer
Everybody has a character map on their computer that includes special characters and symbols. In Windows, the character map looks like this:
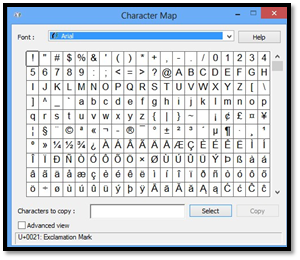
Find the character map on your computer.
Next, select the character you want to copy by clicking on it.
Click the Select button, then the Copy button.
Return to Muse CC.
Click Edit>Paste.
Set Minimum Page Height
You may want to set a minimum page height for the pages you design. This way, no matter how much content you do (or don't) put on your page, your page is guaranteed to have a minimum height.
To set the minimum allowed height for a page, click and drag the Bottom of Page guide to the desired spot.
The Bottom of Page guide is located at the bottom of the page. You'll see three blue arrows. The Bottom of Page guide is the second arrow. You can mouse over the arrows to see their purpose and ensure you are moving the right one.
Where you move the arrow to is now the minimum page height for that page.
Create Flexible Widths
Just as you created flexible width footers, you can also create flexible width text boxes.
To do so, click the Selection tool and select the text box.
Drag the left control handle to the edge until you see the red guide.
The content's width is now locked to the left edge of the browser.
Follow the same instructions for the right edge.
This is to make your content as wide as the browser window.
Non-Scrolling Content
Non-scrolling content is always visible to the user even as they scroll down the page. It is also known as pinning content.
To do this, add a text box, then enter text into the text box.

Click on the Selection tool and select the text box to be pinned.
Next, go to the Control bar. Click the option for the Pin tool.

Select the location on the page where you want to pin it: top left, top center, top right, bottom left, bottom center, or bottom right. We are going to choose top center.
Now, go to File>Pre
view in Browser.
Formatting Text
The way you format your text can make a huge impact on how your visitors react to your site. The formatting can inspire them to start reading, call their attention to certain parts on the page, and even make the design and layout of your website more appealing.
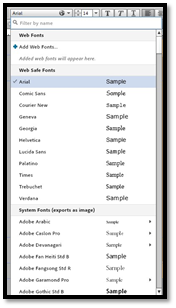
Muse CC Fonts
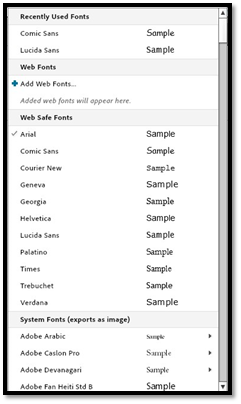
There are two types of fonts in Muse CC: Web Safe fonts and System Fonts. Web safe fonts are automatically installed in the majority of browsers that your visitors will use. This means you visitors will be able to view these fonts on your website without any issues. Naturally, because of this, these are the best types of fonts that you can use on your web pages.
You can use a system font for the text on your pages. However, since most browsers do not recognize a system font without a plugin installed, Muse CC will convert the text that you enter in the web page using a system font into an image. You will still be able to edit the text in Muse CC. It will not appear as an image in Muse. It will appear as an image on your web pages when you publish it to the web.
Take a look at the snapshot below. You can see the web safe and system fonts listed in the Font dropdown.
Basic Text Formatting
When you format text, you change the appearance of it. Muse CC allows you to format text in the same ways that you would in a word processing program such as Microsoft Word. You can change the font type, size, or color. You can also bold, italicize, or underline text.
Changing the Font Type
To change the font type for text, use the Text tool in the main toolbar to select the text you want to change. We are going to change the text pictured below.
Go to the Control bar and click the Font dropdown. Select the font you want to use. Keep in mind the difference between a web safe and system font when making your selection.
We've changed ours to Verdana.

Change the Font Size
To change the size of your font, use the Text tool to select the text, then click the size dropdown menu.

Choose the size you want. If you don't see the size you want, you can type it into the field above, then push Enter.
We've enlarged our font to 28 in the image below.
Boldface Text
To make text appear in boldface, select the text using the Text tool. Go to the Control bar, and click the button with the bold T on it. It's pictured below and is the first of three buttons with a T on it.

The text you selected is bold faced for you.
Italicize Text
To put text into italics, select the text using the Text tool. Click the button for italics. This button appears to the right of the Bold button. It looks like this:

The text is then put into italics for you.
Underline Text
To underline text, select the text you want to underline with the Text tool. Then click the Underline button. It's located to the right of the Bold and Italics button. It looks like this:

Your text then appears with a line under it.
Change Font Color
To change the font color, select the text using the Text tool.
Next, click the Color dropdown box in the Control bar. It looks like this:

You can select the color you want from either the swatches or the Color Picker.
Your color is applied to the text for you.
Aligning Text
You can also align text to the left, center, or right of the text box. You can also justify it.
The buttons to align your text are found to the right of the Underline button. They look like this:
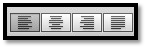
From left to right, these buttons are:
-
Align text to the left side of the text box.
-
Align text to the center of the text box.
-
Align text to the right side of the text box.
-
Justify the text.
To align text, select the text you want to align with the Text tool. Click the appropriate button in the Control bar.
Spacing
Muse CC gives you two ways to set spacing for your text. You can adjust the spacing between characters or between lines of characters.
If you want to adjust the spacing between characters, select the text that you want to adjust using the Text tool, then go to the Control bar.
In the field above, enter a value. You can also use the arrows to increase or decrease spacing between characters.
To add spacing between lines of characters, select the text using the Text tool, then go to the Control bar.
You can adjust line spacing the same way that you did character spacing.
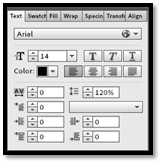
The Text panel gives you the same options as the Control bar for formatting text, plus a few more including left and right indents.
To view the Text panel, go to Window>Text.
The Text panel looks like this:
Character Styles
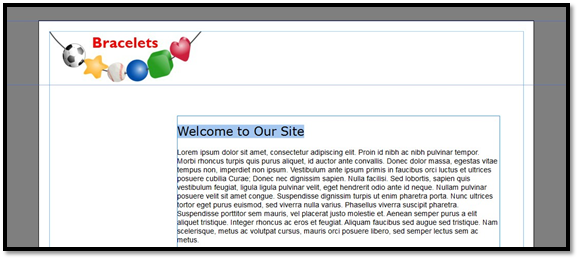
Let's say that you change the font, increase the size, then boldface it to create a heading for a paragraph, as we did in the snapshot below.
We created a header, but chances are, this is not the only header we will have on our site. In fact, we'll probably format most of our headers the same way throughout the site so that our site has a consistent look.
However, it would take up a lot of time to format the text by increasing the size, changing the font, and converting it to boldface every time we created a header. Those three steps are easy enough, but they require time. What we want to do is save our time so we can focus it on other areas of our site.
Whenever you are using the same character formatting for multiple selections of text, it's easier to just create a character style. A character style is all of the formatting you used for a section of text.
In the example above, our style is this:
-
Font: Verdana
-
Font size: 24
-
Boldfaced
We can also say that this is our header or page header style.
Muse CC allows you to save styles like the one above as a character style. When you save a character style, it only takes one step to apply all the formatting to it.
To create a character style, select the text you want to use to create a character style using the Text tool.
Go to Window>Character Styles to bring up the Character Styles panel.
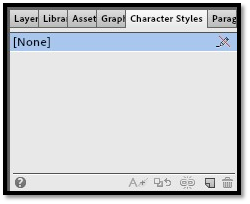
Click the New Style button, pictured below.

As you can see, the new style is added to the panel.
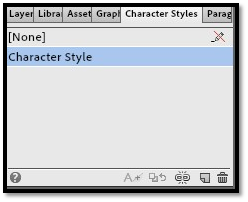
Double click on the style to bring up the Character Style options dialogue box.
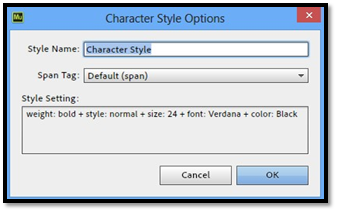
Enter a descriptive name for the new style. Then click OK.
We chose Page Header for our name.
As you can see, it now appears in the Character Styles panel.

Apply a Character Style
To apply a character style to a selection of text, first select the text using the Text tool.
Next, go to the Characters Style panel. Click on the style you want to apply.
We'll click on Page Header.
The style is then applied.
Modify a Character Style
Once you create a style, you may decide that you want to make some changes to it. Perhaps in the example above, we decide that we want to make the font even larger.
To modify a character style, first select the text you want to modify using the Text tool.
Make the formatting changes that you want to make. For us, we are going to increase the font size.
Now, go back to the Character Styles panel.
Click on the Redefine Selected Style from the Attributes Applied button. It looks like this:

The style is then modified.
Paragraph Styles
Paragraph styles are much like character styles, except they apply to an entire paragraph(s) of text. You can format an entire paragraph of text, then create a paragraph style that you can apply to other paragraphs on your website.
To create a paragraph style, select a paragraph of text using the Text tool.
Format your paragraph.
We've changed our font type to Georgia and italicized the text.
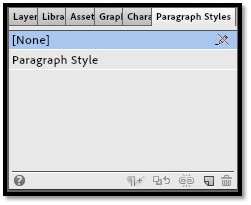
Next, open the Paragraph Styles panel by going to Window>Paragraph Styles.
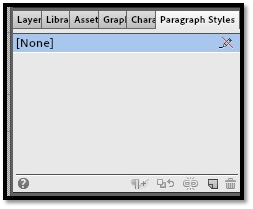
Click on the New Style button. It looks like this:

The new paragraph style is created, as shown below.
Double click it to bring up the Paragraph Styles Options dialogue box.
Enter a descriptive name for the style, then click OK.
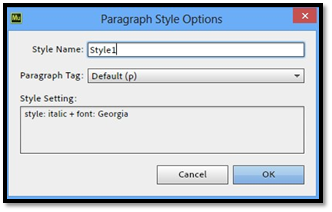
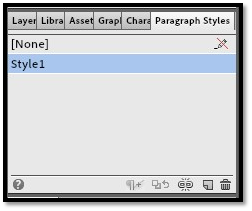
The style now appears in the Paragraph Styles panel.
Apply a Paragraph Style
To apply a paragraph style to a paragraph, first select the paragraphs using the Text tool.
Next, go to the Paragraphs Style panel. Click on the style you want to apply.
We'll click on Style1.
The style is then applied.
Modify a Character Style
Once you create a style, you may decide that you want to make some changes to it. Perhaps in the example above, we decide that we want to make the font larger.
To modify a character style, first select the paragraph you want to modify using the Text tool.
Make the formatting changes that you want to make. For us, we are going to increase the font size.
Now, go back to the Paragraph Styles panel.
Click on the Redefine Selected Style from the Attributes Applied button. It looks like this: