When deciding on the program to use, it's important to choose one that has an easy setup process. You don't want the setup process to be convoluted or you may end up making mistakes that cost you later.
Fortunately, QuickBooks Online has a streamlined setup process that should get you up and running in no time. While in the last lesson we learned a lot about the basics of QuickBooks Online - such as who it is for, its history, and the features available at different subscription levels - in this lesson we will look at setting up your own QuickBooks Online account. By the end of this lesson, you will have your own QuickBooks Online company set up and ready to go.
Set Up
To begin this course, we will be using the Simple Start plan. You may find that you will need another plan as your business develops and expands, and in that case, you may want to switch to another plan. Switching plans is a fairly straightforward process that we will cover later.
For now, we will be taking advantage of Intuit's free 30-day trial of QuickBooks Online. That means you won't have to pay upfront for anything. You won't even need a credit card to take advantage of this offer, although you will need a working phone number to receive SMS messages.
Be aware that Intuit is continually adjusting how they implement QuickBooks Online. So, the plans as well as the 30-day trial used in this lesson may change at a moment's notice. However, the functionality should still remain fairly constant, even if it is realigned into different subscription plans.
Test Drive
You can also explore QuickBooks Online without signing up by using their sandbox. The URL for this is http://qbo.intuit.com/redir/testdrive. With Test Drive, you try out QuickBooks Online through the fictional company Craig's Design and Landscaping Services. Using Test Drive is a great way to test something out without the hassle of registering.
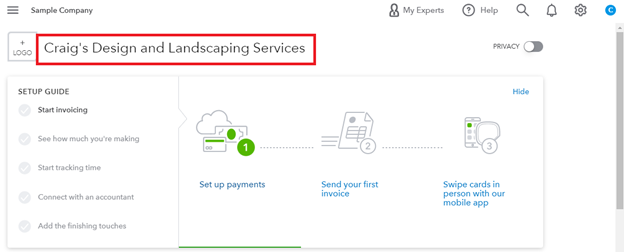
[Figure: QuickBooks Online's Test Drive site with the fictional company called Craig's Design and Lanscaping Services]
Setting Up a New Company with the Free 30-day Trial
We'll now move on to setting up our own company in QuickBooks by using the free 30-day trial. You can find the link in many places on their website, but the easiest place is right from QuickBooks Online's front page. Clicking on the 30-day trial link will take you to a sign-up screen.
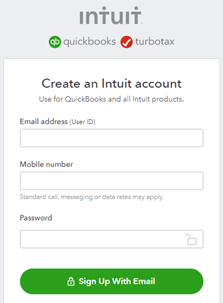
[Figure: Signing up for the 30-day free trial]
Your email address will serve as your user ID. You will also need a valid phone number in order to proceed. Additionally, a strong password is required which is 8 or more characters, has both upper- and lower-case letters, and includes at least one number and one symbol.
After entering your registration information, you will get a screen confirming that you want to do the trial, and not just go ahead and buy it for 3 months. At this point you can just click the 'Continue with trial' button.

[Figure: Confirming the free trial]
QuickBooks will then start setting up your company file based on the information that you enter in the following steps. Currently, the setup process includes 7 different steps. Don't worry if you don't know the information in some of the steps because you can enter it all in later.
In the first step, you are asked to enter basic information about your business. In this example, we'll just make a fictional company called Harry's Plumbing. When you start typing the industry, QuickBooks Online will attempt to autofill in the industry name for you. At the bottom, there is a checkmark for importing data from QuickBooks Desktop. We'll leave that blank for now and talk about importing later.
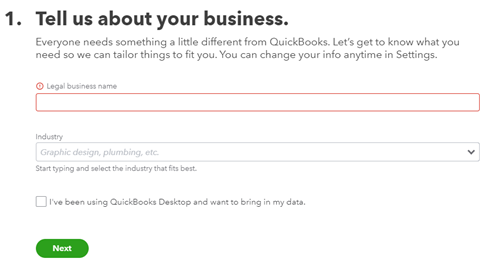
[Figure: Giving your business name in the first step of setting up]
Clicking the Next button will take you to the second page of setting up QuickBooks Online. The second step asks what you would like to do in QuickBooks. You can choose as many of the options here as you like. Try clicking all of them and then click Next at the bottom.
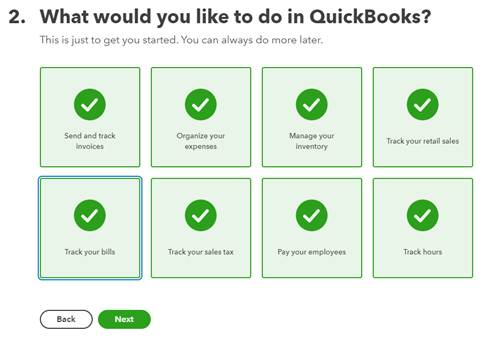
[Figure: Telling QuickBooks what you want it to do for you]
The third step asks if you would like to try a 30-day trial of QuickBooks Payroll. We will skip that for now.
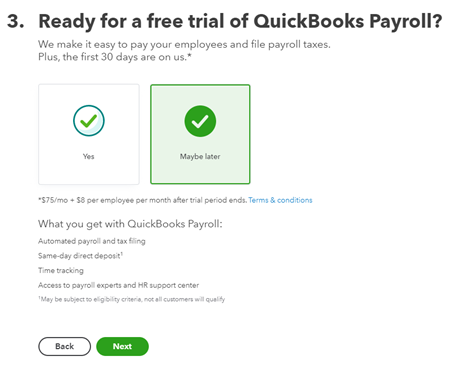
[Figure: Skipping QuickBooks Payroll in the third step of the setup]
The fourth step asks what role you have at your business. The roles can be accountant, bookkeeper, employee, owner, or something else. For now, we'll say that we are the owner. As the person setting up the account, you are also referred to as the administrator in later settings.
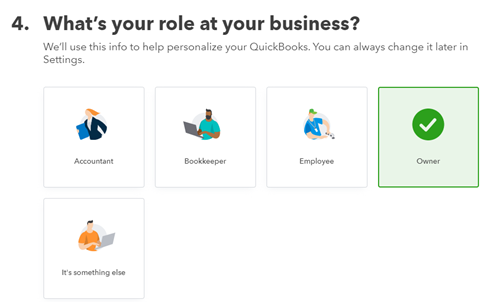
[ Figure: Defining your role in the fourth step of setup]
If you select either owner or employee, then there is a second question that pops up below the first and asks if you have an accountant or bookkeeper with you. This will influence some settings later, but for now we will select the option that reads 'No, I do it all myself.'
In step 5, you will be asked to describe your business structure to help QuickBooks Online categorize your transactions. For this example, we will just put in 'I don't know' and set that later.
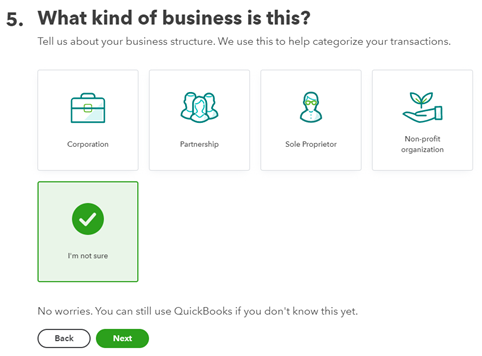
[ Figure: Telling QuickBooks Online your type of business entity]
In the sixth step, we are asked how our business makes money so that QuickBooks Online can customize accounting categories. We can choose between selling products, selling services, or something else. For this example, we'll choose to sell services because we are a plumbing company.
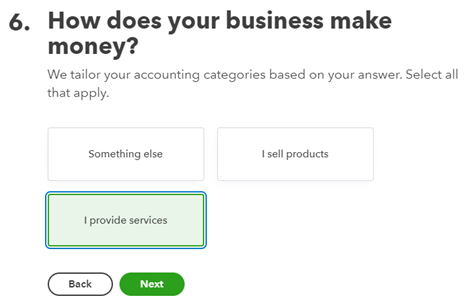
[Figure: Answering how our company makes money for the sixth step of the setup]
The last step asks how you want to track income and expenses. You can automatically link accounts so that you never have to enter your bank and credit card statements, or you can choose to just do that manually. For this example, we will choose to manually add transactions, since our fictional company does not have any accounts at other institutions.
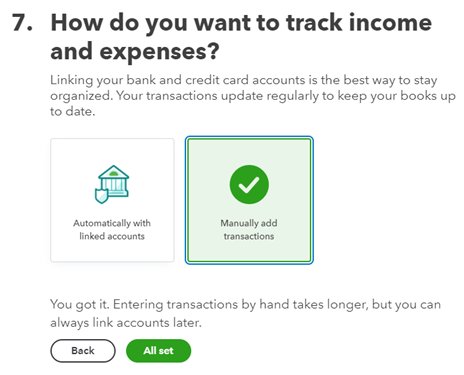
[Figure: Adding bank accounts for the seventh step of the setup]
Once you click 'All set' on the last step, you will be taken to your dashboard. A modal window will open up that offers to give you a quick tour. Go ahead and accept the tour. Later we will look at each part in more depth.
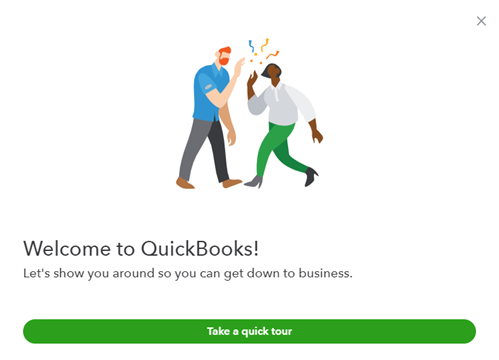
[Figure: Screen after finishing the setup]
The tour is very simple and only has two parts. It starts by highlighting the Setup Guide which is right in the middle of the Dashboard. It lets you know that you should start there after the tour. It subsequently highlights the help button where it mentions that you can watch videos, read articles, and send help requests.
Once you finish or exit the quick tour, you will be at the Dashboard. At this point, you have now set up all the basic information for your company. Congratulations! In the next section, we will take a look at signing in and signing out of your account.
Signing In and Signing Out
If you look at the top-right corner of your screen after you finish the Quick Tour, then you will be able to see a profile icon that will most likely be represented by the first letter of your name. You can easily log out of your account by clicking that profile icon. That will bring up a window where you can either manage your Intuit account or sign out. Click the 'Sign out' button to sign out, and you will be taken from the Dashboard and sent to the Sign In page again.
Signing in again involves entering your user ID and the password that you created when you made your account. You may also sign in with a Google account if you are using Gmail. You will need to still enter your Intuit password one more time to do this.
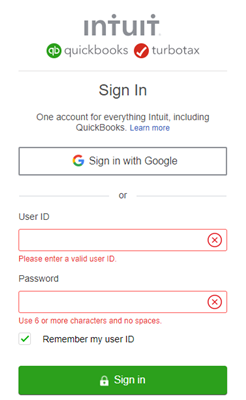
[Figure: Signing in to QuickBooks Online ]
If you have forgotten your user ID or password already, they can be recovered by clicking the link at the bottom. You will need to supply your phone number, email, or user ID to retrieve whichever information you lost.
If you have closed your browser window and need to sign in again, head to the URL https://quickbooks.intuit.com and hover your mouse over the 'Sign in' text at the top-right in the navigation. You can then choose 'QuickBooks Online' from the dropdown menu. That will take you to the same Sign On screen as before.
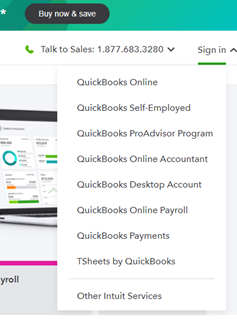
[Figure: The Sign In dropdown menu from QuickBooks Online's front page ]
That will take you to the same Sign On screen as before. You will now be able to log out and log back on to get to your company dashboard. Let's now take a look at setting up QuickBooks Online when you already have a company set up in the desktop version.
Importing a Company from QuickBooks Desktop
You can also create a company in QuickBooks Online by exporting a company from the desktop version of QuickBooks. Before attempting this, make sure that you are using the latest version of the desktop software. You can check if you have the latest version by clicking Upgrade QuickBooks Desktop from the Help menu.
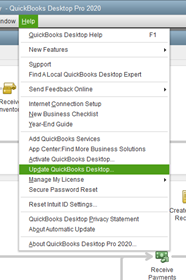
[Figure: Updating QuickBooks Desktop before exporting company file]
Once you have the latest version of the desktop software, you need to then choose Export Company File to QuickBooks Online from the Company menu. That will pop open a window where you will need to log in to your online account with your user ID and password. You may get a confirmation screen that will send a code to your email or phone number to ensure that it's you who is requesting the data export.
QuickBooks will ask you a few questions before finishing the export. It will first ask if you want to transfer the inventory over. You will need to select the date that you want to start from if you choose this option. You will also be asked to specify which company you are moving over.
Once you confirm the company to move over, QuickBooks will begin the process of exporting it. You will receive an email when everything is ready.
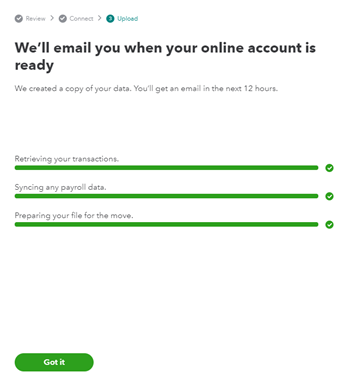
[Figure: Waiting for confirmation after moving company file to the cloud]
Once your company file has been uploaded, you will want to confirm that all the data copied over correctly. QuickBooks Online will help you with this process. You will need to have your QuickBooks Desktop version open at the same time as QuickBooks Online in order to compare. QuickBooks Online will show you the procedure to follow in the Dashboards when you sign on to your new company online.
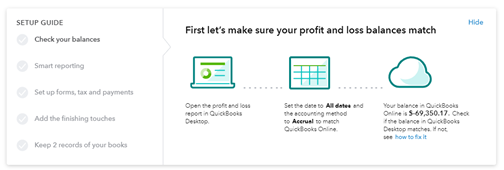
[Figure: Confirming that data from the desktop version matches data in the cloud.
You are first asked to open the profit and loss report in QuickBooks Desktop. In your reporting tab, run a profit and loss report that includes all dates and uses the accrual method.
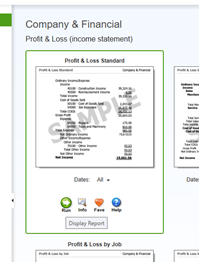
[ Figure: Running a profit and loss report on the desktop version of QuickBooks]
After running the report, you should see that the balances match both online and on the desktop. There may be some discrepancies, such as if you did FIFO recalculations on the inventory when importing, had transactions with multiple currencies, or used a cash basis report. Click the link that says 'how to fix it' to be taken to the QuickBooks Support site which has more details on correcting these types of issues.
You should now have all your data uploaded to the cloud using QuickBooks Online. Make sure you don't delete your original data in the desktop version. That should be stored in a safe place for future reference. In the next section, we will return to our original company that we created from scratch in the previous section.
Editing Setup Information
Returning to the original company that we made when we signed up for the 30-day trial, you may remember that we skipped entering some of the information during setup. That information can now be entered from the dashboard. To do this, find the gear icon on the right side of the navigation. When you click the gear icon, a window will appear with four columns of information that can be changed. Click on Account and Settings in the left-most column titled Your Company.
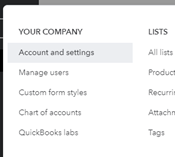
[ Figure: Editing account and settings information for your company file]
On the Account and Settings page, we can see many editable fields for our company. In the initial setup at step 5, which didn't choose a company type. From here, we can now choose our company type, such as Sole Proprietor.
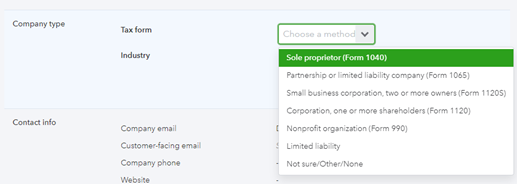
[ Figure: Changing company type]
There are seven separate categories we can edit from in this area. In addition to company, where we edited the company type, we can edit information for billing & subscription, usage, sales, expenses, payments, and advanced. Let's take a brief look at what we can set up in each one:
- Company. You can edit the company logo that appears on sales forms and purchase orders, edit the company name that shows up on sales forms and purchase orders, the legal name used on forms, and the EIN/SSN used for taxes. Additionally, you can change the company type, industry, and contact information. Communication preferences with Intuit are also edited here
- Billing & Subscription. Here you can change your subscription level as your company grows. You can also subscribe to other services like TSheets for time tracking, order checks and supplies, sign up for QuickBooks Online Payments, enroll in QuickBooks Live Bookkeeping, or start using QuickBooks Payroll.
- Usage. This tab shows you your usage and limits according to your subscription plan. This includes the number of billable users, how many charts of accounts, and the number of tag groups.
- Sales. This is where you can make all sorts of changes to your sales form, including design and form fields. You can control when reminder emails are sent to clients and decide on things like late fees or whether or not to show past statements at the bottom of an invoice.
- Expenses. Here you can decide on various options related to expenses, such as whether to use purchase orders or make expenses billable.
- Payments. In Payments, you can get access to QuickBooks Payments if you already have subscribed to that service.
- Advanced. This tab is full of extra options for setting up your account. Decide on accounting options such as the first month of the fiscal year and accounting method. Set the level of automation for such things as applying credits, invoicing unbilled activity, and applying bill payments. You can also set regional information such as the home currency and date format.
The settings here will give you all you need to have your basic company set up in QuickBooks Online. You don't need to enter everything now, as later on we will be looking into these things in more detail.
At this point, we've now seen how we can set up a new company from scratch as well as import an existing company from the desktop version of QuickBooks. We also learned where we can edit the initial information we provided after setup. In the next lesson, we will take a closer look at the dashboard and learn to navigate QuickBooks Online's interface.
Conclusion
In this article, we learned how to set up a new company file in QuickBooks Online. We saw that you can start a new company from scratch as well as import from a desktop version of QuickBooks.
We also saw how the information entered during the setup phase can later be modified within QuickBooks Online. In addition, we saw that you can freely experiment with QuickBooks Online by using their Test Drive site.