If you've ever used a word processing program, then you're probably already pretty familiar with the character and paragraph formatting options available to you in InDesign CS6. InDesign gives you most, if not all, of the same tools, and even a few more with which you can fine tune the appearance of text and paragraphs within your documents.
Applying Basic Character Formatting

Text and paragraph attributes can be changed from the character formatting Control panel, which is available whenever you're working with text or the type tool.

You can then select the font and style. In this case, it's Minion Pro in the regular style. Other style options include bold, italics, bold italics, and others. These styles are part of the font, and not necessarily a feature of InDesign, so not all fonts will have a style.
To the right you can select a size for your font. In this case, it's 12 pt. Below that you can set the space between lines. This is called "leading", because in the early days of movable print, printers used lead bars to create the space. It's a little bit different than the way word processing programs set the space between lines. They tend to do so in simple terms: Single space, double-space, triple-space, etc. This is a holdover from the typewriter age.
You can use the larger arrows to the right of each of the boxes above to access a dropdown menu. The smaller arrows on the left change the values by one point.
Changing Case
So now let's take a look at the next set of buttons.
- Use for all caps-changes the case of selected text. When you want to display a selection of text in all caps, you should use this button rather than the shift or shift lock key. With this button you can easily convert text from lower-case to upper case and vice versa. When you use the caps lock key, or just type in all caps, this button will not affect the text
- Use for small caps-InDesign automatically uses the small-cap characters included in the font package when they are available. When no small-cap characters are included, InDesign creates its own out of scaled-down versions of the regular capital letters.
- Use for super-script
- Use for sub-script
- Use for underline
- Use for strike-through
Applying Advanced Character Formatting
The next collection of tools are generally considered to be advanced character formatting. Some of them are available in basic word processing programs, but when they are, they're usually hidden and most people never use them.

So let's take a closer look at them.
The first two boxes allow you to change the spacing between characters. The first one is for something called Kerning. Kerning refers to the spaces between particular pairs of characters. You may want to manually adjust these values because the spacing between certain characters may make the text look odd. By default, InDesign uses a kerning process called Metrics. This uses the kerning information that is included with most fonts called "kern pairs." These are usually letter pairs like: LA, To, WA, Wo, etc. When Metrics is selected as the kerning process, InDesign automatically kerns the text as you type it, or import it.
Other options include Optical kerning, which adjusts space between neighboring characters based on their shapes.
You can also select a measurement that is proportional to the type size.
To adjust the kerning value of any pair of characters, you must first select them, then select an option. You'll be able to see how the options affect the appearance of the text in real time.
Below the kerning tool you'll find the tracking tool. Tracking is similar to kerning, except that it adjusts the space between entire blocks of text.
Like kerning, you can select a measurement that is proportional to the font size.
Note: Tracking and kerning are cumulative. You can adjust certain pairs of characters with the kerning tool, then use the tracking tool without affecting the relative kerning.
To change the tracking values of a block of text, you must first select the block of text.
The next tool looks like an uppercase T with a double-headed arrow next to it. It allows you to adjust the vertical scale of your letters, or, in plain language, make them taller. At first glance, this tool may seem very similar to the font size tool, but it is very different is some very critical ways. For example, when you adjust the size of a font, it also adjusts the base-line, so that it isn't in any danger of running into the characters above or below it. The vertical scale tool does not. It is very possible to increase the height of your font to the point that it touches the letters above it.
The horizontal scale tool (the fat T with the double-headed arrow at the bottom) works in a similar way, except that it makes stretches the text horizontally. Again, you can easily stretch the font into the adjacent characters.

The baseline shift tool looks like a capital A with a small A on a line a little bit above it. This allows you to move the selected characters above or below characters on the same line.
The final tool we're going to talk about is the character Skew tool. With this you can apply a "false italic" or oblique angle to a font. This can be real handy if you have a font that didn't come with an italic type.
To the right of this tool group is the Character Styles button, which we'll talk about more in a later article. To the right of that are paragraph formatting tools which we'll go into shortly.
Using Find/Change for Text Formatting
The Find/Change feature works as well for locating text formatting and fonts as it does for text and objects.
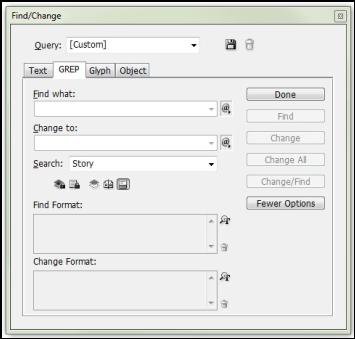
Go to Edit, then select Find/Change from the dropdown menu. Click the GREP tab.
Use the Find Format box to select a formatting option for InDesign to locate. You can just click the empty box to select the formatting options. This will open another dialog window that allows you to do so.
If you'd like to change the found format to another format, click the Change Format box, and select your specifications.
Find Font
The Find Font feature allows you to easily locate any font in your document. To use it, click Type from the menu bar, then Find Font. This opens the Find Font dialog box.

You can also replace fonts. Just click a font, select the font you'd like to replace it with, then select which instances of the font you'd like to change.
Paragraph Formatting
 |
To see the paragraph formatting tools in the Control panel, click the paragraph button
 .
.
As with the character formatting functions, these tools should be familiar to you if you've ever used a word processor.

Going from left to right on the control panel, the first group of icons controls the paragraph alignment. Your options are: Left Margin Flush, Center, Right Margin Flush, Align Toward Spine, Justify With Last Line Left, Justify With Last Line Center, Force Justify, and Align Away From Spine.
Next, we have our indent tools. You can use these to:
- Indent left-this moves the entire paragraph inward, away from the left margin.
- Indent right-this moves the entire paragraph away from the right margin
- Indent first line-this indents only first line, which is most common in writing.

-
Indent last line right-this indents the last line away from the right margin.
Moving on, the next set of tools allows you insert or remove space before and after paragraphs, as well as create drop caps.
- Use this button to insert space before a paragraph
- Use this button to insert space after a paragraph
- Use this button to create a drop cap-a larger letter at the beginning of the paragraph. Use the box to enter a value determining the size of the drop cap.
- Use this button to define how many characters you want the drop cap to encompass.
The next two buttons allow you to create bulleted and numbered lists.
Adding Automatic Bullets
The easiest way to create a bulleted or numbered list is to type the list, select it, and click one of these buttons.

This automatically adds the bullet or number. You cannot use the buttons on the Control panel to customize the bullets or numbers, however, and you cannot select them with the Type tool. You can only edit them using the Bullets and Numbering dialog box, the Paragraph panel, or the Bullets and Numbering section of the Paragraph Styles dialog box.
You should be aware that bulleted and numbered characters that are automatically generated are not actually inserted into the text and will not be found during a text search. You can, however, convert them to text.
Let's take a closer look at the Bullets and Numbering dialog box. To launch it, click the menu button in the upper right corner of the Paragraph panel, and select Bullets and Numbering.

This example shows the options associated with bullets. Use the List Type box to change between None (no bullets or numbers), Bullets, and Numbers. You can choose one of the predefined bullet characters, or create your own by clicking the Add button. You can select what text to show after, such as a colon, or M-dash, or just a blank space. Then apply a character style to the text.Use the Bullet or Number Position controls to position the bullet on the page.
If you select Numbers in the dropdown menu, you'll see the options associated with numbering.
You can set the list type, numbering style (1,2,3 or A,B,C, etc.) where to start the numbering at. For instance, if you want a numbered list to continue on from another numbered list, you can have it start at say, 5, or 8, or 15, or wherever.

Use the Level box to choose how many levels you'd like in your list.This is an example of a 2-leveled list:
1. Example
1.1. Example
1.2. Example
2. Example 2
2.1. Example
2.2. Example
Continuing right on the Control panel, you'll see these two buttons.
 They allow you to align objects and text to a baseline grid. We learned about baseline grids, so there's no reason to
go into again here.

The next group of tools allows you to create and customize columns.
Use the first button  to specify the number of columns.
The button below that  allows you to change the amount of space between columns. This is called the gutter.
The next button allows you to create a line or lines that span a number of columns.


Using Styles
Text styles are just a collection of character or paragraph formatting attributes that can be applied easily to a range of text with the click of a button. What's more, when you alter a style, all the text to which that style has been applied will automatically be updated. This comes in very handy when creating long documents.
Most popular word processing and design programs provide styles but many people are still reluctant to use them. Or don't know how to use them. We encourage everyone to use them, for a number of reasons.
One, it makes it incredibly easy to change the formatting attributes of similar text. Look at it this way. Imagine you've just created a 251-page document with many headlines and sub-headlines. You decide, suddenly, that you want to make the headlines bigger, bold, and a dark blue color. The sub-headlines you're going to make smaller, italics, and a lighter blue color. If you applied a style to each of these headlines and sub-headlines, the process will only take seconds to complete. If you did not, you will have to go through the text and change them all manually. It could take hours.or days.
Two, when styles are applied to text, it makes it easier to convert the text to another file format, like HTML, without losing too much of the character formatting attributes.
Creating and Applying Paragraph Styles
InDesign automatically creates and applies one paragraph style by default. This style is called [Basic Paragraph]. You can edit the attributes of this style, but you can't delete it, or even rename it.
You can find the paragraph styles on the Control panel, or the Paragraph Styles panel on the right side of the screen.
 |
This is what the paragraph styles portion of the Control panel looks like.
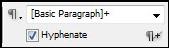
The window tells you the paragraph style of the selected text. In this case, it's [Basic Paragraph]+. The + means that some formatting attributes have been added, but not saved to the style. Clicking on this arrow icon to the right will unfurl a dropdown menu with a list of styles. To apply one to the selected text, just click on it.
 |
To create a new style, click on the paragraph symbol on the left.
Click New Paragraph Style.
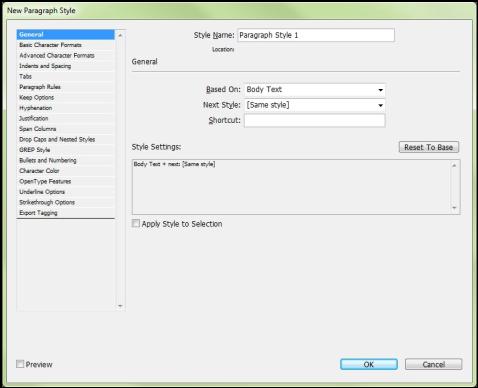 |
� In the New Paragraph Style window, you can create a name for your style. This should be something descriptive, like "Headlines" or "Body Text" or "Sidebar" so that you can easily identify the kind of
text it's applied to.
� The Next Style box allows you specify a style to use next. For instance, when you use a headline, you may want the next style to be body text. This way, you'd only have to type the text of your headline, hit enter, and the next thing you type would be in body text.
� You can also create a shortcut for your style. This can be any key combination you like.
� The Style Settings box shows you the attributes that have already been selected.
� Click through the list on the left to change the attributes of your style.
Using Character Styles
Character styles are similar to Paragraph styles, except they don't save as much formatting information. Instead, they include basic information like font family and size.
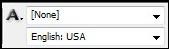 |
Click the icon that looks like an A to create a new character style. In this example, no character style has been applied, as indicated by the [None]. You can use the dropdown menu to select a style that's already been created.
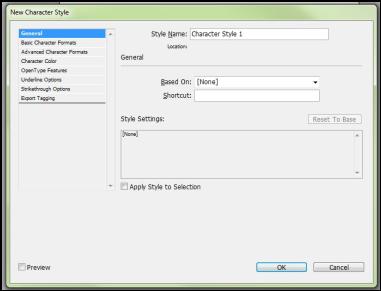
To create a new character style from the Control panel, click on the A, and select New Character Style. In this new window, you can set your specifications for the style.
 |
Another way to locate character styles is on the Character Styles panel. Here the styles are also listed. To apply a style, you must first select the text you'd like to apply it to, then simply click any style in the list.
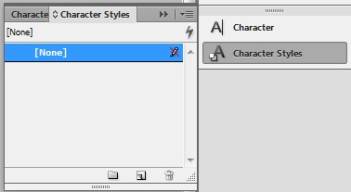 |
In this example, we haven't created any new character styles.
To create a new character style with the Character Styles panel, click the menu button in the upper right hand corner and select New Character Style
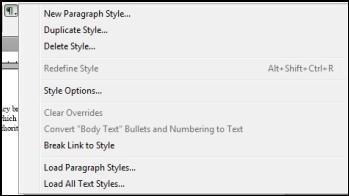
Editing and Redefining Styles
To edit or redefine a style, either a character style or a paragraph style, is simply a matter of reactivating the window you used to create the style. To do so, simply double-click on any style in the Paragraph Styles panel or Character Styles panel.
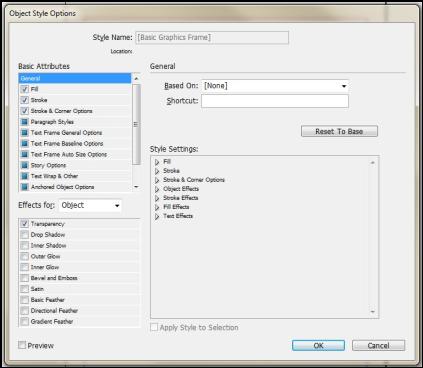
Using Object Styles
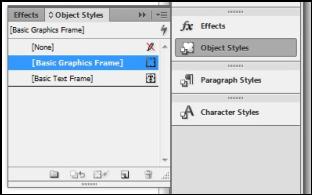 |
To create a new style, you can use the Create New Style button at the bottom of the Object Styles panel, or click the menu button in the upper right hand corner of the panel, then select Create New Object Style.
 |
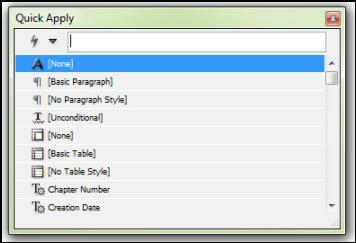
Applying Styles with Quick Apply
Quick Apply is just a floating panel that you can reposition on your screen. It allows you quick access to all of the styles in your document, whether they are Paragraph or Character or Object styles.
 . This icon can be found in the Control panel or on each of the Style panels.
The Quick Apply panel looks like this:
 |