Inserting Graphics
Inserting text or images into a document is a little bit different than it is with other programs, such as Microsoft Office. With other programs, you usually use an Insert command to insert text or an image. However, with InDesign, you use the Place command.
To insert text or an image, go to File>Place.
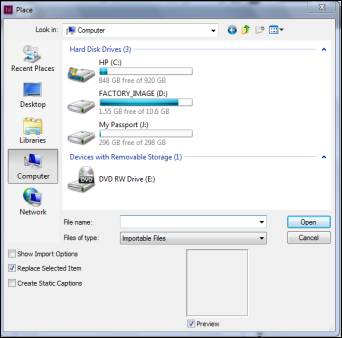
Locate the text or image that you want to place in your document, then select any of the following options (shown on the lower right hand side of the window above).
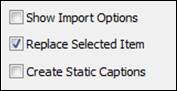
- Show Import Options allows you to specify options for the item you're importing into InDesign.
- Replace Selected Item will replace the item selected in your document with the new item.
- Create Static Captions will create a caption using the title of the file.
Click Open when you're finished.
If you select Show Import Options, you'll have to specify the import options you want:
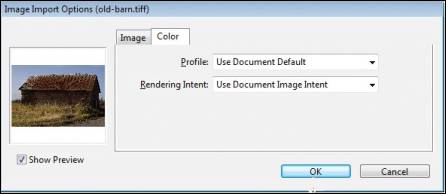
Click OK when you're finished.
Using the Links Panel
Whenever you place a graphic into your document, InDesign creates a link to the orignal file. You can see the link circled in red in the snapshot below:
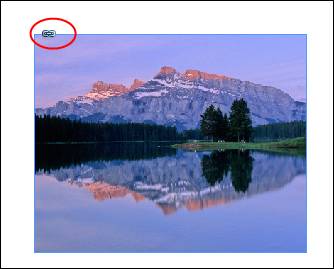
Linking displays information stored in one document (the source file) in another file (the destination file). Then, you can edit the object from either file, but the changes are saved in the source file. If you want to break a link between the source and destination files, the object becomes embedded in your document. Embedding simply means you insert a copy from one document to the other.
To work with linked graphics, you use the Links panel. (Windows>Links)
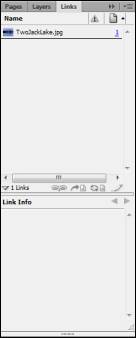
If the linked graphic that you want to see information for in the Links panel doesn't show, select the graphic using the Selection tool in the Tools panel.
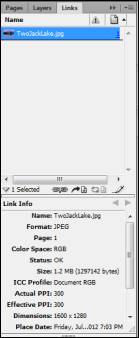
We've selected our linked graphic. All the information about it now appears in the Links panel:
If the source file moves, you'll have to update your link. Go to the Options menu on the Links panel and select Relink.
If you want to embed the graphic instead of having it linked, go to the Options menu
 and embed link.
Editing a Linked Graphic
Editing a linked graphic is not as simple as making changes to the graphic in your document. To edit a linked graphic, you'll use the Links panel. Remember, you'll have to edit the source file, and the changes will show up in the destination file, which is your InDesign document.
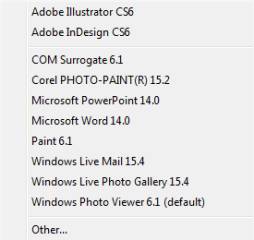
Click the Options menu. Select Edit With and select graphics editing program from the list. It will only display graphics editing programs (such as Adobe Photoshop) that you already have installed on your computer.
Graphic Frames
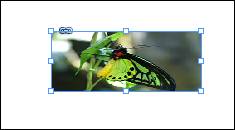
You can create a frame on your page, make sure it's selected, and place your graphic into it. Below, we've created a polygon frame and placed a graphic inside the frame:
To do this, create a frame using one of the frame tools.
Next, go to File>Place and select a graphic.
Using Auto-Fit
In the snapshot above, the frame was smaller than our graphic, so only a portion of the graphic shows in the frame. We can fit graphics to a frame by following these steps:
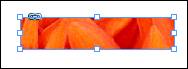
This is a picture of a butterfly that we imported into InDesign, but (as you can see) the frame is too small.
We can easily fix this, but first we have to decide what we want to do. Do we want to make the graphic fit the frame? This would mean reducing the size of the picture. Or do we want to make the frame fit the content, which would mean enlarging the frame? In most cases, you'll want to make the graphic fit the frame because the frame is already part of your design.
To make the graphic fit the frame, go to Object>Fitting>Fit Content to Frame.
However, if we wanted to make the frame fit the graphic, we go to Object>Fitting>Fit Frame to Content.
Creating Compound Paths
You can use rectangle, ellipse, or polygon frames for graphics, or you can create and then use specialty frames too. A specialty frame is simply a vector-based compound path, or a path that you draw in InDesign. Vector graphics are based on mathematical equations based on paths and points. The opposite of vector graphics are raster graphics which are bitmaps and based on pixels. Just as you can alter a mathematical equation to get a different answer, you can edit vector graphics without distorting or ruining the original graphic. With raster graphics, if you edit it, the pixels can become distorted.
You can create specialty frames from text characters. The Create Outlines command takes characters in a text frame and turns them into a compound path. If you don't want to use the compound path, you can use the Release Compound path to split the path into individual frames.
Let's show you how this is all done. It can be confusing until you learn to do it for yourself.
First, click the Selection tool in the Tools panel.
Now, select the frame that you want to use in the compound path.
Hold down Shift while using the Selection tool to select more than one frame.
Now, go to Object>Paths>Make Compound Path.
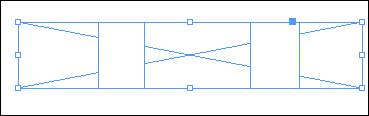
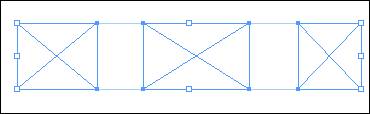
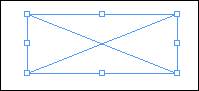
A compound path has diagonal lines across the entire frame instead of individual frames. Notice the difference for yourself in the two snapshots above.
Now, let's place a graphic.
As you can see, the graphic is placed over the three frames.
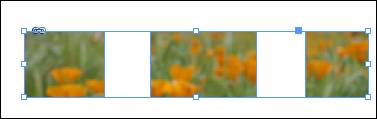
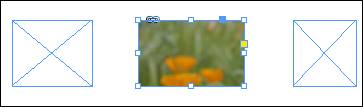
If we go back to our original three frames (before we made a compound path), if we place the same graphic, it only goes into one frame.
Create Type Outlines as Graphic Frames
Use the Selection tool to select the text frame you want to turn into an outline.
Go to Type>Create Outlines.
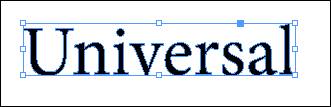
InDesign now turns your type into a compound path. You can see the characters have a blue outline around them. These are the points and paths that are part of vector images. Now that we have a compound path, let's place a graphic.

The graphic is now placed inside our characters.
-
Formatting Objects
We can create rectangle, ellipse, and polygon frames. But so far, we've only learned about graphic and text frames. We haven't learned about unassigned frames that we can use to create shapes, then fill those shapes with fill and stroke color to add to our layout. Unassigned frames have a dot in the middle. Diagonal lines appear in graphic frames.Creating Shapes
To create a shape, select the Rectangle or Ellipse tool in the Tool panel. Remember, the Rectangle Frame tool looks like this:
 . The Ellipse Frame tool is grouped with it. The Rectangle Tool looks like this:
  . Let's select the Rectangle tool.
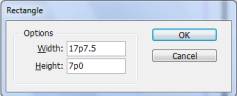
If you want to create a certain sized frame, click a blank area on your page, then specify the width and height. Then, click OK. You can also click and drag across your page to create the shape. You don't have to enter specific measurements if you don't want.
The frame then appears:
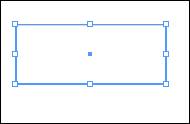
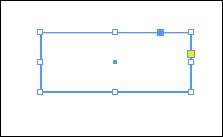
Look at the circle in the middle of the rectangle. This tells us it's an assigned frame. When we use the Rectangle Frame tool instead of the Rectangle tool, we get a graphic frame, as shown below. Make note of the difference.
Selecting Objects
Being able to select objects will be very important to working with shapes. You can use the Selection tool to select entire objects. However, you can also use the Direct Selection tool
 to select points on an objects or images inside objects.
To select an object, click on the Selection tool in the Tools panel, and click on the object. You can also drag a marquee around the object to select it. Hold down the Shift key to select more than one object.
Applying Fill and Stroke Colors
Now that you've learned how to create unassigned frames and select them, we can now apply fill and stroke colors to the shape. The fill is the color that goes inside the shape. The stroke is the outline color.
To assign fill and stroke colors, we'll use the Fill and Stroke boxes in the Tools Panel:

The stroke color has a border around it.
To apply a fill color, make sure your object is selected, then double click the Fill box.
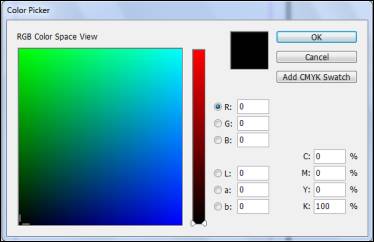
You can adjust the slider to get more color choices:
Click on the big square for the color that you want. We're going to pick a purple hue. Your fill color shows to the left of the OK button. We've circled it in red.
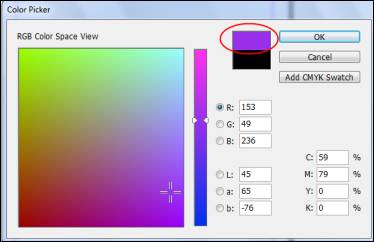
Click OK when you're finished.
The fill color has now changed in the Fill box in the Tools panel:

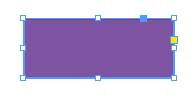
What's more, your object has been filled in with the fill color:
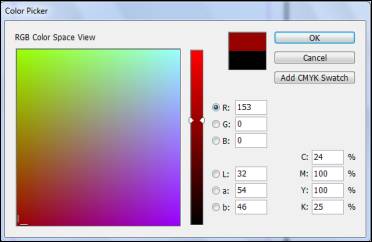
We follow the same steps to add stroke color. Right now, our stroke color is black. Let's make it red.
Double click the Stroke box in the Tools panel.

Move the slider to get a shades of red.
Click OK.
The Stroke box reflects the new color:

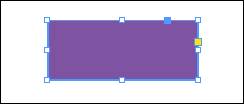
Now, in our object below, the red stroke color isn't that obvious:
Let's say we want to make the stroke thicker. We go to the Control Panel for that.

Go to the color and stroke boxes on the Control Panel:
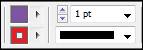
In the top box, we can change the thickness of the stroke. Let's make it 10 pt.
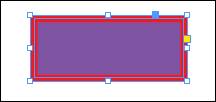
Now, we can see the stroke color easily:
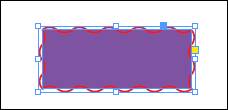
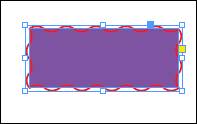
In the bottom box, we can change the style of the stroke line:

Let's make it wavy:
Adding Transparency
Whenever you apply fill or stroke or enter text, these things appear solid. That means they have an opacity of 100%. Again, they are solid - or a solid color. You can also make these things transparent or add a level of transparency. 100% opacity is completely solid. 0% opacity is completely transparent. You can make these things anywhere from a 100% opacity to a 0% opacity. Whenever you decrease the opacity, the objects that are below the object for which you are adusting the opacity becomes more visible.
To adjust the transparency, you use the Effects panel (Window>Effects).
Let's look at our object below:
We're going to adjust its opacity using the Effects panel (shown below).
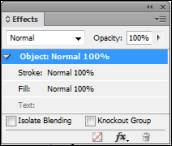
As you can see in the Effects panel, our opacity is currently 100%.
Let's apply transparency effects to it.
Make sure your object is selected before you begin.
Now, select a level to designate what parts of the object you want to change:
Since we have an unassigned frame, our levels are:
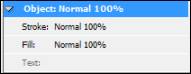
These are shown in the Effects panel. Click on a level to select it.
However, other levels you may see, depending on what you're adding transparency to, include:
- Object. The transparency will effect the entire object
- Graphic. Only the graphic you've selected will have transparency effects added to it.
- Group. Affects all objects and text in the group you select. Use the Direct Selection tool to apply transparency effects to a group.
- Stroke. The transparency effects will only affect the stroke.
- Fill. The transparency effects will only affect the fill.
- Text. The transparency effects only affect the text inside the object, but not the text frame.
Now, click the FX button on the Effects panel:
 .
.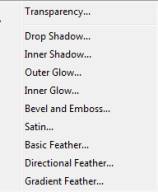
These are transparency effects that you can apply to your object.
Let's apply a drop shadow effect by clicking on it in the menu.
Apply a Drop Shadow

Check the Preview box if you want to see the changes as they are made.
In the Drop Shadow category, set the opacity for the drop shadow.
In the Position category, set the position of the drop shadow.
Then, in the Options category, select if you want:
- Object Knocks Out Shadow. This means that the object appears in front of the drop shadow that it casts.
- Shadow Honors Other Effects. This means that the drop shadow will factor into other transparency effects. For example, if the object is feathered on a side, the drop shadow will look feathered on that side as well.
Click OK when you're finished.
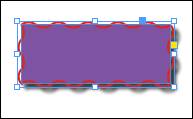
You can see the drop shadow in our above object.
Effect Options
Setting options for your transparency effects will determine the overall effect you achieve. Listed below are common options for transparency effects so you can understand and use them in your projects.
Angle and Altitude determine the lighting angle at which an effect is applied. Zero is ground level. Ninety is directly above the object. This is used by Drop Shadow, Inner Shadow, Bevel and Emboss, Satin, and Feather effects.
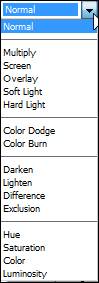
Blending Mode specifies how colors in transparant objects interact with objects behind them. This is used in Drop Shadow, Inner Shadow, Outer Glow, Inner Glow, and Satin effects. The blending mode menu is viewed in the Effects panel. You can set your blending mode before you apply an effect:
Choke determines how much of a shadow or glow is opaque and how much is transparent. This is used in Inner Shadow, Inner Glow, and Feather effects.
Distance sets the offset distance for Drop Shadow, Inner Shadow, or Satin effect.
Noise determines the amount of random elements in the opacity of the glow or shadow. This is used in Drop Shadow, Inner Shadow, Outer Glow, Inner Glow, and Feather effects.
Opacity sets the opacity of the effect and is used by Drop Shadow, Inner Shadow, Outer Glow, Inner Glow, Gradient Feather, Bevel and Emboss, and Satin effects.
Size determines the amount of shadow or glow. It's used by Drop Shadow, Inner Shadow, Outer Glow, Inner Glow, and Satin effects.
Spread sets the transparency of the blur within a shadow or glow. A higher percentage makes the blur more opaque. This is used by Drop Shadow and Outer Glow.
Technique will specify how the edge of a transparency effect interacts with background colors. Softer and Precise are the choices for Outer Glow and Inner Glow effects. Softer applies a blur to the edge of the effect. Precise preserves the edges of the effect that you use.
Use Global Light applies a global light setting to shadows. It's used by Drop Shadow, Bevel and Emboss, and Inner Shadow.
X Offset and Y Offset will offset the shadow on either the x or y axis by the amount specified. These are used by the Drop Shadow and Inner Shadow effects.
Copying Fill and Stroke Attributes with the Eyedropper
The eyedropper tool allows you to copy the color from an object or stroke and use the color for another object or stroke.
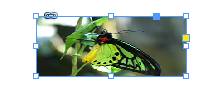
If we want to use the green color of the butterfly for the fill color of an unassigned frame, we can using the Eyedropper tool.
The Eyedropper tool is found on the Tools panel and looks like this:
 .
.Click on it, then move the eyedropper over the color in the picture that you want to copy. Then click your mouse button.
That color is now your Fill color.

To use the Eyedropper to apply to a shape, draw your shape, then use the Eyedropper tool as instructed above. If the shape is active, the color will automatically be applied.