
Word's Internet Grammar and Spelling Checker
Before you start proofing your document, you can rely on Word's internal grammar and spelling checker. This tool checks grammar and spelling as you type text in a document, but you can manually run a spell check over a document using proofing tools. You can also get a word count to identify the number of words and characters stored in a file.
Proofing tools are found in the "Review" ribbon tab. These buttons are found on the left side of the ribbon tab in the "Proofing" category.
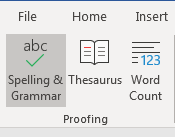
(Proofing tools in Word)
In the image above, the "Spelling and Grammar" button is selected. This button runs a quick check on the document, but Word provides this check as you type. Spelling errors in a word are indicated when a red line is underneath the word. Grammar errors are shown using a blue underline underneath the word. Sentences that Word determines could be better written have a green underline. Should you decide to run another check on the document, click the "Spelling and Grammar" button to execute the process.
The "Thesaurus" tool provides a lookup of alternative words for another typed in your document. When you click this button, a search text box displays where you can type a word and Word performs a look up for synonymous words or phrases.
Finally, you can get statistics on your document by clicking the "Word Count" button. When you click this button, a new window opens giving you several statistics on the current document.

(A word count in the current document)
These statistics are beneficial when you need to identify the number of pages, words, characters paragraphs and lines in a document. The numbers shown are used for academic papers or when you must reach a word count for specific content.
Adding Comments to a Page
When you review content from another writer, or you send content to another person to review, Word comments make it easy to communicate revision requests and changes. Comments allow someone with access to the document to create a small bubble window at the side of the document to create a message to another person who reads the document.
The "Review" ribbon tab has a category named "Comments" where all tools for viewing and creating new comments can be found.
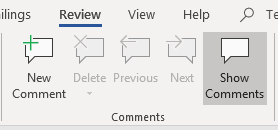
(Comment tools in Word)
When you create comments, you want the viewer to see what section of the document that you're commenting on. You do this by linking a comment to a part of your document. Highlight the word or paragraph that you want to comment on, and then click the "New Comment" button. This action will link the comment to this part of the document, so the viewer knows where to edit text. You should keep comments linked to a small part of the document to ensure that it's not confusing for the reader. For instance, if you want to revise a sentence in a paragraph, you would highlight just the sentence and not the entire paragraph.
Highlight a section of your document and click "New Comment." The highlight color changes, and you're prompted to enter a new comment on the right side of the document.

(Add new comment)
Notice that it has your initials and your name that you configured when you installed Microsoft Word. This is used, because several people could be using the comment feature. By separating comments using color codes, initials and names, the person making revisions can identify who is making the request.
Each highlighted section of your document with a comment can be replied to or marked as resolved. Click the "Reply" button to add a reply to the comment. This can then be seen when the reviewer responds to a revision request. The "Resolve" button will delete the comment and mark it as "Resolved" whether you make changes or not. The resolve feature indicates that changes were made, or the reader could reject changes and just mark it as resolved with no changes. To better work with changes that can be accepted or rejected, it's better to work with the "Track Changes" feature.
Should you decide to delete a comment, click it on the right side of the document and then click the "Delete" button in the "Comments" category menu options. You can also cycle through each comment in a file by clicking the "Previous" and "Next" buttons. Cycling through comments makes it simple to see each one in documents that have several that you need to review for revision request.
Tracking Changes in Word
The track changes tool isn't unique to Word, but Word is one of the few word document solutions that support it. This tool tracks any changes made to a document including deletions, additions and edits to content. When a recipient views a document with track changes turned on, the content that was deleted is shown along with the content that replaces it. These changes are also shown in a different color based on the user making the changes similar to comments added to a document.
The track changes features are found in the "Tracking" and "Changes" categories in the "Review" ribbon tab.
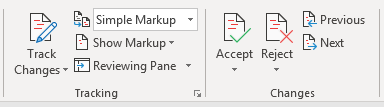
(Track changes button controls)
Before you can start tracking changes, you must first click the "Track Changes" button. Click the "Track Changes" option from the dropdown. You can also lock changes by clicking the "Lock Changes" option. After track changes are turned on, any changes made to the document will be highlighted by the color assigned to you in Word.
To test these settings, find a word in the document and make changes to it. Notice that the word as a line through it and the new word has the same color. This indicates that a change was made to the document, and anyone who views it will see these highlights.

(Tracked changes)
The line at the left of the sentence can be clicked to turn review of these changes on or off. If you want to see the document without the tracked changes, click the gray line and it will only show the end result. The line will turn red indicating that a change was made. The reader can then click the red line to see those changes. This feature lets the reader turn off the track changes view which can be confusing when there are several in the document.
Accept and Reject Changes
When a proofreader edits content in a document, the owner of the document can accept or reject changes. Word incorporates this functionality with the track changes tool. The accept and reject buttons are found in the "Changes" category of the "Review" ribbon tab shown in the image in the previous section.
When you review suggestions to a document, you have the option to revert to the original content or accept the changes from a third-party. Should you accept the changes, you click the change made in the content and then click "Accept." If you prefer the original version, click "Reject" to delete these changes.
Printing Documents
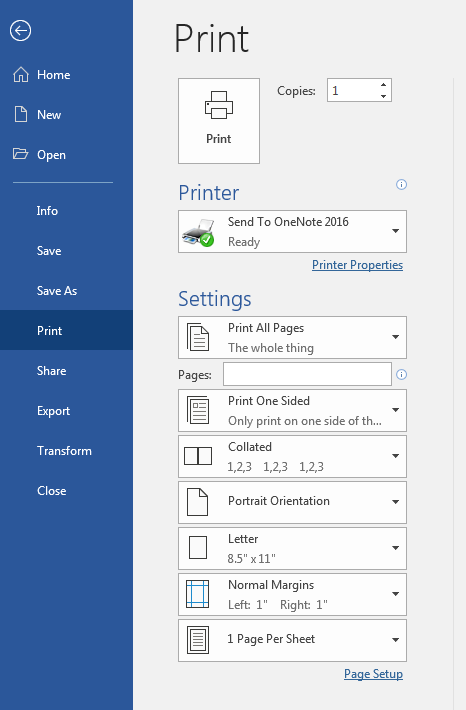
Printing documents in Microsoft Word 2019 isn't much different than printing in previous versions. Word displays several options when you click the "Print" link in the "File" ribbon tab. Clicking this tab opens a new view where you have several options in the left panel. One of these options is the "Print" link.
(Print options)
Notice that you can use the print settings to select the way that you want it to create a hard copy on your printer. You also need to choose a printer to send the print job. If you don't have a physical printer, Microsoft chooses a virtual one for you. In the image above, the default print is set to OneNote due to a physical printer not connected to the computer.