Photography is more than just the big ideas. The first steps to learning how to take better photos is to master the big concepts like exposure, composition and light. But the second step? Once you've mastered the big ideas like exposure, composition and light, it's time to fine-tune.
Sometimes, the simplest adjustment can make a dramatic change. A minor adjustment in a pose can eliminate the double chin in a portrait. The same exact landscape composition can change dramatically simply by shooting at a different time of the day. A good action shot can become great with an advanced panning technique.
Good portraits are more than just quick snapshots. Whether you are taking a picture of yourself, or someone else, there are a few tricks to getting the best portraits.
Focus on the eyes. The eyes are essential to a portrait-they show personality, mood and more. The key to getting a good portrait is to getting sharp eyes. Often, the autofocus selects what's closest to the camera-when you are taking a portrait, that's the nose. Ensure that the portrait stands out by using the touch-to-focus feature on the iPhone and tapping one of the subject's eyes.
Eliminate the distractions. Portraits often draw attention to the subject by blurring out the background. On a DSLR, that's done by using a wide aperture. The aperture on the iPhone, however is fixed. Instead, to get more of that background blur, move your subject farther from the background. If your subject is leaning up against a brick wall, those bricks are going to be almost as sharp as the eyes because they are so close. But, if you have the subject stand several feet in front of the wall instead, you'll get more background blur even without being able to adjust the aperture on your iPhone.
Forget the "say cheese." The traditional "say cheese" doesn't get real, genuine smiles. Fake smiles will turn up the lips, but a real smile will also light up the eyes. Instead, work to help your subject feel comfortable. Chat with them as you take their pictures. Tell a few jokes or even act a little silly-the real smile will be worth the extra effort.
Fine-tune your pose. Posing a portrait is an art in itself. A great pose will flatter any body type, but a bad one could give anyone a double chin. Here are a few posing basics to get you started:
What's closest to the camera appears the largest. The size of objects is one of those clues that helps the brain determine things like distance in a two-dimensional image. Objects that are closest to the camera will appear the largest. In a portrait, that means you don't want to shoot from tummy level. Eye level shots and even climbing a bit higher than eye level tend to be the most flattering.
Angle towards or away from the camera to appear slimmer. Or, to appear stronger, stand straight-on. When the subject stands straight on to the camera, they'll appear at their widest. Angling the body towards or away from the camera will make them appear slimmer. What pose to use depends largely on your subject and the look you are going for. Guys tend to prefer shots standing straight on-they look a bit tougher. Most women prefer shots taken at an angle-they look a bit slimmer. Of course, that's just a generality-just be aware of how dramatically standing parallel to the cameras and standing at an angle changes the shot.
Create lines by angling the arms or a leg. An easy way to create a line in a portrait? With an arm or leg. With arms by their side, the subject will look even wider. Putting some space in between their side and their arms-for example, putting their hand on their hip or resting their arm on a prop-helps. Bending one knee a bit helps create flattering angles as well.
Taking a portrait of a child is much different than taking a picture of an adult. Most kids don't sit still for long, which creates a challenge when it comes to taking their pictures.
Get down on their level. Taking pictures of kids from their eye level will make them appear small. Instead, try shooting from their eye level. You'll not only show their surroundings how they see them, but you'll also create a more intimate face-to-face feel in the shot.

Use a fast shutter speed. Photographing kids is a mix between sports and portrait photography. You'll still need to try focusing on the eyes, but you'll need to use a fast shutter speed and anticipate the action too. Use your favorite manual mode app to bump up the shutter speed so that fast action doesn't become a blur.
The iPhone travels easy, so it can be a great tool for shooting landscapes on the go or even closer to home. Mastering the HDR technique and long exposures is a great start, but here are a few more ways you can take your landscapes to the next level.
Plan ahead. A little planning can travel a long way when it comes to landscape photography. Besides just planning out your location, pinpoint a good time to be there-it's hard to get a good shot when the location is crowded. Aim to shoot before sunset or after sunrise for the most even light. Often refereed to as "golden hour," that's a great time to get a well-exposed landscape photo without too many harsh shadows. Usually, shooting at noon is the worst time of the day-but, bodies of water will appear the most blue when the sun is directly overhead. Consider whether bluer water or minimal shadows is more important to the shot as you plan.
Don't rush it. The landscape shots that inspire you? Chances are, they're a product of several hours work and not a quick snapshot. Take your time. Check your composition for distracting elements. Look for leading lines or patterns that could be incorporated in a different way. Take the time to perfect your exposure and white balance. For even sharper shots, set up a tripod even if you aren't shooting a long exposure.
Consider the foreground. The front portion of the image is often forgot by new photographers. Referred to as the foreground, adding elements between you and the main scene can be a powerful compositional tool. Foliage, rocks and other parts of the scene can be used as foreground elements. Try moving to a different spot or shooting lower to add some interesting objects to the front of the image.
Keep your horizon straight. Don't forget about the horizon as you shoot. If your horizon is straight (i.e. there are no mountains or hills), make sure it's also straight in your image. While correcting a crooked horizon is easy to fix later, it also requires cropping the image to correct. When you are using a camera with a smaller sensor like the iPhone, cropping will drop the resolution even further.
Action is one of the toughest things to shoot. Shooting without a zoom on the iPhone makes it even tougher, but that certainly doesn't mean you can't shoot great action shots.
Anticipate. Getting good action shots is all about the timing. Milliseconds count when it comes to getting the perfect moment on camera. If you wait until you see the perfect moment, by the time you press the shutter release, you'll have missed it entirely. That's why anticipation is important in action photography. Where will your subject move next? By thinking ahead and predicting the movement, you can press the shutter release just before the right moment to capture the peak of the action.
Don't forget the burst. Increase your changes of getting that moment by using the iPhone's burst feature (iOS 7 and later). Hold the shutter release or volume button until the action has passed, and you'll get a collection of closely timed photos, increasing the odds you got the perfect moment.
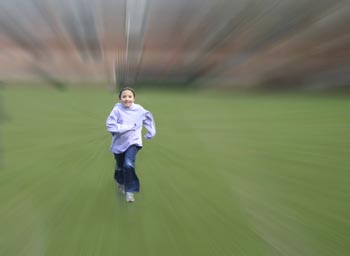
Panning. Creative blur isn't just for long exposure landscape shots. Panning is a technique that keeps a moving subject sharp, while blurring out the background. To try panning, turn your shutter speed down a bit-the exact speed will depend on how fast the subject is moving and how much blur you want. If you're not sure, start with 1/60. Once your shutter speed and exposure is set, anticipate where the action will be next. Compose the shot and then wait for the subject to enter the frame. Once the subject is in the frame, press the shutter release and then follow the subject, moving the camera at the same speed. If you move the camera at the same speed as the subject, the subject will be sharp but the background will blur. The panning technique takes some patience and practice to get right. Try heading to a spot with predictable action, like a race track, so that you have plenty of opportunities to practice. If there isn't enough blur in the background, turn the shutter speed down and vice versa-the best settings will depend a bit on the speed of the action you are shooting. A 1/60 shutter speed may work well for a race car, but not a jogger.
While many photography concepts are universal, many other techniques need to be adjusted based on what you are shooting. Try fine-tuning your portrait pose. Photograph kids from their eye level. Take your time and plan ahead for landscape shoots. Try the panning technique for creative action shots.
Even professional photographers never stop learning-it's important to continually look at your images and find new ways to improve, even if they may seem small at first.