Changing the Display View
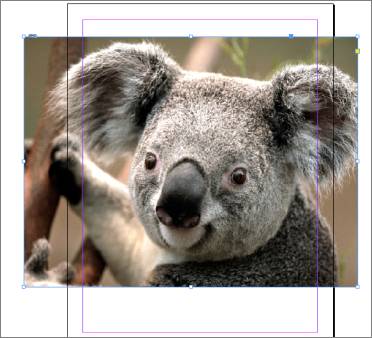
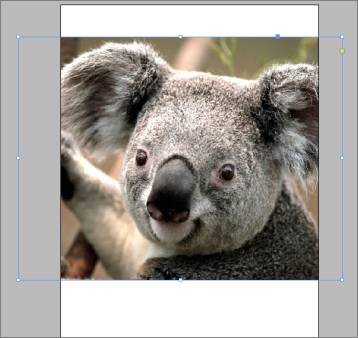
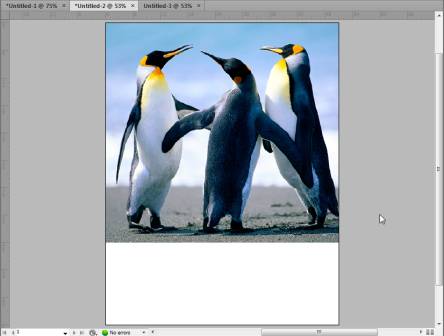
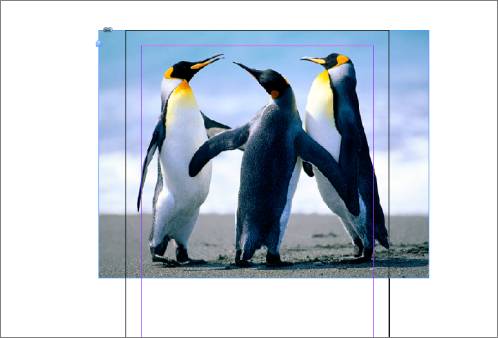
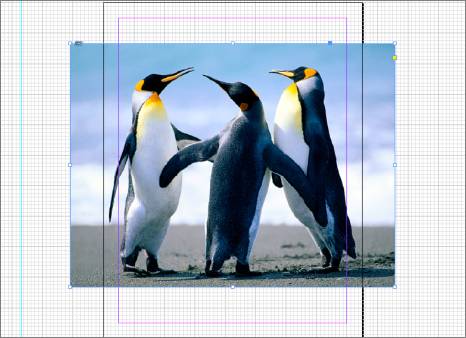
InDesign has two main viewing modes that you can use to view your documents. These are Normal and Preview. The Normal view mode shows you everything, such as the document pages, guides, pasteboard, bleed, slug areas, etc. The Preview mode, on the other hand, only shows you inside the page boundaries since it's a preview of what your final work looks like. Take a look at the two documents below. The first is in Normal view. The second is in Preview.
However, these are the two main viewing modes. There are also two other viewing modes: Bleed and Slug.
The bleed, by definition, is the area outside the trim of the page where objects still print. The bleed mode displays the bleed area and document pages.
The Slug mode displays the slug area and document pages.
In addition, you can use the Presentation mode to view your document without the Application bar and panels showing.
Let's learn how to change the display view and switch to different modes.
Click the Screen Mode button located in the Application bar:

Our mouse pointer is pointing to it in the snapshot above.
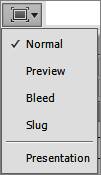
Choose the view you want to use.
Changing Views Using the Zoom Tool
The Zoom tool gives you control over exactly what you see in a document. It does not change the document or the view (Preview or Norma), but instead it lets you view that image at different magnifications. In other words, you can zoom in and out to view a certain area of a document.
The Zoom tool is located in the Tools panel. It looks like this:  .
.
The maximum amount you can magnify a document is 4000%. The minimum is 5%. If you have a large document, it may be impossible to view the entire document on the screen. You can zoom out so you can.
To use the Zoom tool, click on it in the Tools panel.
Click on an area of your document. The zoom in increases, centered on the spot where you clicked. To zoom out, press down Alt as you use the Zoom tool. Use Option if you're using a Mac.
You can also drag to define an area that you want to zoom. The image will increase in magnification based on the boundaries.
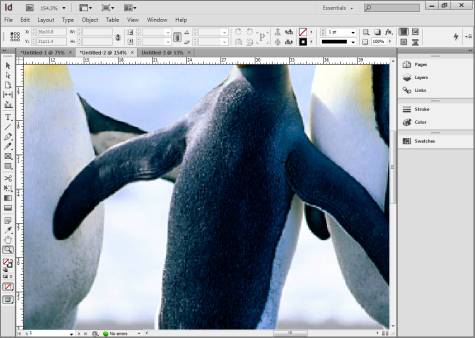
Simply hold down your mouse button and drag. You can see the boundaries (the rectangle in the image below).

When we let go of the mouse button, InDesign zooms in on the area we selected:
In addition, you can also specify a view size. Go to the Application bar and click the Zoom Level button:  .
.
You can also use Zoom to fit the page to the window. To do this, go to View>Fit Page in Window.
If you want to fit the entire spread (or all facing and adjacent pages laid out for printing) in the window, go to View>Fit Spread in Window.
If you want to view the actual size of your document, go to View>Actual Size.
If you want to view the entire pasteboard, go to view>Entire Pasteboard. A pasteboard is the holding area for text, images, etc. It's simply the area around the page surface. You can see the pasteboard below. It's the white space around our document.
The Rulers
Rulers in InDesign are located on the top and left sides of the document window. The numbering starts at the upper left corner of the page. They let you measure the width and height of an image, but they also let you place guides so you can control the placement of other elements. What's more, they also create markers that will follow the cursor as you move. Rulers are essential for accurate designs. The rulers are shown in the snapshot below:

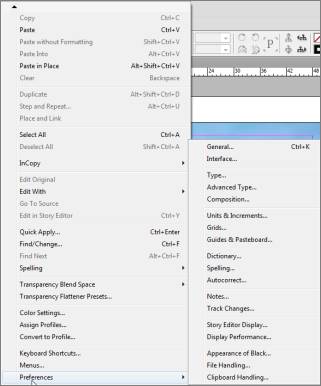
When you use InDesign rulers, the measurements are in pica. You can change this by going to Edit>Preferences, then Units and Increments.
You can also change the origin to use rulers across spreads and spines (of books).
Let's walk you through how to change ruler options.
Go to Edit>Preferences>Units and Increments.
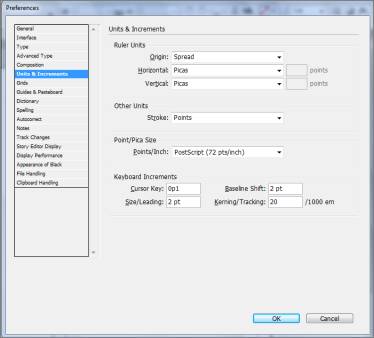
Here you can change the unit of measure.
Now, to change the origin, click the Origin list arrow. Select an option.
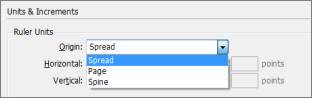
- Spread will show rulers for two pages at a time.
- Page displays the rulers for one page at a time
- Spine displays rulers for the area where two page spreads are bound together.
Guides
Guides are nonprinting lines that can go either vertical or horizontal. You use guides to place text and objects onto your document. You can show and hide guides, lock them in place, or align objects to guides. If you use the Snap to Guides command, you can quickly align an object a guide.
Let's learn how to create and use them.
Go to View>Show Rulers.
Now go to either the vertical or horizontal ruler bar, then click and drag onto the document.
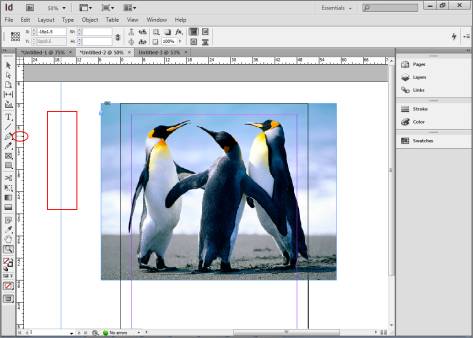
In the snapshot above, the dotted line (circled in red) is where we clicked on our ruler. The blue line (which we've highlighted with a red rectangle) is our guide line.
Now you can drag and drop all the guides you'll need to place objects in your document. When you're finished, you can lock them into place by going to View>Grids & Guides> Lock Guides.
You can move the guides if they're not locked by going to the Selection tool in the Tools panel
 , then clicking on and dragging the guide.
To show or hide guides, go to View>Grids & Guides, then Show Guides or Hide Guides.
Change Guides and Pasteboard Options
There are different types of guides in InDesign that show different areas of a document. Ruler guides are the first type of guides. These are defined by you. You just learned how to set those. Margin guides show you the margins in the document. Column guides show the settings for columns on a page or master page. Bleed and slug guides show you the bleed and slug areas. All these guides have different colors so you know which guides they are. However, you can set the color, as well as the display options and pasteboard settings, to make the guides more recongizable for you.
To do this, go to Edit>Preferences>Guides & Pasteboard.
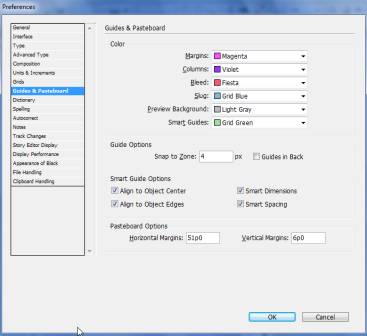
Now, you can select from the options to customize and make changes. Do this by selecting the guides that you want to assign a new color to, and specify the color.
You can also:
- Snap to Zone. Here you'll enter a value that will specify the distance (in pixels) when an object snaps to a guide. For example, if you want an object that is 20 pixels away from a guide to snap to that guide, enter that value.
- Put a checkmark in Guides in Back if you want the guides to appear behind objects on your document
- If you want to change the margins of the pasteboard area above and below the document, you can do that in Pasteboard Options.
Click OK when you're finished.
If you want to change the appearance of the ruler guides, go to Layout>Ruler Guides.

Set the View Threshhold. This is the lowest view percentage at which the ruler guides will be visible. Then, set the color of the guides. Click OK.
Smart Guides
Smart Guides are guides that are shown by default in InDesign whenever you drag an object across a document. The Smart Guide is circled in red in the snapshot below. We were dragging the image when it appeared.
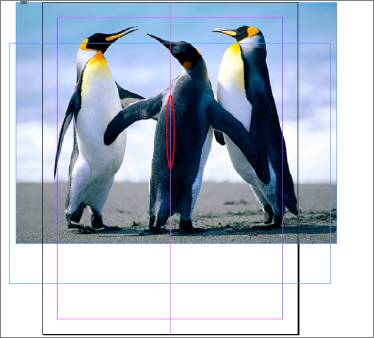
The purpose of Smart Guides is to help you align objects on your page as you move or resize them.
To turn Smart Guides on or off, go to View>Grids & Guides>Smart Guides.
The Grid
The grid is just what the name implies. It looks like a checkerboard and is used to align text and objects on a page.
That said, there are two types of grids: Document and Baseline. The document grid is used for aligning objects because it's the grid that looks like a checkerboard. The Baseline grid is horizontal lines and is helpful for aligning text. These grids appear behind your objects and text. Just like with guides, you can also use a Snap to Document Grid command to easily align objects to the gridline whenever those objects come within a certain amount of pixels of a gridline.
Let's take a look at the grid. Go to View>Grids & Guides>Show Document Grid.
You can see the grid in the above snapshot.
We're going to resize our picture, then place another image and use the grid to line them up.
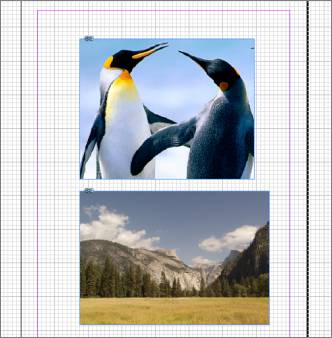
We aligned the images to the left using the grid.
To see the baseline grid, to go View>Grids & Guides>Show Baseline Grid.
If you want to make it so objects snap to the grid, go to View>Grids &Guides> Snap to Document Grid. Whenever you drag an object near a gridline, it snaps to it.
The Hand Tool
The Hand tool is used to move objects an active document without using the scroll bars.
You'll find the Hand tool in the Tools panel. It looks like this:
 .
.Click on it, then click on the active document. Move your mouse to move the document around.
The Info Panel
The Info panel shows you information on the active document, as well as objects that you're working with. It will show you the X and Y coordinates of your mouse cursor on a page (horizontal and vertical), and it will also show you the size of an object.
To access the Info Panel, go to Window>Info.
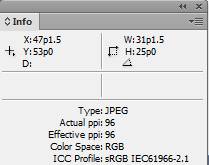
The X and Y coordinates shown in the snapshot above show use where are mouse cursor was located within the document. We can use this to place objects as we drag and drop them. Next to that, you have the width and height of the active object. At the bottom of the panel, you have information on your object. We can see our active object was a JPEG image.
You can also use the Info panel to create an object of a certain size. For this, we're also going to teach you to draw a basic shape so you can see firsthand how the Info panel works.
First, go to the Tools panel and click the Rectangle tool:
 .
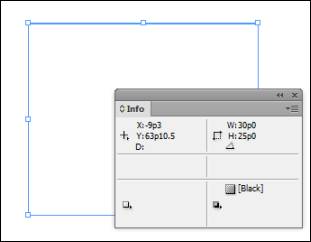
.Go to your document and drag to draw the rectangle. Keep your eyes on the Info panel. We want the width and height of our rectangle to be 30 and 25 respectively.
Just drag your rectangle across the screen until you reach the desired width, then down to get the height:
Create and Display Workspaces
The workspace in InDesign is the document area and panels. These are things you use to work. You may use certain panels, or you may like certain panels positioned in a certain way. For this reason, InDesign allows you to create and customize workspaces.
To create a workspace:
First, open the panels you want to use and position them. You can also create custom menus.
Next, click on the Workspace menu on the Application bar. It looks like this:
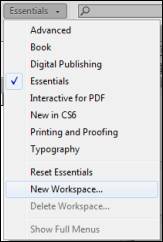
Click New Workspace.
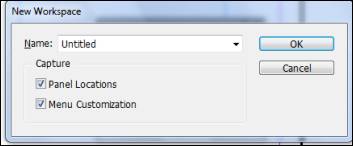
Enter a name for the new workspace. Select if you want to capture the panel locations or the menu customization.
Click OK when you're finished.
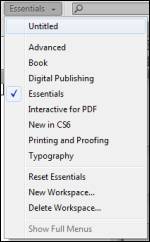
To display the workspace, go back to the Application bar and select the name of the workspace:
Undo and Redo
Undo and Redo are two features that are common to almost all software programs nowadays. The Undo command lets you undo your last action. In other words, if you accidentally make a change to your document, you can click Undo and InDesign undoes your mistake. You can undo as many mistakes or changes as you like; however, you can only undo one at a time. Just keep selecting Undo until you've undone all the changes. If you want to redo something you've undone, you can select Redo.
To und
o a change, go to Edit>Undo.
To redo a change, go to Edit>Redo.