
Outlook and other Office applications have collaboration tools that make it easier to automate tasks and communicate with other coworkers. Whether you're a contractor that must work with clients, or you're an employee that needs to work with other employees to complete a project.
Sharing Your Calendar
The Outlook 2019 calendar is a powerful tool that can be used to schedule events, keep track of your meetings, and track tasks. It's also a tool that can be used for collaboration. When you share an Outlook calendar, coworkers and others who have permission can add appointments and view your schedule. With the Outlook calendar, users within an organization don't even need to communicate before a meeting. They can just open a calendar, schedule a meeting, and an alert is shown when the meeting is about to happen.
Before you can share your calendar, you first need to activate the calendar view. The calendar view button is at the bottom-left corner of your main Outlook view.

(Calendar view button)
After you click the "Calendar" view button, your calendars display. Outlook creates a default calendar in your iCloud account and one on your local machine. Uncheck any of these buttons and the corresponding calendar is hidden.
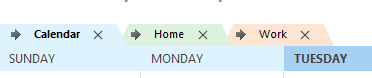
You can potentially have several calendars installed in Outlook, so the first step to share your calendar is to choose it from the tabs shown in the calendar view.
(Calendar tabs)
Click the tab for the calendar that you want to share. In the image above, three calendars are displayed. The default calendar is the first tab, and then you have the option of a "Home" and "Work" calendar. Outlook allows you to separate calendars for your personal and work life.
After you select a calendar, you can find the "Share" menu options in the "Home" tab.
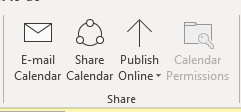
(Outlook calendar sharing features)
Click the "E-mail Calendar" button and an email window opens along with a popup that asks for the range and calendar components that you want to share.
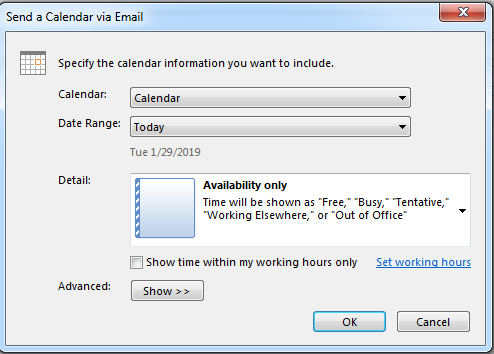
(Calendar share options)
In the image above, you can see that there are several options for sharing a calendar in email. When you send a shared calendar in email, you send recipients a list of events and scheduled meetings so that they can review them.
You can select a date range using the "Date Range" dropdown. You can also choose a calendar using the "Calendar" dropdown. You can limit the calendar email details by only showing working hours, which is beneficial if you have a strict working schedule that only allows a set timeframe within a working day.
The "Advanced" options are shown when you click the "Show" button. Advanced options are simple. You can select a shared calendar layout and choose to send private events. Private events are not sent by default, so choosing this option will email events that you have marked as private to your list of recipients.
After you have chosen your shared options, click the "OK" button. You're returned to the email window where you can choose a list of recipients and send the email when you are ready.
If you are a part of a team, you can also share your calendar. The "Share Calendar" button allows you to share your calendar among other coworkers within an organization. You should first set permissions by clicking the "Calendar Permissions" button. This button is available if you are using Outlook with an Exchange server. With Exchange, you can share permissions among other network users within your organization. You choose users within the organization configured on the Exchange server to provide permissions to view and add events on your own calendar.
Click the "Share Calendar" button and choose users within your organization that you want to view your calendar.
The final option is to publish your calendar online. This option publishes your calendar to a shared WebDAV folder located within your organization's network.
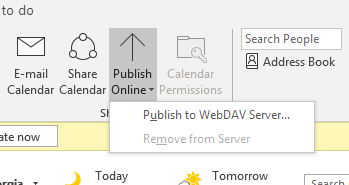
(Publish your calendar online)
A WebDAV server is a location where uploads are allowed based on permissions. WebDAV is Microsoft's way of allowing users to share files across the Internet using procedures similar to uploading and downloading files in a shared network drive environment. Notice that in this dropdown menu, you can also remove your calendar. This will remove sharing with anyone who has access to the WebDAV shared drive.
Turning Alerts On or Off
Outlook has functionality that lets you turn alerts on or off. When you receive an email, whether it's from an outside sender or one from within the organization, you get an alert that displays on your desktop. This alert is connected with a sound file that you can also set in your Outlook settings.
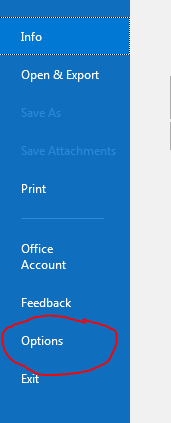
Alerts are a part of your Outlook settings. You can find most settings in the Outlook "File" tab. Click this tab and then click the "Options" link in the left panel.
(Outlook options link)
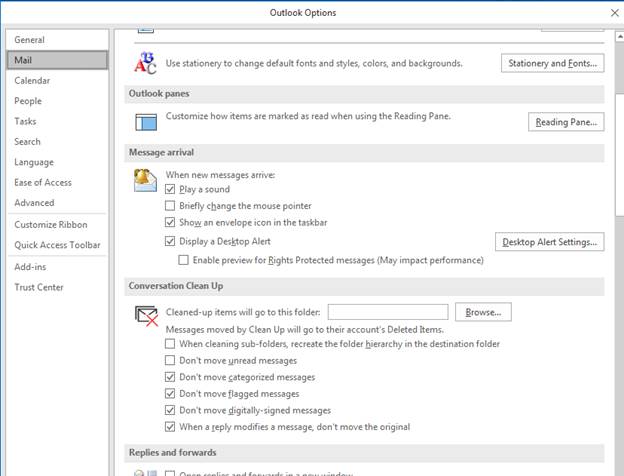
When you click the "Options" menu option, a window opens with several panels and selections that you can make for your Outlook configurations. The "Mai" panel option shows several options including alerts for when you receive incoming messages.
(Mail alert options in Outlook configurations)
Setting alerts is found in the "Message arrival" section. In these set of options, you can control the way Outlook displays alerts when you receive a notification such as a new email arrived in your inbox. The defaults are shown in the image above.
The default action is to play a sound when an email arrives. You can uncheck the "Play a sound" option to change his behavior. If you leave Outlook open on your desktop, each time it synchronizes with your email service, it will download any new emails. If you have new email in our inbox, then Outlook will download these new messages. If you have new email in your inbox, they will be downloaded, and a sound will play. It's generally recommended that you leave this sound on, but you may prefer to turn the sound off. Uncheck this option, and Outlook will no longer play the sound when messages arrive.
Outlook has other alert options. Notice in the image above that the option " Show an envelope icon in the taskbar" is checked. This means that an envelope icon will show in your Windows system tray when an email arrives. This is a great alternative if you don't wan a sound to execute but you need a way for you to know when an email arrives on your desktop.
The other options in the options list is to "Display a Desktop Alert." It's enabled by default, so you don't need to change this option unless you feel that it's intrusive while you're working.
Use any of these alert options to change the way you see your notifications as you receive email. Notification alerts are a benefit to using Outlook, because many basic email services do not show you any alerts so that you can see email as soon as you receive them. Alerts and sharing are main components in the advantages of using Outlook over basic email client applications.