
Creating an Email in Outlook
Outlook can help you keep a schedule, organize messages and coordinate meetings, but its main functionality is to help users create, store and organize email messages. One aspect of Outlook that makes it unique to many other email clients is that it's easy to make HTML and content-rich email that embeds images and formatted text. We'll cover text formatting in lesson four, but this lesson will help you create and send a simple message.
The main feature buttons for emails in Outlook are located in the "Home" tab. The first two buttons create objects. You can click the "New Email" button to quickly create an email or click "New Items" and a list of objects that can be created in Outlook is shown.
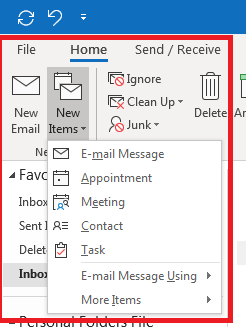
(Buttons to create new emails or other objects)
Notice the other objects that you can create in an Outlook interface. Outlook lets you create and manage email messages, but it can also be used as a scheduler for appointments, meetings and storing contacts. These features also integrate well with other software including Office products.
The "New Email" button skips a mouse click but choosing "E-mail Message" from the "New Items" dropdown box will also open a new email template in Outlook. A new window opens with the Outlook template for an email message.
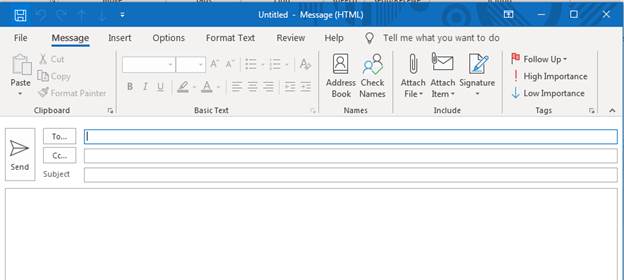
(New email window)
The main parts of an email include:
- To: The recipient who will receive your email.
- CC: (Optional) CC stands for "carbon copy," and adding an email to this text box will send the same email to anyone listed.
- Subject: The subject of the message
- Body: Outlook does not label the body of a message, but the large text box under the subject is the body of an email.
At the top of the new email window, you'll see several buttons that add files, signatures and properties to the email.
You can type an email address in the "To" text box but clicking the "To" button will open your contact list.
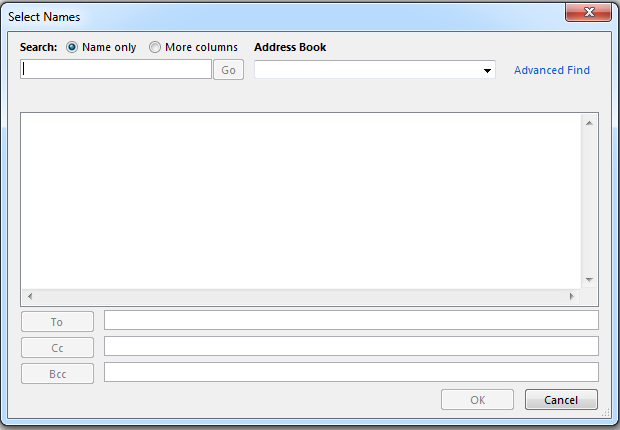
(Outlook contact address book)
In the image above, you can see that there is a text box to search for contacts. You can use the advanced find to use other contact properties. If you have several address books stored in Outlook, you can choose the one that you want to search from the "Address Book" dropdown. Since Outlook lets you connect to several email accounts, you might have an address book for each account.
Each recipient address should be separated by the semicolon ( ; ) character. If you use the address book feature and add several email recipients, this feature will add a semicolon automatically.
In the contact window, notice that there is a BCC option. BCC stands for "blind carbon copy." Any email address in the CC text box will be shown to all recipients. When you add an address to the BCC text box, all other recipients cannot see the BCC addresses. This option is beneficial when you want to send a message to several recipients but don't want them to see all email addresses in your address book.
It's common to add files to your email messages. You can add an attachment using the "Include" features.
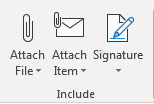
(Include an attachment in an email message)
You can attach any file to your email message by clicking the "Attach File" button. File attachment options are found in the "Include" section of the "Home" tab. Any type of file can be attached to a message, but many corporate and individual email services have filters in place to block malicious content. For instance, an .exe file is an executable that runs code on a local computer. You should never run an exe file from an untrusted sender, and even a sender that attaches an exe file should be suspect. Many email providers including Gmail will block these files from being sent to a recipient. Instead of attaching an executable file, it's better to upload the file to a storage location such as Google Drive or DropBox and send a link to the location in the email body. This is a much safer way to transfer executable files in email messages.
Signatures are important in email especially if you send messages as an employee. You could also use a signature if you run your own business or need to leave information at the bottom of the message to indicate that it's professional, private information. If you've ever open email sent from a corporate account on Outlook, you've probably seen a signature with a logo, the sender's name, and several social media links that point to the sender's accounts. This is a signature set up in Outlook.
To set up a signature, click the "Signature" button. A window opens where you can configure your custom signature.
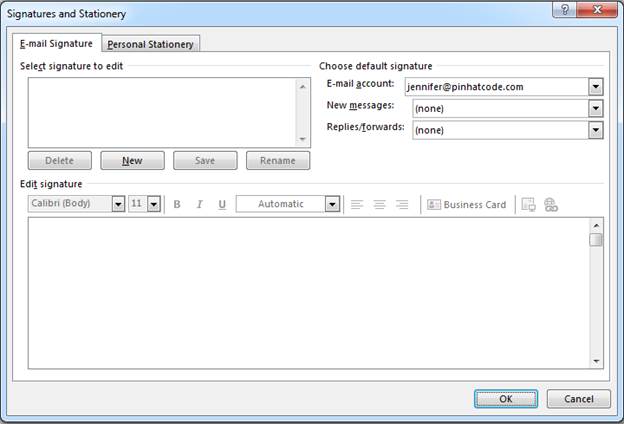
(Outlook window to set up an email signature)
One advantage of Outlook against other competitor email clients is its ability to allow users to create creative fonts, colors, images and other rich content in emails. Notice that the same can be done with an email signature. In the "Edit Signature" section, you can create an email signature that contains a business card, logo and any formatted text that you choose.
If you have multiple email accounts, you might need multiple email signatures. You can store any number of these signatures in Outlook. When you save a signature, you assign it to an account. You set this option in the "Default signature" section for each email account. For each signature that you create, it will show in the "Select signature to edit" section. If you should ever want to change a signature, select it from this section and it will display in the "Edit signature" section. You can then make changes as needed.
Tagging an Email and Sending It
Before you send an email, you can tag it with an importance setting. This importance can be just a follow-up, or high importance so that the recipient knows that it must be read immediately.
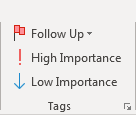
(Email tags)
Tags display in the recipient client application to let them know if the message is critical. Some senders overuse these settings, so you should only use them if the message is indeed critical.
After you set up your message and are ready to send it, simply click the "Send" button in the Outlook window. Once you send a message, you can't take it back, so make sure you are truly ready to send it. Proofread it, check it for spelling mistakes, and ensure each recipient in the list should receive the message. After the "Send" button is clicked, Outlook sends your message using the outgoing server settings configured in your mail settings.