If your company has a project that needs to be completed, you are going to want to make sure that every aspect of it is organized so that it goes efficiently and according to budget. It goes without saying that making sure that you have enough employees, equipment, and everything you need to complete the project is critical to the success of you and your business. It is a lot to manage and a lot to do. Even for someone with the best project management skills, it can be overwhelming.
Decades ago, perhaps everything would be done on paper. You'd have numerous graphs, pages of notes, and copies would be made for everyone who had just the slightest part in the project. Nowadays, however, project management software can make managing and completing a project easier than ever before. Tracking the progress of a project is as easy as signing into the program. In fact, a good software program like MS Project 2013 can allocate resources, assign tasks, track budgets, and be your right hand as you manage the project from beginning to end.
That said, there are dozens of project management programs on the market today. Choosing the right one can be confusing because you want the best one for your company and your projects. Microsoft Project 2013 is just one of those programs. While you may choose it because it is a familiar name, you should also choose it because it offers the insight and features that are common to all Microsoft products and will offer the aspects you need to complete any project within your company.
Microsoft Project 2013 is a project management software program created for businesses and freelance professionals to help better manage individual projects that occur within companies. Although no project management software should be used to replace project management techniques or adequate training of management and staff, MS Project 2013 can and will improve the efficiency, organization, and sometimes even the speed of which a project is completed.
Understanding Projects
Before you can begin to understand project management � or maybe even put this software to work for you � it is important that you comprehend the nature of projects, as well as what is or is not a project. By definition, a project is a temporary endeavor that is completed to create a unique product or service. You will use MS Project 2013 to organize and manage any products that you or your company create.
Each project that you undertake will be made up of certain components. This holds true in MS Project 2013. The first component your project will have is tasks. Tasks are things that have to be accomplished in order for the project to be complete. Think of it as your to-do list that will get you from point A to point B. Your tasks can be as detailed (or not) as you want them to be. A task can be simply researching competition or it can be a phase of your project that contains a summary task as well as subtasks. For example, if you are creating a new software program for your company, your task might be to research similar software. Subtasks might be researching businesses that have similar software, analyzing their sales, and then looking at their pricing models.
In Project 2013, tasks are organized into phases, or stages. In the Gantt chart view of Project 2013, you will be able to see your tasks, as well as an outline of the time it will take to complete those. Since timing is always going to be important to your project, MS Project 2013 allows you to set up and view the timing relationships upon tasks. You can also set dependencies. A dependency will show that one task (task A, for example) must be completed before Task C can begin.
Defining Project Management
Simply put, project management is defined as the process of managing all the elements of a project to complete it. This includes supplies, labor, financials, etc. It is a fact that project management is becoming increasingly important within companies in order for them to operate successfully and efficiently. The skills that managers and employers are given during training to manage the day-to-day operations of a company are different than the ones they'll need to manage individual projects.
Successfully managing a project requires discipline. It requires that time, scope, and cost are managed in a way that bring about the completion of specific goals or a project itself. This requires planning and organization. Microsoft Project 2013 can help project managers and their staff organize their projects and meet their goals by acting as a virtual assistant that can produce information, charts, and reports to help the project smoothly advance through to completion.
There are three things that must be managed during a project. This will help you better understand what MS Project offers you and help you put the aspects of this software to work for you once we've learned how to use it.
-
The first is cost. Cost is everything and anything that has to do with money related to your project. It includes people, equipment, material, profit, etc. If anything costs or makes your company money in relation to a project, then it is factored into the cost.
-
Next is time. The time used for the project is a sum of all the time used to complete tasks that lead to the completion of the project. This can include employee time, equipment time, and even time to see profit.
-
Finally, there is the scope. The scope of your project can also be referred to as the specifications for the project. The specifications or scope define what the final results are supposed to be. Quality is a major part of the scope.
That said, if your project is well managed, it delivers exactly what it was supposed to within the given time frame and without spending more money than allocated. By managing the above three components using MS Project 2013, it can be much easier to achieve.
Downloading MS Project 2013
Project can be purchased one of two ways. You can purchase Project 2013 through Microsoft for a one-time charge. However, if you do not want to fork out a large sum of money at once, you can also purchase a subscription of Project Pro through Office 365. The subscription requires that you pay a monthly fee; however, you get all the benefits of Project 2013 with the subscription-based version.
You can also download a free trial of MS Project 2013 if you just want to learn the software, but not purchase it � or if you want to try it before you buy it. You can download a free trial of Project without downloading any of the other Office programs. Simply go to the Microsoft site and locate Project 2013. If you haven't already, you will be asked to fill out a profile for Microsoft. You will be asked for basic information, such as your name, address, and phone number. In addition, you will be asked some questions about your download requirements for Project 2013.
Because downloading Microsoft Project is not always as simple as it seems, we are going to download the steps you need to follow below.
1. Fill out the profile information, such as your name, address, etc.
2. Microsoft will as you if you want to download the 32 or 64 bit version of Project 2013. Be careful here. You should select the one that matches any other versions of Office (or Office programs) that you have on your computer. You should not choose the one that matches your operating system. If you choose the wrong one, Microsoft will instruct you to uninstall other Office programs from your computer during the Project installation process. You do not want to have to do this. If you have Office 365, 32 bit is the default. Unless you specified 64 bit during your setup and installation of Office, you have 32 bit. This means you will need to choose 32 bit for Project.
3. Once you've finished your profile information, Microsoft will provide you with a product key to use for your free trial. The page will look like this:
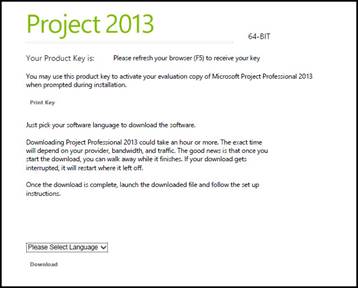
Make sure you either print this page or write down the product key. Then, select the download language, and click Download to download MS Project 2013.
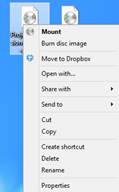
4. Unlike other software programs that you download to your computer that save as a zip file (or unpack and install without saving the install files to your computer), Project, as well as the versions of Office that contain Project, will appear on your computer as an image file. It will look like this:

Right click on the icon to pull up the context menu. Click Mount.
Chances are, if your computer is running the Windows 8 or 8.1 operating system, you will receive an error message when you click Mount that tells you it couldn't mount the image file. Installation will not proceed when you see this message.
To mount the image file and install Project, right click on the image file again. This time, instead of selecting Mount from the context menu, select Copy.
Now, click elsewhere in the location where you have the image file (for us, it is Desktop). Right click, then click Paste to paste the image file. We've pasted ours side by side in the snapshot below.

Next, right click on the copy of the image file (the one on the right in the snapshot above). Select Mount from the context menu. A DVD drive will appear in Windows Explorer (as shown below). You will see the Project files as well.
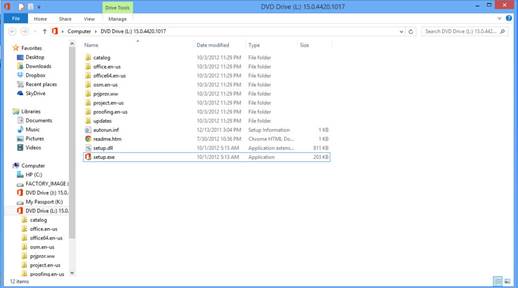
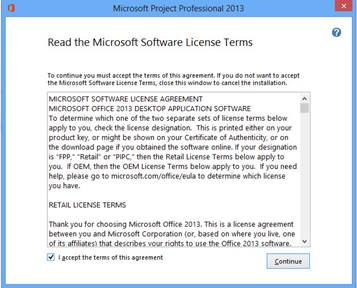
5. Double click the setup.exe file (as shown above) to start installation and setup. The first screen you will see when you start setup is one that asks you to agree to the terms issued by Microsoft:
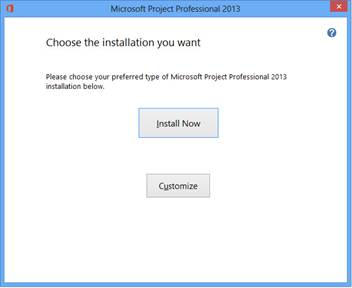
Click the Install Now button:
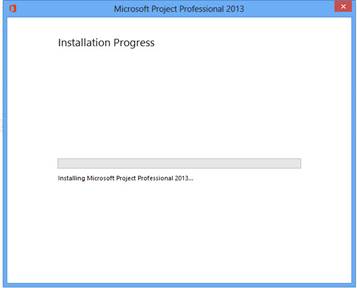
MS Project 2013 then begins installation.
6. Once Project is installed, locate it on your computer. If you are using Windows 8 or 8.1, go to your Start screen and locate Project, then open it. You will be asked to sign into your Windows Live account to verify your copy of Project is genuine. Again, be careful! If you downloaded a free trial of Project 2013, you must enter the product key to verify the Project 2013. You will see a blue link toward the bottom part of the sign-in box that says "enter product key instead." Click this link, and enter the product key that was given to you when you created your profile.
MS Project 2013 is now installed and ready to use!
What's New in MS Project 2013
Before we delve into learning all about Project 2013 and how it works, let's talk about the improvements that have been made to this version.
Opening Project 2013 for the First Time
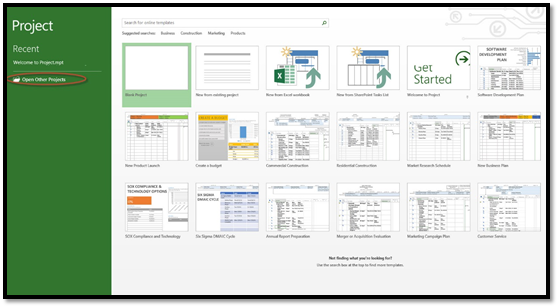
The snapshot below is of the backstage area of Project 2013. The backstage area is under the file tab. In addition, the backstage area is what you will see when you open Project 2013.
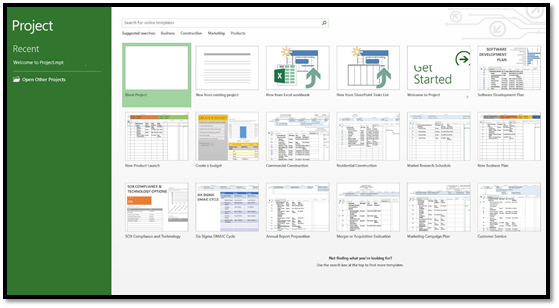
When you open Project 2013 for the firt time, you have a few choices in ow you want to get started. You can open a project you recently opened with Project. You will find recently opened files on the left (as circled in red below). There probably won't be files showing in this area if it is the very first time you opened the program.

You can also open another project file that you've saved. This includes files created in previous versions of Project.
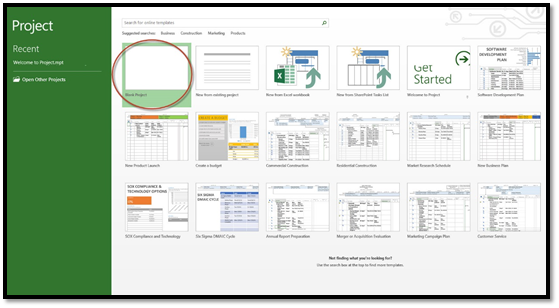
You can also open a new file. To do this, go to the right of the green column. You can choose to open a blank project.
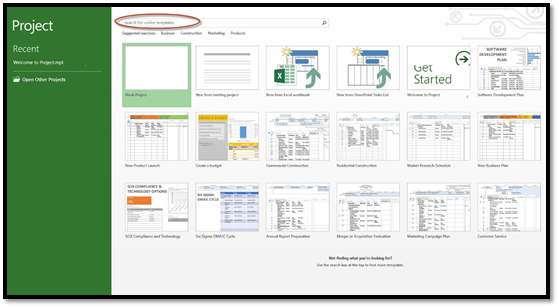
You can also choose to use one of the templates displayed. If you want to use a template, but do not see one displayed that you want to use, you can use the search box and search for the type (or category) of template that you'd like to find and use.
Project 2013 File Types
File types are simply the formats you can use to save your project files. Project supports numerous file types. You can open and save aspects of your project in the following formats, however some formats only allow you to save information contained in Project fields.
-
Microsoft Project Plan (MPP). This is the standard file format for your projects. It uses the .mpp extension.
-
Microsoft Project 2007. MS Project 2013 supports the opening and saving of files from Microsoft Project 2007.
-
Microsoft Project 2000-2003 file. MS Project 2013 supports the opening and saving of files from Microsoft Project 2000-2002, as well as 2003.
-
Project Template (MPT) and Microsoft Project 2007 Templates. These are template files that save information you will use in other products. It is just like a template for a website, except it is for a project. It uses the .mpt extension. The global file (Global.mpt) is the master template. It can contain information for all projects, but it cannot save tasks, resources, or assignments.
-
PDF files. This format is the portable document format. It has the extension .pdf.
-
XPS files. XPS is Microsoft's version of a PDF.
-
Excel Binary Workbook uses the file extension .xlsb.
-
Excel Workbook or Excel 97-2003 notebook. You can export your field data to this format, but you cannot export entire projects.
-
Text. This format is commonly used by word processing programs. It uses the .txt extension and is tab delimited. You can export field data to this format, but you cannot export entire projects.
-
Comma-separated values (CSV). This format uses the .csv extension and is comma delimited. You can export field data to this format, but you cannot export entire projects.
-
Extensible Markup Language (XML). This format is used to deliver rich and structured data. It uses the .xml extension. You can import and export data using this format. It can also be used to interchange data from Project between Project and other programs.
The Project 2013 Interface
We've looked at the backstage area shown to you when you first open Project 2013. Now let's look at the entire Project interface by opening a blank project.
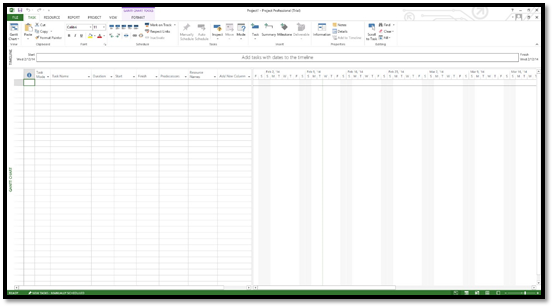
At the top left of the Project window, you will see the Quick Access toolbar, a feature shared by all Office products. We've highlighted the Quick Access Toolbar in yellow below.
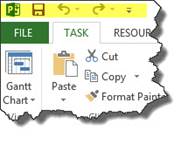
Beneath the Quick Access Toolbar, you will see the traditional menu bar. This is also common to all Microsoft products and contains menus you will need for the software and individual projects.
These menus include:
-
File
-
Task
-
Resource
-
Report
-
Project
-
View
-
Format
The menu bar is pictured in the snapshot below.

Below the toolbar, you have the ribbon. The ribbon contains the tools and commands you will need when using Project 2013.

The entry bar where you will enter tasks appears below the ribbon, as shown below.

The workspace is located below the Entry Bar. By default, the Project Screen is shown with the Gantt Chart View being the view that is displayed by default. You can change the view in the workspace by going to View on the menu bar.
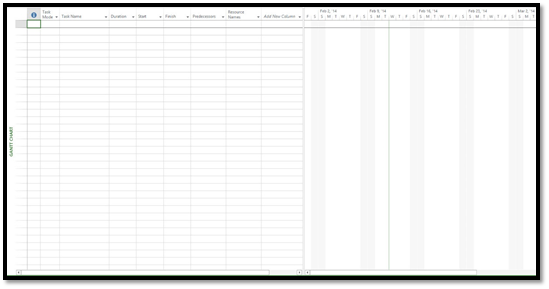
Below the workspace is the status bar where you can use zoom or change the views.

While memorizing the parts of the interface is not critical to being able to use the software. Please take a minute and review if you feel like you need to.