Photoshop Elements has two workspaces: Organizer and Photo Editor. Now that we've explored Organizer, it's time to move on to Photo Editor.
You can get to Photo Editor by clicking it on the Welcome Screen. If you're using the Organizer Workspace and want to go to Photo Editor, click the Editor button below the Media Browser. We've outlined the button in red below.
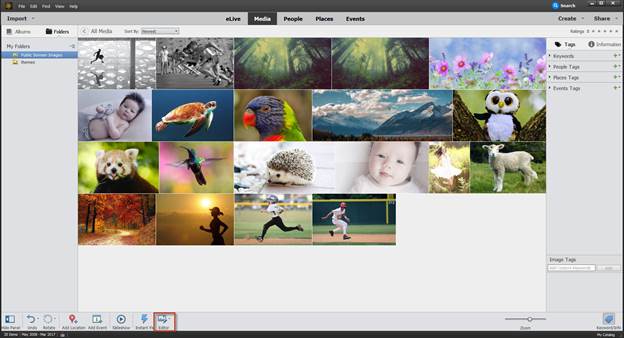
Photo Editor will open in a different window.
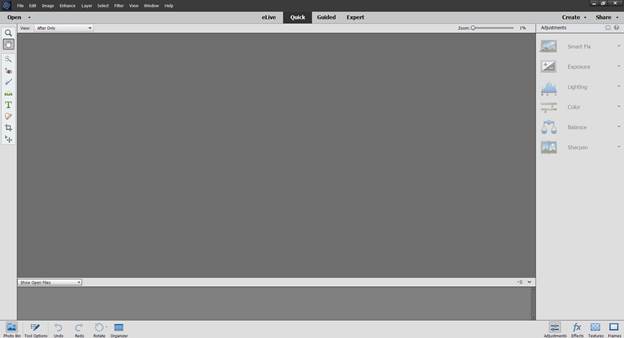
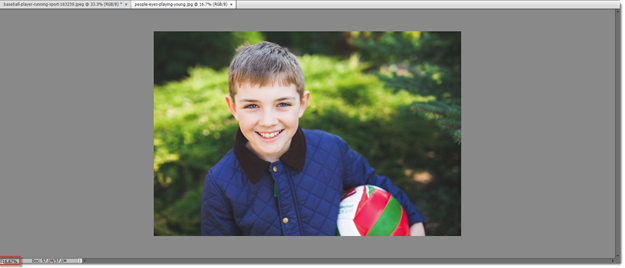
The Photo Editor workspace is pictured below:
Touring the Photo Editor Interface
Just as with the Organizer, the Menu Bar appears at the top of the Photo Editor window.
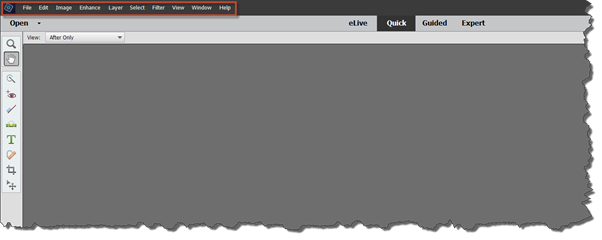
The Menu Bar contains commands and tools that you'll use to edit images in Photo Editor.
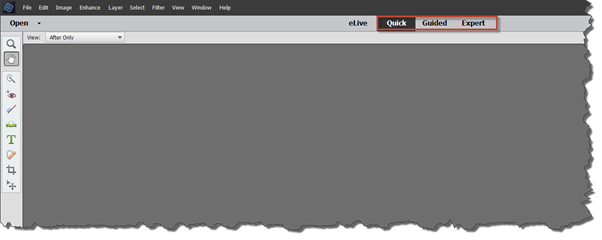
Below the Menu Bar, are the Photo Editor modes. Elements has three editing modes: Quick, Guided, and Expert. You can switch between editing modes by clicking on the mode you wish to work in.
The Panel bin is located on the right side of the Photo Editor window, just as it is in Organizer.
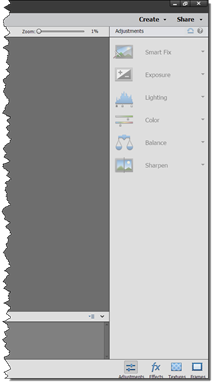
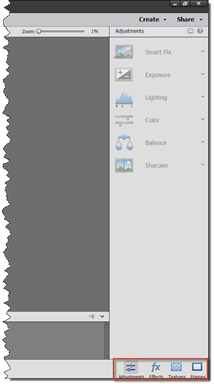
The Panel bin is currently displaying the Adjustments panel. Click an icon below the Panel bin to change panels. The available panels are Adjustments, Effects, Textures, and Frames.
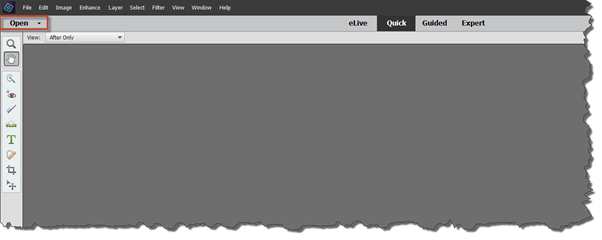
The Open menu lets you open a file from the clipboard or a new blank file. If you have several files open, you can also use the Open menu to switch between files.
The Open menu is shown below.
The Create and Share Menus are located on the right side of the Photo Editor.
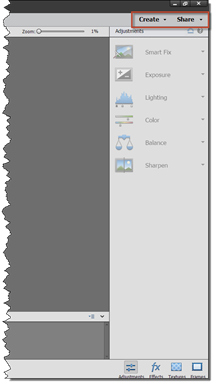
If you select an option in the Create menu, you leave the current editing mode. Instead, the Creation Wizard opens, and the Photo Editor disappears. If you want to return to the Photo Editor, finish the creation or exit the wizard. The Share menu works the same way, except it allows you to share your images through social media and other options.
Opening an Image from Organizer in Photo Editor
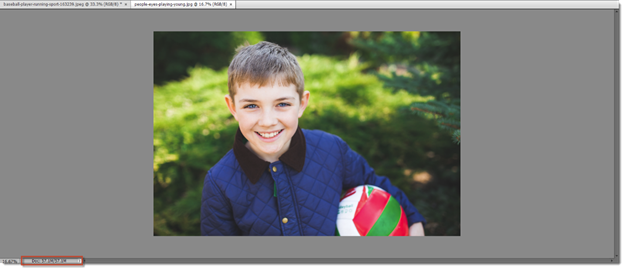
To open an image from Organizer in Photo Editor, select the image in Organizer. Once you've selected the image, click the Editor button below the Media Browser.
The image then opens in Photo Editor, as shown below.
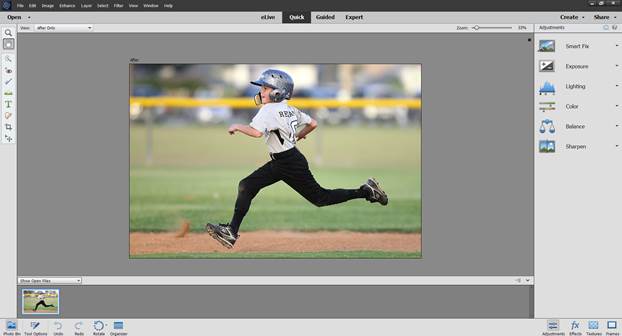
Photo Tools and the Photo Bin
The tools that you'll use to edit images in the Photo Editor are found in the Tools panel. You'll find the Tools panel on the left side of the Photo Editor window.
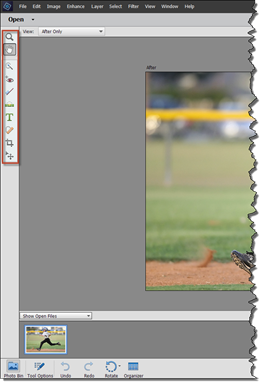
The Photo Bin is located at the bottom of the Photo Editor window. By default, the Photo Bin shows you what files you have open. It can also display the files selected in the Organizer or an album. Click the dropdown menu to select what you want displayed in the Photo Bin.

Click the Tool Options button below the Photo Bin to see the options for the tool that's currently active in the Tools panel.

Tool Options allow you to control how the selected tool works.
For example: If you're working with the Brush tool, Tool Options would allow you to select brush size and brush style.
Additional Photo Editor Commands
The Undo and Redo buttons are located to the right of the Tool Options button in the Photo Editor window.

These commands allow you to undo or redo your work. By now, you've used the Undo and Redo commands in other programs. They are standard features.
To the right of the Redo button is the Rotate button.

Click the downward arrow beside the button to select if you want to rotate the image clockwise or counter-clockwise.
The Organizer button is located to the right of the Rotate button. It allows you to return to Organizer.

Opening a File in Photo Editor
You can open an image from Organizer in the Photo Editor, or you can open any image stored on your computer � or a device attached to it.
To open an image that's stored on your computer in Photo Editor, go to File>Open.
You will then see the Open dialogue box.
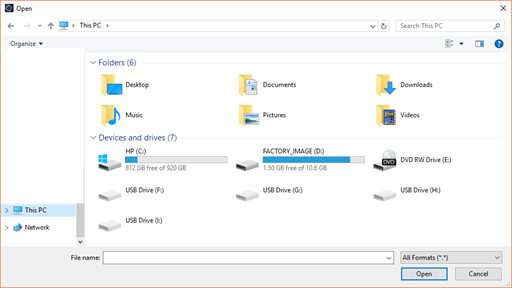
Find the image that you want to open, then click the Open button.
The image then opens in Photo Editor.

You can also use File>Open Recently Edited File to open files that you've recently had open. Elements provides you with a list of the file names. Just select one to open it.
The Image Window
The image window is the largest part of the Photo Editor. It's where you make edits and other changes to your image.
The image window looks slightly different depending on the editing mode you're using. Let's look at the image window in each of the different modes.
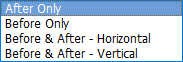
Quick Edit Mode
At the top right of the image window, you'll see the Zoom slider to increase or decrease magnification of the image.
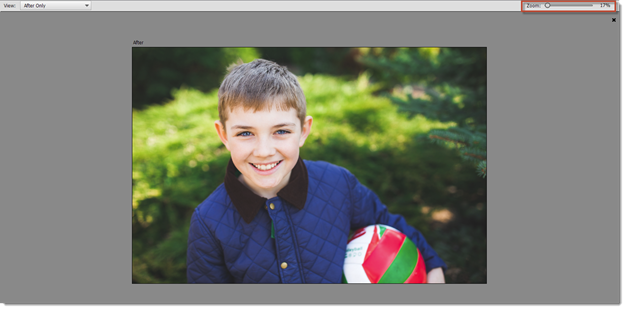
On the far-left side of the image window, you can choose how you want to view the image.

You can choose from:
-
After Only or after any edits
-
Before Only or before any edits
-
Before and After any edits with the before and after images appearing horizontally
-
Before and After any edits with the before and after images appearing vertically
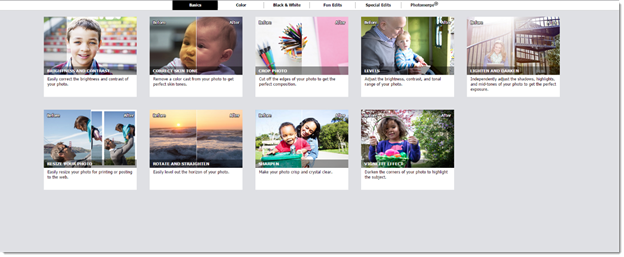
Guided Edit Mode
Guided edit mode doesn't show the image window with the image. Instead, it shows the various edits you can make to the image.
Expert Edit Mode
The image window for the Expert edit mode is pictured below.
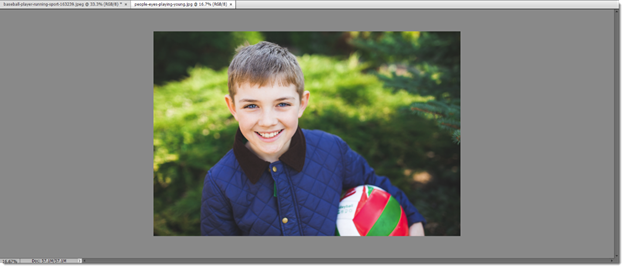
At the top left of the image window, you can see tabs that represent the files currently open in Photo Editor.
The magnification box is found in the bottom left corner of the image window.
You can click in this box and enter in a new magnification percentage.
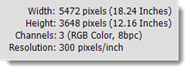
To the right of the magnification box is the information box.
This box contains information about your image. You can select what information you want to appear by selecting an option from the popup menu you see when you click on the box.
Getting Help in Photo Editor
If you need help using the Photo Editor or completing a task in Elements, there are several ways you can find the help you need.
1. Go to Help on the Menu Bar, then select Photoshop Elements Help. Enter a search topic, then press Enter to see results that match your search.
2. Go to Help>Key Concepts to get explanations of terms and tasks. This is helpful if you've never used Elements before.
3. Go to Help>Support to launch a browser window and go to the Adobe website where you can see problems from other Elements users, as well as solutions.
4. Go to Help>Video Tutorials to go to a webpage where you can watch videos on how to complete tasks.
5. Go to Help>Forum where you will find user comments and questions, as well as answers.
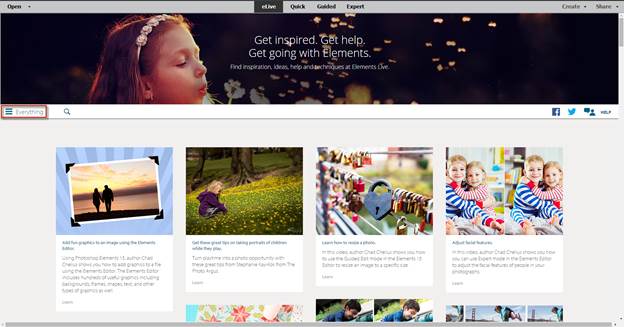
Getting Help Using eLive
If you need help using Elements, you can also use eLive view. The eLive view is found at the top of the Photo Editor window and is grouped with the editing modes, as shown below.

eLive view contains articles, videos, tutorials, etc. that are divided into channels. To search for help pages, tutorials, or articles, click in the search box in eLive view and enter the keywords for what you need to find.
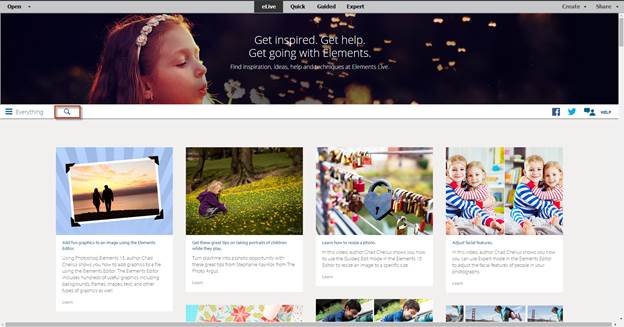
You can filter the results by the channel by clicking the channel dropdown menu to the left of the search box.
Setting General Preferences
You can set your preferences in the Photo Editor to determine everything from your cursor, to how files are saved, performance, and plug ins. However, in this lesson, we're only going to discuss General, Saving Files, and Performance preferences. We'll cover the rest later in this course as we learn more about editing and the features Elements offers.
Whenever you want to change or reset your preferences, go to Edit>Preferences. You can choose to set your preferences for any of the items in the side menu, but for this lesson, we want to start by just selecting General. This will open the Preferences dialogue box. All the selections listed in the side menu are also listed in this dialogue box.
The General preferences dialogue box looks like this:
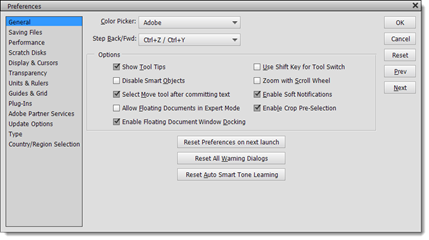
You can now set preferences for:
-
Color picker. Default is Adobe. You can also choose Windows.
-
The shortcut key for step backward/forward. Default is Ctrl+Z/Ctrl+Y. You can use these commands for undo and redo.
Then, you can personalize Elements by choosing options. To select an option, place a checkmark beside the item.

You can also set your preferences for saving files by selecting Saving Files on the left of the dialogue box or going to Edit>Preferences>Saving Files.
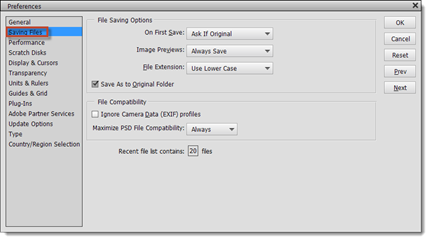
Saving Files Preferences
To specify your preferences for how Elements saves files, go to Edit>Preferences>Saving Files.
Look at the File Saving Options section at the top of the dialogue box.
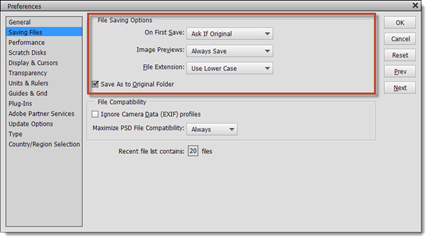
On First Save allows you to control how files are saved.
-
Ask if Original is the default selection. Selecting this opens the Save As dialogue box the first time you save the original file. All saves after the first save replace the previous version. (The Save As dialogue box won't appear again after the first time.)
-
Always Ask means that the Save As dialogue box will open with the first save every time you edit the image.
-
Save Over Current File overwrites the previous saved version. The Save As dialogue box does not open.
Click the OK button to save your preferences.