You can use tables to organize information or text within a document. They allow you to present complex information in a way that makes it stand out from other text on the page and makes it easier to understand. You can also use them to organize your entire document, the way you would in a more complex page-layout program like MS Publisher or Adobe InDesign.
Creating a Basic Table
There are a number of ways to create a table in MS Word 2003. The simplest is to move the cursor to the insertion point and click the Insert Table icon![]() in the toolbar. This method only allows you to create a basic table with a maximum of four rows and five columns. When you click the Insert Table icon, a drop down menu with 20 white boxes will appear. Each box represents a single cell in either a row (going down) or a column (going across).
in the toolbar. This method only allows you to create a basic table with a maximum of four rows and five columns. When you click the Insert Table icon, a drop down menu with 20 white boxes will appear. Each box represents a single cell in either a row (going down) or a column (going across).

Drag the mouse over the boxes to select the number cells you'd like to in your table then click the left mouse button. In this example, we have three rows and three columns selected. This inserts a simple table into your document that looks like this:

If this is too simple for your needs, never fear--any table in MS Word 2003 can be customized. You can add or delete rows and columns, separate cells, and otherwise manipulate them to match. You'll learn how in just a minute.
You can also create a table by clicking �Table' in the menu bar, then selecting �Insert' and clicking �Table':
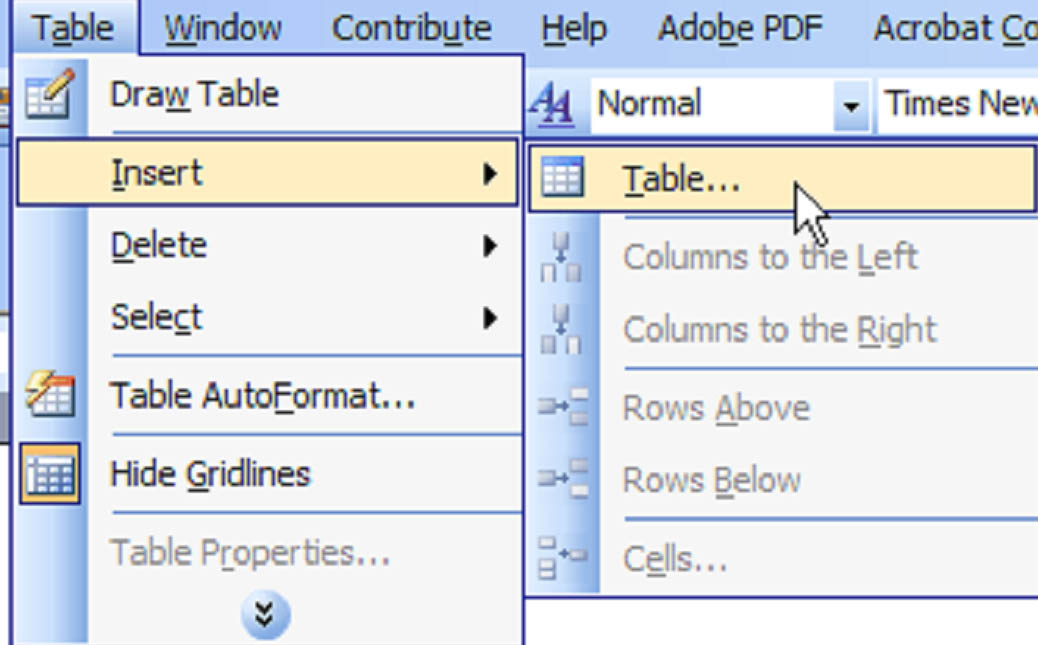
Select the number of rows and columns in the Insert Table dialogue box. In this example, we've selected 3 rows and 3 columns:
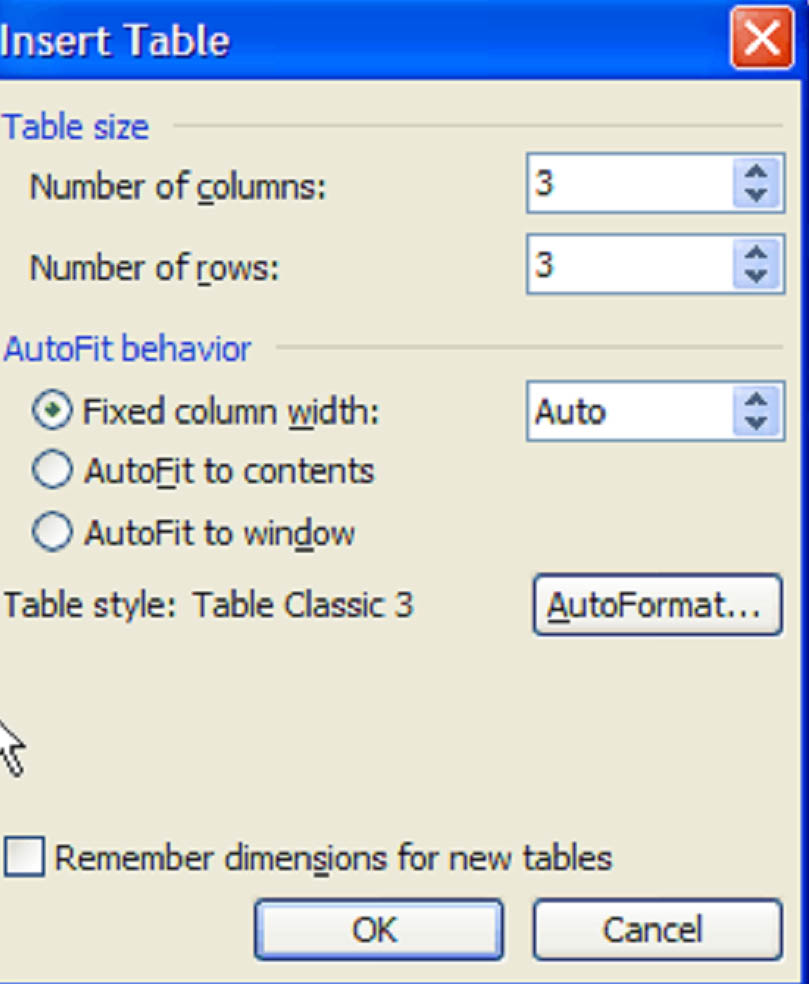
Click OK. The table will be identical to the one in the first example.
Another way to create a basic table is to select �Draw Table' from the �Table' menu on the menu bar. This method gives you more creative control of the table from the outset.
The final way to create a table is by converting text you've already typed into a table. To do this, you must first tell Word how to divide the text into rows and columns. We will place a comma where we want to designate a column and a paragraph (press �Enter') where we want a row, then select the text. Next we will click �Table' in the menu, select �Convert', and click �Text to Table.'
Select the number of columns in the dialogue box. In this case, we've selected three:
Moving a Table
MS Word 2003 treats a table like any other non-text object, so you can move it around like one. Position the cursor over any cell in the table and the handle appears in the upper left hand corner. Click and hold that handle and drag the table to any position on the page.
Adding Rows and Columns
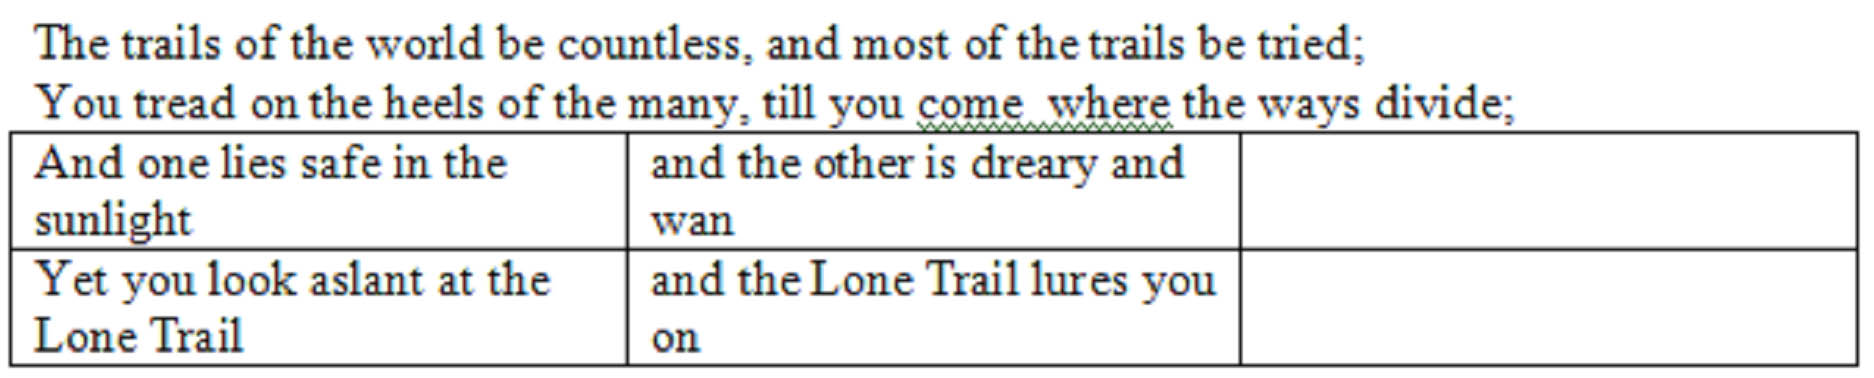
As we said before, once a table has been created, you can manipulate it to suit your needs. You can insert columns to the right or left of a selected cell by clicking �Table', �Insert' and the appropriate command. In this example, we've chosen to insert columns to the left of our selected column.
![]()
This shifts the selected column to the right and inserts empty cells. In this case, our selected cell was "and the other is dreary and wan."

To insert a row, click �Table', �Insert' and �Rows Above' or �Rows Below'.
In this case, we selected the cell that contained "Yet you look aslant" and chose to add a row above it.
Merging Cells
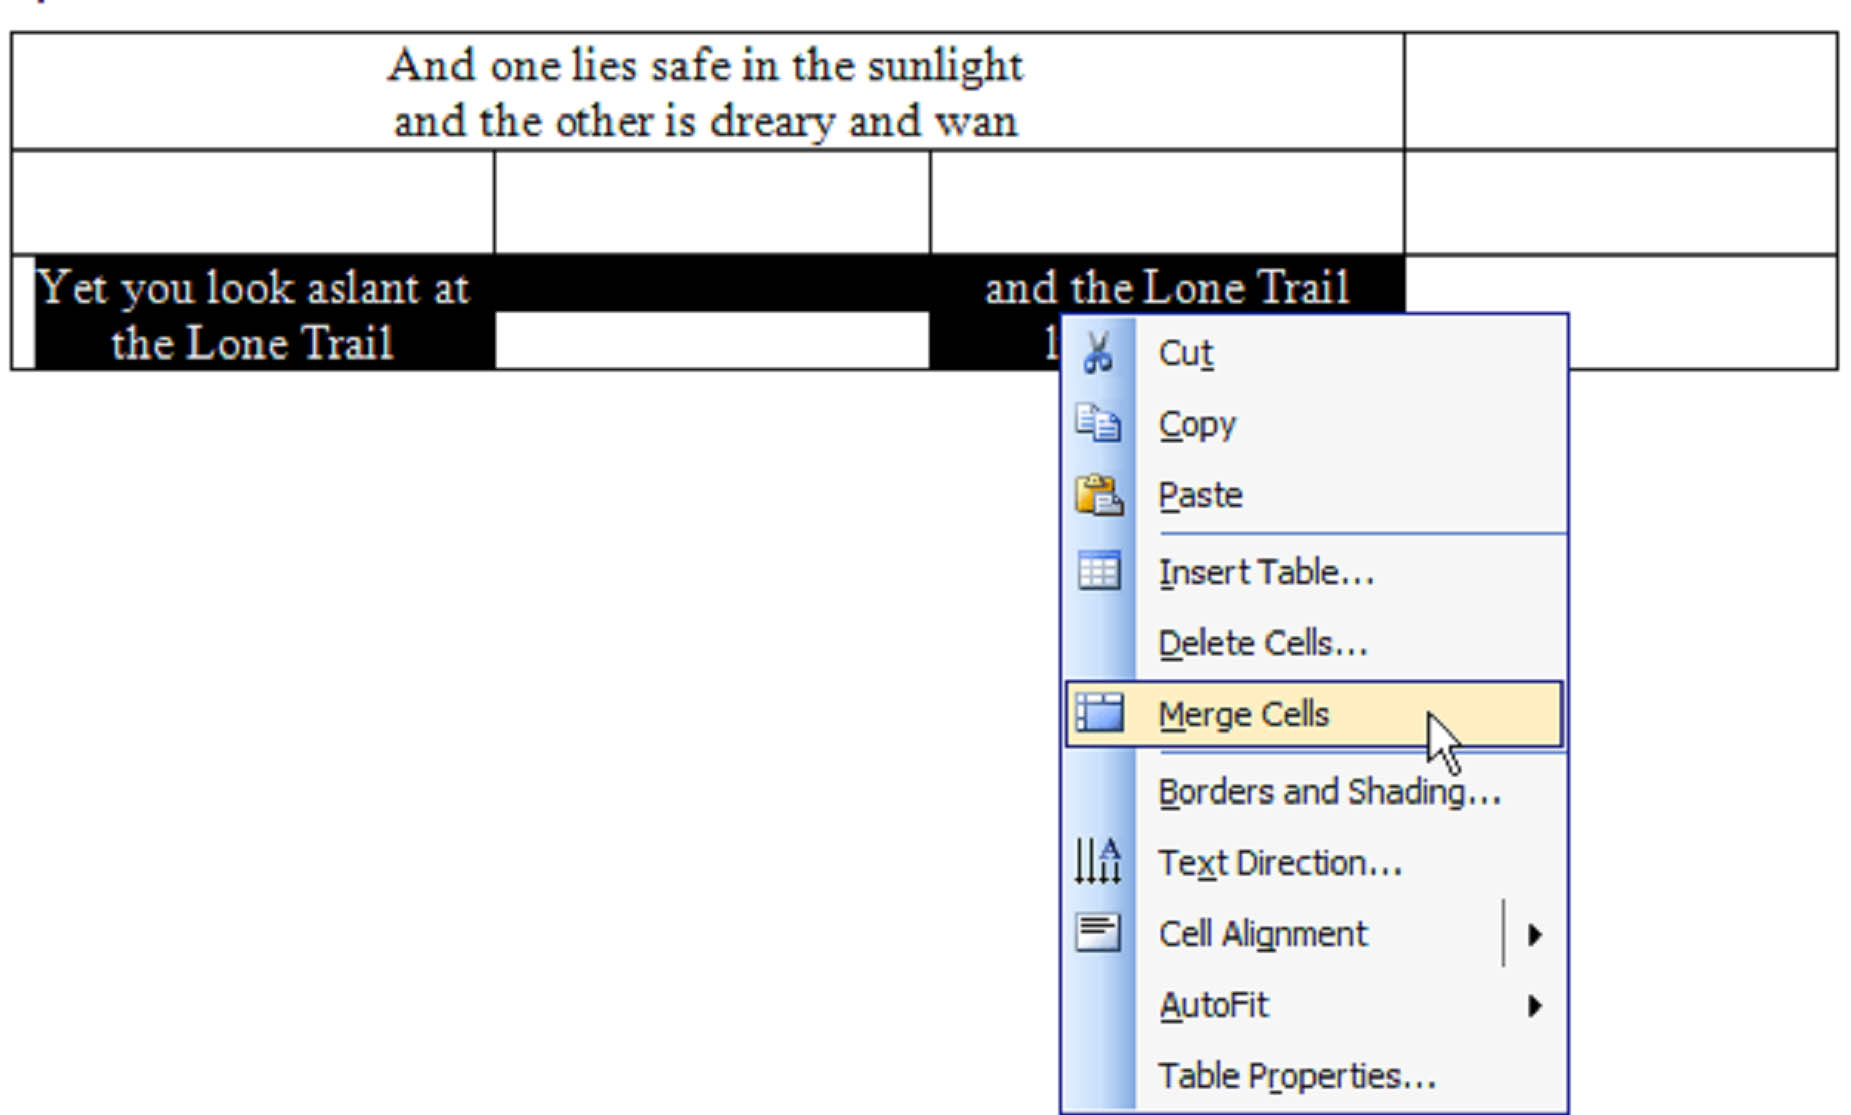
When you merge cells, the content of the individual cells will be combined, so you must be careful. To merge any number of cells, you must first select them. To select a single cell, you just click it. But to select several cells, you click and hold on one and drag your mouse through the others. The selected cells will be black.
Once the cells are selected, right click on them and select �Merge Cells' from the menu. In this instance, we've already merged the three cells in the top left of our table and are in the process of merging the three in the lower left. The selected cells are black, and we've clicked the right mouse button to see the menu.
Deleting Cells
Because deleting cells will change the layout of the table, you have to tell Word how to handle it. Whether to shift the cells to the right or left, up or down. You can delete a single cell, several cells, or an entire row or column.
There are two ways to delete cells, rows, or columns.
First, you must select the cell, or cells you'd like to delete. Then click the right mouse button. From the menu select �Delete Cells.' When you do that, a dialogue box will open and ask you how you'd like to handle the remaining cells.
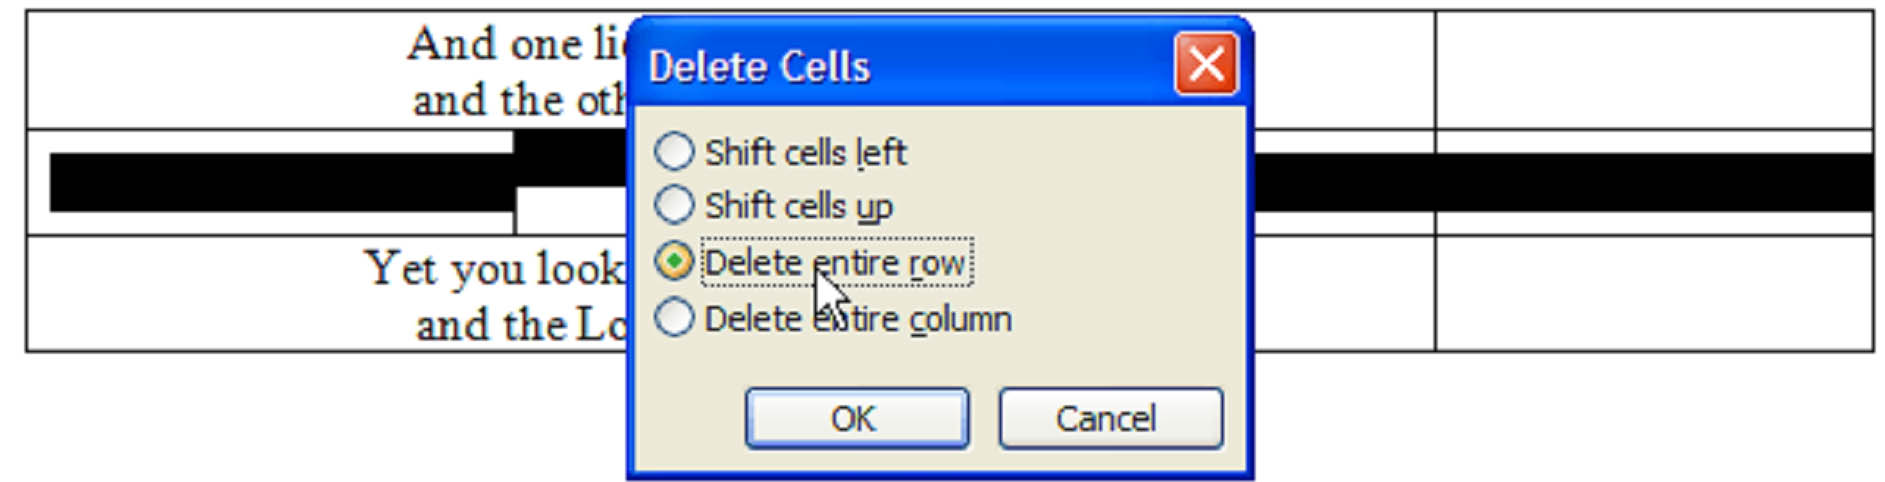
Since we'd like to remove an entire row, we'll select that and click OK.
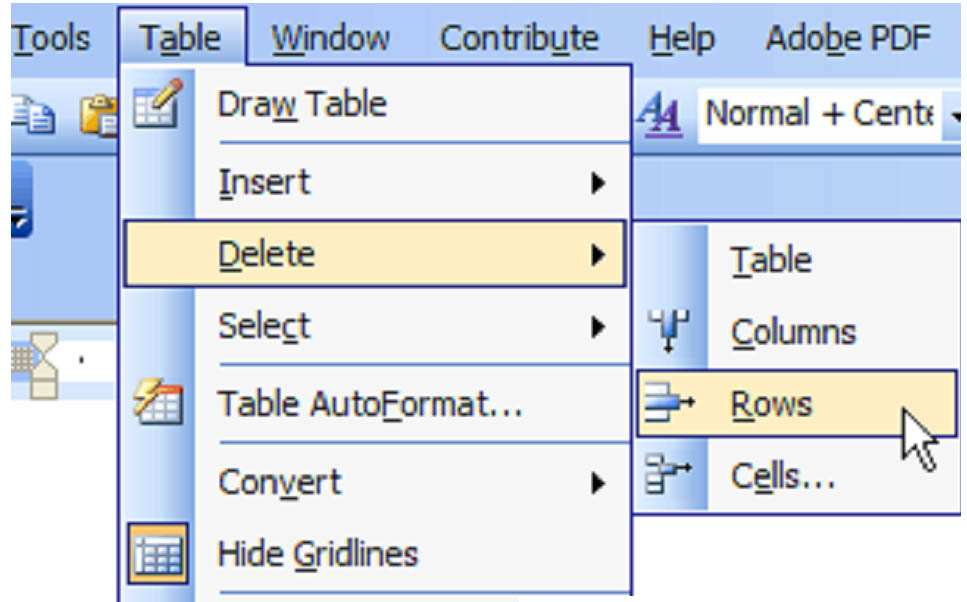
Another way to delete cells, rows or columns is to select the offending cells and click �Table',
�Delete', and, in this case, �Rows.'
Splitting Cells and Tables
Not only can you split individual cells into more cells, you can also separate entire tables into more tables.
To split a cell, right click on it and select �Split Cells' from the menu bar. Choose the number of rows and columns in the dialogue box and click OK.

You can also find the �Split Cells' command in the �Tables' menu.
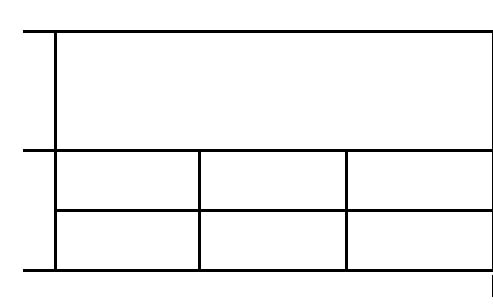
To split a table, click on a cell and select �Split Table' from the �Tables' menu bar. Here, we've broken our table in two:
Once a table has been split, both are completely independent. You can move each one anywhere in the document, and manipulate each one independently.
Entering, Formatting and Aligning Text
Naturally, you're going to want some kind of information in your table, either text or numbers or other objects. To do so, just click a cell and start typing. It's that simple.
Yet, like the document itself, you'll want the information in the tables to be well presented. Well really that's all any cell is: a tiny document. You can format text the same way you'd format text in your document. It can be bold, italics, or 18 picas tall. You can center it, align it to the right or left, toward the top of the cell or toward the bottom.
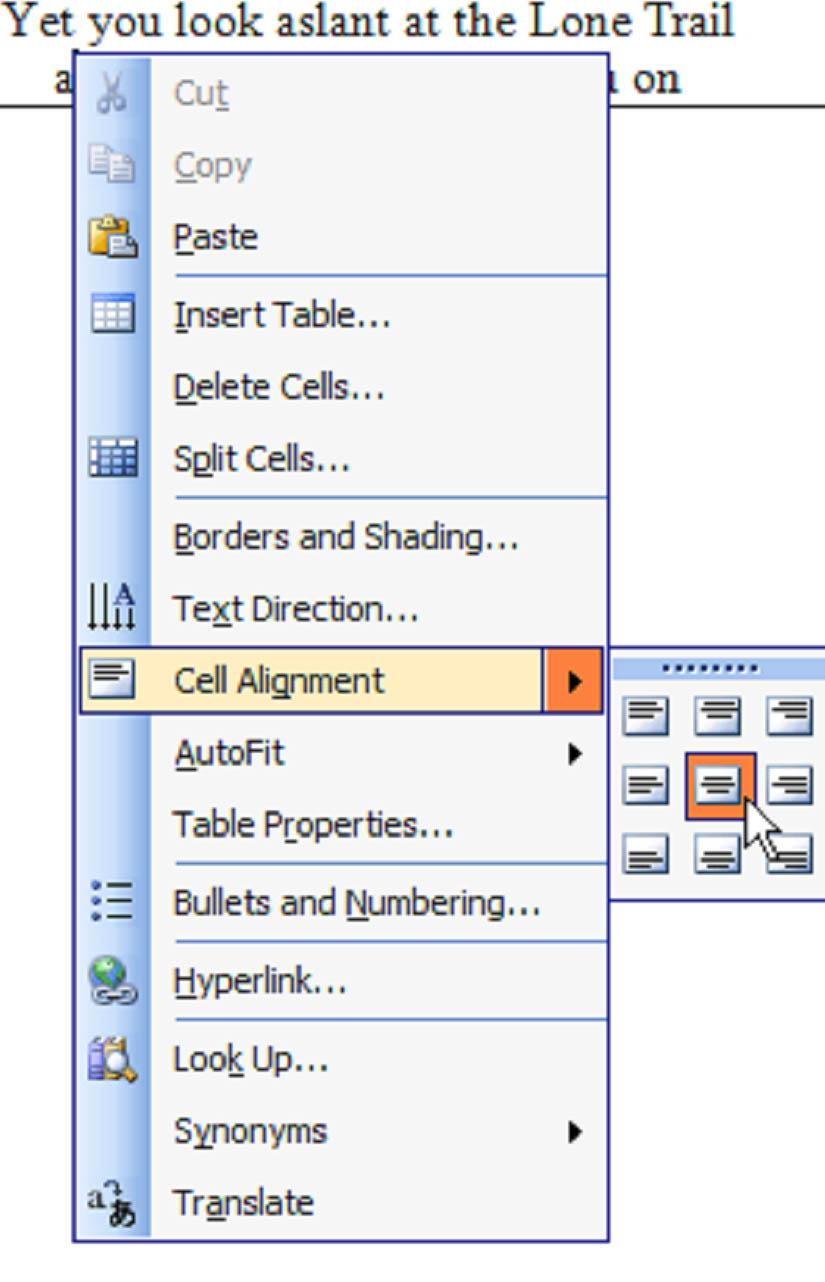
To align text within a cell, right click on it. From the menu, select �Cell Alignment', then click the icon that matches your preferences. We've chosen to align our text vertically and horizontally within the cell.
In this way, Word 2003 can also be a powerful page layout tool. Use tables to lay out and align text and objects the way a magazine or an advertisement would.
Borders and Shading
Like any object in Word 2003, you can control its borders. You can make them thick or thin or invisible and you can even change the color. And you can do this to a single cell, multiple cells, or an entire table.
Shading refers to the color of the cells.
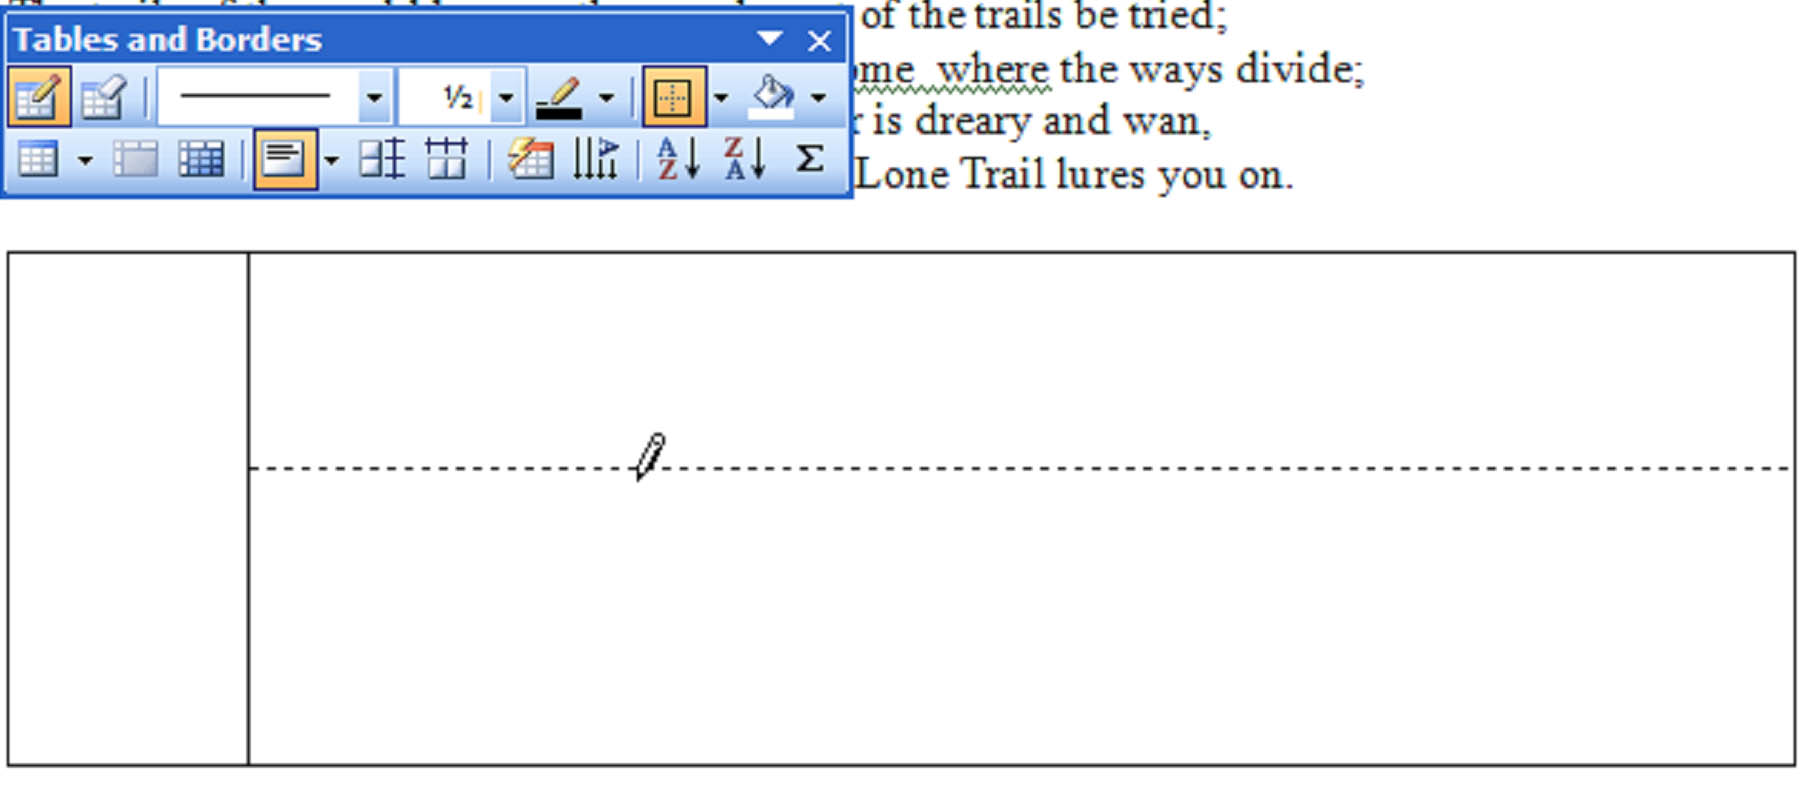
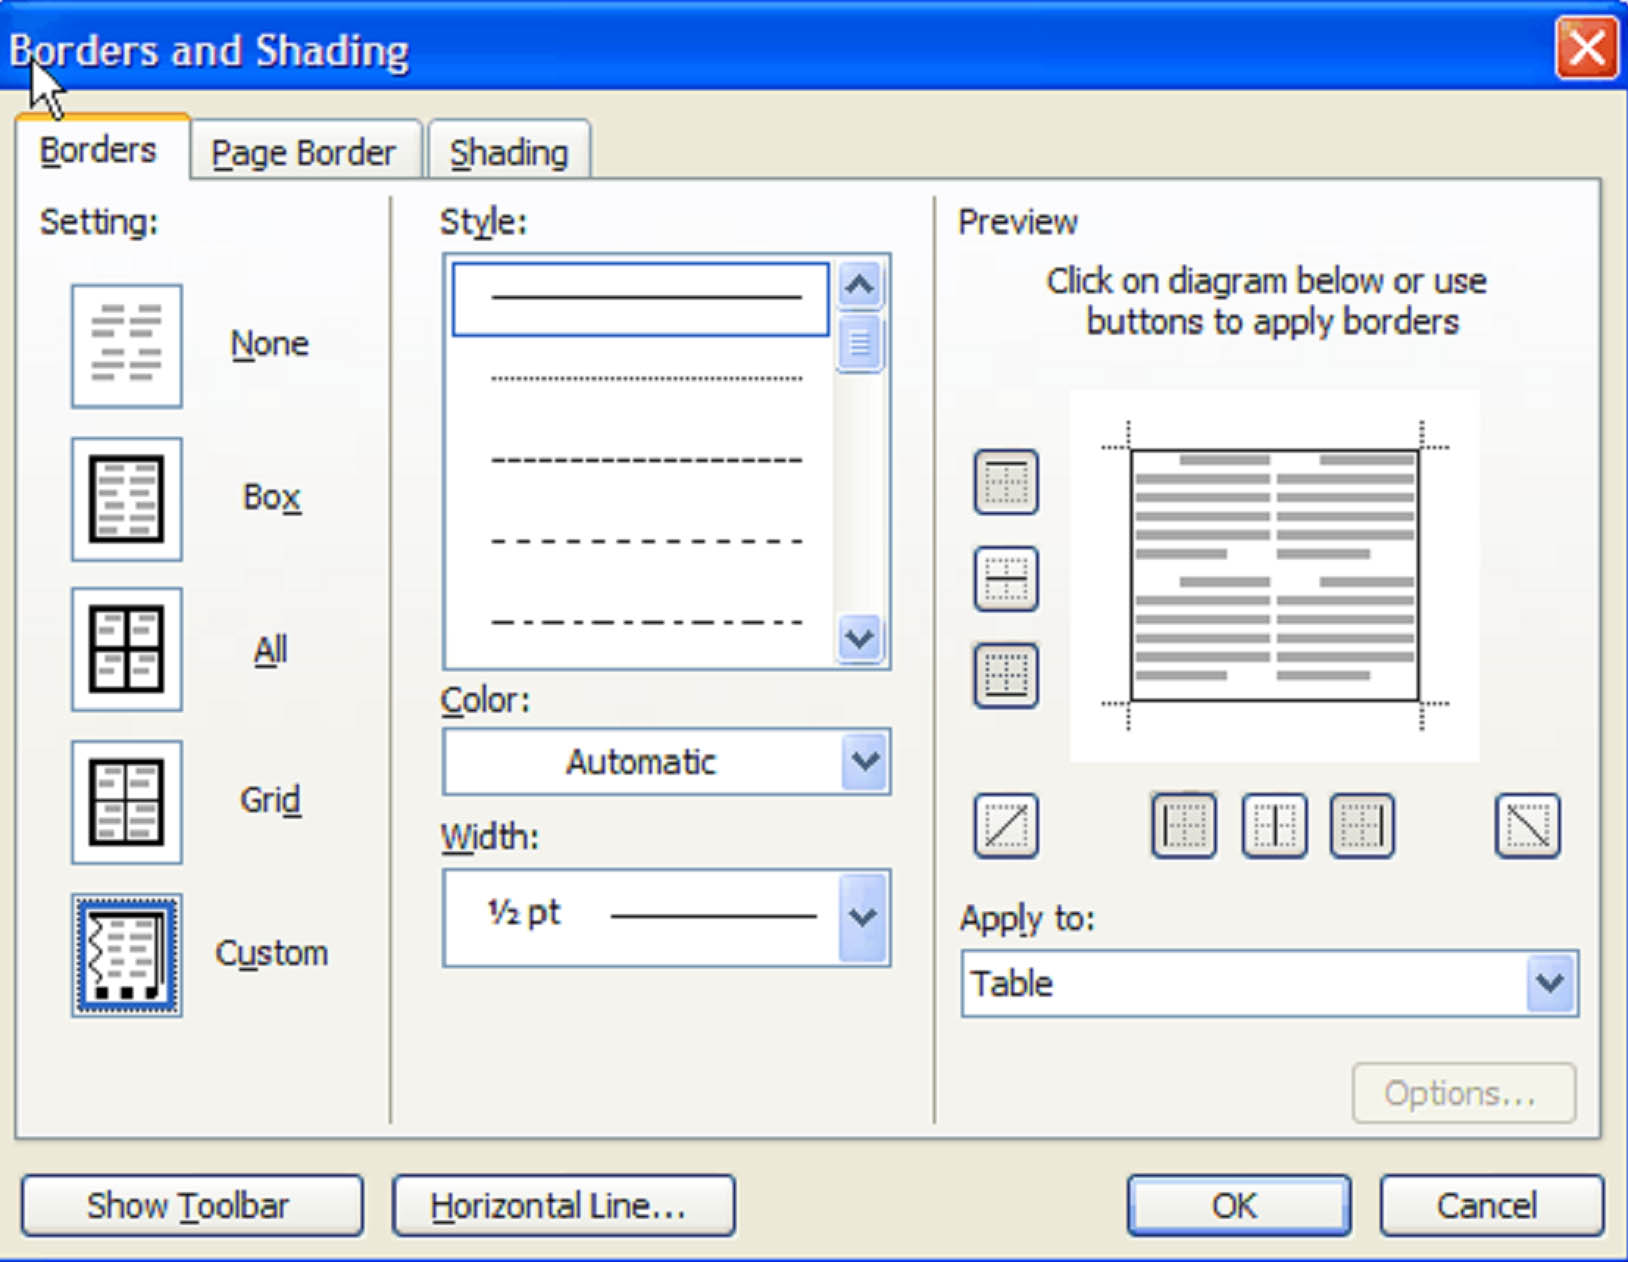
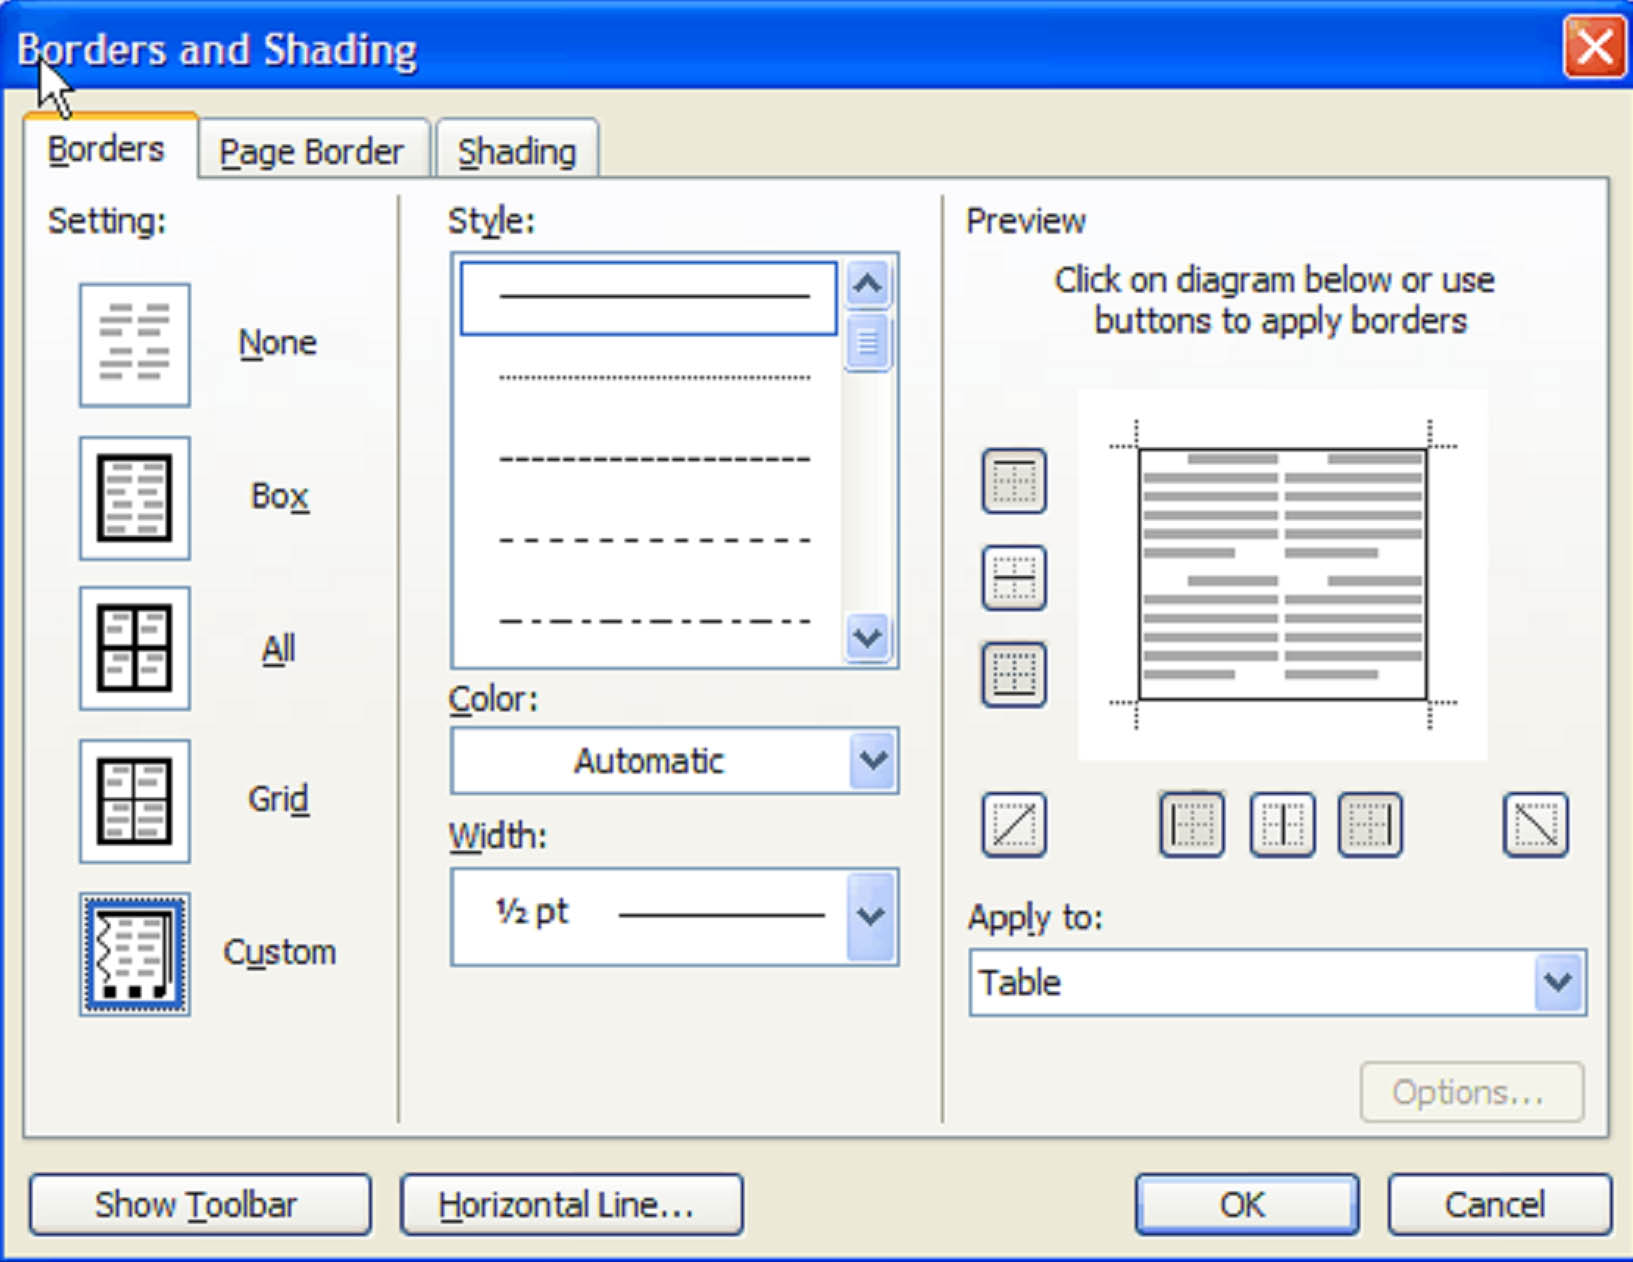
To change the borders, right click on a cell or table and select �Borders and Shading' from the menu. Select the options you want in the dialogue box and click OK. In this case, we have selected a solid � point line and applied it only to the entire table.
To change the color of a cell, click the �Shading' tab in the Borders and Shading dialogue, choose the properties you want, then click OK.
Table AutoFormat
Word 2003 provides you with some simple templates to make it easier for you to create eye-catching professional quality tables. This function is called AutoFormat.
You can apply these styles to an existing table or create one from scratch.
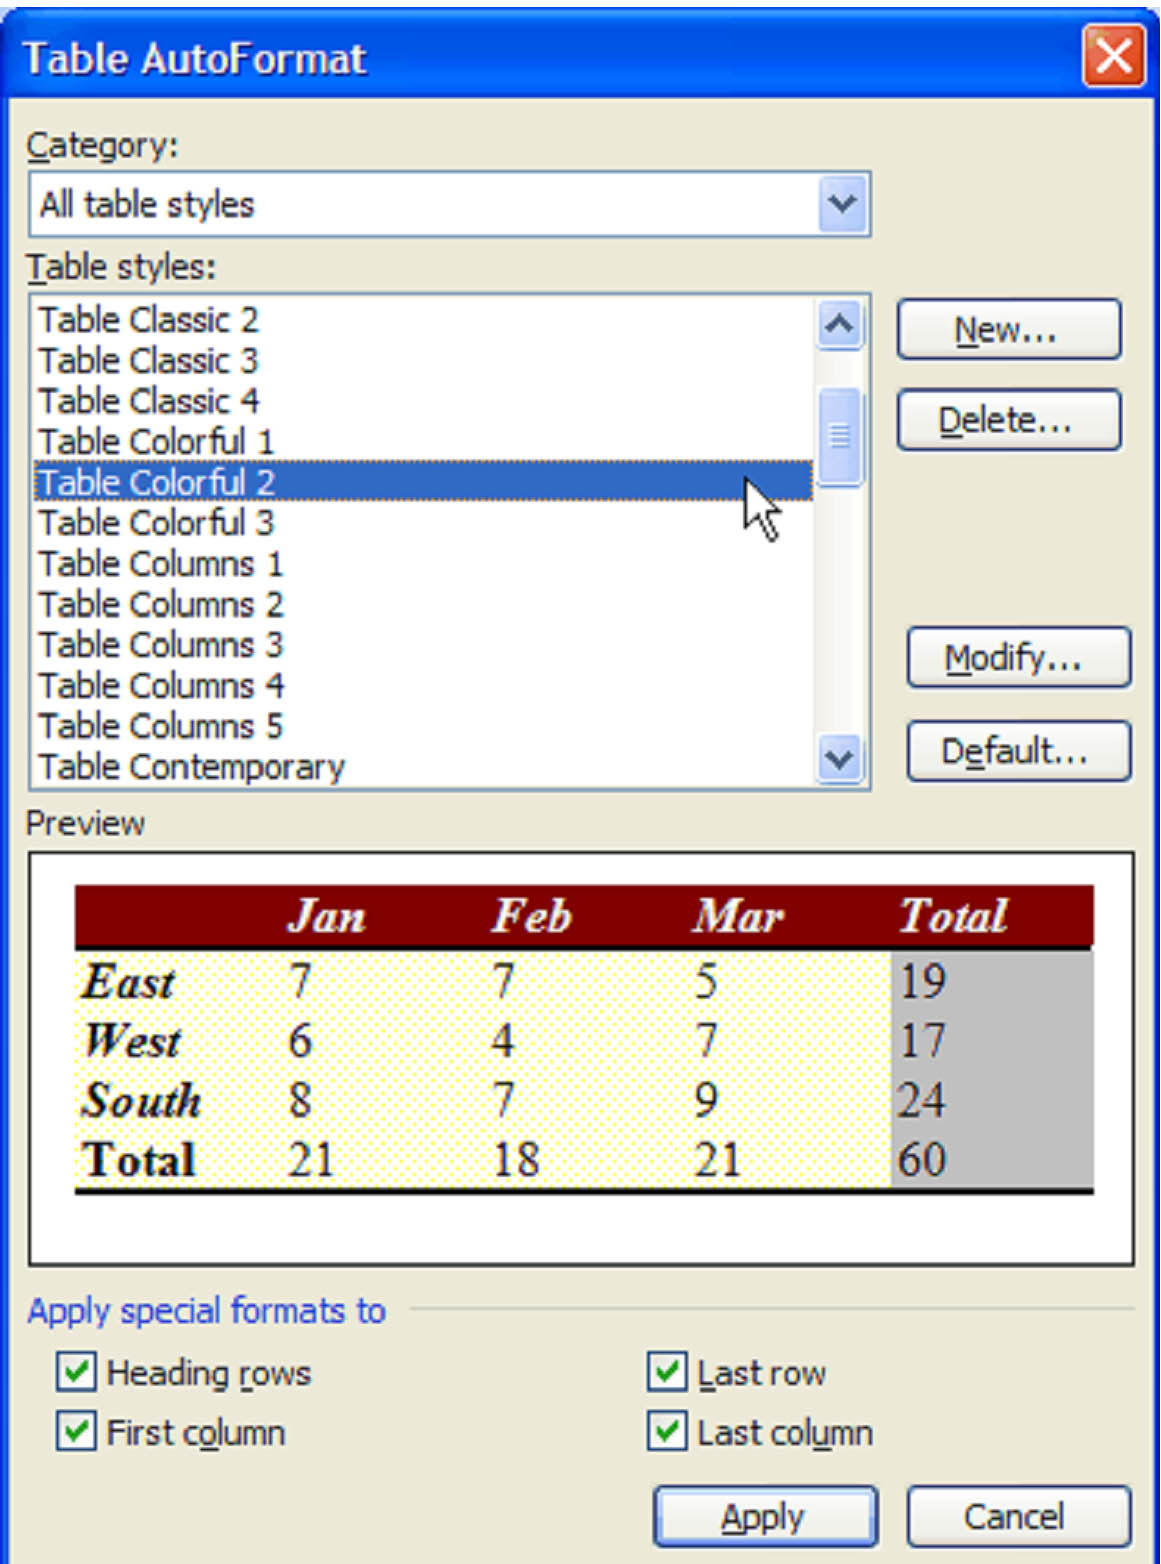
To apply a template to an existing table, select it, then click �Table' in the menu bar and click �Table Auto Format.' Scroll through the templates until you find one that appeals to you, then click �Apply'.
To create a table from scratch using an �Auto Format' template, click �Table' in the menu bar, then �Table Auto Format' from the menu. Select the template you want, and click �Apply'. The �Insert Table' dialogue that you learned about earlier in this article will appear. Choose the number of columns and rows you want and then click OK.
Calculating Columns
Most people know that Word 2003 is a good word processor, but few know that it can also do arithmetic.
Word can calculate the numbers in rows and columns. To do so, place the cursor in the cell where you want the answer. Then click Table > Formula. In the dialogue box, type the kind of calculation you want Word to perform and the cells you want it to use. In this example we are going to find the total for March.

Since we're adding, we want to find the SUM and we want word to use the rows (ABOVE). Click okay and we get our answer: 795.
If we wanted to find the average bonuses for the three month period, we'd place the cursor in the cell directly below Average and type =AVERAGE(LEFT).

These figures must be manually recalculated any time you make a change to the number, so it's recommended that you use MS Excel for complex calculations.