Long gone are the old days of using a typewriter to create documents, lists, articles, letters, and even stories. Word processing programs like MS Word 2003 make performing these tasks a lot simpler and quicker to do.
Even if you've never used any of the versions of MS Word before, it's almost a sure bet that you've heard of it. MS Word is the most popular word processing software on the market today. However, don't be fooled into thinking it's so well known just because it's a Microsoft product. That's not true. MS Word 2003 is so widely known and popular because it offers the most features. Better yet, all its features are easy-to-use. It doesn't matter who you are or what level of experience that you have; you can learn to use MS Word.
Opening MS Word
If you have MS Word 2003 installed on your desktop, you'll recognize it by the icon.
icon.
Whenever you open MS Word, you will open what is called a document. All files in MS Word 2003 are referred to as documents. You can open a document in one of two ways. First, you can open a new MS Word file. To do this, simply double click on the MS Word icon.
You can also open an existing MS Word file that is saved to your computer. Simply find the file that you want to open and double click it. This will open the file in MS Word where you can make changes and edit it.
Once you open MS Word 2003, this is the screen you will see:
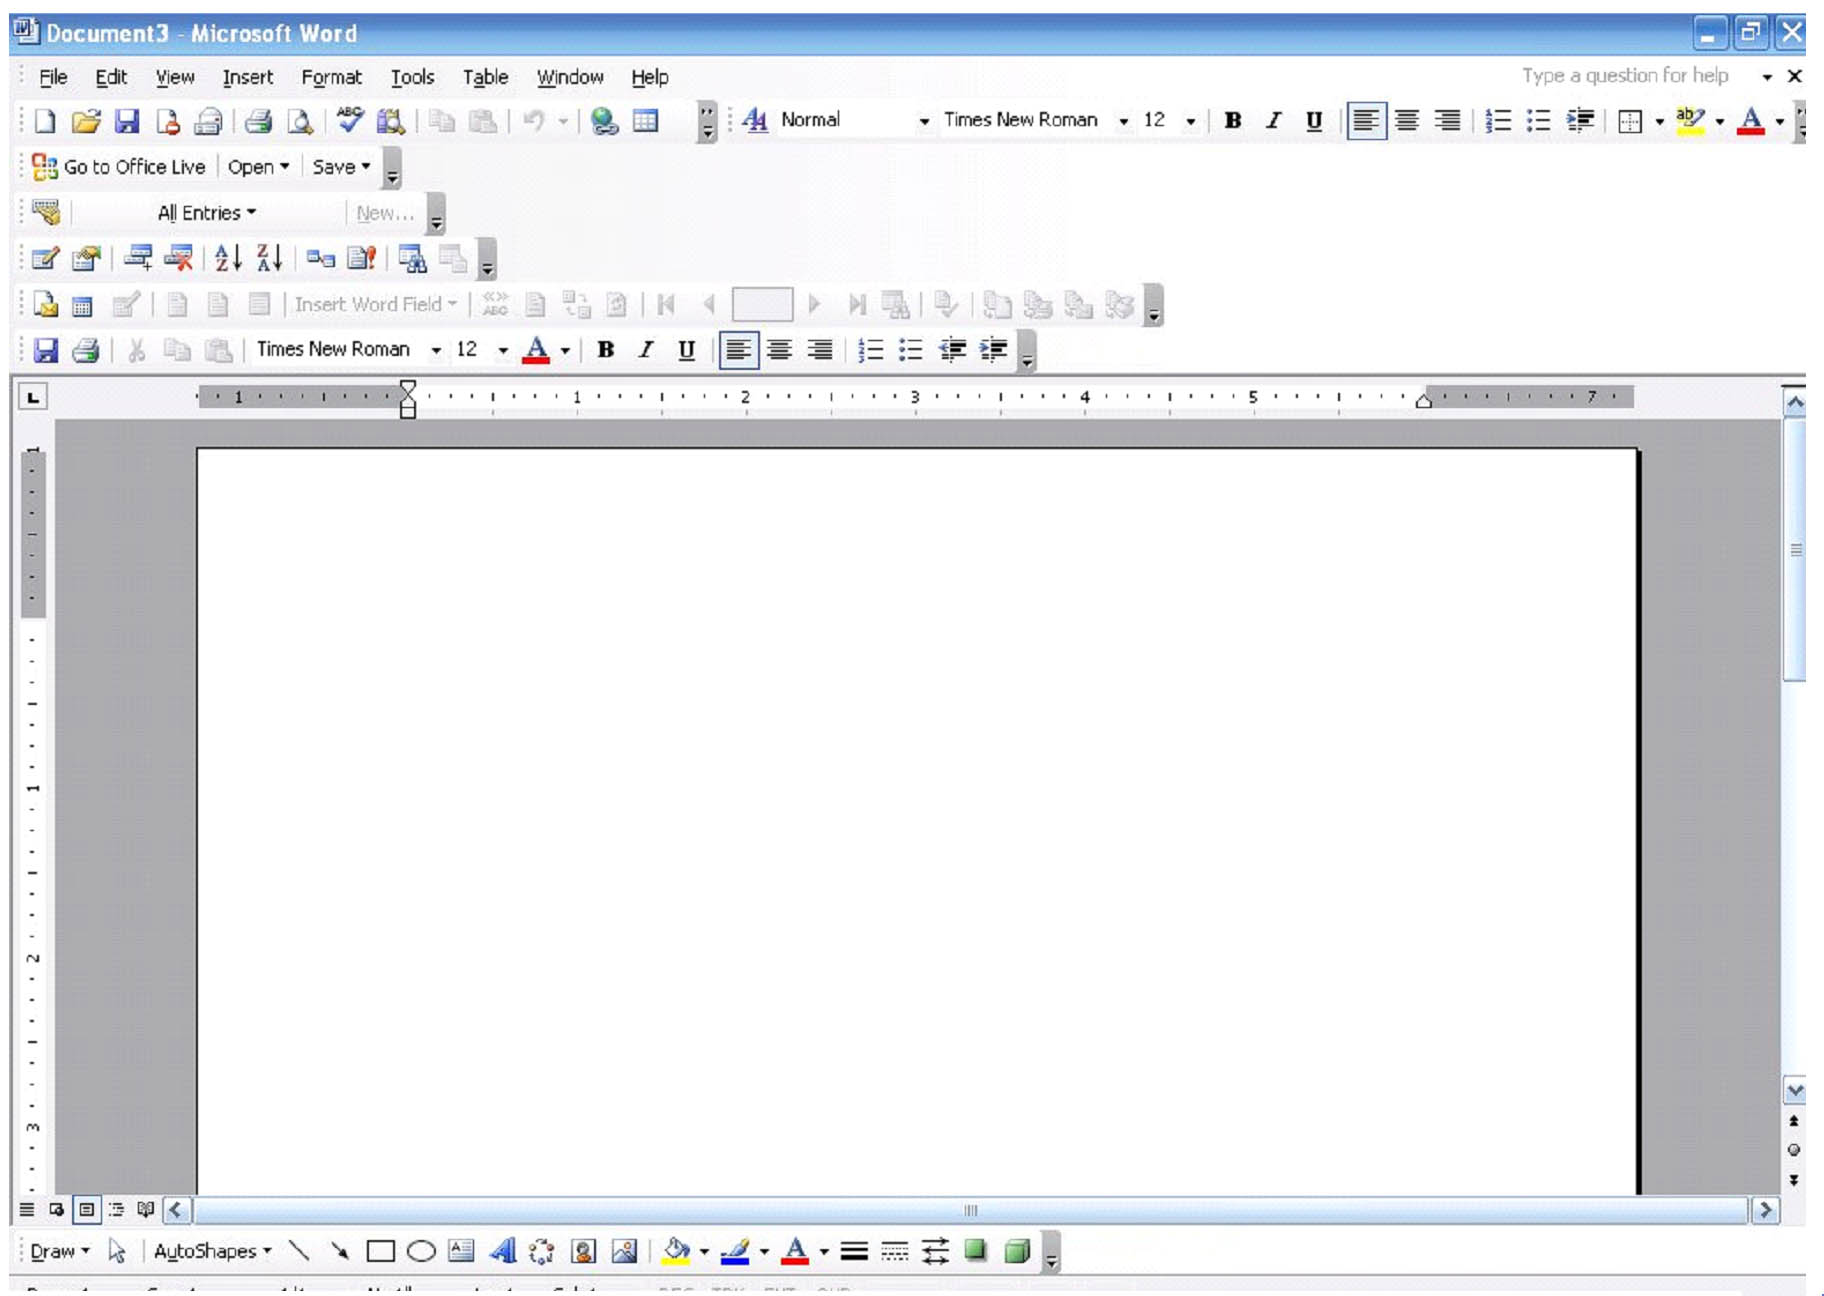
Depending on if you've used MS Word 2003 before or customized the appearance, you may or may not see everything pictured above. For the time being, we're going to learn the major components of MS Word 2003 so you can identify and find all of them.
The Title Bar
At the very top of the MS Word 2003 window, you'll find a blue bar with either the name of your file in it or the default MS Word file name "Document1" (it may be Document2, Document3, etc depending on how many MS Word 2003 files you have open) on the left hand side. This blue bar is called the title bar.
It will always contain the name of your file on the left. To the right, you will see three buttons to  minimize the screen,
 ![]() maximize the screen, or
maximize the screen, or  close the screen and exit MS Word 2003.
The Menu Bar
The menu bar in MS Word 2003 is located directly below the title bar.

The menu bar contains all commands that you will need to operate MS Word 2003, including all toolbars available to you. We'll give a brief overview so that you become familiar with the layout.
The menus from left to right are as follows:
File. The file menu contains all commands that you will need to open files, save files, search for files, set margins, and perform tasks that have to do with printing your documents.
Edit. It's just as it sounds. Commands you will need to perform basic editing to documents can be found under this menu.
View. The �View' menu allows you to switch page views, zoom in, view headers and footers, view proofreading marks, and also access MS Word 2003 toolbars.
Insert. MS Word 2003 gives you several options to insert fields, pictures, graphics, drawings, page numbers, WordArt, and other items into your document. You can do many of these things in the �Insert' menu.
Format. When you create a document, you may want to format the paragraphs or text, add borders to your pages, etc. You can use the �Format' menu to accomplish those things.
Tools. The �Tools' menu contains some editing features as well as more advanced features such as mailing lists and mail merge.
Table. Insert, edit, and create tables.
Window. Allows you to organize your window and sit open documents side by side in the window for comparison.
Help. Contains the help files for MS Word 2003 as well as information about the software and the version you are using.
To the far right on the menu bar, you will see a help box with �Type a question for help' written inside it. If you click on that window, your cursor will appear, and you can ask MS Word 2003 questions about how to navigate or use the software.
For example, we typed �menu bar' in the box. The results, shown below, appear on the right of your MS Word 2003 window.
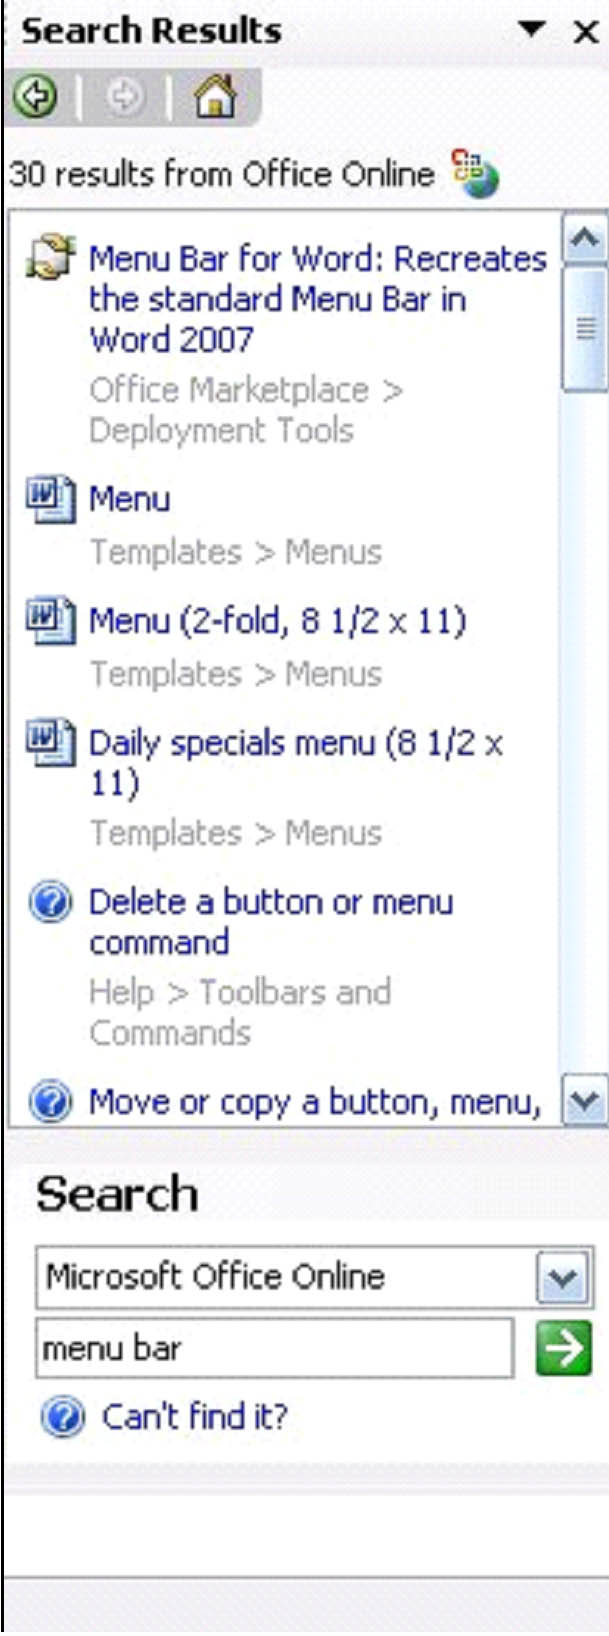
Simply select the result that best answers your question by clicking on the blue text.
To close out the file you are working on, but keep MS Word 2003 open, click the beside the help box.
The Toolbars
The toolbars appear below the menu bar in MS Word 2003. The toolbars that appear are totally up to you because you can customize the appearance of MS Word 2003. It's handy to just have the toolbars you use the most showing on the screen rather than cluttering it with all available.

In this example, we only have the �Standard' and �Formatting' toolbars exposed in our MS Word 2003 screen.
To locate and view all toolbars:
- Go to the �View' menu on the menu bar.
- Select �Toolbars.'
- A window will open up listing all the MS Word 2003 toolbars. Select the one you want to view. Ones that are already showing will have a check mark by them.
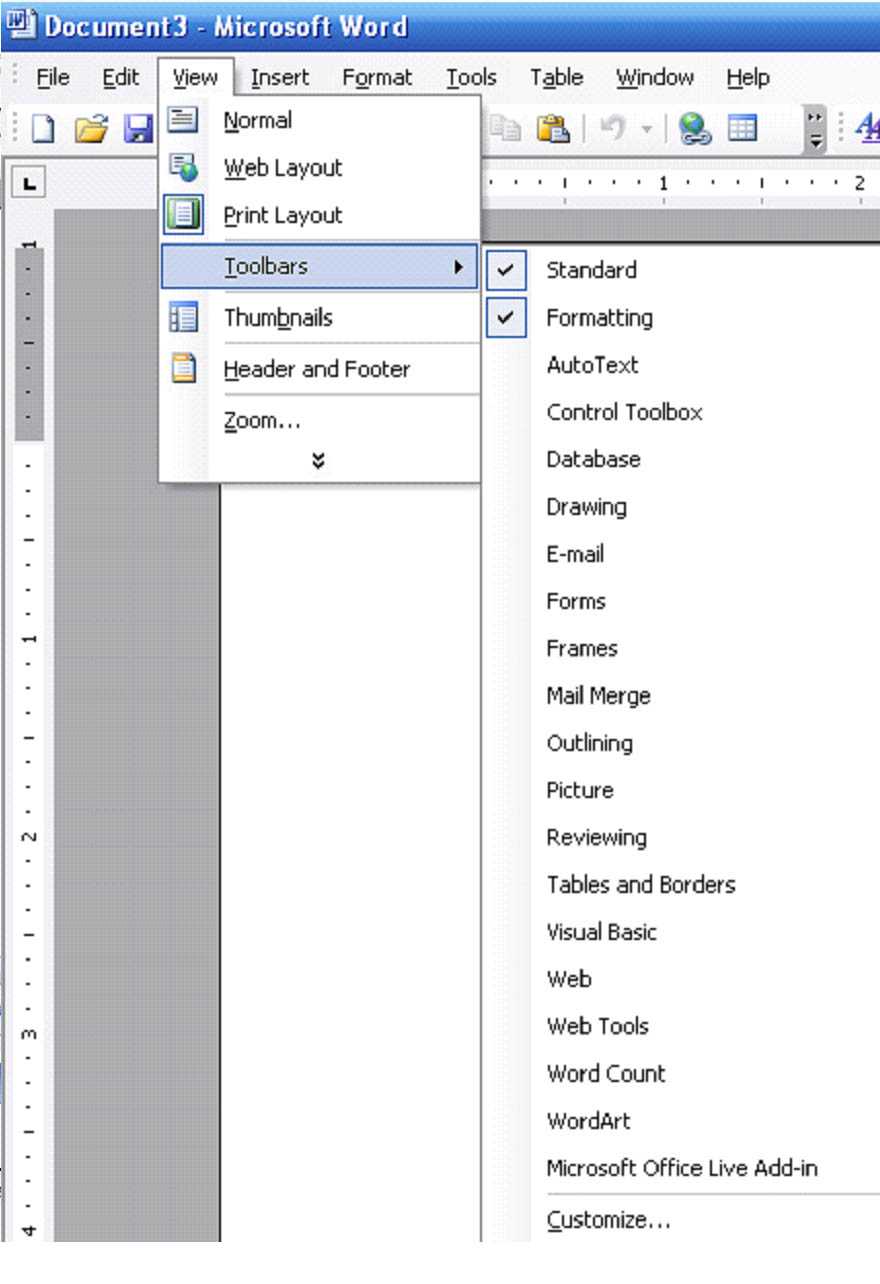
- The toolbars will be displayed below the menu bar or will appear as a small box on your screen. Note: The �Drawing' toolbar will appear at the bottom of the window.
The Text Area
The text area is located below the toolbars and comprises the major portion of the MS Word 2003 screen. This is where you will enter all text and information. It is also where any files that you open will appear.
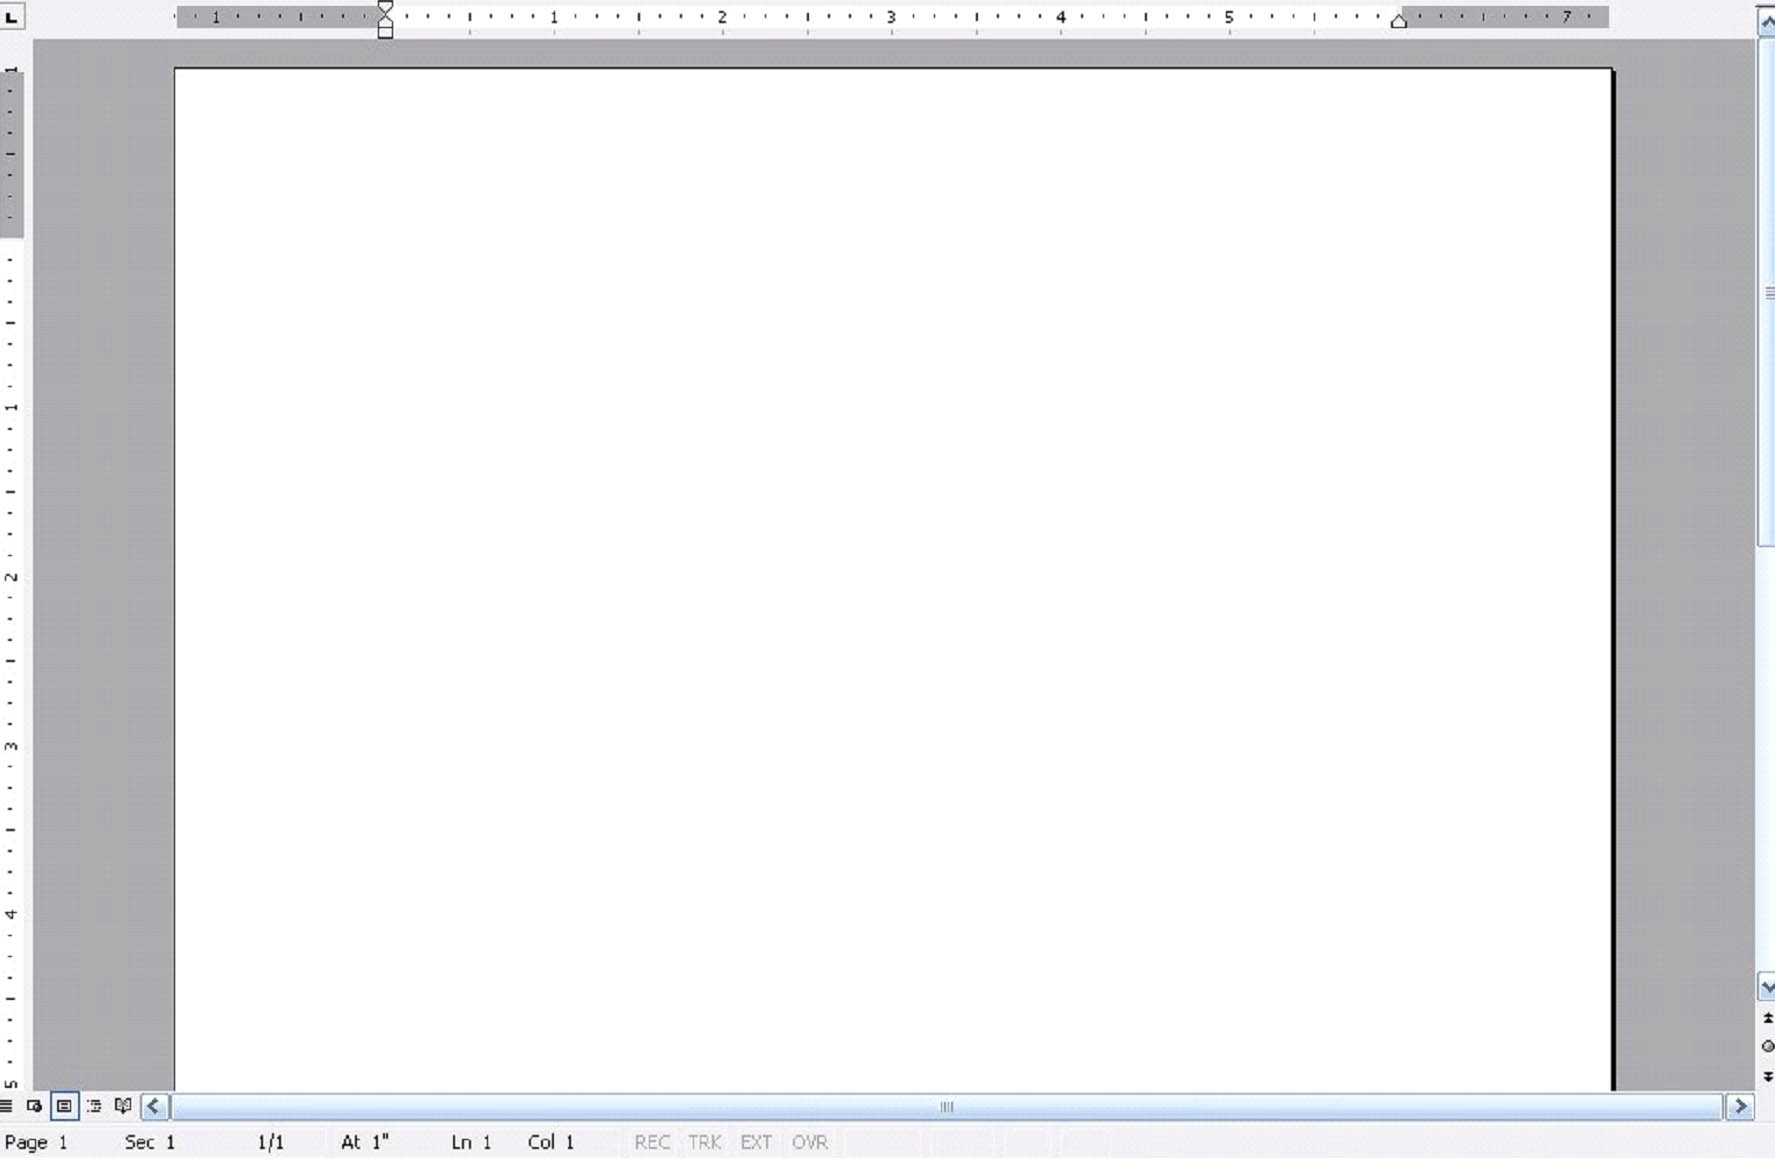
You will see rulers above and to the left side of the text area. These are your margins. At the bottom left of the text area, you'll see the page number, section number, line number, and column number.
|
Note: You may have already been familiar with these areas of MS Word. However, it is important to know each and every component of MS Word 2003, as well as the proper names for those components. You will hear the words �menu bar' and �toolbars' a lot, so it is important to know what they mean and how to find them.
|
The Cursor
Once you have a file open in MS Word 2003, you are set to begin creating or editing a document. When you open a file, the cursor (a vertical, blinking black line) will always appear in the upper left of the document area. It doesn't matter of it's an existing or a new file; this is where the cursor will appear. New text will appear to the left of the cursor as you type it in, as shown below.
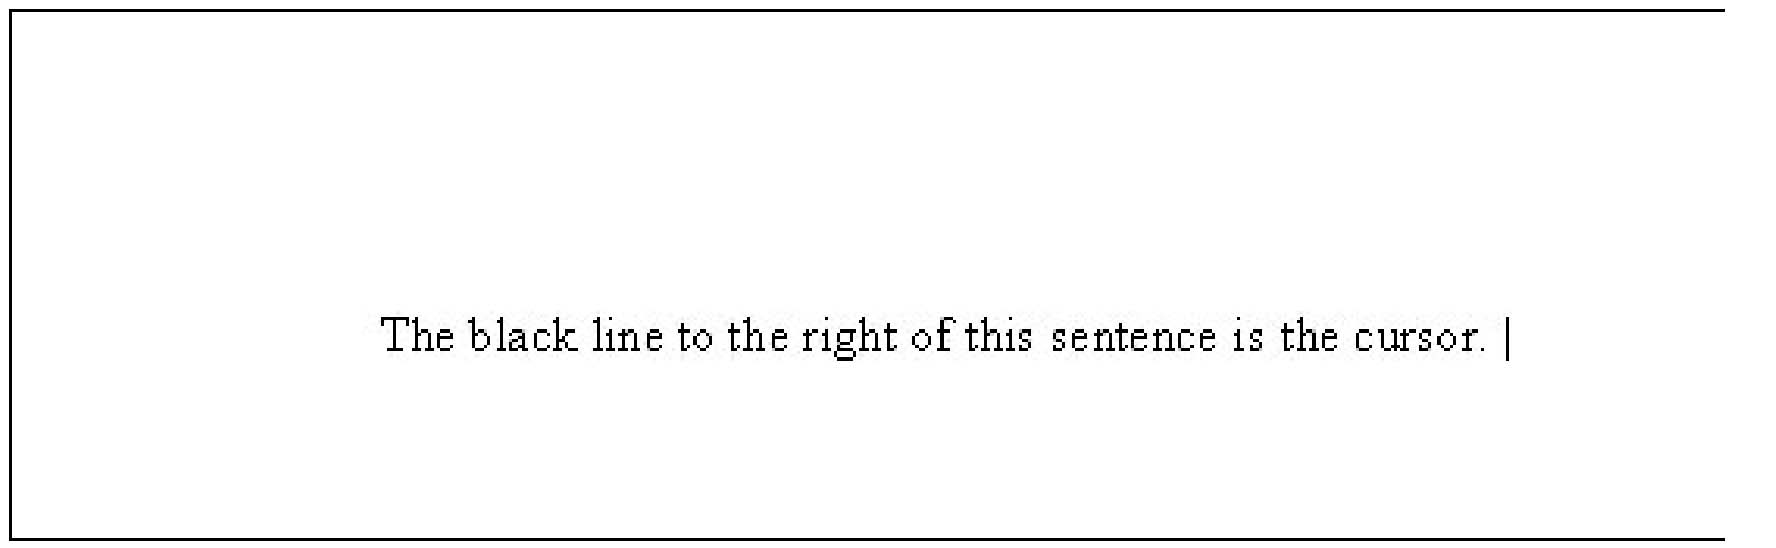
The cursor lets you know where you are at in the document. It can also serve as a placeholder if you walk away from the computer for a minute.
Typing in the Text Area
Typing in the text area in MS Word 2003 is easy. Just move the cursor to where you want text to appear and begin to type. Simply clicking on a location in the document will move the cursor, even if no text has been entered yet. Once you see the cursor appear, you can begin to type.
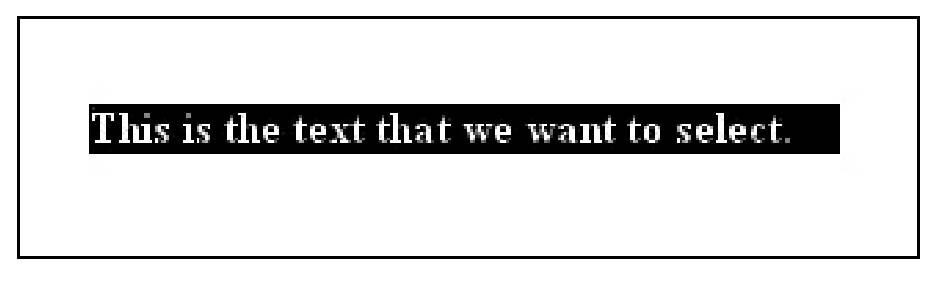
Selecting Text
You can select text within a MS Word 2003 document. Selecting text simply means that you highlight it to edit or move it. It's important to remember that the highlighting won't show up if you save or print the document; it's only for editing and formatting features.
To select text:
Move the cursor to the beginning of the text that you want to select like shown in the example below.

Click on the cursor and, holding the left mouse button down, drag it across the text that you wish to select.
Note: You can also select all text in a document by going to �Edit' on the menu bar and selecting �Select All.'
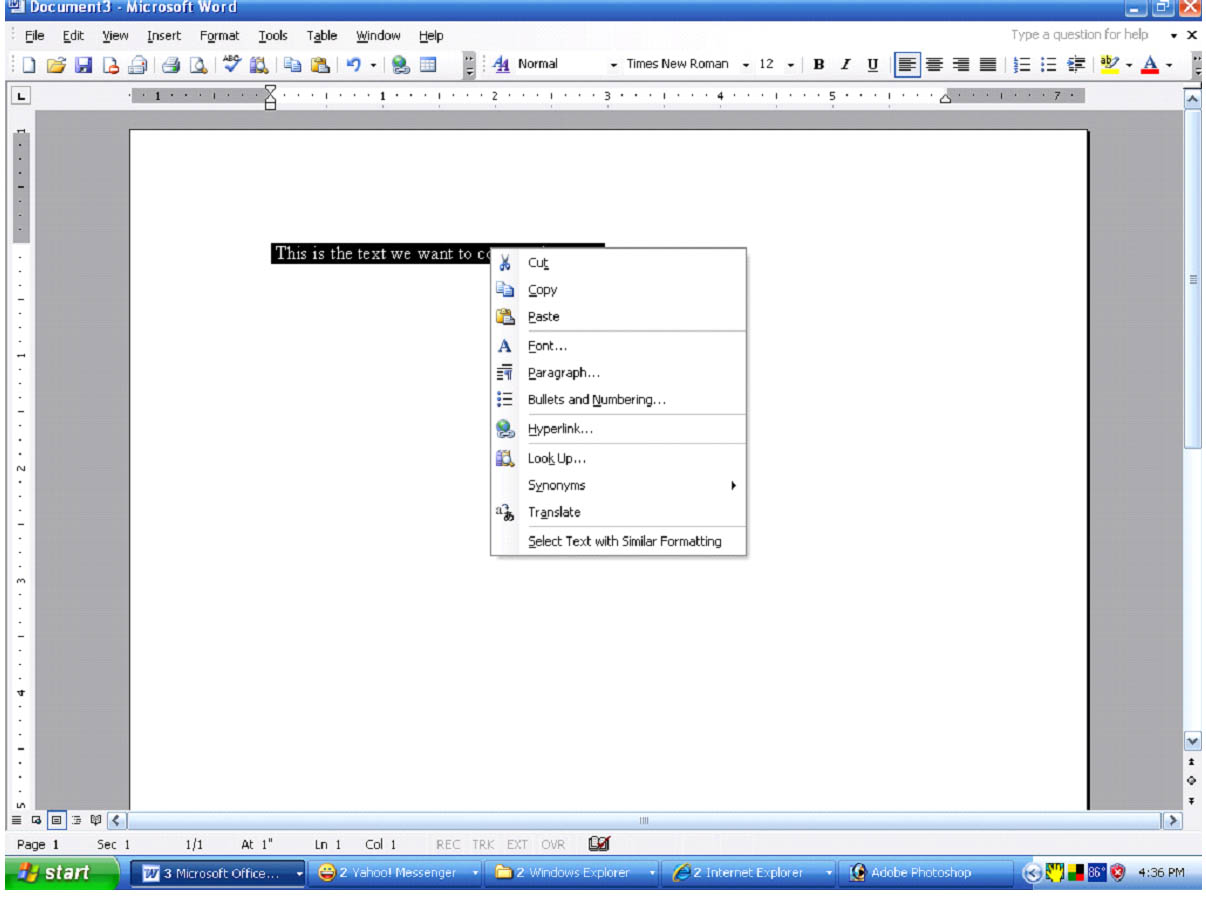
Copy and Paste Selected Text
There are many things that you can do with selected text. The most common of those things is �copy and paste.' Let's say, for example, that you want a section of text that appears in one document to also appear in another. Instead of re-typing that same section of text into another document, you can simply copy and paste from one document into the other. (You can also copy and paste within the same document.)
To copy and paste:
- Select the text that you want to copy.
- After you've selected the text, you can do one of two things. You can either right click your mouse and select �Copy' from the pop-up menu. This will copy the text onto the MS Word 2003 clipboard.
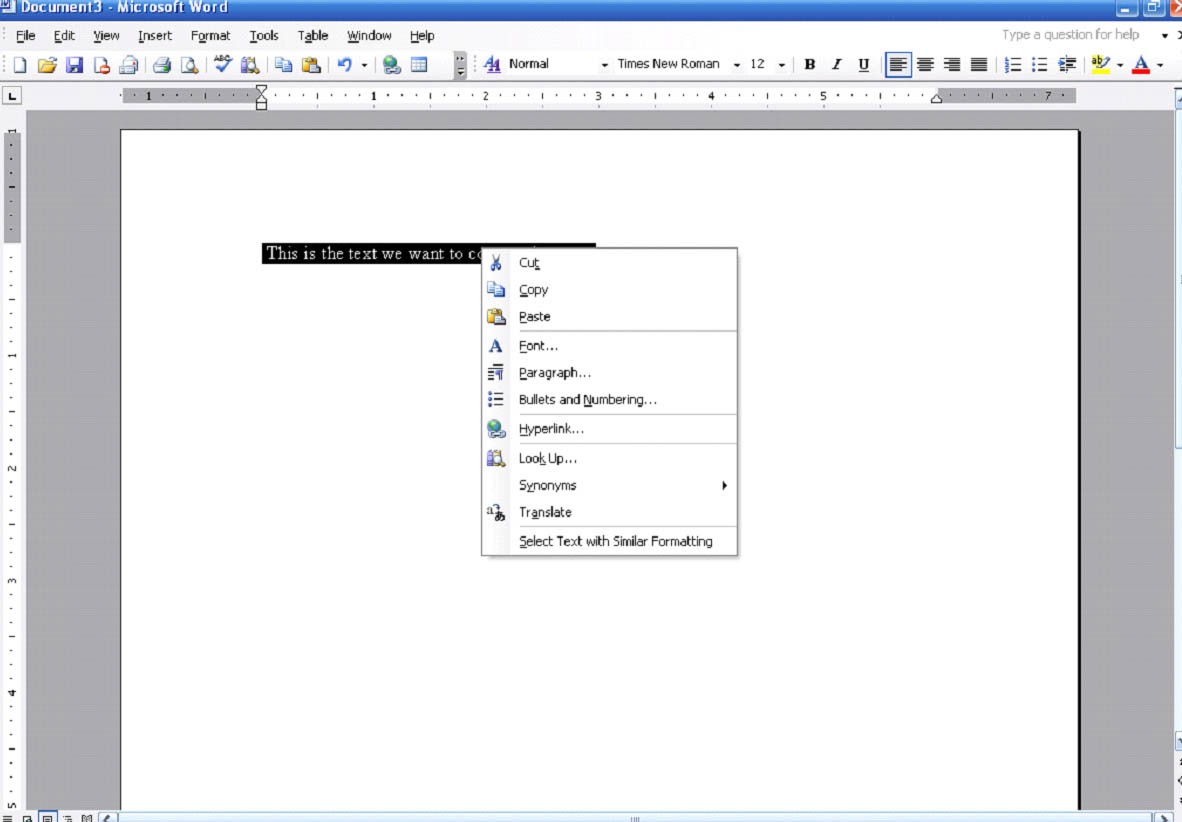
The clipboard is where all text that is copied or cut from a document is temporarily stored. However, it is not considered a file and is not saved to the hard drive. Rebooting your computer will erase the clipboard.
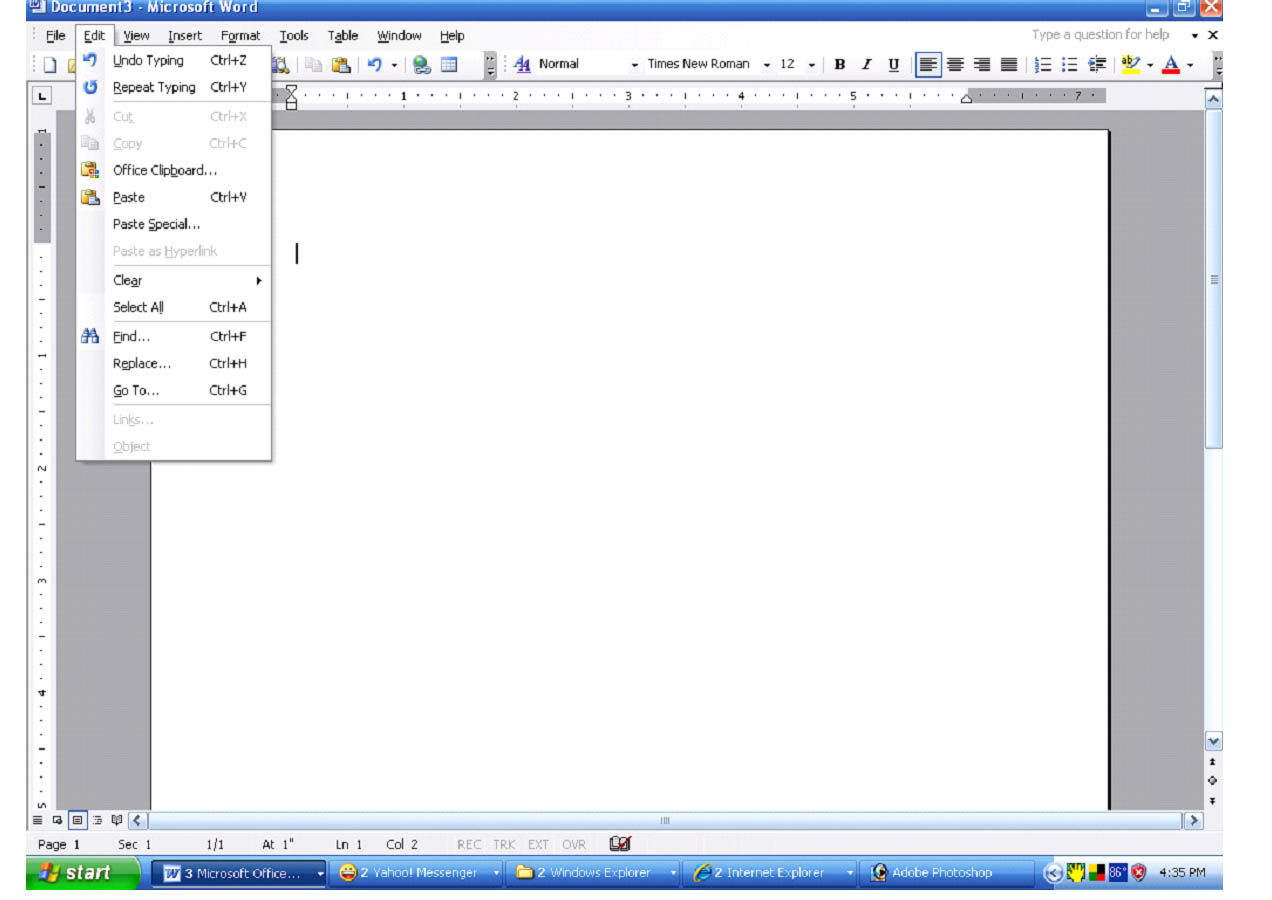
OR you can go to �Edit' on the menu bar and select �Copy.'
- Go to the place in the same document or another document where you want the text to appear. Move the cursor to that location.
- You can paste the information from the clipboard into the document using one of three methods:
1. Right click and select �paste.'
2. Go to �Edit' on the menu bar and select paste.
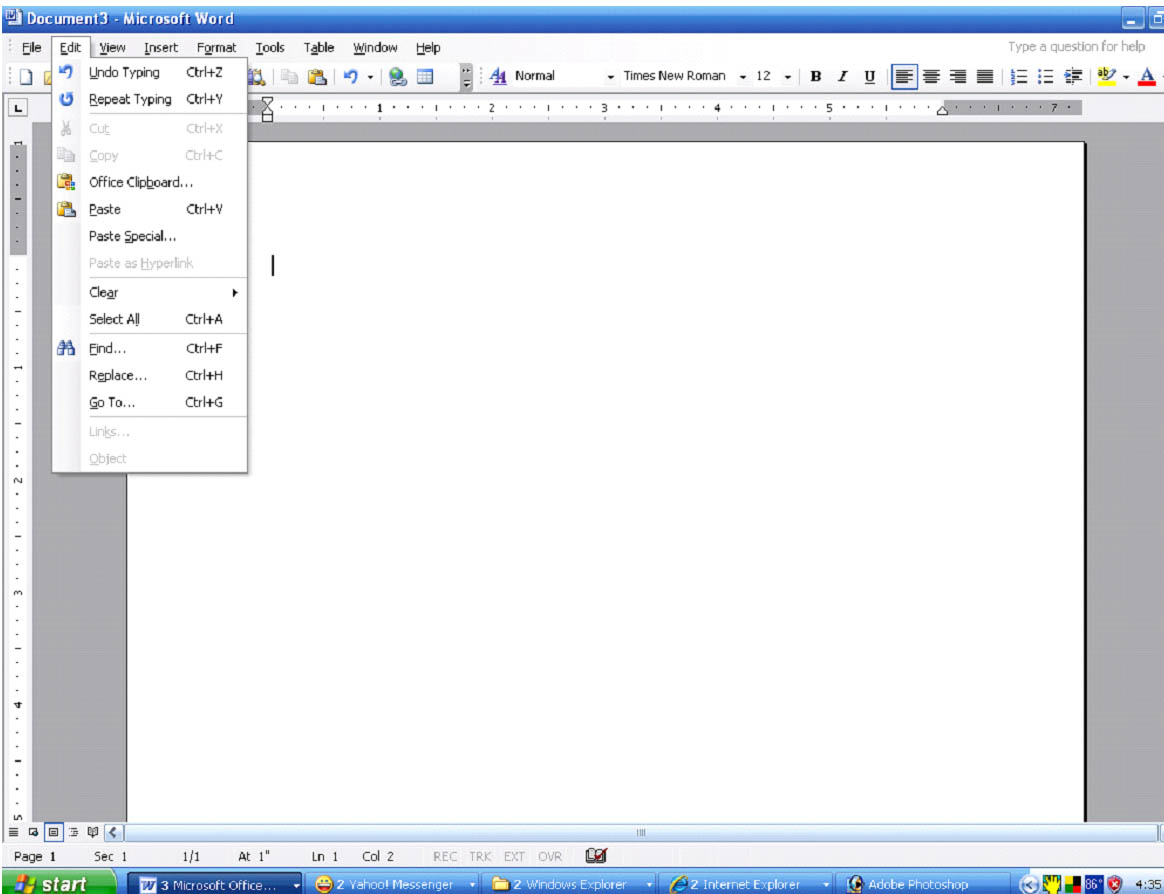
3. Click on the clipboard in the �Standard' toolbar. 
Cut and Paste Selected Text
When you cut text from a document, you remove it from that location permanently. It is not the same as deleting text because when you cut text, it is stored on the clipboard so that you can move it elsewhere.
Look at the following two sentences.
|
While she was there, she bought some eggs. Mary went to the store. |
These sentences are obviously out of order and need to be reversed. Rather than deleting the second sentence and retyping it so it appears in the correct place, we can simply cut and paste that sentence.
To cut and paste:
- Select the text that you want to cut from the document.

- As with the copy and paste feature, you can either right click or select �Edit' on the menu bar to cut text. However, instead of selecting �copy,' you would select �cut.'
- Move the cursor to where you want the text to appear when you paste it. It can be within the same document or a different document.
- Right click, select �Edit' then �Paste' from the menu bar, or click on the clipboard in the �Standard' toolbar to paste the text (just as with copy and paste.)
- The pasted text will appear to the left of the cursor.
Saving a Document
Make sure that you save all your documents before shutting down MS Word 2003. Although it will prompt you to save changes to a document, you want to make sure that you save them yourself for easy retrieval later.
To save a document that you've edited or a new document that you've created:
Select �File' on the menu bar.
Select either �Save' or �Save As.'
�Save' will save the file with its original name. Remember that all new documents in MS Word 2003 will be given the default file name �Document1,' �Document2,' etc while you're working on the unsaved document. When you select �Save,' it will save the file using the first sentence of the document as the new file name.
�Save As' will prompt you to name the file that you are saving. Type the name of the new file in the box, then select the format that you wish to save it in. To save it as a Word document, just select �Word Document' from the list. The file extension for Word documents is .doc.
You can also click  icon on the �Standard' toolbar to save files. Caution! This is for �Save' only and not �Save As.' It will not prompt you for a file name when you click this icon.
Printing a Document
Once you've finished editing and creating a document, you may want to print it. Printing any document using MS Word 2003 is quick and easy once you learn your options. You won't need to take advantage of all these options each time you print, but it helps to know them.
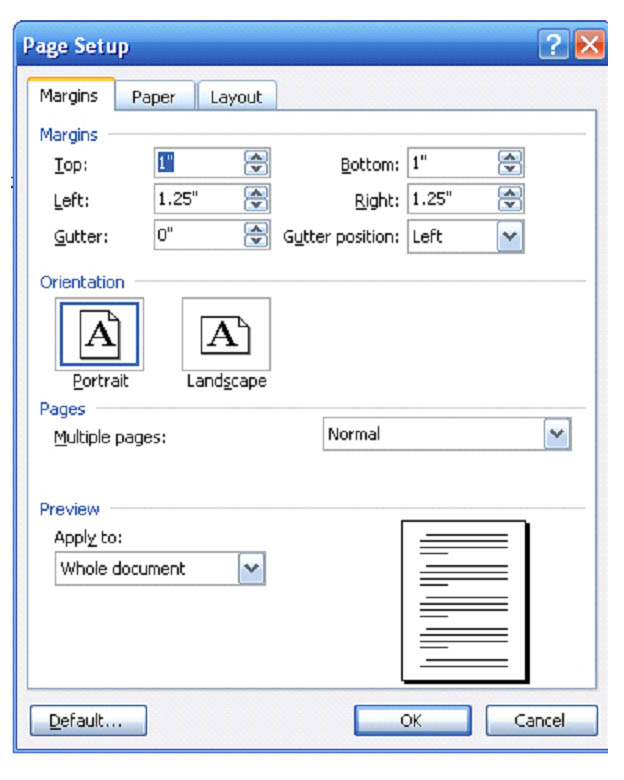
First, select if you want to print the document using Portrait or Landscape as your page setup. There is a difference between the two! Portrait will print your page as it appears right here on the screen, where it's longer than it is wide. Landscape will essentially flip the dimensions of your document. To simplify it, if you're using 8.5 x 11 paper, you would insert the paper sideways in your printer (11 x 8.5) to print using Landscape. This is perfect for brochures.
To select Portrait or Landscape, go to �File' on the menu bar and select �Page Setup.' You will see Portrait and Landscape in the �Margins' tab. Portrait is the default MS Word 2003 setting.
Once you've selected Portrait or Landscape, click �File' on the menu bar again. This time select �Print Preview.' Although you do not have to select this every time you want to print a document, it's helpful to know how to use it. When you select �Print Preview,' a new window will open up over your existing window, showing you how your document will look when it's printed. This is an excellent time to check formatting and to make sure everything looks exactly as you want it. To close out the print preview, simply click on the red �x' at the upper right hand corner of the screen. This will not close out your document, only the print preview.
To print your file, go to �File' on the menu bar and select �Print.' You will see a window open like the one below:
![]()
In this window, you can select:
- The printer that you want to print the document.
- The pages of the document that you want to print.
- The number of copies that you want to print.
- How many pages per sheet of paper that you want to print. (You can create printed thumbnails of your document and print more than one page on a sheet of paper.)
Other options that you can select from this window before printing your document.
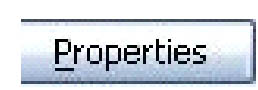 Clicking on properties will allow you to add preferences for your printer. For example, you can select the quality of print. A lower quality printing saves on ink.
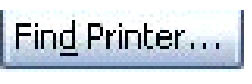 Allows you to find a printer that's connected to your computer or your network to use to print the document.
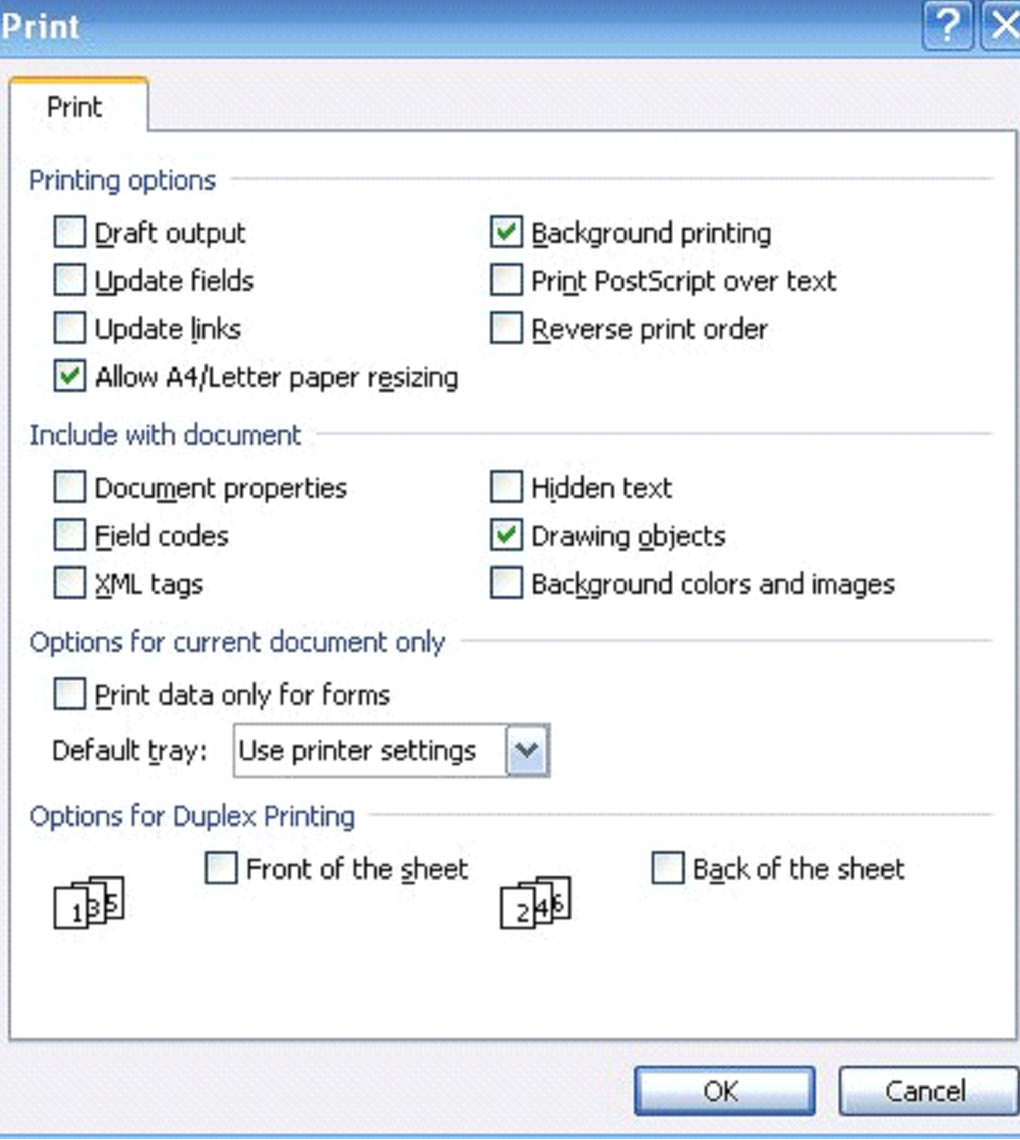
![]() Gives you extra options for printing, as seen below.
Gives you extra options for printing, as seen below.
Once you have everything set up and you're ready to print, select  to start printing. If you've changed your mind and do not want to print the document, simply select �Cancel.'