Every webmaster has a goal for their website. Goals could be traffic results, time spent on a page or a monetary amount such as revenue from a shopping cart. Google Analytics lets you create goals, so you can monitor your website's success. Goals are also a good way to monitor the number of conversions you get from ad, search engine or social media traffic. They tell you effectiveness of your marketing campaigns and social networking.
First, you must decide your goals for the site. Goals can be monetary or based on events. For instance, here are a few goals that help you identify the success of a website:
1. How many search engine users bought product?
2. How many people who clicked on my ad bought product?
3. How many users watched my video after finding my page?
4. How long do people stay on my website after they find it?
5. How many pages do users read after they find my website?
6. How many users recommend my site using social media?
Once you've decided what you want to track, you can then set up your goal tracking in Analytics.
Setting Up Goals
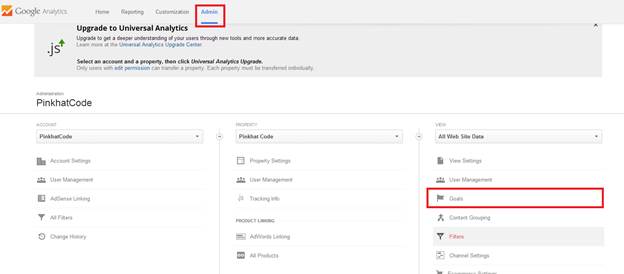
Goals setup is found in the "Admin" section under the view you want to use. The image below shows you where to find the goals settings.
Click "New Goal" in the goals area to get started.
Just like filters, Google gives you a number of templates you can use. There are four types of goals you can set up:
1. Destination: track a destination page where you want users to go such as a "thank you" page after a sale is made.
2. Duration: the amount of time a user stays on your site. These goals are good for media websites, because it tracks the length of time people sit on the page and watch media.
3. Pages/Screens per session: The number of pages the user views before leaving the site. These goals are good for content sites where you want viewers to read information pertaining to your services or your blog.
4. Event: track when users perform an action such as play a video, share your site on social media or click a link.
The above goal types are shown when you choose to build a custom goal, but you can also use several templates. Templates make it easier to set goals without the need to configure your goals. If you're new to goals, it's best to use the templates, so you don't accidentally configure the goals incorrectly.
Set Up a Goal
A conversion is when a user opens your website and purchases service or an item. Most websites have a conversion goal, so we'll set up a conversion goal to get you started with goal tracking. A conversion is basically the metric used to determine when a search engine user, social media user or any other random user becomes a customer. Conversion rates are tied to goals, because the more conversions you make, the more you can build and grow a successful website.
Google Analytics has a template that you can use to set goals for conversions. For instance, if you have an ecommerce site, you would set the goal page as the "thank you" page after the user completes an order. For sites that sell service, you might use the "thank you" page after the user signs up for service. You can set any page as your official goal page, but make sure it indicates that the user is a conversion. The page is usually cut off from being found through search engines, and the user must perform an action before finding the page. This ensures that the numbers you get for your goals are actual conversions and not random viewers.
Click the "Revenue" option from the template and click "Next Step."
In the next step, give your goal a name. Google defaults to "place an order" for your goal name, but you can give your goals any recognizable name that helps you find your goal report when you want to review them.
The next step also asks you for the goal type. Even though the setup is with a template, you still must attribute your goals with the four main types offered in Analytics. With an ecommerce store, you should use the "Destination" type. You then attribute your order's confirmation page with the destination goal, and you know you've made a sale and a conversion.
Click "Next Step" after you make your selection.
The next step sets the monetary amount associated with your sale and the page you want to use. First, enter your order confirmation or thank you page name. There is an option to check for case sensitivity, but you normally keep this unchecked.
Setting a monetary value is difficult if you have variable amounts of products with different prices. Setting a value for your conversion is optional, so you can leave it off. However, if you have a static service, static products and prices or an average amount you can associate with each sale, you set the price in the "Value" text box.
You might also have steps that lead to a conversion. You can set these steps in the "Funnel" section of the goals setup. Funneling is optional too, but it lets you get more granular when you want to evaluate your sales process. When you run an ecommerce store with several steps from the landing page, shopping cart and then the final sale, you might want to set up a funnel to identify which users when through the particular sales process before adding them to your goals. For instance, you might have an ad campaign that points to a specific landing page. You might want to set a goal that only counts customers that go from the specific landing page through the shopping cart system to the thank you page. You would set this in the Funnel option, which would filter any sales except the ones that follow your ad campaign.
After you finish with your settings, click "Create Goal" to get started.
Goals are similar to filters with reporting. Only after you create a goal can you access the reports. You want to create goals especially for conversions and ad tracking campaigns, because these reports can also tell you where your site is failing. With the funnel feature, you can also use your exit page reports to find a correlation between your shopping cart system, your ad campaigns and where you're losing your possible conversions.
Segments
Segments are similar to filters, but they work to let you customize your reports by adding allowed data instead of filtering out what you don't want. Filters block data and segments add data to reports. Segments are a way to run reports on specific areas of your traffic. Consider segments as a combination of one or several filters. You use these segments to compare traffic. They are especially useful when you have several different traffic sources.
For instance, if you run an ecommerce store that's popular in your local region, you might want a segment that is specific to your location that tells you how much local traffic you're getting versus global traffic. You might want to view reports specific to mobile data, so you can decide if you want to set up a responsive website.
Segments can handle the following situation:
1. What users from a specific location engage with my site?
2. What sessions convert to customers?
3. How many sessions from what regions purchased product within certain dates? (Good for promotions and seasonal reporting)
Google has a segment builder to get you started, but you need to brainstorm about what you want to do with your segments.
Create a Segment
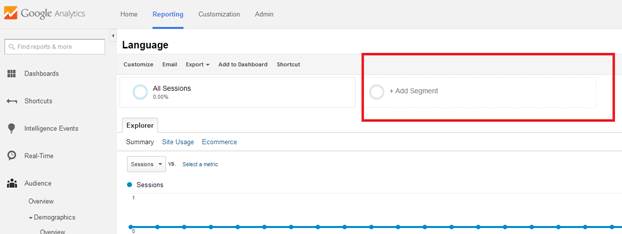
You can create a segment from any of your reports. There is an "Add Segment" button at the top of your reports. You can see the button in the image below:
After you click the button, you choose what segments from your data you want to add. What's great about segments is that anyone can add segment data and upload it to Google's library. You can then download these pre-made segments and add them to your own reports.
Select which attribute you want to filter and then click "Create New Segment." A window opens where you can configure your segment. You'll notice where you can filter your segments. These filters are similar to the ones you used before, except they run on the selected segment and not on a view.
You can configure the following filters on your segments:
1. Demographics
2. Technology
3. Behavior
4. Date of your session
5. Traffic sources
For instance, suppose you just want to view segments from users who use Chrome, because you heard that your site has issues with Chrome. Click the "Technology" left navigation panel tab and then type "Chrome" in the "Browser" text box. You can do the same for several other technologies including operating system, screen resolution, browser version and operating system version.
If you want to add any more filters, click the left tabs, configure the settings and then click the "Save" button when you're finished.
Analyzing Segments
You might wonder why you would use segments and not just filters. Filters eliminate the data that you don't want to see, but segments let you compare data and funnel that data into a certain part of your reports. After you create your segment, you'll see a new line added to your report. The line used to identify your segment is a different color than the default blue used to identify sessions (the default report). The new line represents your new data.
Since you can use segments to identify differences in data, suppose you wanted to view a list of users with each type of browser for a specific date range. You can set a segment for each browser with any other filters and add these segments to your report. The result is that you can watch traffic and sessions for these segments side-by-side for any report. You can then identify (using goals) which users are more likely to buy product from your store.
Identifying which users are more likely to buy product is useful when you have demographic information and you sell local product. You can also identify seasonal changes if you sell product globally and notice that different users from different parts of the world buy products at different season. The result is that you target your ad campaigns based on these seasonal changes, and you can focus your ads on particular demographics. All of this information will help manage your ROI and budget.
Social Media Segments
Social media segments are common for sites where webmasters have heavy social media marketing. Social media segments are a great way to familiarize yourself with segments, because you can display graphs that correspond with social media sources.
Go back to your Audience section in Analytics and then create a new segment. Click the "Traffic Sources" left panel tab. In the "Source" text box, type the social media outlet you use and click "Save." Repeat this process for each social media outlet you use. In some cases, you want to use social media outlets you don't use. For instance, suppose your website is shared on Facebook by one of your customers. You would then have segments set up to identify when someone shares the link and someone else clicks the link on that person's Facebook wall.
Social media segments are useful if your site goes viral. While the probability of the site going viral is low, you still get a heads-up when the site gets shared in social circles. The advantage is that you can usually see these comments and act on them. Social media can make or break a business, so most experts urge businesses to acknowledge social media mentions.
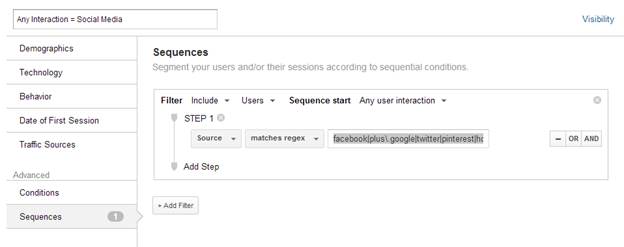
You can also group your social media segments. Using "Matches Regex" as an option, you can type "facebook|plus\.google|twitter|pinterest|hootsuite|reddit" into the text box. An example of grouping your social media outlets into one segment is shown below:
One great thing about Google Analytics is that people can share settings and segments and upload them for other viewers. The result is that you don't have to customize your segments, especially if you're new to Analytics configurations. You download these pre-made templates and apply them to your reports. No configurations are needed.
Incidentally, you can do the same segmenting with other types of social media. For instance, some webmasters use segments to find who is bookmarking their site. You can also use segments for your images and image sharing sites such as Flickr and Pinterest.
If you own a YouTube channel, use segments to understand when users are watching your videos and the demographics of those users. This analysis helps you further investigate which videos are popular, so you can expand on them for more video traffic.