
One aspect of Outlook that makes it a better choice than many other applications on the market is that it lets you create messages with rich content. You can use graphs and pictures you've created on your own or files found on the Internet. You can use images to create templates or signatures attached to your email messages. Outlook's interface makes it easy to add an image to your email messages that your recipients see when they open them.
Create a New Email
Before you can add a graphic or picture to an email message, you first need to create a new one. You can send email to yourself by placing your own email address in the recipient list. This is a good way to test your templates and signatures that contain images. You will see your email as your recipients see them.
You can add images in replies, but only if the message is sent as HTML. Outlook has two types of email message formats: plain text and HTML. With plain text emails, you can only send unformatted text but no images can be attached to the message. HTML messages work similarly to HTML pages. HTML pages can have embedded images and styles, and it's these messages that most people use with Outlook. Note that if you recipient only accepts plain text messages, your images will go unseen.
To create a new email, click the "New Email" button in the Outlook "Home" tab. A window opens where you create a new email message. To ensure that you have HTML formatting turned on, click the "Format Text" tab. In this tab, you'll find the "Format" section of the menu.
(Format section of the "Format Text" tab)
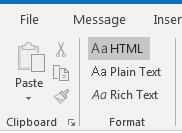
Notice that this section has three options: HTML, Plain Text, and Rich Text. Rich text formatting has its own standard, but it's for documents passed around from computer to computer. When users view an email in a browser, they see content in HTML. Since HTML is more widely used, it's better to use HTML as your formatting options, but rich text can also use images and stylized fonts.
In the image above, "HTML" is highlighted, so you know that the new email will be sent with HTML formatting. With this option selected, you can write any email text that you want to include in your email. You can always add images later.
Adding Images to an Email Message
With your message created, you can now add a graph or picture to the message. You can add an image as a signature, or you can embed an image within the body of your content. Before you add an image, you must select the location of where the image will be displayed. You do this by clicking the location in the body of your message. By clicking this location, you can see that the cursor displays within your text. When you insert an image, this is where your image will be placed.
The features to add images in Outlook are found in the "Insert" tab. Within this tab, the "Illustrations" section contains several buttons that insert images into an email.

(Features to insert images in an email)
In the image above, notice that you have several image types that you can insert. The first option is to insert a picture, but you can also insert online pictures, shapes, icons and 3D models. The "Online Pictures" option lets you search online for pictures that you can use online. The other options let you insert a shape defined by Outlook or files located on your computer that can be used within your messages.
Click the "Online Pictures" button. A window opens where you can search for pictures online. This feature uses Bing to display images from keywords entered into the search text box.
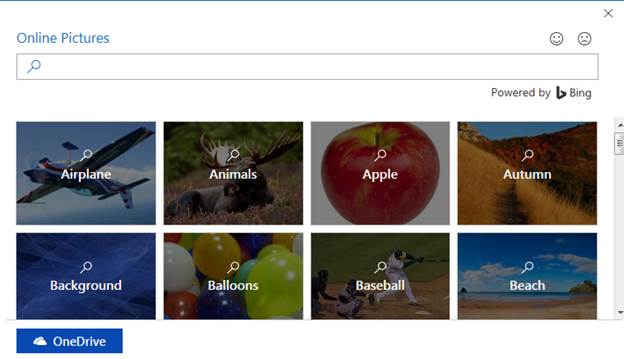
(Outlook online picture search)
Notice that images are categorized where you can quickly find one matching a popular category, but you can enter a search phrase to find a specific image. After searching for an image, if you find one that matches what you're looking for, then double-click it to add the image to your email message. Before you use an image in an email, make sure that you have the rights to use it. If your message is a business email or one that is used for marketing purposes, you need rights to the image before you can legally use it. Although some images in Bing can be freely used, some authors want payment for use and other authors require credit that links back to their site.
Although using images online is good for personal, non-commercial emails require files of your own located on your local computer. You can use any image file stored on your local drives. You can also use images stored on a network drive, if you have a network with shared directories.
Click the "Pictures" button to open a new window. This window is the traditional Microsoft dialog window where you can select a file to open. Search a file on your hard drive, and it's this file that will be added to your email message. You can choose several images to add to your email including JPEG, PNG or GIF.
After you add an image, you can resize it to fit within your email content.
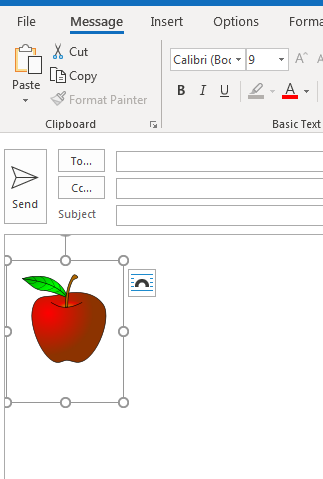
(Resizing an embedded image)
In the image above, several circles indicate where you can resize an image. The circles located in the center of each line allow you to size an image either horizontally (wider) or vertically (taller). The issue with this type of resizing is that it skews the quality of the image.
Instead of using the vertical or horizontal sizing, the better way to work with resizing is using the corner circles. These circles will resize the image evenly both horizontally and vertically. To resize an image, click the circle that you want to use and drag the mouse to make the image smaller or larger depending on your preferences.
An additional image option is adding shapes. This is a convenient way to add simple circles, squares, rectangles or triangles to your email. This is a less common option, but it's still an option should you decide to use it within Outlook.
Click the "Shapes" button and a dropdown displays with a list of shapes to choose from.
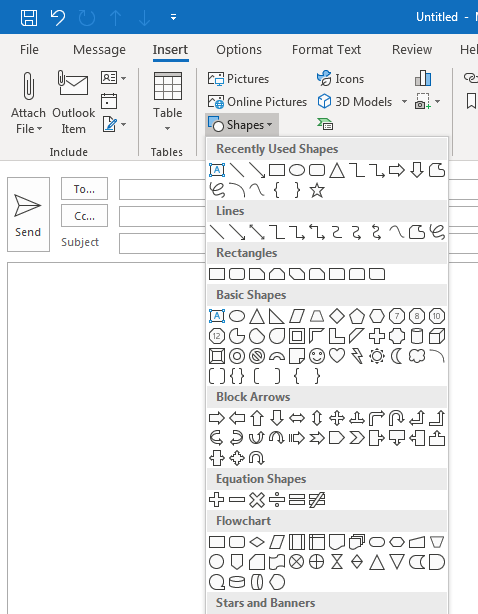
(Shapes available in Outlook to insert into email)
Outlook has several shapes that can be inserted into an email. Outlook categorizes these shapes into sections. Choose any shape and it's inserted into your email. For this example, a circle is inserted into an email.
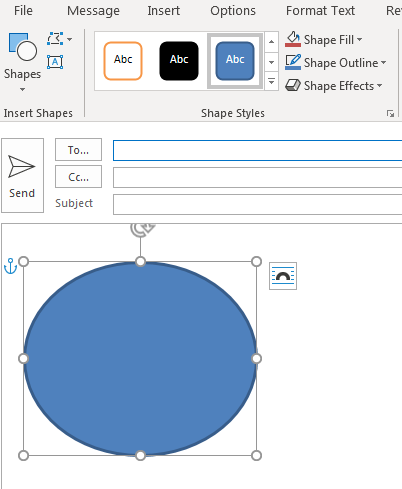
(Inserted circle into an email)
You'll notice that these shapes also have the circles to reshape them either vertically, horizontally or evenly at the corners. When you click a shape, a menu displays in the Outlook interface where you can customize it. You can perform several changes to the image layout including the color of its fill, the outline and special effects. Click any of these effects to change the basic look of your image.
Microsoft has several options when using images in Outlook, and you need to experiment with each one to find the right layout for your email. Should you ever change your mind and decide to remove the image, click it and press the "Delete" key. The image will be removed from your message.