
Slack does not have much of a learning curve for a standard user, but it can be much more difficult to work with as an administrator. Administrators must use Slack as a standard user, but they must also set up the server so that it's maintainable and usable for all users on the platform. In addition to administrating the Slack server, administrators can also get analytics to identify any issues and get statistics on the way users interact with the server.
Managing Members
Whether it's inviting or removing users, administrators are responsible for the users that have access to the server. Administrators can also give permissions to standard users to help with managing the server and its channels. All administration menu options can be found in the dropdown when you click the server name. Click the "Administration" menu option to see a submenu. The "Apps" submenu option opens the same window that you used to install third-party apps. In this window, you can remove the apps that you no longer need or install additional ones.
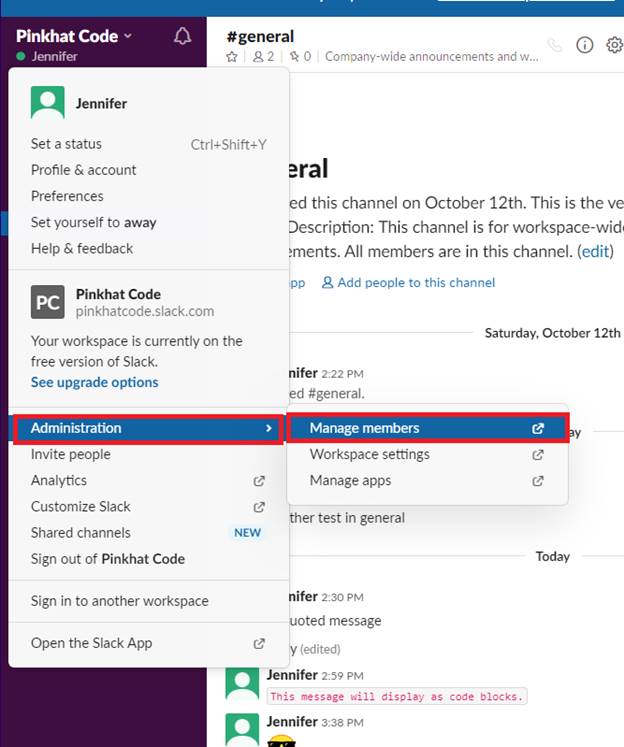
The "Administration" menu is only available to administrators, so no standard users can access these windows without the administrator giving them permissions. In the submenu that displays, you see three options. These three submenu options are where you manage the basic setup of your Slack server.
Click the "Manage Users" option to open a new tab that will help you manage user permissions and invitations. You can change users to standard users, administrators and even promote them to owner of the server. Revoking access to users in this window will remove the account from the Slack server workspace. When the window opens, you first see a list of users with access to your server.
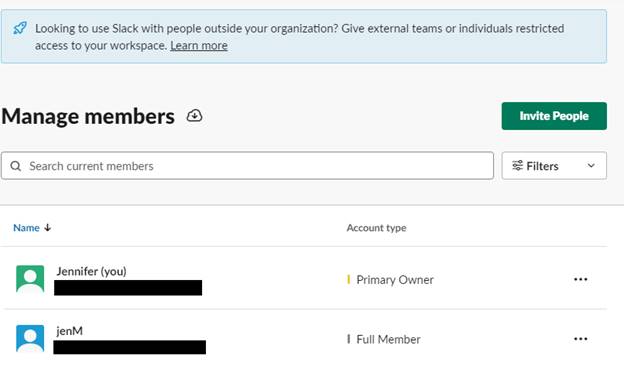
If a user has not accepted an invitation yet, it will be indicated in the "Account type" column. Should a user not accept an invite, you can resend the invitation by clicking the button labeled "." in the far-right column. Click "Resend Invitation" to send another one to the user's email account. You can also revoke the invitation so that the link will not work should the user later accept it.
The first user in the list is labeled as the "Primary Owner," which is the main administrator. You cannot remove or uninvite the primary owner, but the primary owner can pass ownership to another user. To see every option available in user settings, click the "." button next to any user in the list.
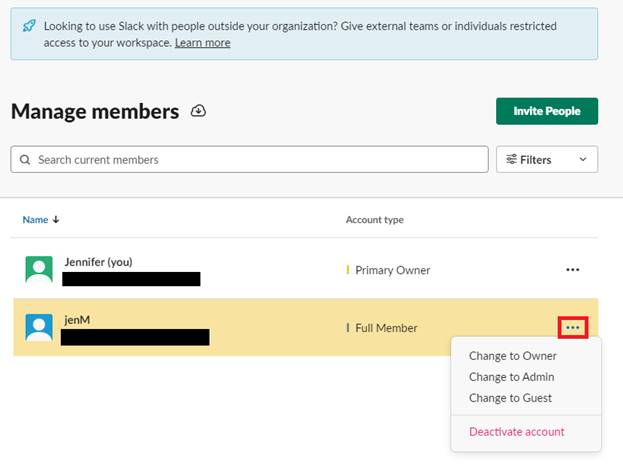
The three options for every user are to change the user account to an owner, an admin, or a guest. The fourth option is to deactivate the user account, which will remove it entirely from the Slack server. If you remove a user, you must send another invitation if you want to re-add an account.
Making a user the owner means that you are no longer the administrator and don't have control of the server. You cannot re-take ownership, so make sure you give the right account ownership before passing this permission to another user account.
Admin users can help you manage the server. They can set up channels, delete channels, add and remove users, and make changes to loading messages. Administrators have full control of the server except for any owner-only permissions such as changing ownership and promoting other users to admins.
Standard users are considered guests in Slack. By changing a user's permissions to "Guest," they can communicate with any other user on the server, but the account must be invited to private channels, and these accounts are unable to make any changes to server or channel configurations. Most users on a Slack server are guest users with a few administrators needed to manager user invitations and channel settings.
If you click the same "." button next to your own account, the "Edit your info" menu item opens a window where you can set up personal information. This information will be seen by other users who can browse your profile, so ensure that you want this information to be public to other users before entering it.
After you acquire several hundred users, scrolling through the list to clean up accounts or view who has access can be tedious. The main "Manage Members" window has a search feature to find a specific user. Enter a user account name into the text box at the top of the window and press "Enter." If Slack finds any user with the exact name or a similar name, the results will display in the user account list.
Managing Workspace Settings
Slack has numerous settings that you can configure from your administrator account. The second option in the administration submenu is "Workspace Settings." This menu option opens a window that lets you configure several settings including permissions, interface options and authentication.
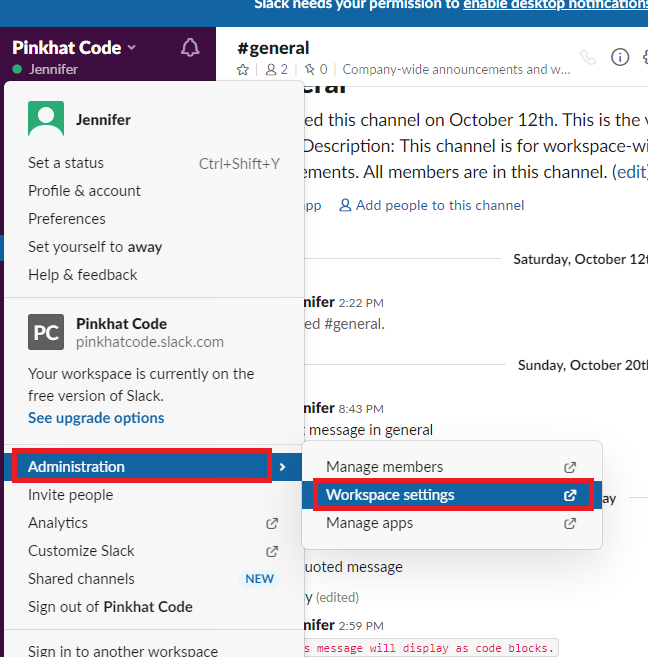
Workspace settings can also be accessible to basic users to make changes to personal preferences, but many of these settings are only available to administrators. If a setting makes a change to the entire server environment, it's only available to administrators and the owner of the server.
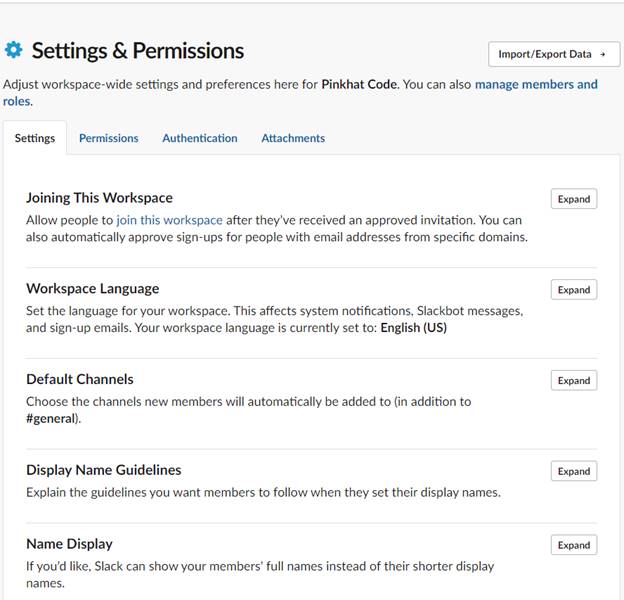
To see each set of configurations, click the "Expand" button to see what you can change. Settings are categorized in sections, and there are several of them in the "Settings" tab. It's best to change settings during off-peak hours to avoid interruption of productivity. With a free account, you can also create a secondary server to test changes before you implement them on your main server. This will ensure that no disastrous changes happen to your server that stops communication and has an impact on the server as a whole.
The "Permissions" tab lets the administrator configure specific permissions across users and channels. The "Manage Members" screen sets user groups, but the "Permissions" tab has more granular options. Some options in this tab are only available for a paid subscription. These options are labeled as "See paid plans."
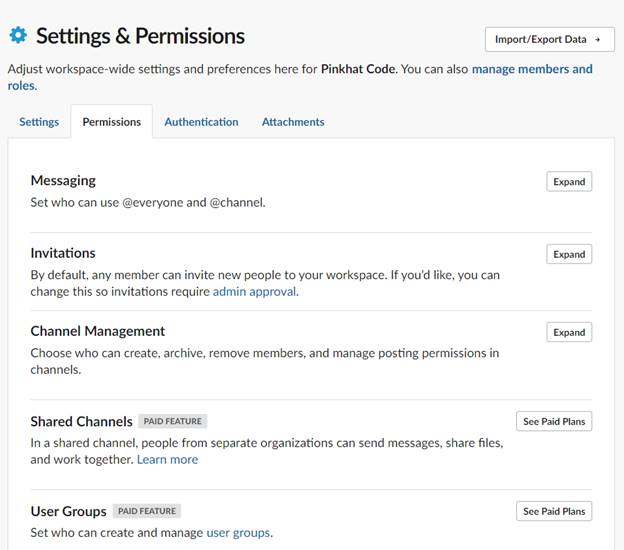
Most permissions in this window are behind paid plans, but the main configuration in this window is setting which users can use the "@everyone" and "@channel" user account notification. The "@everyone" account will send a notification to all users on the server. The "@channel" user account will send notifications to all users present in the channel.
Click the "Authentication" tab to see options for two-factor authentication (2FA) and global password resets. Two-factor authentication adds a step between authentication and access to the server. Users that enter their password must then enter a personal identification number (PIN) sent to their mobile device. The process stops phishing attacks should a user get tricked into sending their Slack password to an attacker.
Should you feel that several users were victims of a phishing attack, you can force a password reset for all users on the server. While initiating a password reset, you can also clear all sessions associated with your Slack server accounts. Sessions are variables associated with an authenticated user account, so clearing them will force all users to log out and re-authenticate.
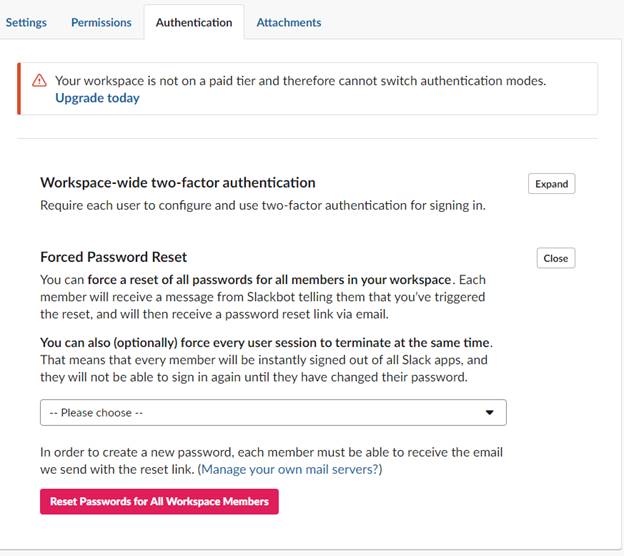
Click the "Expand" button next to the "Forced Password Reset" section. When you turn on 2FA, users will not need to use a PIN until the next time they authenticate. To force users to re-authenticate, you can then terminate all user sessions. The dropdown has a list of reasons why you would need to terminate sessions, so choose one of the options in the dropdown and then click "Reset Passwords for All Workspace Members." You too will be logged out of the server.
The last tab is the "Attachments" tab. This tab does not have many options, but you can use these settings to blacklist links to specific files and locations. For instance, if you find that a specific site often hosts malicious attachments, then you can block users from posting links to the domain. This feature is a security benefit for your Slack users.
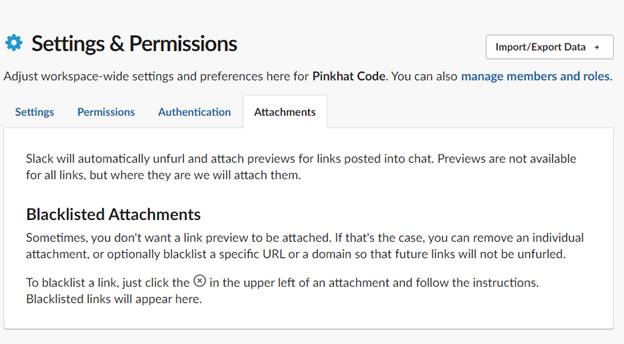
The "Attachments" tab displays any attachments that you've blacklisted from the server. The administrator can look at files posted to the server's channels and click the "x" button that displays next to the file link. Slack will ask the administrator if the attachment should be blacklisted. If you choose to blacklist the file, it will then be added to filters and display in this window.
For every tab in the "Workspace Settings" section, there is a button in the top-right corner labeled as "Import / Export Data." This button will let you send all messages to a JSON-formatted file. This file can be used as a backup of all your messages that you can use should you need to import messages to another Slack server. It's also a way to keep an archive of older messages.
Click the "Import / Export Data" button to view the options for exporting data. This window also has an "Import" tab where you can choose to import messages from a backup.
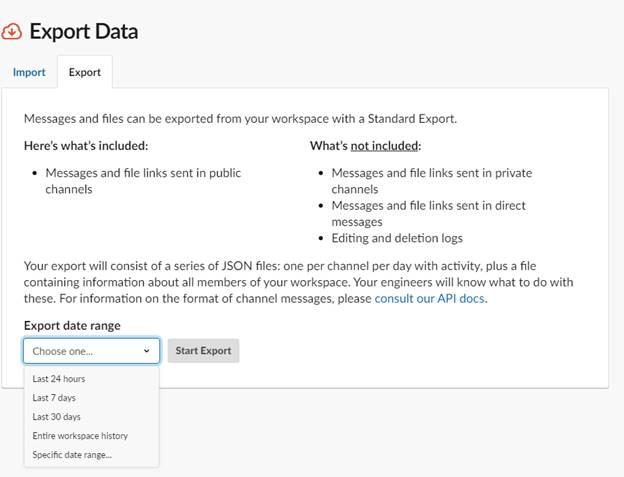
When exporting messages, you can choose to create a backup of all messages on the Slack server or just ones within a specific date range. Notice in the list of messages that won't be included are messages in private channels, direct messages and deletion logs.
If you click the "Import" tab, you see a list of formats that Slack is compatible with. This means that you can import messages from other application platforms directly to your Slack server. You can use this feature to consolidate servers to Slack across several different platforms.
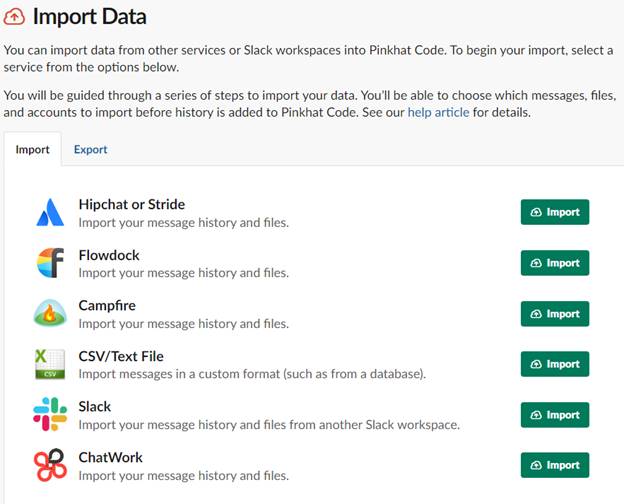
Importing from other platforms will not affect messages on the other application, but the messages and objects will now be stored on your Slack server. If you have any of these file formats stored, click the "Import" button, select the file on your local drive, and Slack does the rest.
Viewing Analytics Data
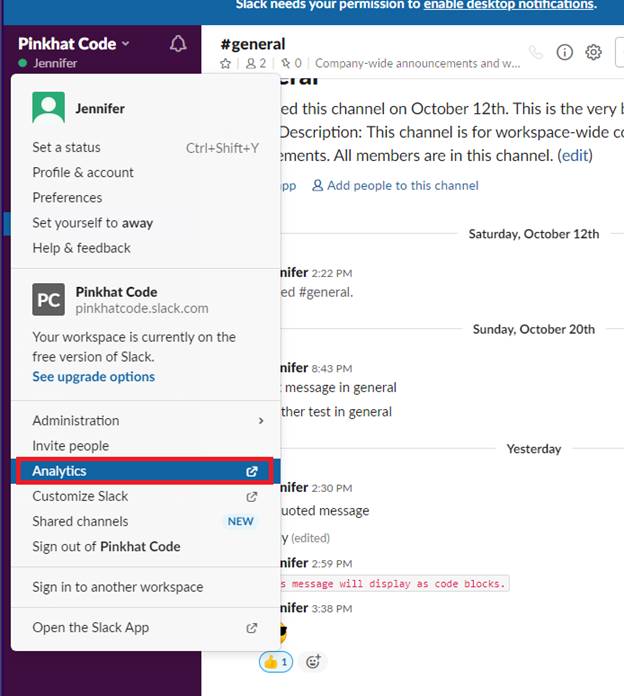
As an administrator, you might want to know how users are using the server and gauge its popularity. Slack includes an analytics section for administrators to view several data points. This area of Slack will help identify traffic patterns, channel popularity and active users. To find the analytics window, click the server name in the main Slack interface.
After you click this menu option, a new window opens where you can see a basic overview of your analytics. Basic analytics include the time users spend on the Slack server, the number of messages sent based on the selected date range, the apps installed, and the amount of file storage used. This window helps you identify if you need more file storage space so that you can upgrade your subscription if needed.
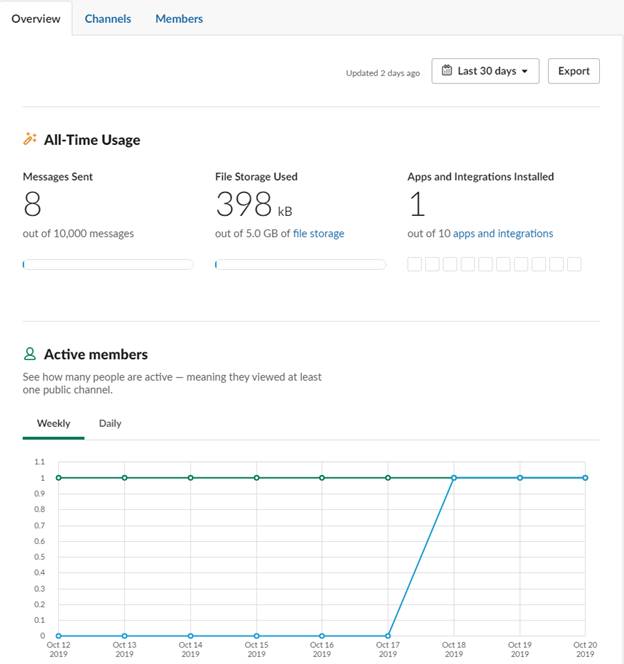
The active member section will let you know when users activated their accounts. Use this section to identify the number of users that join so that you can estimate user participation and the amount of storage you might need to support messages and file uploads.
At the top of every tab in the analytics window is a dropdown where you can choose the date range for data. Use this dropdown to change the date range to get a better idea of your server's popularity every day.
The "Channels" tab displays information analytics about each channel you've created on your server. Using this view, you can identify any unused channels so that you can remove them. Any active channels can be more frequently checked and moderated by your administration team.
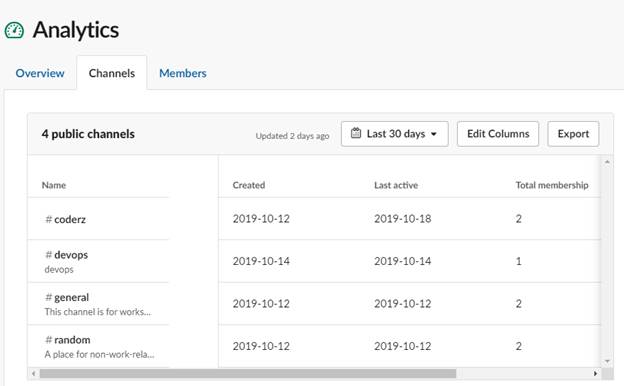
For any channel that has few memberships, you can save on costs and server storage by deleting it from the server. This view also tells you when any new channels were created so that you can review them.
The "Members" tab provides a list of users added to Slack. You cannot edit, add or remove user accounts in this tab, but you can return to the Workspace Settings view to make changes. Analytics is strictly for reviewing statistics, and this view is where you can get a number of members with access to your server.
As an administrator, using analytics and settings views will be common as you manage a Slack server. Large servers need constant supervision and administration, so ensure that you have plenty of help when you create a server that has hundreds of users.