If you click on the View tab, you will see the Page Setup Group, as shown below.

Here you can set page color, add ruler lines to your pages, hide the page title, and choose the paper size.
We're going to go over each of these things one by one in this article and show you how to use each tool to create and edit page features in your notebook.
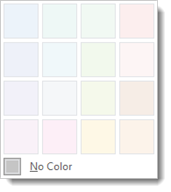
Add Page Color
To add page color, click the Page Color button dropdown arrow and move your mouse cursor to the color that you want. It is then applied to your page.
Add Ruler Lines
To add rule lines, click the downward arrow beside the Rule Lines button and select the type of lines you want to add to your page.

Hide Page Titles
Click the Hide Page Title button if you don't want page titles to appear on your pages.

Change Paper Size
Click Paper Size to select the size of the paper. The Paper Size Pane will open up on the right side of the window.
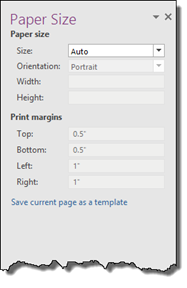
In this pane, you will specify everything that has to do with measurements of your page. This includes paper size and margins.
To make it easy for you, you can click the downward arrow in the Size field and select one of the several standard paper sizes OneNote 2016 offers. For example, you can select Letter as your paper size.
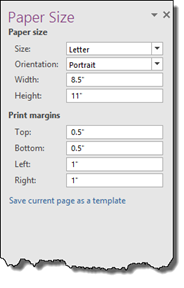
When you do that, as you can see in the snapshot above, all the information is inputted into the other fields for you. However, that doesn't mean you can't enter the information for yourself.
You can specify portrait or landscape, and you can also enter the height and width of the paper yourself - without using the sizes OneNote lists in the dropdown menu.
Also, you can specify margins.
After you enter all this information, you can also save the page with the new settings as a template if you want. Just click Save Current Page as a Template.
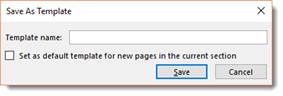
Enter a name for your template and click Save.
Undo and Redo
Undo and Redo are located in the Quick Access Toolbar. This is Undo:  . This is Redo:
  . If you don't see Redo on the toolbar, click the downward arrow and put a checkmark by it so it appears.
Undo undoes your last action. For example, if you change the color of your page and decide you don't like it, you can click Undo, and it will restore your page to the previous color.
Redo will restore an action that you undo.
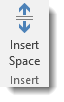
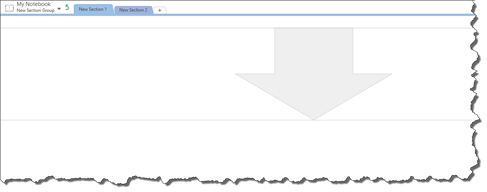
If you want extra space to add even more notes, then you can insert space to make that happen.
Go to the Insert group under the Insert tab.
Now, click the place on your page where you want to add more space. Hold your left mouse button down and drag until you have as much space as you want or need, as shown below.
If you've used Microsoft Word before, then you already know about shapes and how easy it is to draw them. OneNote 2016 also allows you to draw all sorts of shapes and easily place them onto your notebook pages. Let's learn how.
When we say "draw shapes," it sounds more complicated than it is. A lot of people have a hard time drawing a straight line, so before you think that you're going to actually have to draw freehand, let us tell you that's not true. OneNote 2016 actually does the drawing for you. Let's show you what we mean.
Go to the Draw tab, then to the Shapes group.
Select the shape that you want to draw.

We're going to choose the circle.
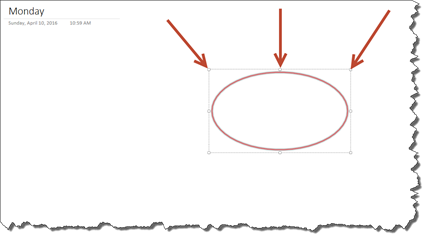
Simply click on the place on your page where you want to put the shape. Keep the left mouse button held down and drag the shape onto your page, as shown below.
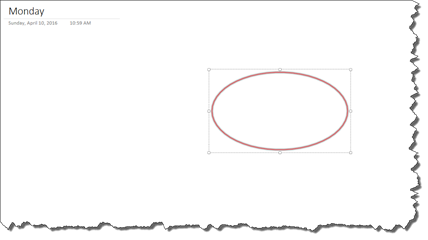
When a shape is selected, it has a dotted line, square border around. When you first draw a shape, it's automatically selected. Your shape has to be selected in order for you to move or edit it.
That said, to select a shape, move your mouse pointer over a line or border of the shape.
Now, click your mouse, and your shape will be selected.
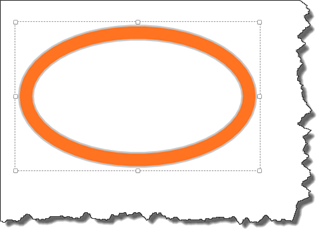
Now that you have your shape on the page, we can format it. Select your shape, then right click.
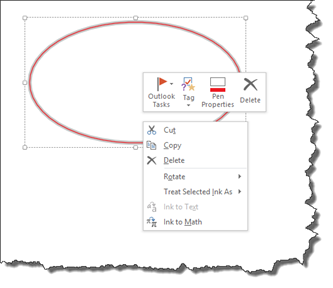
Click on the Pen Properties button from the toolbar. It looks like this:

You will then see the Color & Thickness dialogue box.
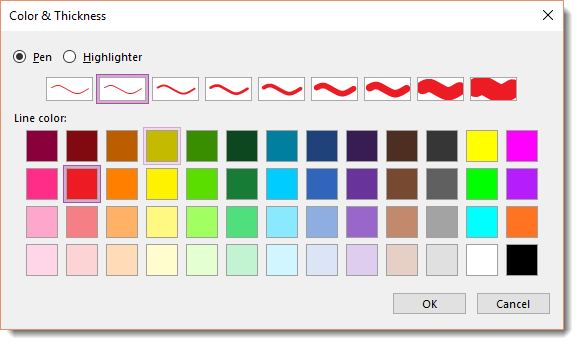
Select the thickness of the line around the shape as well as the color of the line.
Look at how we've changed our shape by formatting it:
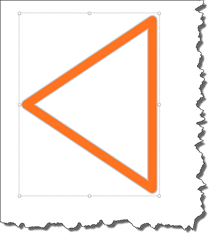
Let's say you draw a triangle, but want to rotate it. Look at the example below:
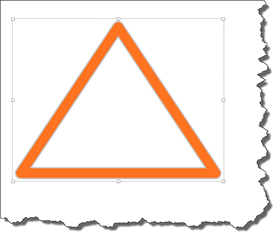
To rotate the shape, go to the Draw tab, then click Rotate in the Edit group. Click the dropdown arrow below the Rotate button.
You will then see the dropdown menu.
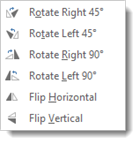
Select how you want to rotate the shape from the dropdown menu. We've selected Rotate Right 45 degrees.
Use the handles around the shape to drag it out to make it larger and push it inward to make it smaller. Remember to keep your left mouse button held down while dragging.
To move a shape, hover your mouse over it until you see a four-way arrow. Drag and drop the shape to its new location.
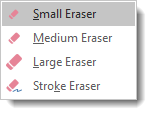
The eraser lets you erase part or all of a shape. To access the eraser, go to the Draw tab and click the dropdown arrow below Eraser in the Tools group.

As you can see in the snapshot below, you can pick what size eraser you want to use.
Choose the size eraser that you want, then go to the shape on the page. Below is the shape that we've drawn.

On your page, the eraser appears as a square. Just move it over the parts of the shape you want to erase. For our shape, we've erased a portion of it using the medium eraser.

Remember to keep your left mouse button held down as you use the eraser. When you're finished, simply release the mouse button.
NOTE: Whenever you work with shapes and want to switch back to typing text, be sure to click the Type button in the Draw tab. This switches OneNote from Draw mode back to text.
OneNote is really a simple program; however, it can do a lot. With OneNote installed on your Android or iOS based device, you can access Office files on the go. You can also insert content from other Office apps into your notes. You can insert office documents as printouts, attachments, or manually as raw data. Although you can't do much editing of the data you insert, you can access it via OneNote.
If you choose to insert data as a printout, OneNote will treat it as if it was a true printout that you stuck in a binder. The data can't be edited, but you can mark it up with ink.
To add a Word document or PDF as a printout in notes, open the note you want to use, then click to place the cursor where you want the printout.
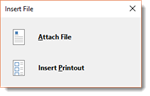
Next, go to the Insert tab. Click File Printout.

You will then see the following dialogue box.
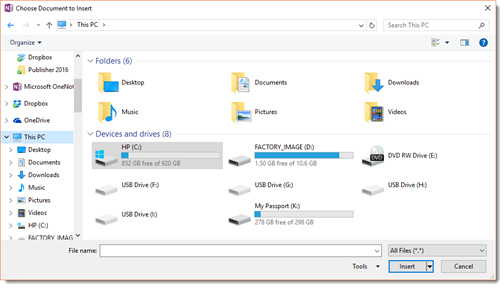
Locate the file you want to insert as a printout.
Click the Insert button.
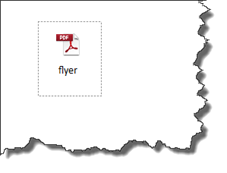
The file is inserted into your notes as an image.
In the snapshot below, we have inserted a PDF document into OneNote.
If you insert data as an attachment to your notes, an icon of the associated Office program will appear in your notes. You can then double click it to open the file.
To attach data, click in your notes where you want the icon to appear.
Go to the Insert tab. Click the File Attachment button.

You will then see the following dialogue box.

Select the file you want to attach, then click the Insert button.
You will then see the Insert File dialogue box.
Select Attach File.
Your file is then attached to your notes.
If you just want to insert certain elements of a data file into your notes, you can do so by inserting data manually by using copy and paste as we learned to do earlier in this lesson. You'll be able to edit some data that you paste, such as text. However, you won't be able to edit other elements, such as an image from a Visio file.
Inserting Existing Data from Excel
So far, we've mentioned inserting files from Microsoft Word, but what about Excel? OneNote allows you to add spreadsheets to notes. You can also add charts and tables from a spreadsheet into your notes. The only way you won't be able to edit the data is if you insert it as a printout.
When you insert data from an existing spreadsheet, all cells that contain information or are between cells that contain information will be inserted into your notes.
Here's how to do it.
Place the cursor where you want the Excel data to be.
Go to the Insert tab, then the Spreadsheet button.

Click the dropdown arrow to see the menu.
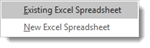
To insert existing data contained in an Excel spreadsheet, click "Existing Excel Spreadsheet".
You will then see this dialogue box:
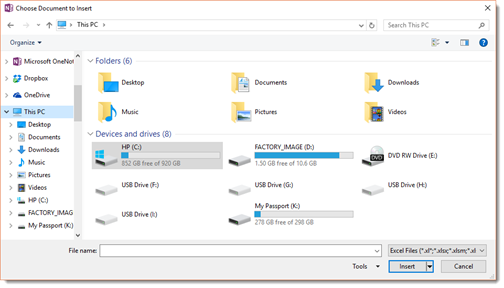
Find the spreadsheet that you want to insert.
Click the Insert button.
You will then see the Insert File dialogue box.
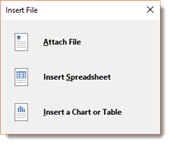
Choose Insert Spreadsheet.
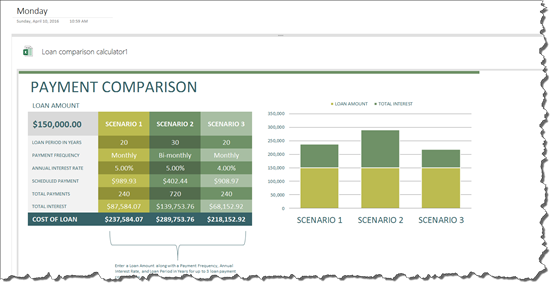
Your spreadsheet now appears in your notes.
NOTE: You can also insert an individual chart or table using these steps. Just select Insert a Chart or Table from the dialogue box pictured above.
As you have probably noticed, OneNote doesn't give you the extensive chart and table tools that come with other Office programs such as Excel. However, that doesn't mean you can't use those tools with OneNote. You can by inserting data.
As you're creating notes, perhaps you realize that you need a fancy table or a chart inserted into your notes. This is easy to do using the Spreadsheet button under the Insert tab.
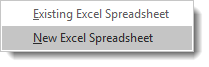
Select New Excel Spreadsheet from the dropdown menu.
As you can see, a new spreadsheet is inserted.
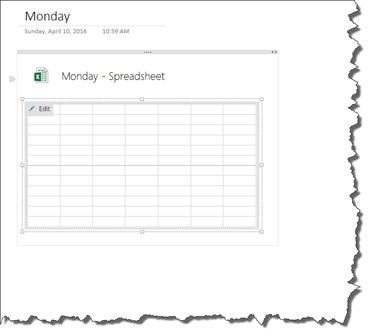
Now click the Edit button in the upper left hand corner of the spreadsheet.
Microsoft Excel opens.
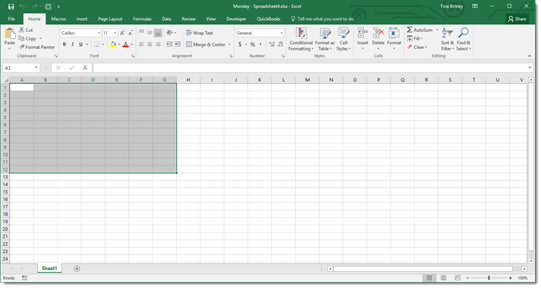
You can now enter data, create a table, or create a chart.