In Crystal Reports, you can use a formula to calculate a piece of data. That data is then inserted into your report. In this article, we are going to focus on learning all about formulas, starting with the basics and moving into the more advanced.
Creating a Formula Field
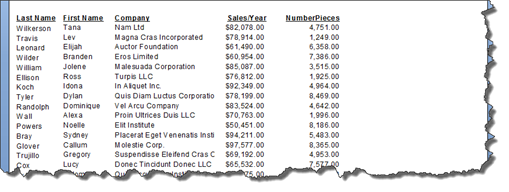
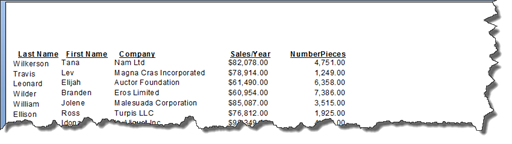
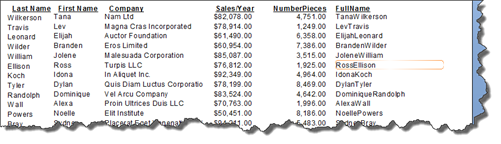
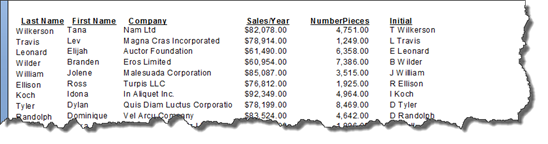
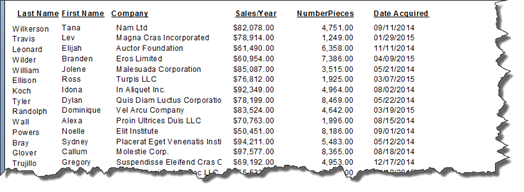
Take a look at our example report below.

We want to add another field in this report that will come after Sales/Year field. This new field will be a formula field, and it will contain the average monthly sales. Of course, we will use the Sales/Year field, which is the sales for the entire year, to calculate the average monthly sales.
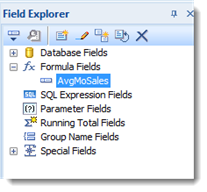
To add the formula field, go to the Field Explorer panel.
Click on Formula Fields to select it.
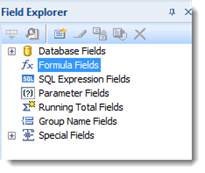
Right click on Formula Fields, then select New.
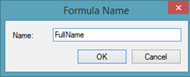
Enter a name. We will call ours AvgMoSales.
Click OK.
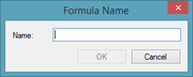
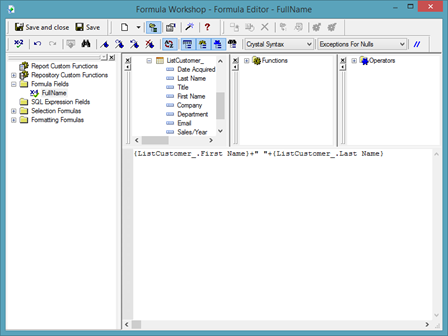
You will then see the Formula Workshop dialogue box.
The Formula Workshop is divided into five areas.
On the left, you have the Explorer.
You can see that our new formula field is selected.
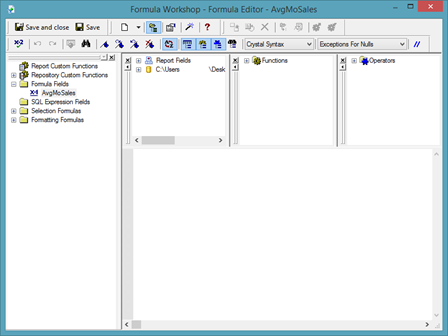
The data fields in your report are shown in the section circled below.
The next section contains functions.
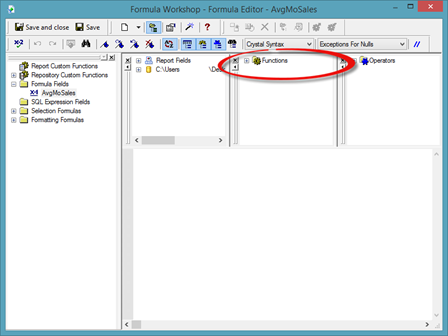
The next section contains mathematical operators.
The final section is the empty white area on the Formula Workshop. This is where you build formulas.
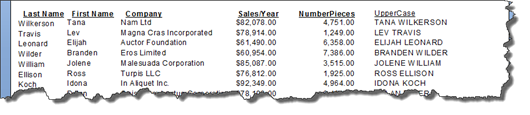
Now, we want to build a formula that will tell us the average amount spent per product in the report below.
We will do this by taking the Sales/Year field and dividing it by the NumberPieces field.
To do this, in the Formula Workshop, we are going to double click the Sales/Year in the section of the Formula Workshop that contains our report fields.
![]()
You can now see this field in the white area where we will build the formula.
We want to divide this field by the number of pieces sold. To divide, we add the symbol for division.
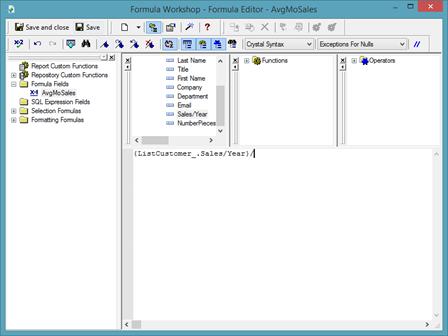
Now we double click on the NumberPieces field to add it to the formula.
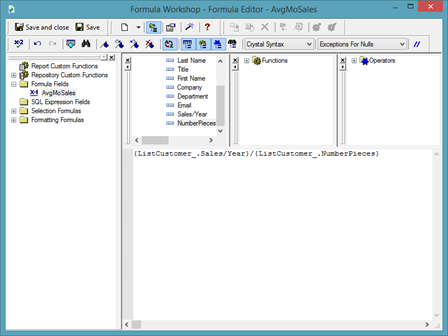
Once our formula is finished, we are going to click Save & Close.
To place the formula field in the report, go to Field Explorer and drag the formula field just as you would any other field in your report.
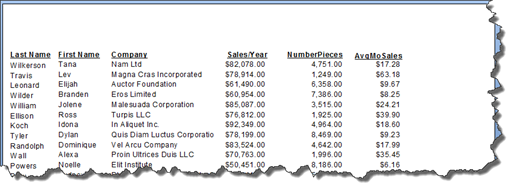
The formula field then appear in our report:
Changing, Renaming, and Deleting Formula Fields
If you want to rename a formula field, right click on the formula field in Field Explorer. Choose Rename from the menu.
The field will then open so that you can edit it.
Type in the new name for the formula field.
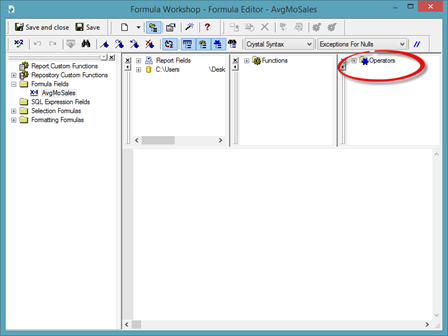
If you want to change the formula that calculates the data in the formula field, select the formula field in Field Explorer. Right click, then choose Edit.
You will then see the Formula Workshop dialogue box.
![]()
You can then change the formula.
To delete a formula field, go to the Field Explorer panel. Select the formula field, right click, then select Delete.
You will then see a message that lets you know that if you delete the field, it will also be removed from your report.
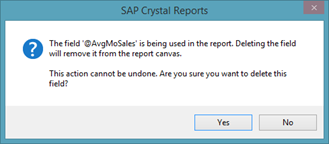
If you still want to delete the formula field, click Yes.
Joining Multiple Fields Using a Formula
You can also use formulas to concatenate the values in multiple fields � or combine the data in multiple fields.
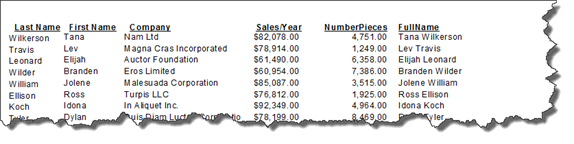
Take a look at our report below.
As you can see, the first names and last names for our customers are in two separate fields. We want to combine them in one field.
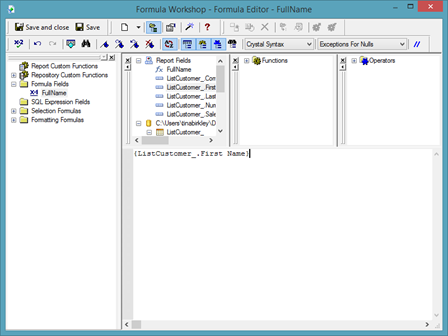
To do this, go to Field Explorer and create a new formula field.
We have named ours FullName.
Click OK.
You will then see the Formula Workshop.

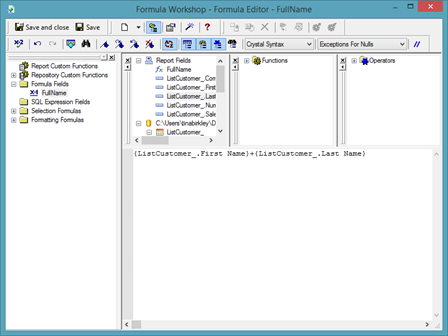
In the section of the dialogue box that contains the report fields, double click on the first report. For this example, it will be First Name.
Since we are adding two fields together, we are going to enter a plus (+) sign. However, if you want, you can use an ampersand (&) instead.
![]()
Now double click on the report field that you want to combine with the first field that you already added.
Click Save & Close.
Drag the formula field from Field Explorer to your report.
As you can see in our report above, the fields are combined. However, there the first and last names run together. There isn't a space between them.
To fix this, go to Field Explorer.
Right click on the formula field, then select Edit.
After the plus (+) sign, add open quotation marks, hit the spacebar, then add closing quotation marks. This tells Crystal Reports to add a space.
Enter another plus (+) sign to join the space to the second report field.
Click Save & Close.
The space is now added between the first and last name in our report.
Additional String Manipulation Formulas
When most of us hear the word formula, we automatically think of numbers and math. We don't often think about formulas as they relate to text � or strings. However, you can use formulas for strings. In fact, they're very handy when building a report in Crystal Reports.
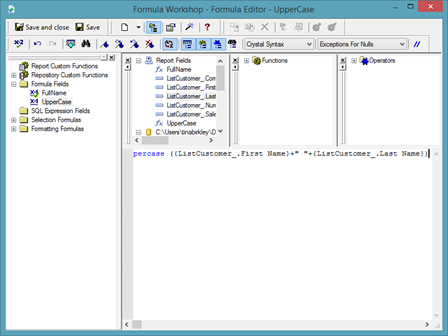
In the last section of this article, we combined two fields using a formula. Now let's learn how to combine those fields AND use a function to turn the fields into uppercase.
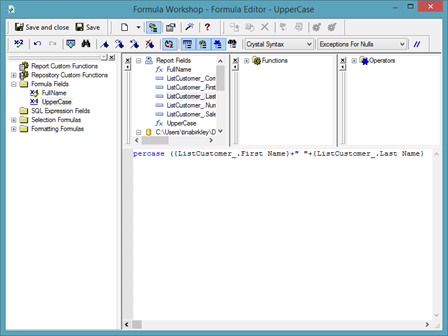
To do this, we are going to create a new formula, and name it UpperCase.
Once we create the formula, we are taken to the Formula Workshop.

In the area where you build your formula, type the function "uppercase," as shown below.

Notice that when we finish typing the function, it turns blue. This lets us know we've typed in the function correctly.
Add an open bracket.

Now, we are going to combine the first and last name fields again.
Add a closing bracket.
Click Save & Close.
Drag the formula field from Field Explorer and place it in your report.
You can also create a formula that makes the field entirely lower case. To do this, simply change the function to lowercase, as shown below.

You can also put the field in title case by using the propercase function.
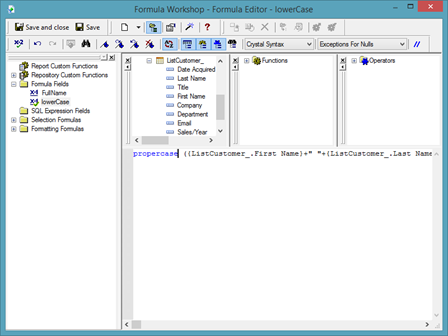
NOTE: Remember to use an opening bracket after the function. Add a closing bracket at the end of the formula.
In addition to combining fields and chasing the case of fields, we can also change the content of a field.
In our report, we have the first name field, then a last name field. Let's say we want to combine those fields, but we only want to use an initial for a first name.
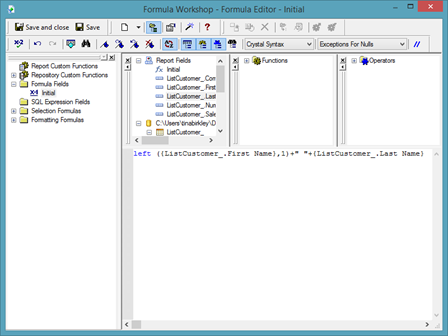
To do this, start out by creating a new formula field. We are going to name ours Initial.
In the Formula Workshop, we type in the function "left." This tells Crystal Reports that we want to only use letters from the left side of the name.
Add an open bracket.

Next, we are going to double click on the first name field in our report. Add a comma, then the number 1. We are using the number 1 because we only want the first letter from the left side of the first name.
Type in the closing bracket.

Now let's combine the first and last name fields.
Click Save & Close.
Drag the formula from Field Explorer to your report.
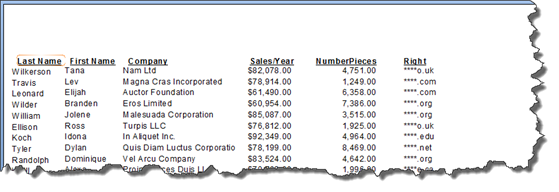
You can also use the "right" function to only have a certain number of characters from the right hand side of a word appear. This is commonly used when you have data fields that contain sensitive information such as credit card numbers. You can add asterisks within quotation marks to any formula to indicate hidden characters.
Take a look at our formula below. We've used the function to remove characters from the right.
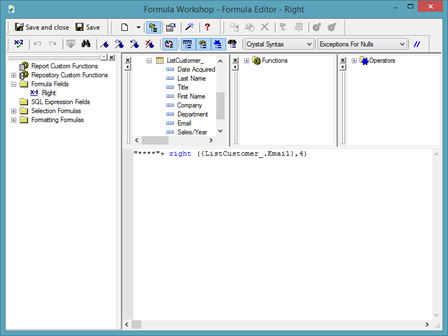
NOTE: Don't forget to use a plus (+) sign to combine multiple fields or a text string (in quotes, such as the asterisks) with a field.
Click Save & Close.
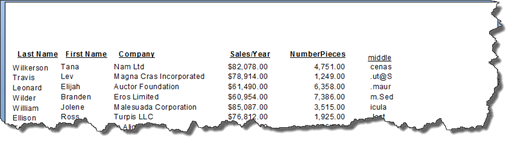
You can also use the "mid" function to take characters out of the middle.

Take a look at the numbers 4 and 5 in our formula. We started at the fourth character and want five characters to appear.
Click Save & Close.
The "mid" function is typically used with the "len" function.
The "len" function counts how many characters there are in a string. To show how the "len" function works, we've created a new formula field and named it Len.
Below, we have used the "len" function to count the number of characters in our email field.

Click Save & Close.

The Date Formula
We've looked at formulas with numeric values, then with text values. Now, let's look at formulas with date values.
Take a look at our report below. We've added a date data field to it.
We are going to create a formula field to find the year that our fictional company acquired each customer. The name of this new formula field will be "year."

We are going to use the "year" function.

Next, we are going to double click on the field that contains the dates in our report, then add a closing bracket.

Click Save & Close.
You can then drag the field onto your report.
NOTE: You can use the "month" function to calculate the month, or you can use the "day" function for the day.
You can also build a formula to calculate the day of the week.

The result is a numeric field. The number represents the day of the week.
If we want it to display the actual day, we can also do that by using the "weekdayname" function with the "weekday" function.
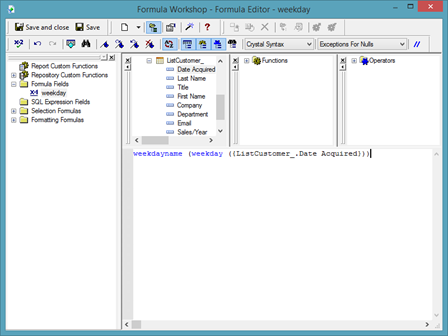
As you can see in the above snapshot, we've embedded one formula into another formula.
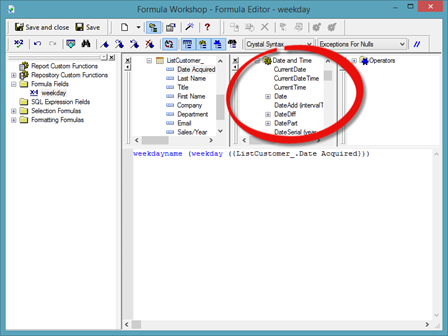
NOTE: So far in this article, we've told you which functions to use. However, you can also go to the Functions section of the Formula Workshop, and select a function. Below you can see the Date and Time functions. If you mouse over a function, it will tell you what parameters are required to calculate the formula. For example, the date field was required in our "weekday" example.
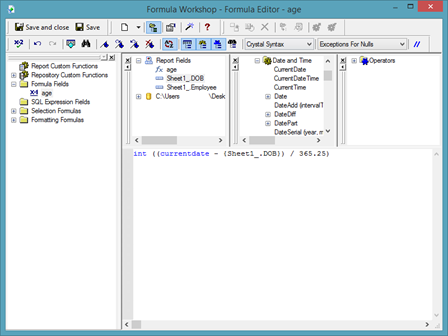
Using Formulas to Calculate Age
Now that we've worked with date formulas, we're going to use a combination of formulas to figure out someone's age based on a date field.
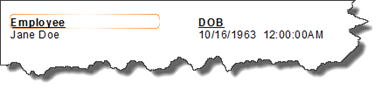
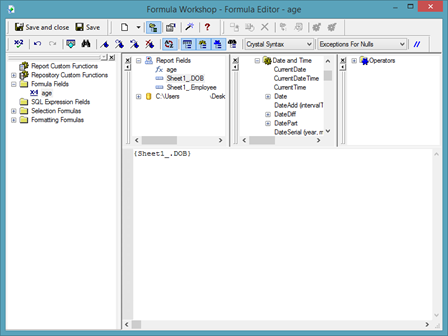
As an example, we are going to figure out the age of the employee Jane Doe listed in the report below by using her date of birth.
The first step in calculating the age is creating a new formula field. We are going to call ours "age."
In the Formula Workshop dialogue box, double click on the date field you want to use.
To produce someone's current age, you need to subtract their date of birth from the current date. However, the current date changes on a day-to-day basis. We want our formula to accurately calculate the employee's age today, tomorrow, and so on and so forth.
We will do this by using the "currentdate" function.
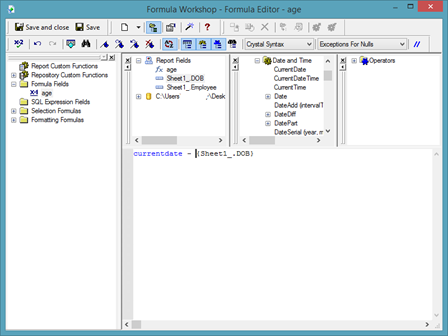
As you can see above, we added the function "currentdate", then the minus sign to subtract the employee's date of birth from the current date. This formula will work out their age; however, it will work it out in days, not years.
In order to convert the days into years, we have to divide it by 365.25 � or the number of days in a year.
Let's place our current formula in brackets.
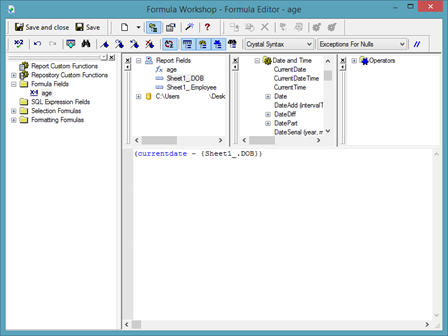
Now we can add the sign for division, then 365.25, as shown below.
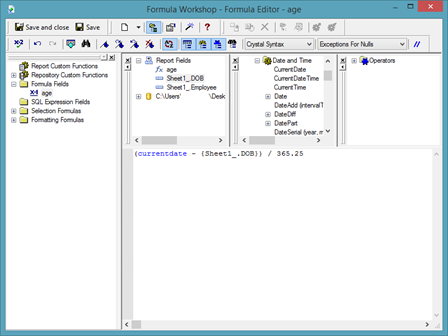
What would happen now if we clicked Save & Close is Crystal Reports would give us the employee's age, but there would also be decimal places included. If our employee was 25 years and 3 months old, it would list her age as 25.25. We don't want the decimal places in our Age field.
To fix this, add brackets around what you've built so far.

We are going to use the function "int" so that we produce a whole number. "int" is short for integer.
Click Save & Close.
You can now add the formula field to your report.

The decimal places will always show zeros. To remove the decimal places, select the formula field, then right click. Choose Format Field.
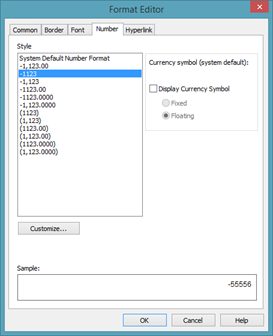
Select a number format, then click OK.

Using a Formula Field to Sort and Filter
Once you create formula fields and add them to your report, you can use those formulas to sort and filter data in your report.
To sort data using a formula field, go to the Record Sort Expert (Report>Record Sort Expert).
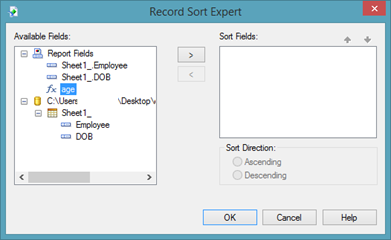
Select the formula field you want to use in the Available Fields column, then the arrow button to move it to the Sort Fields column.
Choose your sort direction.
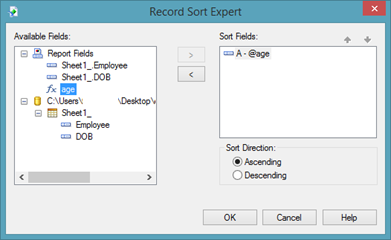
Click OK.
We can also use a formula field to filter the data.
To do this, go to the Select Expert.
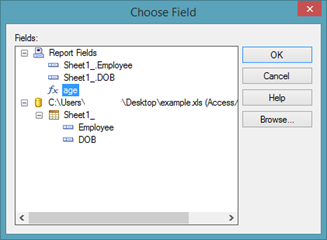
Select the formula field, then click OK.
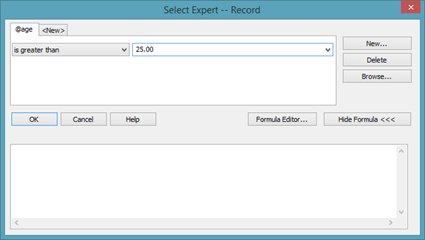
As you can see, we are filtering our data to see anyone whose age is greater than 25.
Click OK.
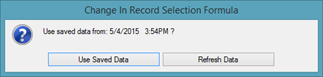
Click Refresh Data.
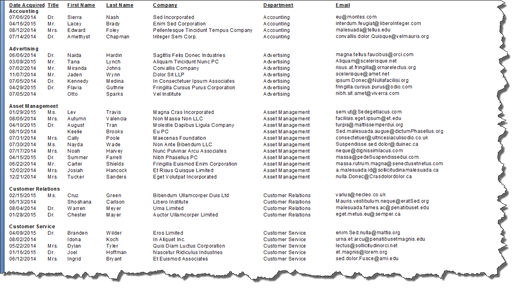
Now you will only see employees in your report who are over the age of 25.
Using Formulas in Groups
Thus far, we've learned to use formula with records in the Details section of a report. However, you can also use formulas when dealing with subtotal fields within groups.
Let's show you what we mean.
In our report below, we've grouped our customers by the department in which they work.
Ultimately, we want to figure out how long it has been since we acquired a new customer in each group.
To do this, we will have to take a few steps.
First, we need to figure out the most recent acquisition date for each group. To do this, we are going to go to the Insert Summary (Insert>Summary) dialogue box.
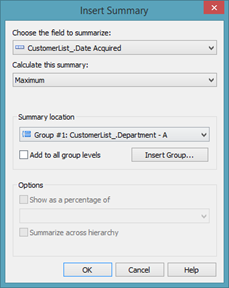
As you can see, we've selected our date field. We've also selected Maximum for the Calculate this Summary dropdown. Maximum will show us the latest date. In the Summary Location dropdown, we've chosen our grouping.
Click OK.
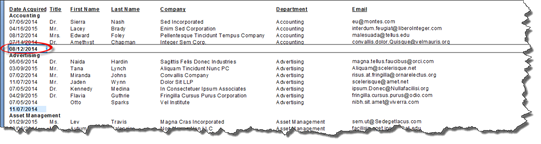
You can now see the date of the most recently acquired customer for each group.
Now that we have our subtotal field, we can suppress the Details section.
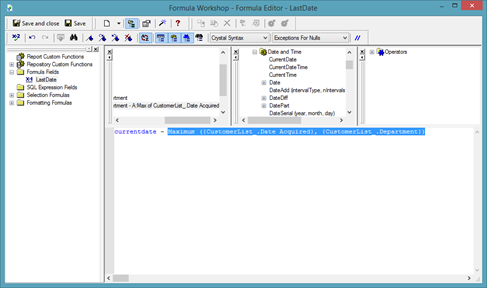
What we want to do next is figure out how long it has been since we've acquired our last customer. We will use a formula to do this.
Create a new formula field in the Field Explorer panel. We have named ours LastDate.
You will then see the Formula Workshop dialogue box.
![]()
Now we are going to enter a formula similar to what we did to figure out how old an employee was.
We will use the "currentdate" function to subtract today's date from the date of the last customer acquisition.
Click OK.
You can them place the formula field in your report.
Removing the Time from Date Time Parameter Fields
When we learned how to create parameter fields, we learned that whenever we create a date parameter field, we must use the Date Time field type for the parameter field.
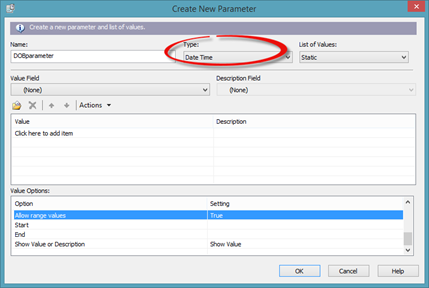
Even though both Date and Date Time are type options in the Create New Parameter dialogue box, we learned that we must choose Date Time in order for the parameter field to function correctly. This can be a hassle and pain when we go to enter in date ranges, because the time must be included.
However, we can change the Date Time field to a Date field by creating a formula field.
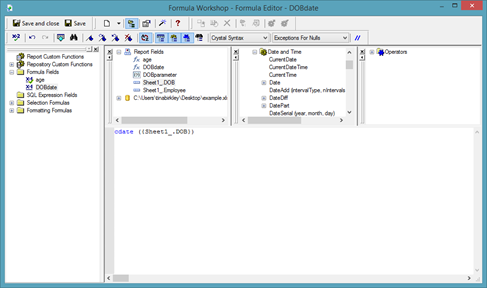
We are going to name our new formula field "DOBdate".
Once you create the new formula field, you will see the Formula Workshop dialogue box.
![]()
We are going to use the function "cdate", then double click our DOB field to add it to the formula.
Click Save & Close, but do not add the formula field to your report.
Now, when you create your parameter field, you can choose Date for the type of parameter field you want to create.
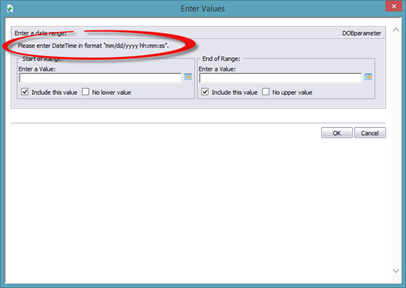
In the snapshot below, we created our parameter field. You can see that you are no longer required to enter a time with the date.

Using the IF Statement in Formulas
If you've used formulas in other programs such as Microsoft Excel, then you are probably familiar with the IF statement in formulas.
The IF statement either tells Crystal Reports to execute or skip a statement based on the value of the Boolean expression.
For example, we could say IF three plus to equals five, then the answer is yes. With this type of IF statement, if three plus two equaled five, Crystal Reports would put "yes" in the formula field.
To learn to work with the IF statement in Crystal Reports, we are going to use our report below as an example.

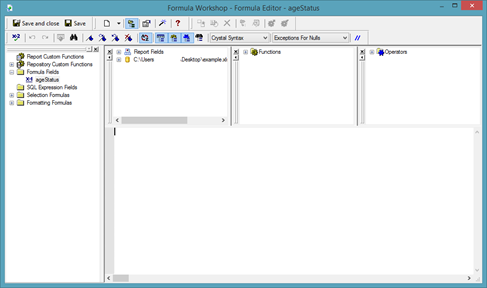
We are going to add a formula field that will allow us to either mark the person as young or mature. We are going to call our formula field "ageStatus".
The Formula Workshop opens once we've created our new formula field.
We want to create a formula that will check the age, then decide if the person is young or mature. If the person is over 50, we want to mark them as mature. If they are under 50, we want to mark them as young.
To start, type in the IF statement.
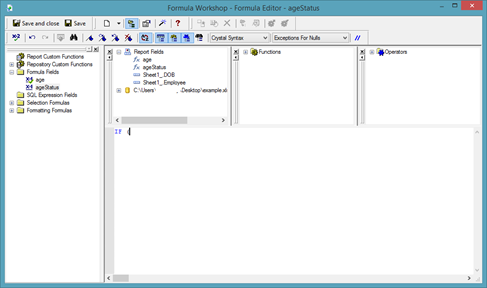
Since we want to use the age to determine whether they are young or old, we will use the age formula field in this formula.
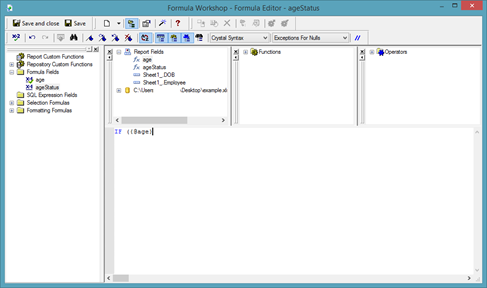
We want to say "If the person's age is greater than 50�
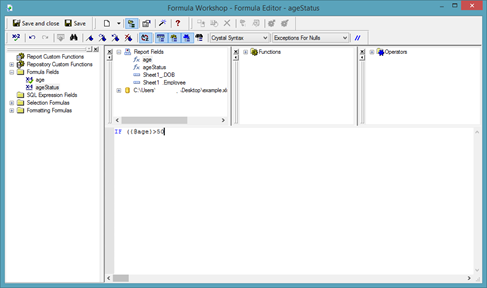
Add a closing bracket.

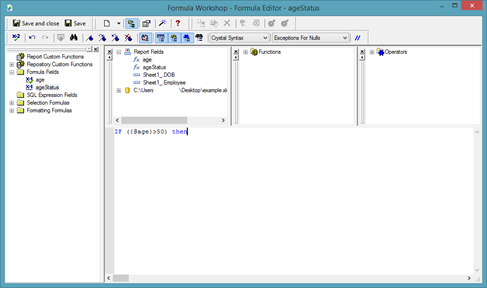
Now we add "then." If the person's age is greater than 50, then�
If the person's age is greater than 50, we want MATURE to appear in the formula field.
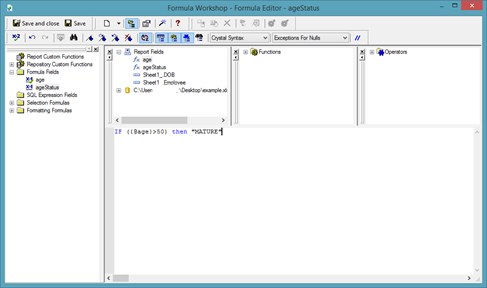
Now our formula says, "If the person is older than 50, then MATURE should appear in the formula field."
Let's make it so that if the person is NOT greater than 50, YOUNG appears.
![]()
Click Save & Close.
We can now add the formula field to our report.