CSS, or a Cascading Style Sheet, allows you to apply styles to your documents. A Cascading Style Sheet is basically a direction for your document. It tells your document what type of font to apply to your document, what colors to use, as well as other styles.
But what is a style? A style in Dreamweaver refers to either an HTML style or a style definition in a Cascading Style Sheet. Of course, in this article, we're going to strictly talk about CSS style.
Style definitions contain information about the text font, white space surrounding the text, the color and size of the text, and other attributes such as border, shading, alignment, etc. You can apply a style to a range of text, an entire page, an entire website, or an image. A style can be defined by Class or ID attributes inside the tags.
Here's an example of a style. You can use a style to change the appearance of all text in your document that is tagged H1. H1 is a header that's used at the beginning of a section. For example, you can make all headers tagged H1 appear in Times New Roman, green font. You can make the body of your text on every page, on one page, or in just one section appear as Calibri boldfaced � or Arial. You do all of this by applying style sheets. This is a quicker, more efficient way to apply style whether than always using HTML.
Please don't fret if all this sounds confusing right now. Also, don't worry if you don't know how to write CSS code � or don't think you can learn it. To be successful using CSS in Dreamweaver, you only have to know how CSS works, then be able to navigate through and use the features Dreamweaver provides for creating CSS. Dreamweaver will do the writing of the code for you.
Creating Style Sheets
In learning to create style sheets, it's important that you also know what purpose they serve. For that reason, we're going to teach you by actually doing. In other words, in this section of the article, we're going to teach you to create a style sheet by actually creating one. That way, you not only learn how to do it, but start to understand exactly how they work and how you can use them.
To start with, we've created a basic document in Dreamweaver. All we did was open a new HTML document and start typing. Go ahead and type a few paragraphs into your new HTML document.
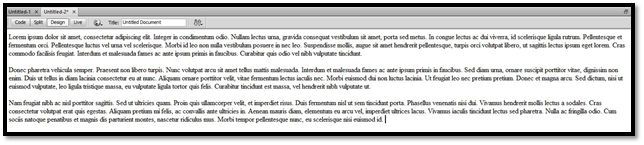
There aren't any styles applied to the above document. We're going to learn to apply them now.
To start applying styles, go to the Property Inspector and click on Page Properties.
You'll now see the Appearance (CSS) dialogue box.
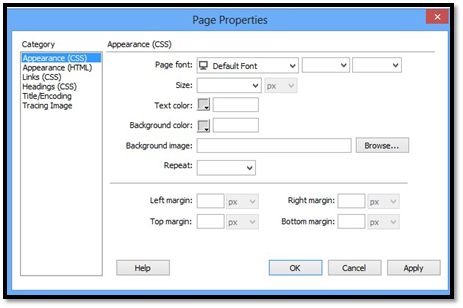
As you can see, this dialogue box is chock full of styles that you can apply. You can see font type, font size, text color, background color� and the list goes on. You could use HTML for these styles, but why bother when you can create a style sheet. It really is easier once you get used to it.
Now follow these steps:
- Change the Page Font to Cambria, Hoefler Text, Liberation Serif, Times, Times New Roman, Serif. Of course, you can change it to anything you want. We're just using this Page Font as an example.
- Change the Size, which is the text size, to small. You can also use a numeric value for the size.
- The Text Color should be changed to #666666.
- Change the background color to #CCCCCC.
- If you wanted to add a background image, you would select that in the Background Image section.
Click Apply, then OK.
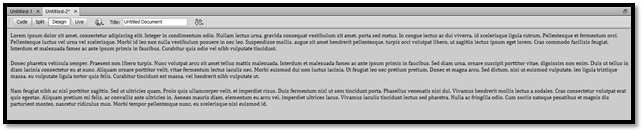
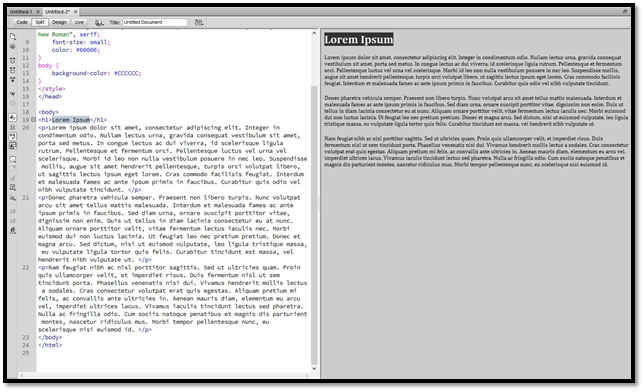
Your document should now look like this:
To see how the styles were applied and to start to get a feel for CSS, go to Split View so that you can view the code and design.
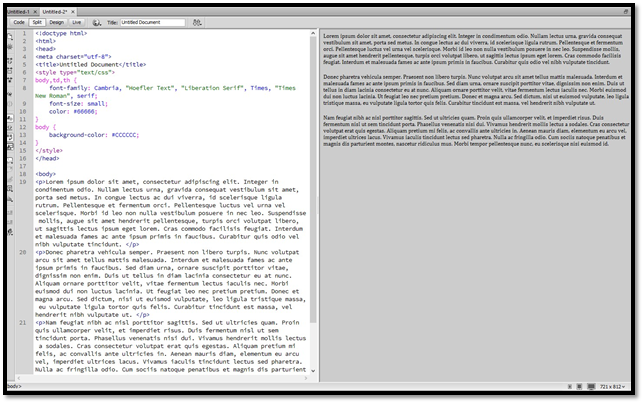
Notice line 6 where it notes the CSS and how the styles are applied in the head portion of the document that will affect the entire page; whereas, with plain HTML, font color, size, etc. would have been applied in the body portion.
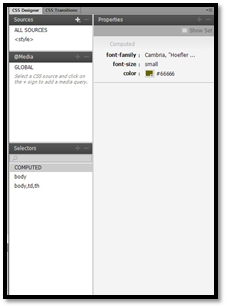
You can also see that the properties listed for the page are divided into two groups. One group is for the body and contains td (table data) and th (table header). Inside this group is the properties for the font and the table cells, as well as their content. In the other group is simply the body and the properties for the body. You can see the background color listed.
CSS Code Format
If you look at the above snapshot, it may seem like pig Latin to you. Learning to understand the format of CSS code can make learning and using CSS easier for you.
That said, let's take a brief look at the format used for CSS in hopes that we can "decode" the code for you. While it's not important that you learn how to write CSS code to use Dreamweaver, it can be helpful to at least understand the basics.
The typical format for styles in a style sheet is:
selector {declaration}
The selector portion tells what elements will be styled within the declaration. Look at this example:
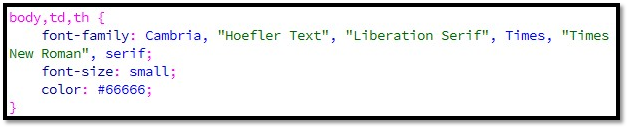
In the above snapshot, body, td, and th are the selectors. Selectors are always separated by commas. This tells us that the body, td, and th will be styled in the declaration.
The declaration is contained within curly braces { }. Declarations are separated by semi colons. Using the snapshot above as an example again, we see the font family, font size, and color are established. These are the styles (declarations of style) that are being applied to the selector portion (body, td, th). You can also apply class and ID using the selector portion, then the declaration.
A Note About ID, Class, and Tag Styles
ID selectors only apply to one element in your document. In other words, you might use an ID selector to underline a sentence.
The class selector is used to create styles that can be applied on your page as many times as you like. They're ideal for formatting elements of a page, such as photo captions.
Tag selectors alter the rules of HTML tags. You can use them to alter the position, appearance, etc. of HTML tags. In CSS, Div tags create sections in your document. They replace HTML tables.
The CSS Styles Panel and Editing Styles
The CSS Styles pane is located under Window>CSS Styles.
You can use the CSS Styles panel to create and edit styles in your document. In the snapshot above, you can see the summary of styles for the current document. Simply double click on any style to edit it.
|
NOTE TO CC USERS: In Dreamweaver CC, the CSS Styles panel is replaced by the CSS Designer panel, pictured below.
|
Internal and External Style Sheets
When you use CSS in Dreamweaver, you can create internal, external, or inline styles. If you use external style sheets, they are saved as a separate file inside your website folder. You can even create a folder just for external style sheets (like you did for images) and name it "CSS."
When you create external style sheets, you can attach multiple style sheets to one page or use a combination of the options we just mentioned.
An internal style means the CSS code is in the <head> area at the top of your HTML page. The styles you choose to apply will only be on that page.
Just as we said, external styles are stored in a separate .css file that's linked to in the code for your page. You can apply several .css files to one page, or you can apply one .css file to several pages.
Inline styles apply only to the element to which they're attached in the document. They are the least useful of the three style sheet options.
You can choose if you want to create an internal, external, or inline style as you edit or create CSS rules for your document.
External Style Sheets
So far in this article, the styles we learned about have been relative to the active document. In other words, the styles were defined in the head tag of the document. We used Page Properties to set these properties. Whenever you use Page Properties, your CSS will automatically be embedded in the document. This is a perfectly acceptable way to create styles to apply to pages.
However, the best way to apply styles to pages is by using external style sheets.
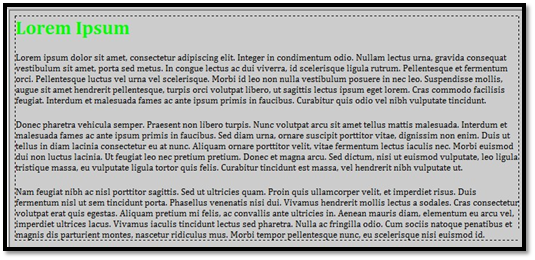
Let's go back to the example document we used earlier when we set some basic styles for a document. We're going to create an external style sheet for this document.
First, we're going to select the page header (that we added) which reads "Lorem Ipsum."
If you're using Dreamweaver CS6, go to the CSS Styles panel, click on New CSS Rule  .
.
This dialogue box will open:
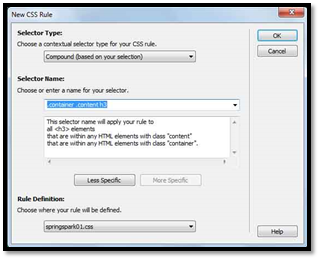
In this dialogue box, you have options to create a new CSS rule. If you click the down arrow in the Selector Type Category, you'll be presented with these options so that you can choose your selector.
- Class
- ID
- Tag
- Compound
We'll discuss ID and Class later in this article. At this time, we're going to choose Tag which refers to HTML.
As you can see, the Selector Name was already filled in for us based on our highlighted text.
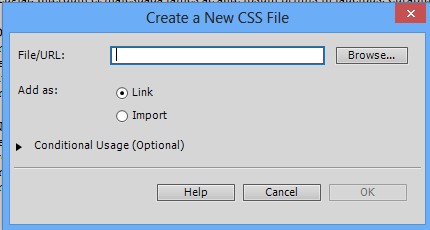
Now go down to Rule Definition. You can choose whether you want to apply it to the current document or create a new style sheet file.
We want to create a new style sheet file.
Click OK.
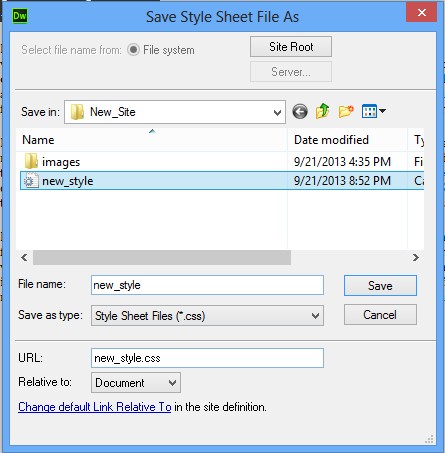
The Save Style Sheet dialogue box should now open.
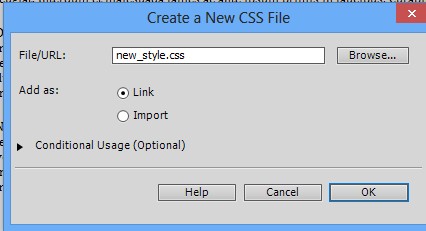
Name your style sheet and click Save. We've name ours "new_style."
The CSS Rule Definition dialogue box should open when you click Save. It will look similar to this:
Now you can go ahead and enter the styles that you want.
Click Apply, then click OK.
If you look at your code, you'll see the reference to the style sheet.

|
NOTE TO CC USERS: The process for creating an external style sheet in Dreamweaver CC is a little different. First, select the H1 text, as we did above. Go to the CSS Designer panel. Click the + sign beside Source and click Add a New CSS File.
Click Browse. Choose the location where you want to save the file (inside your root folder), then enter a name for the file.
Click Save.
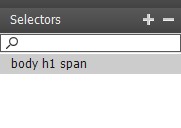
Make sure Link is checked (shown above). Next, click OK. Your new CSS style sheet appears in the panel. Next, select your source, which will be the new .css file you just created. Select the CSS component that you want to add to the style sheet. In our case, it's the text in H1. Now go to the CSS Designer panel again. Click the + sign beside Selectors. This will add the CSS component to the Selectors area in the CSS Designer panel, as shown below.
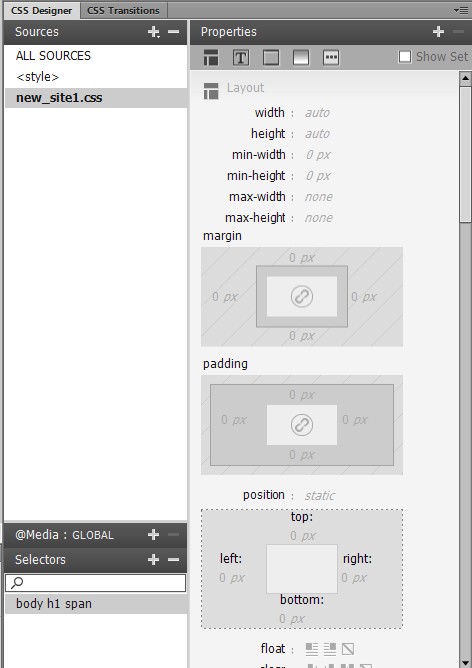
Now look in Properties, as shown below:
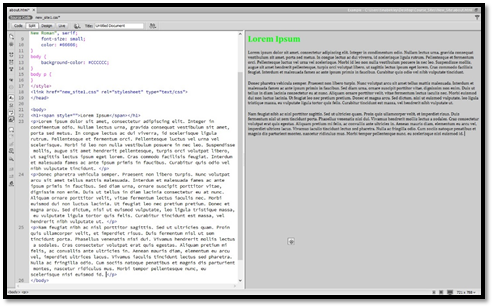
The row of buttons at the top allow you to apply styles. Mouseover the buttons to learn what kind of styles they let you apply. We're going to click the button with a T in it to format text. We're going to change the color of the H1 text to green. On line 18 in the snapshot below, you can see the link to our new style sheet. You can also see our text was changed to green.
If we delete line 18, the text will change back to black. That's because we've deleted the attached, external style sheet that made the font green. |
Applying Existing External Style Sheets
You can also use a style sheet that's already been created and attach it to your document.
Start by clicking the Attach Style Sheet button  in the CSS Styles panel.
Find the style sheet on your computer by clicking the Browse button. You can choose to link to the CSS file or import it to your current root folder.
Then select the media. You can also choose to use some predefined style sheets that Dreamweaver provides by clicking on "sample style sheets." We'll talk about that more in the next section.
Click OK once you've selected your style sheet.
|
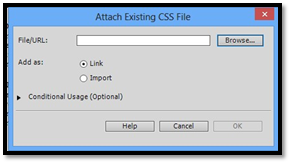
NOTE TO CC USERS: In Dreamweaver CC, go to the CSS Designer panel, click the + sign next to Sources, then click Attach Existing CSS File.
Click Browse to find the file.
We currently don't have any style sheets attached. The one we attached earlier in this article was removed from our code, so we're going to reattach it to show you how to do it. Click OK when you're found the style sheet you want attached. The styles from the style sheet are then applied to your document. |
Aligning Elements Using CSS
Dreamweaver gives you the ability to use CSS even if you don't know how to write the code. To align elements and text on your page using CSS, go to the Property Inspector and click CSS on the far left.
Now, select the elements or text you want to align.
Choose if you want to align it to the left, center, right, or justify in the Property Inspector, as circled below.

Altering Rules and Styles Using CSS
Like we have said (and will say it again), you don't need to know how to write CSS to use it in Dreamweaver. To add styles to your pages, use the CSS Styles panel (or CSS Designer panel in CC).
To add a new rule or a new style, click the New CSS Rule button located on the bottom right side of the panel in CSS.
You'll then see the CSS Rule Dialogue box.
|
NOTE TO CC USERS: To reach the CSS Rule Definition dialogue box in CC, click on the rule you want to edit in CSS Designer, then go to the Property Inspector and click the Edit Rule button. |
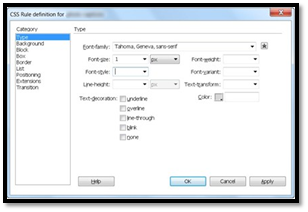
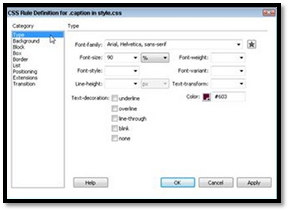
CSS Categories
If you don't know how to write CSS code, Dreamweaver makes it easy to use it anyway. CSS in Dreamweaver is broken down into categories to make it simple to find the style you want, then apply it using a style sheet. You can see the categories in the CSS Rule Definition dialogue box pictured below.
� The Type category relates to your text. It includes font, of course.
� The Background category relates to the background of your pages.
� The Block category relates to spacing and alignment for text.
� The Box category contains settings for positioning and spacing. This is ideal for creating settings to go with <div> tags.
� The Border category relates to border.
� The List category is for creating lists just as we did with HTML.
� The Positioning category lets you alter the way elements are positioned on your page.
� The Extensions category is where you'll find filters and cursor options.
� The Transition category allows you to manage interactive effects.
Creating a CSS Rule in a Style Sheet
Let's say � in the snapshot below, we want to add a border.
The DIV Tag
One tag is the DIV tag. The DIV tag gets rid of the need for HTML tables in designing web pages. The DIV tag is used to create areas for content on our page and creates virtual containers � or boxes.
You can create a Div tag anywhere on your page by going to the Insert tab and selecting DIV under Common. As you can see below, we selected our text, then clicked DIV.
Click OK in the Insert Div dialogue box.
The text is now in its own virtual box � much like we used to use HTML tables in web design.
CSS Transitions
CSS Transitions allows you to apply special, interactive effects to your pages. For example, you can have a hyperlink that starts out in a blue font. When someone mouses over it, it transitions to orange.
Here's how to use the Transitions panel to create special effects:
Create a style for an element on your page. In the example above, it may be font color for text. This is the beginning of the animation.
Open the Transitions panel. (Window>Transitions).
Click the + sign in the panel, which is the New Transition button.
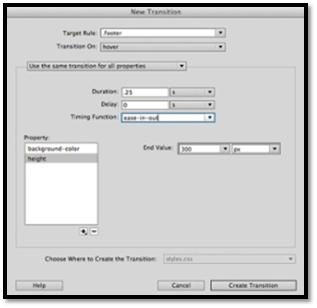
In Target rule, select the style that you just created.
In the Transition On menu, select a trigger.
Next, choose "Use the same transition for all properties" or "Use a different transition for each property." We're going to choose to use the same.
Type a duration for the animation in the Duration box. Use "s" for seconds or "ms" for milliseconds.
Now type a number in the Delay box.
Select an animation speed from the Timing Function menu.
In the Property menu, choose the property that you want to animate.
In the End Value box, set the value for the property.
Now go to the "Choose Where to Create the Transition" menu. Choose the style sheet to add the transition to.
Click Create Transition.
Practice CSS
CSS is more complicated to use in Dreamweaver than plain HTML, however it's not so complicated that you can't master it. Take time to practice creating CSS documents. The more you practice designing pages using CSS, the easier it will become.