Perhaps one of the most important things you can learn in Microsoft Word is how to format your page with elements such as margins and page breaks. Formatting your pages makes them look more attractive and makes them easier to read. Plus, it's easy to do with Word 2016.
Page Margins
Page margins are the white space around the top, bottom, left, and right of your document. Margins let Word know where to start placing text at the top of a document, when to move on to the next page at the bottom, where to start typing text on the left side, and where to stop and move to the next line on the right.
Changing or setting page margins in Word 2016 only requires a few simple steps. It really doesn't take any time at all once you know where to go and what to do.
To change or set the page margins, click the Layout tab on the ribbon, then go to the Page Setup group.
Click the Margins button. It looks like this:

Normal margins are one inch margins at the top, bottom, left, and right.

To set your own margin, click Custom Margins at the bottom of the dropdown menu.
You will then see the Page Setup dialogue box.
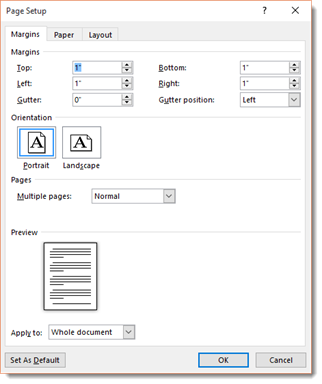
Enter the margin measurement in inches for the top, bottom, left, and right margins.
Click OK when you're finished.
How to Change the Orientation of a Page
When we talk about page orientation, there are two different orientations: landscape and portrait. Landscape and portrait refer to how the document will be displayed on screen and printed. Choose Landscape and your document will be printed horizontally. This is the most common orientation. If you select Portrait, it will be printed from top to bottom (vertically). This is best for professional photos of several people. If your document contains several photos, you may want to choose Portrait.
To set the orientation, go to the Layout tab. Click the dropdown arrow below the Orientation button.
It looks like this:

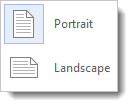
You will be asked to select between Landscape and Portrait.
Change Page Size
Let's learn how to adjust the page size of your Word document.
The default page size in Word is 8.5 x 11, the same as standard printing paper. However, for different types of documents, you may need to change the page size.
To change the paper size, go to the Layout tab. Click the downward arrow below the Size button.

Clicking on this will produce a drop down menu with different sizes that you can choose from.
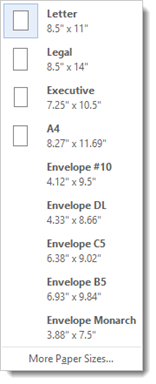
Choose the size of your final document. You can choose legal, A4, credit card size, etc.
Page Colors
Changing the page color is self-explanatory. To do so, click the Design tab and then the Page Color button.

Simply select a color from the menu.
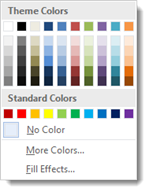
To create your own color, click "More Colors."
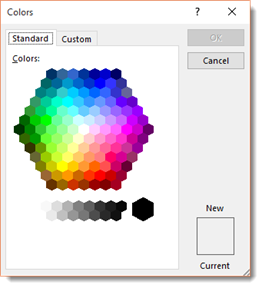
Under the Standard tab, you can click on a color to select it, as shown above.
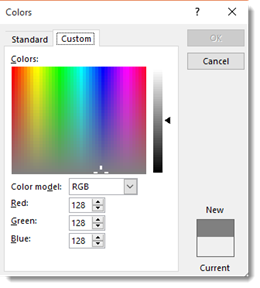
If you click the Custom tab, you can use the color picker by clicking your mouse anywhere on the color that you want, then use the slider to adjust the color to create the exact shade you want.
To add a gradient, texture, pattern, or picture, click "Fill Effects" in the Page Color dropdown menu.
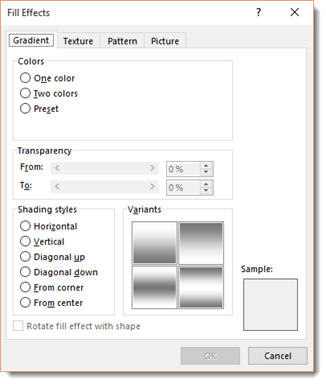
In the Fill Effects dialogue box, you can add a gradient, texture, pattern, or image to use as a background for your document.
Borders and Shading
Borders can be applied to an entire page, an entire document, or just certain sections of the document. A border can also be applied to paragraphs.
To put a border around a page or a paragraph, go to the Design tab and click the Page Borders button in the Page Background group. It looks like this:

When you click the Page Borders button, a new dialogue box opens.
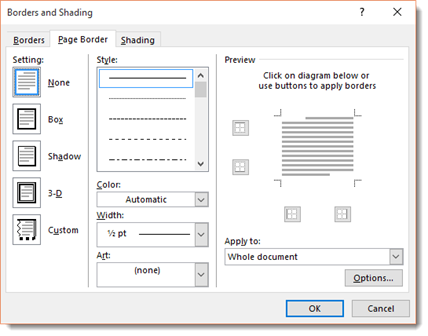
Use this window to define the attributes of your border. You can choose to remove a border by clicking the None box. Select a style, width, and color. You can even select some predefined artwork from the Art dropdown box.
Using the Apply To dropdown, you can choose whether to apply these settings to the entire document or just certain pages or sections.
Now take a look in the lower right hand corner of the window where it says "Options." Click that for even more control over your border and shading options.
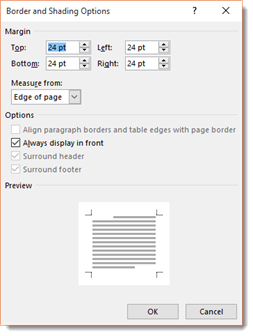
From here, you can choose the margins of your border, and whether or not to measure that from the edge of the page or the edge of the text. Click OK when you're finished.
To add shading to a page, click Page Borders and then Shading from the Borders and Shading dialogue window. Select a color from the Fill dropdown menu, and a style. Click OK when finished.
Using and Formatting Multiple Columns
By default, a blank document contains one column. The text begins at the left margin and runs straight across the document to the right margin. However, if you're creating a newsletter or brochure, you might want to add multiple columns
There are several benefits to using multiple columns. They can:
- Make your documents easier to read
- Make them visually interesting
- Make them look professional
- Allow you to use space more efficiently
Below is an example of a document that was made more interesting simply by breaking the text up into columns.
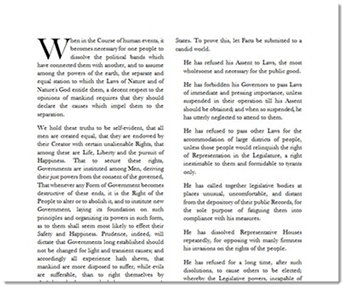
Adding columns to a document is incredibly easy. Go to the Layout tab and click the Columns Button in the Page Setup group.
Select how many columns you want to use in your document.
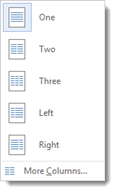
For precise control over the column width and spacing, click "More Columns�."
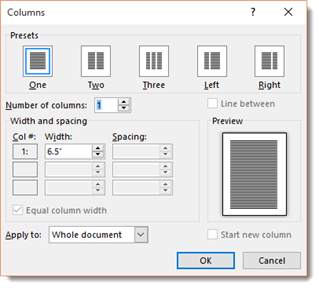
In the dialogue box pictured above, you can adjust the width of the column, as well as the amount of space between columns. You can also decide if you want the columns to apply to the whole document or from the current point in the document forward.
Click OK when finished.
Insert Headers and Footers (Including Page Numbers)
A header appears at the very top of a document. It typically includes the page number and title of the book.
A footer appears at the bottom of a page. It can also contain a page number.
If you want to insert header and footer information (page numbers, title, date, etc.) into your document, you first have to decide if you want headers or footers. Remember, headers go at the top of the page. Footers go at the bottom.
To insert headers or footers, go to the Ribbon and click on the Insert tab.
Go to the Header & Footer Group, the click on either Header or Footer.

We're going to choose Header.
After you click on Header, choose a header style from the dropdown menu, as pictured below.
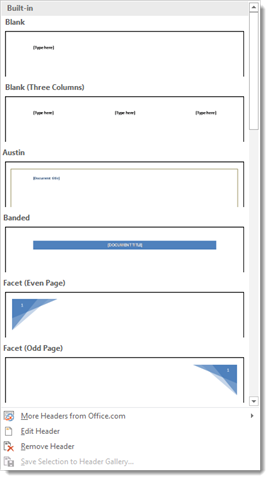
Once you select your style of header, it will take you back to your document where you can then insert the header information, including title, page number, date, etc.
The same steps are applied when you click on Footer.

If you simply want to insert page numbers, then click the Page Number button that is to the right of Footer button. A dropdown menu will appear which will allow you to choose where to place the page numbers.
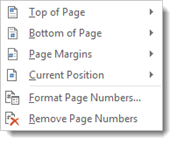
Choose where you want to place the page numbers. You can also format and remove page numbers.
NOTE: If all you want to do is add page numbers, this is quicker and easier to do then going through the Header or Footer dialogue.
Create a Page Break
A page break is the point where one page ends and another begins.
To create a page break:
-
Go to the Insert tab.
-
In the Pages group, click the Page Break button. It looks like this:

Insert a Cover Page
A cover page is inserted before the first page of your document. It contains information such as the name and author of the document. It can also contain image and other graphics to make the page more attractive. Cover pages are commonly used for longer documents, such as reports and books.
To insert a cover page, click the Insert tab on the Ribbon, then click the Cover Page button in the Pages group. It looks like this:

From the dropdown menu, choose a style for your cover page.
To edit the text on your cover page, hover your mouse over the placeholder text, then click to see the cursor.
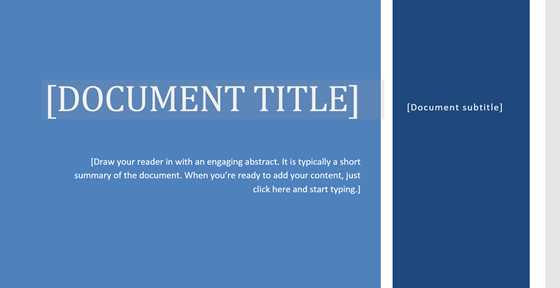
Type the text that you want to appear.
If you want to remove the cover page, click the Cover Page button again and select "Remove Current Cover Page".
Insert a Blank Page
When creating longer documents, you may want to insert a blank page between sections or chapters.
To insert a blank page, click the Insert tab on the Ribbon.
Select Blank Page from the Page group. It looks like this:

Templates
Templates are documents that are already designed for you.
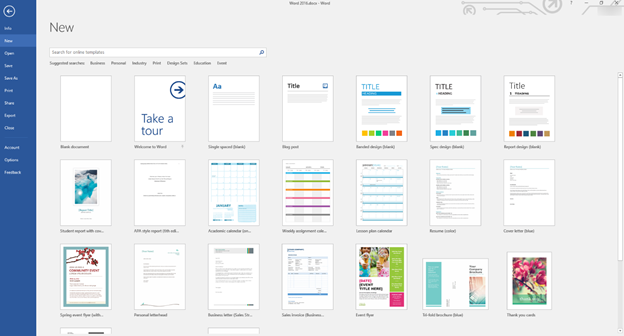
When you use a template, all you have to do is replace the sample text and images with your own. They help you save oodles of time and keep your documents consistent. In Word 2016, you can even edit the templates or create your own and then use them again and again.
Changing the Default Document Template
Whenever you open a blank document in Word, you are opening a template--one in which the margins, font, and themes are already defined. This is called the default template. It's not as fancy as some of the templates you see pictured when you go to File>New, but it's still a template. You can edit this template in the same way you'd edit the fancier templates.
To make changes to the default template, let's take a look at the Font group under the Home tab.

As you can see, the selected font is Calibri, size 11. This is the default font for Word 2016. But let's say you're a professional writer, and your editor is a stickler for old-school standards. That means he wants a fixed width font like Courier New, size 12, with double spacing. Since you write almost exclusively for this stodgy old editor, you don't want to have to go in and change those values every time you open Word.
The solution is easy. Click the little arrow at the bottom right corner of the Font group to open the Font dialogue box. Click the Font tab.
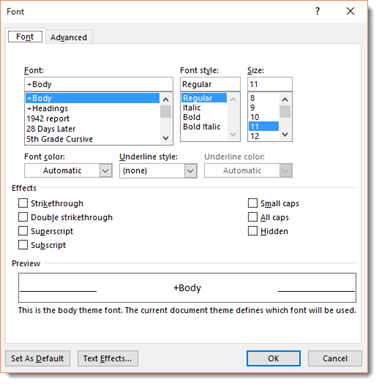
Choose the font and size you want, and then click the "Set As Default" button in the lower left hand corner of the window.
Another dialogue box will open, asking you if you'd like to set this font size and style as the default for this document, or all documents based on the Normal template.
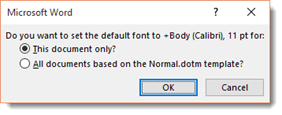
If you want to use 12pt Courier New every time you open a new document, select "All documents based on the Normal template?" You can change these values anytime you like.
To change the default paragraph values, you click the box with the arrow in the lower right hand corner of the Paragraph section of the ribbon. You can change default Margins in the Page Setup section, and so on.
Opening an Existing Template
Microsoft provides a number of templates to make your work easier. They can help you create a budget, write professional letters, design flyers and for Microsoft and more. If you are connected to the Internet, you can browse through and download literally thousands of existing templates from Office.com�without ever leaving Word 2016.
If you already have Word 2016 open, you can view the templates by clicking the File tab, then going to New. You can then see the templates just as you did on the start screen.
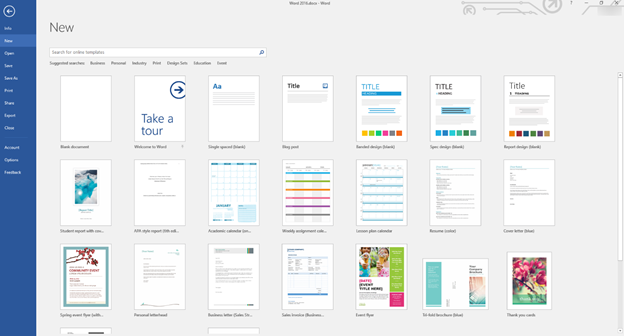
As you can see, the blank document template appears first, followed by a tour of Word 2016. Next, you have a single spaced plain document. If you click on it to open it, Word shows you the features of this template:
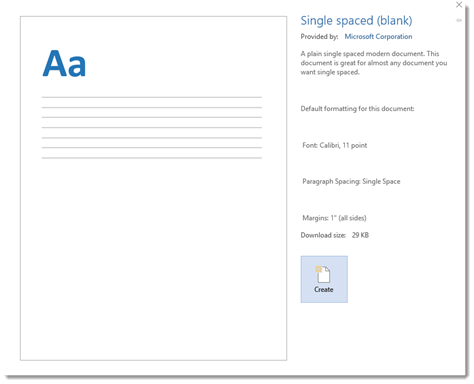
Click the Create button to create the template.
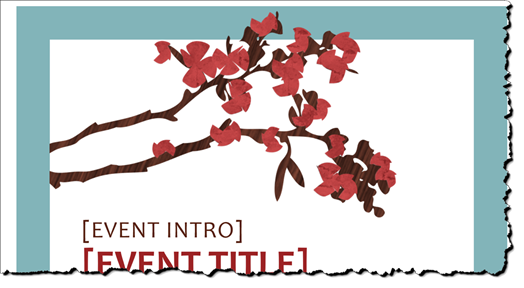
Now, let's choose the Spring Event Flyer template, and open it up so we can show you an example of a Word template.
Again, Word gives us information about this template.
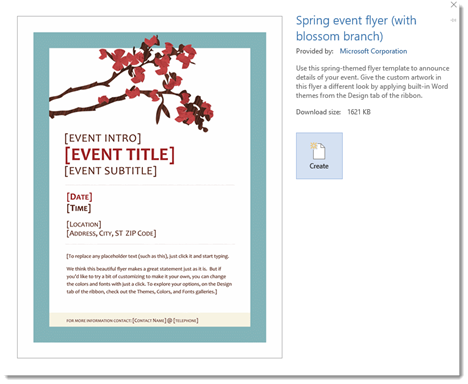
Click the Create button. Word will load the template for you.
Search for a Template
There are a lot of templates in Word. The thumbnails you see when you go to File>New are only a small sampling.
Word 2016 gives you a few ways to search for a template you want. Go to File>New. At the top of the screen, you'll see this:

You can type in the kind of template you want. Let's say we want a report.
Type in report.
Word then searches its online database for a report template, then shows you the results:
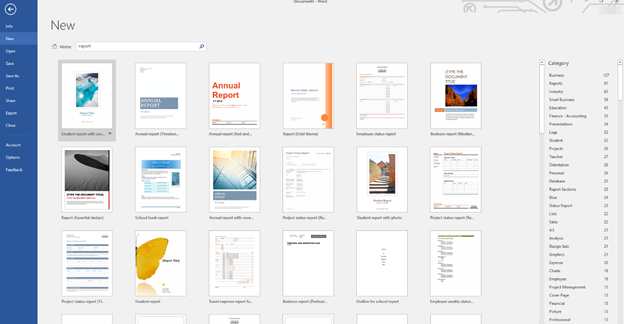
You can see all the results pictured on the screen. To the right, you'll see the category pane where you can search for a report template by category. Simply click on a category to see its reports.
You can also search for a template by clicking on one of the suggested searches below the search box.
Create and Save a New Template
In addition to the thousands of templates available in Word 2016, you can create and use your own. To do so, simply create the document and when you are finished, then click File>Save As. Select the location you want to save the template to, then select "Word Template" or "Macro-Enabled Word Template" from the "Save as Type" drop down menu.
Change the attributes of the style to suit your preferences, then click OK.
Modifying a Template
Let's go back to our Spring Flyer Event template that we showed earlier:
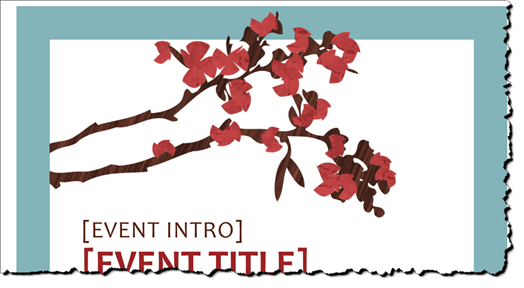
Once you've opened a template, you can now make changes to it. You can change the font size, font color, etc. if you want, and you can also customize the text to make the template your own document.
To edit the text, click on the text that you want to edit. It then selects the text, as shown below.
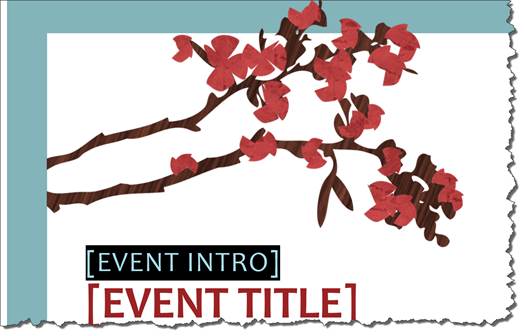
Now simply type the text you want, as shown.
While the text is selected, you can also look in the Style gallery to see the style applied to it.

You can modify the style to change the formatting.
Click on any image in a template, and you'll see a bounding box appear around it:
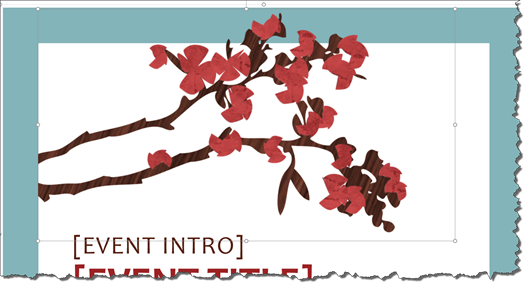
You can then cut or copy the image.
If you want to change the colors used in the template (such as the border colors), you can do that by changing the theme.
Working with Themes
Like templates and quick styles, themes are another way to achieve consistency in your documents. Themes can include font styles, color palettes, and special effects. What they do is give you a group of fonts, colors, and special effects that work well together and even complement each other. This can be illustrated by taking a closer look at some of the themes.
Themes are located under the Design tab.

We can change the theme from the template above by simply choosing a new theme from the Themes dropdown menu.

We can also choose a new color scheme by clicking the Color button on the far right side of the Document Formatting group and choosing a new one:
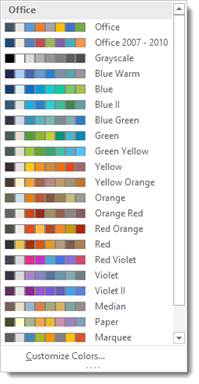
Let's choose Yellow Orange.
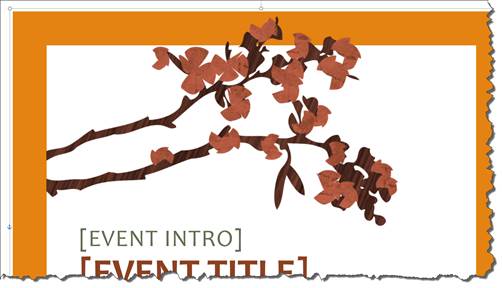
That's all it took to change the colors in our template:
Applying a Document Theme
So far, we've talked about modifying or changing a template's theme. However, you can also apply a theme to your documents that you create.
Before we learn how to do that, it's important to understand exactly what a theme is, so you know how it applies to your text. A theme consists of three things: Colors (of graphics and design elements, background color, text color, and hyperlinks), fonts (headings and body text), and graphical effects such as 3-D, shading, drop shadows, etc.
To apply a theme, select a theme from the Theme Gallery under the Design tab. You can mouseover any theme to preview what it will look like in your document, just like you did with styles. Simply click on a theme to apply it to a document.
Modify or Create a Theme
If you want to create a custom color theme (or a color scheme that you create instead of the ones Word has built in under the Color button), click the Color button under the Design tab, then select Customize Colors.
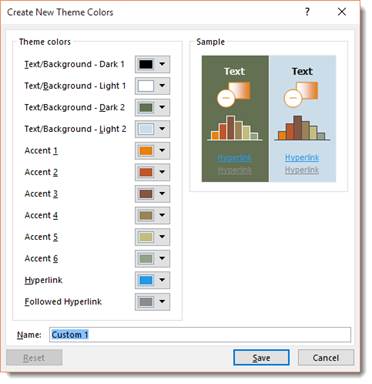
Choose the colors for the various elements, then enter a name for your new color theme. Click Save when you're finished. This new theme will now appear with the other themes.
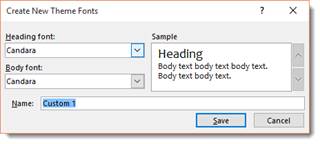
To create a custom font theme, click the Fonts button under the Design tab and choose Customize Fonts.
