Templates are simply publications built in to Microsoft Publisher 2016 for you to use. These templates already have design elements added to them, such as color scheme, backgrounds, graphics, images, and even areas for text. When you select a template, it's nearly-ready-to-use. All you have to do is customize it to make it your own.
We're going to take this entire article to learn how to find the template you want, then customize it for your use. By the end of this article, you will be able to create an entire publication using a template.
Finding a Template
What if you already have Publisher open and want to start a new publication? It's easy. Click on the File tab in the Ribbon, then click New in the column on the left side of the window.
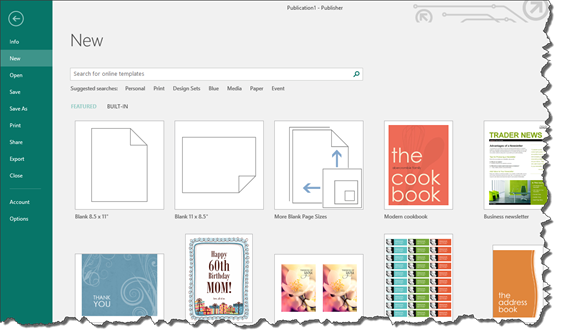
Click on the template that you want to use. We are going to select Business Newsletter.
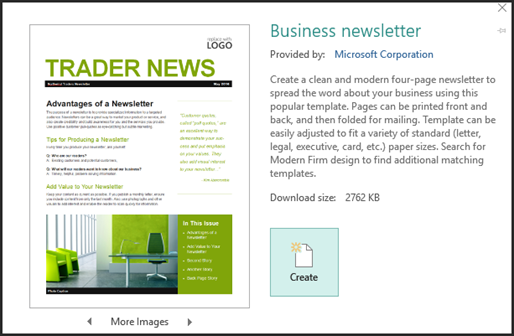
Click Create.
The template will then open in the Publisher window.
Using Search to Find a Template
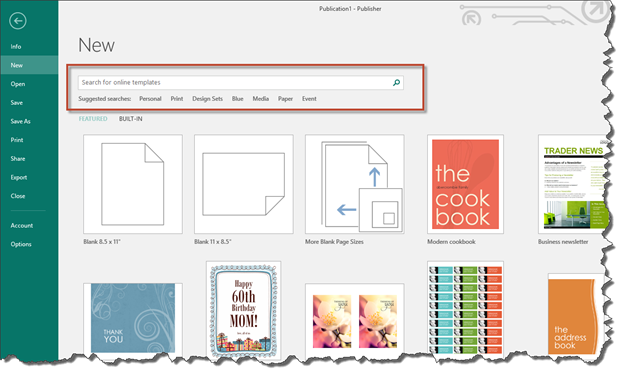
You can also use the search feature to find a template that you want. The search feature is located at the top of the templates in the Backstage View, directly above the blank publications.
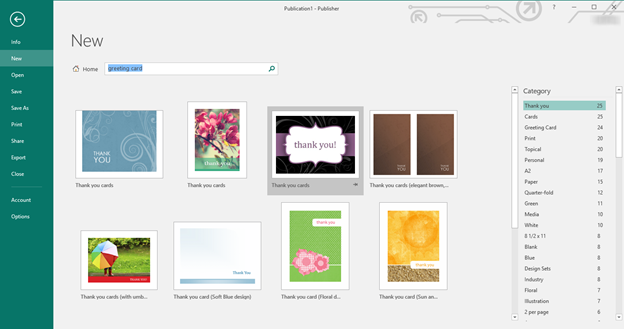
To search for a template, enter the type of publication that you want to find. For example, let's say you want to find a greeting card.
Enter "greeting card" into the search box.
Below, you can see the templates that match our search:
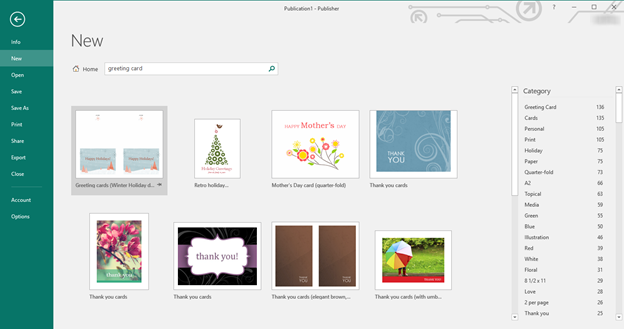
On the right side of the window, you can see the greeting cards broken down by category.

To further narrow your search results, you can click on a category. We clicked on "Thank You".
You can click on more than one category to narrow results. For example, you could click on "Thank You" and "Green".
If you didn't like any of the cards in the "Thank You" and "Green" categories, could select a third category, or you could remove a category by hovering your mouse over it until you see the "X".

Click the "X" to remove the category from your search.
Another Way to Find Templates
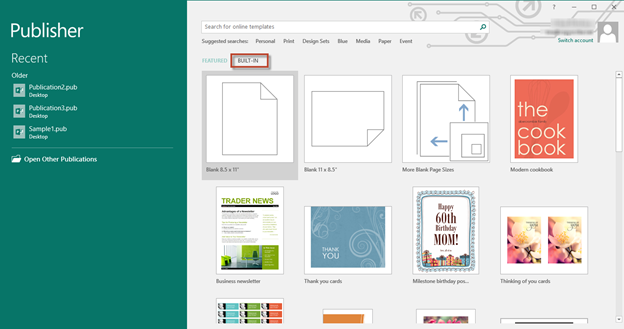
When you go to the Backstage View and look at templates, you will see the featured templates displayed. That said, there are a lot more templates that you can use than just the featured templates. In fact, there are hundreds that are broken down and sorted into various categories.
To see these templates, go to the Backstage View, then click New in the left column.
Click the Built-In tab above the featured templates.
You will then see all the different categories of available templates. Each category contains templates from which you can choose.
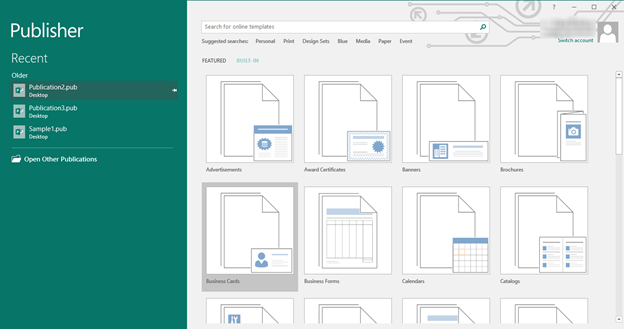
Let's click on the Advertisements templates.
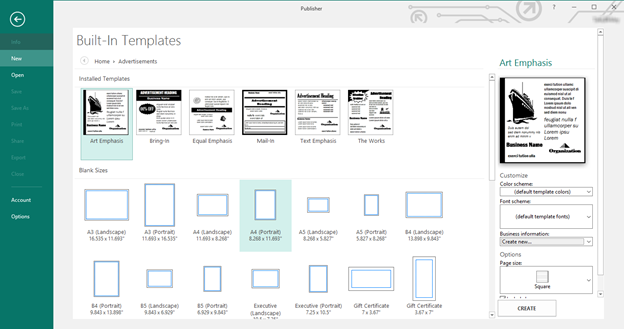
You will then see the installed advertising templates available for you to use.
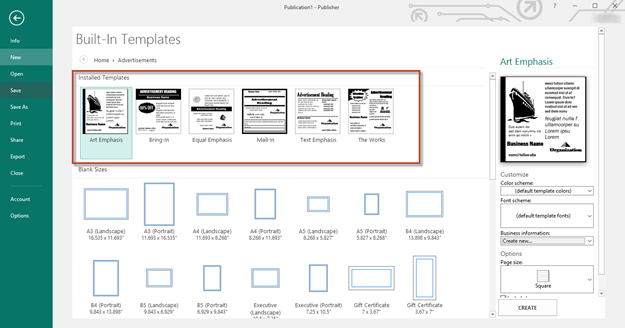
Below the installed templates, you will see sizes. You can select a blank publication size instead of a built-in template if you want.
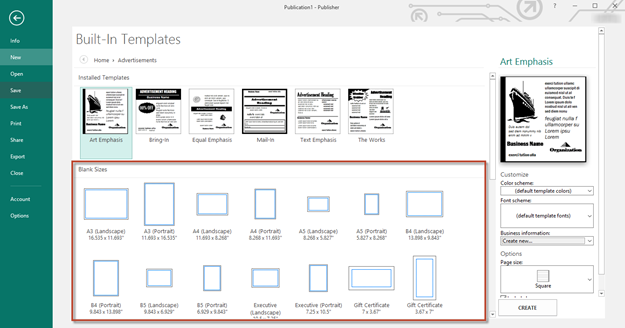
To the right of the installed templates and the various sizes, you will see a column with customization options. You can use this column to customize your template before you ever open it in Publisher. You can select the color scheme, font scheme, and page size. You can also add your business information.
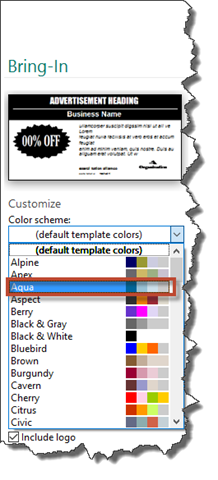
To show you how to customize a template in the Backstage View, we are going to choose the Bring-In template and customize it.
As you can see below, we've chosen the Aqua color scheme.
We are going to choose Courier New Bold for the font scheme.
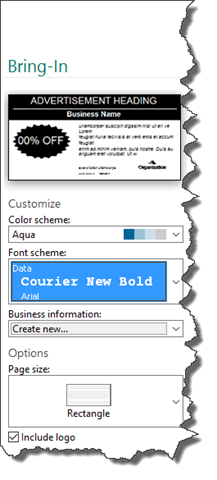
We aren't going to add business information yet, but we're going to select square as our page size.
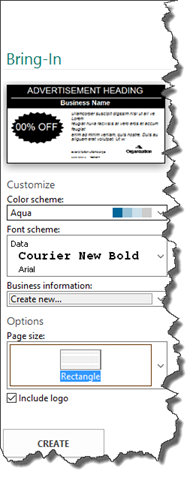
When we're finished, we click the Create button to create our template.
You can do the same for the various sizes of built-in blank templates. This means you can already have your color scheme, font scheme, and other elements selected when you begin to work on your publication, allowing you to save yourself a little time.
About Customizing Templates
Each publication that you create, whether you create it from a template or from scratch, is going to be made up of objects. Basically, anything that you insert into -- or draw on -- your publication is an object. A picture that you insert is an object. A table that you insert is an object. Text that you insert is contained within a text box. A text box is an object. You get the idea.
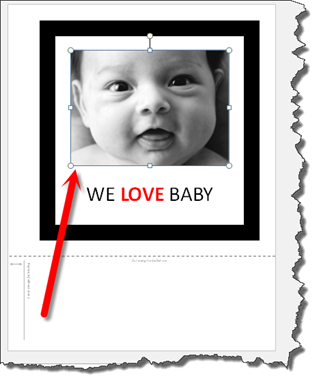
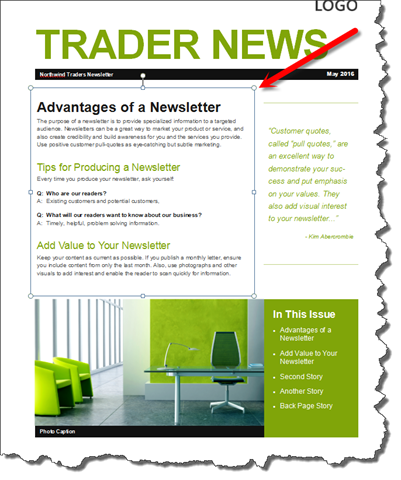
When you customize a publication, you will customize the different objects by first selecting the object, then making the changes. Whenever you select an object, you'll see a bounding box around it. The arrow below points to the bounding box around the graphic in the template.

Remembering this simple step will make customizing your publications easier.
Replacing Images in a Template
Most Publisher templates contain stock images that you can either use or replace. Stock images are simply images that are licensed to people, organizations, or companies for specific use. In this case, Microsoft has stock images for use in their templates.
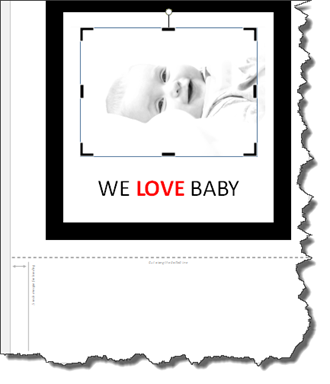
Take a look at the template below, which is a baby album.
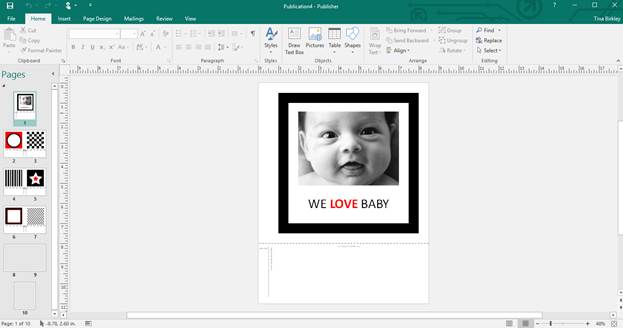
Once you open a template such as this in Publisher, you're going to want to customize it by adding your own images and graphics. We want to replace the image of the baby.
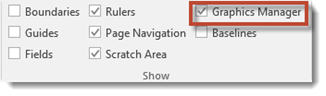
Most of the time, to insert an image into a publication, we'll go to the Insert tab. However, since we want to replace an image in a template, we are going to go to the View tab instead, then put a checkmark beside Graphics Manager in the Show group.
The Graphics Manager pane opens on the right side of your screen.
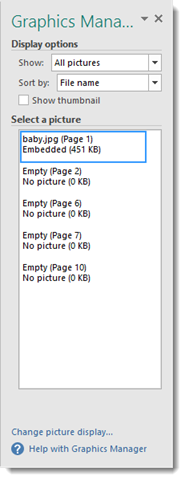
The Graphics Manager shows you all graphics in the template. However, by default, it only lists the images by name. Put a checkmark beside "Show Thumbnail."
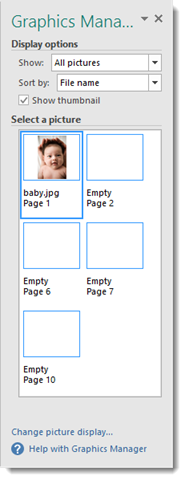
Now you can see the actual images instead of the image names, which will make it easier to locate the picture you want to replace.
Select the image that you want to replace by clicking on it in the publication or in the Graphics Manager. We've already selected our image in the snapshot above. You can tell it's selected because it is highlighted with a blue box. In the template itself, the image has a bounding box around it.
Now, hover your mouse over the image in the Graphics Manager. You'll see a downward arrow appear. Click on it to see a context menu, as pictured below.
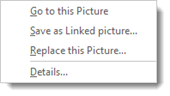
Choose "Replace This Picture".
Locate the picture that you want to use on your computer, then click Insert.
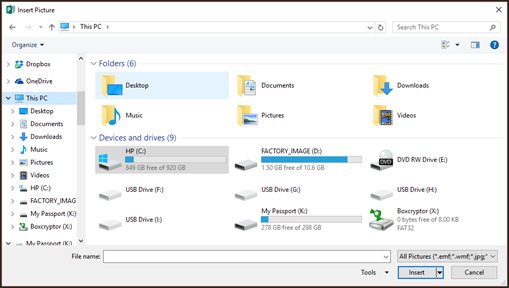
As you can see, Publisher replaced the image for us, making sure the new image is sized and positioned correctly.
Once you insert the new image into the publication, you will see crop marks around the image. These are the black marks that you see at the top, bottom, left, and right center � as well as at all corners. Crop marks allow you to cut away the edges of the image if you want to reduce the image size, as well as remove the edges.
To crop the image, click on one of the crop marks and drag inward.
Next, go to the Picture Tools Format tab on the ribbon. Go to the Crop group.
Click the downward arrow on the Crop button. Click Crop.
The outside of the image is now cut away.
Editing Text
You can also change the text that is on the template. We're going to teach you the basics of editing text in a template.
In Publisher 2016, all the text that you add to a publication is added inside of text boxes. It may seem like working with text boxes is a hassle, but it's really not because you can easily drag and drop the text boxes anywhere in a publication by just moving the text box.
To edit the text in a text box, click the chunk of text that you want to edit to select it. When you click on the text you want to edit, you will see the text box around it.
You will see the cursor inside the text box. Now you can just start typing.
Getting Started with a Blank Template
Working with Page Setup
Once you open a blank publication in Publisher, you'll want to do things such as set the margins and page size. Some of this you may have already established in the Backstage View when you chose the blank template size. However, you can also set these things in the main Publisher window using the Page Settings dialogue box. The Page Settings dialogue box allows you to get started designing your own publication and set options for it.
You'll find the Page Setup dialogue box by going to the Page Design tab on the Ribbon, then going to the Page Setup group. It looks like this:
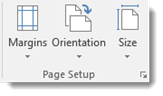
These three buttons will allow you to adjust the margins, orientation, and size of your publication.
-
Margins means the amount of white space that is along the top, bottom, left, and right edges of your publication. Margins are measured in inches.
-
Orientation refers to either Portrait or Landscape. Portrait means the longer edge of the publication makes up the height (it runs vertical). Landscape means the longer edge goes horizontally across.
-
Size refers to the size of the publication and directly corresponds to the size you want to print.
Click the arrow at the bottom right hand corner of the Page Setup group.
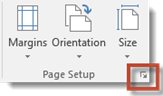
You will then see the Page Setup dialogue box, as pictured below.
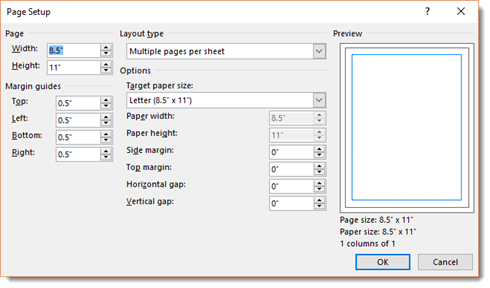
Let's learn how to set the options for your page.
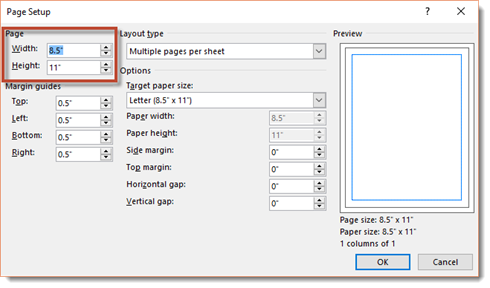
Under the Page section, you're going to enter the height and width of the paper of your publication.
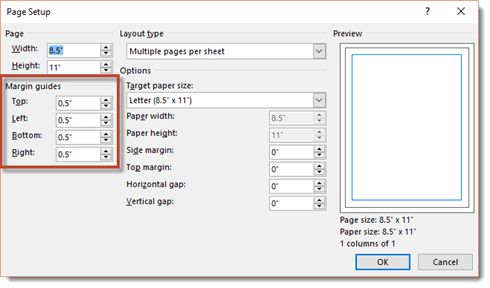
Under the Margin Guides section, you'll set the amount of white space that goes around the edges of your pages. You'll enter margins for the top, left, bottom, and right. Remember, this is measured in inches.
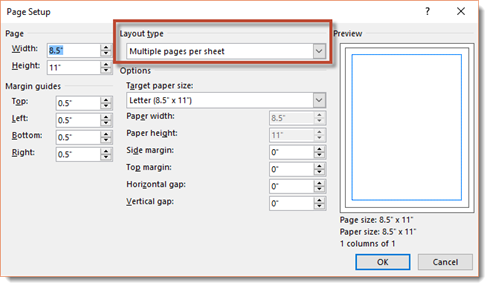
Next, under the Layout Type section, select the layout type:
-
One Page Per Sheet means that one page of your publication will be printed on one sheet of paper. You can use Print Preview to see how it fits on the page.
-
Booklet means your publication will be in a booklet design. You'll notice the margin guide labels will change. Left will be Outside. Right will be Inside. This lets you know where they appear in your booklet.
-
Email will enable you to create a design for email.
-
Envelope will set you up to create a standard 9.5"x4.125" envelope. If you want to change the measurements, you'll have to change the width and height in the Page section of the window.
-
Folded Card. Use this to create greeting cards. You'll print the sheet, then fold it to make the card. When you choose this layout, sheet fold options are displayed. You can decide how you'll fold your publication. On the right side of the window, Publisher 2016 will show you how your publication will be folded.
-
Web Page allows you to design a web page.
-
If you choose Multiple Pages Per Sheet, you'll print more than one page of your publication on a sheet of paper. When you select this, target sheet options are displayed. Horizontal gap refers to the space between each column of page. Vertical gap refers to the space between rows. The Preview window to the right shows you how it will look.
As you adjust your settings, you'll be able to see the changes in the Preview section.
If you want, you can also specify the size of the paper you'll use to print your publication.
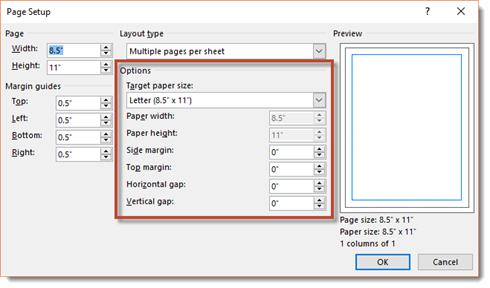
Click OK when you're finished setting your options.
NOTE: You can also use the Size and Margins buttons on the Ribbon to change the margin and page size.
Setting Page Size Using the Size Button
You can also change the page size by clicking the Size button in the Page Setup group.
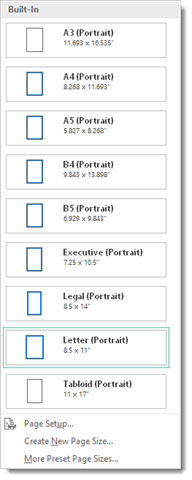
By clicking the dropdown menu, you'll see the standard sizes listed. You can click on one of the sizes to select it. Choose a size from the menu. If you don't see the size you want, you can also click Create New Page Size to create a size not listed.
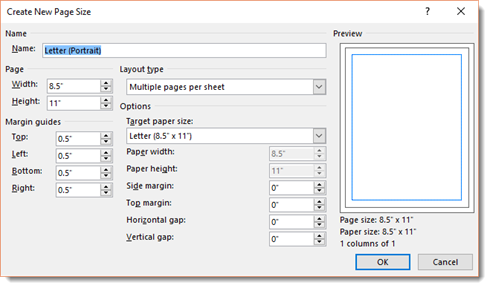
As you can see, you can set the page size, margins, and the layout type just as we did during page setup earlier in this article. Fill out the information in the dialogue box, then click OK.
If you want to choose from preset page sizes provided by Publisher, click on More Preset Page Sizes from the Size dropdown menu.
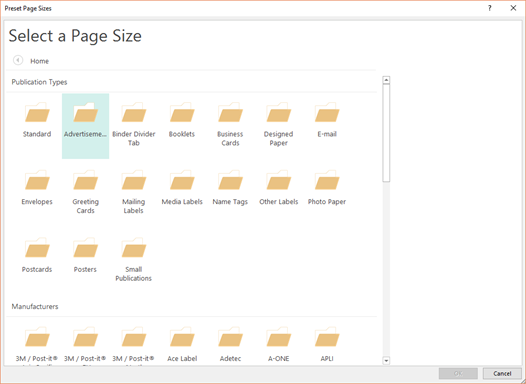
Select a publication type or a manufacturer. For example, if you want to print a 3M Post-It note, you'll want to create the publication to match the size specified by the manufacturer.
We're going to choose Postcards from "Publication Types".
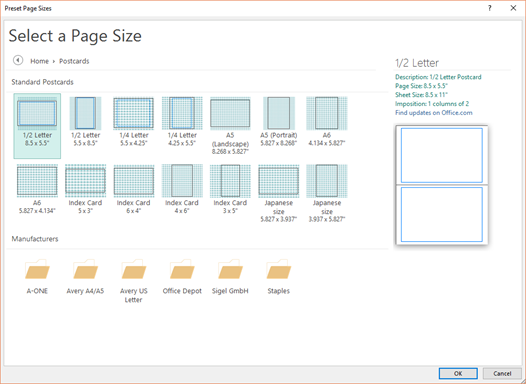
Now you can select a size � or a manufacturer. We're going to choose Office Depot under Manufacturers.
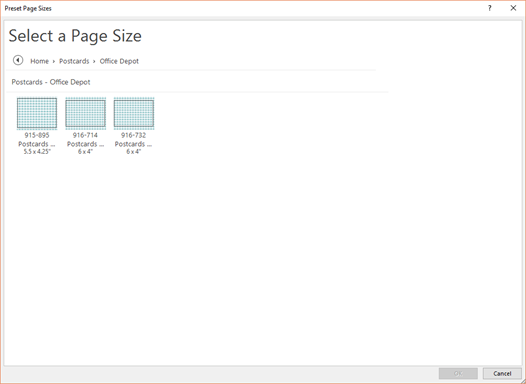
Now we can choose a size.
Click OK when you're finished.
Changing the Page Orientation
To change the orientation of your page from portrait to landscape or vice versa, click the Orientation button in the Page Setup group.
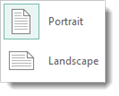
Our blank template is 8.5" X 11", which is portrait. We can switch it to landscape, and our new measurements will be 11" x 8.5".
Using Layout Guides and Rulers
When you're working with a blank publication and designing it yourself, you can use layout guides and rulers to organize and align your text and pictures, as well as other items, into columns and rows. These tools make it a lot easier to design professional looking publications because it makes lining things up a snap. Without the guides and rulers, it would be hard to create an organized publication.
Layout guides are there to help you align objects (pictures, text boxes, etc.). You can enable the layout guides and get visible guidance to easily align everything on your page. Your layout guides can serve as a grid on your pages and master pages. You'll use the grids to align images, graphics, shapes, and any other object that you insert into a publication.
The layout guides in Publisher 2016 include four layout guides: margin, column, row, and baseline. When you use these, they make up a grid.
To structure a page using layout guides, click the Page Design tab, then click Margins. Select Custom Margins.
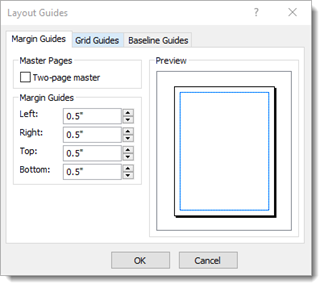
Under the Master Pages category, make sure the Two-Page Master box is checked if you want a two-page spread.
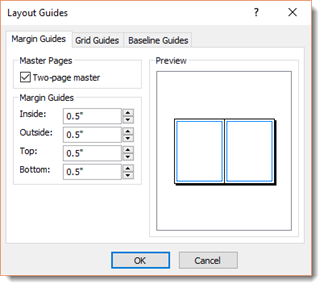
Under Margin Guides, specify the amount of space you want for the Inside, Outside, Top, and Bottom margins. Remember, the space you specify for margins will be the amount of white space around your publication. You can see the current margins in the preview. The outside of the blue box represents margins
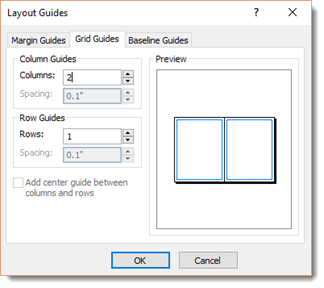
Now, click on the Grid Guides tab.

Under the Column Guides section, specify the number of columns in the Columns Box. Then specify the amount of space you want between the columns in the Spacing box. This will add columns to your presentation. You can see we added two columns below by looking at the preview area.
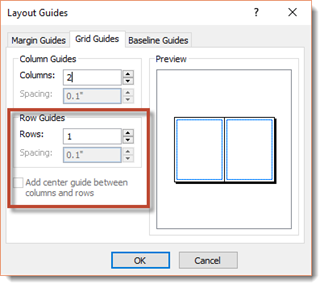
Now, under the Row Guides, do the same thing you did for columns, expect this will be for rows.
Clicking "Add Center Guide Between Columns and Rows" will add an additional guide in the center of the space between your columns and rows.
Next, let's set up the Baseline Guides. Click the Baseline Guides tab.
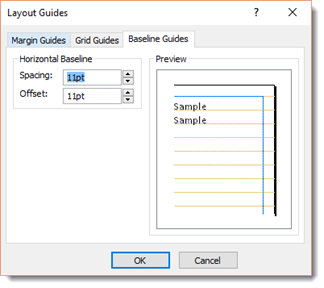
Baseline guides help align the text that is not linked between several text boxes in columns.
Specify the amount of space that you want between the baselines.
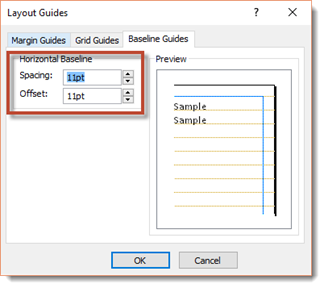
Click OK when you're finished.
Another Way to Add Guides
You can also add guides by going Page Design tab on the Ribbon, then the Layout group. Click the Guides dropdown menu.
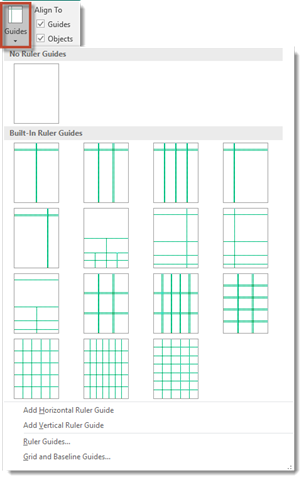
These are the pre-defined ruler guides that Publisher gives you to use. You can select any of these or use the ruler to create your own.
Using the Ruler to Add Guides
By default, the ruler extends horizontally above your publication and vertically along the left side of your publication. You can see the rulers highlighted in yellow in the snapshot below.
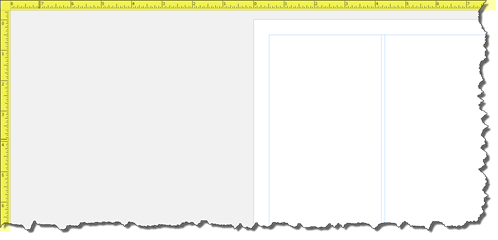
Whenever you move your mouse over the work area, you'll see a black line appear on the rulers that tells you the location of your mouse.

You can use this little black line to add guides. This is helpful if you want to align objects to the center of your publication or at a certain spot in your publication.
To add a guide, click on the black line, then go to the Guides dropdown menu and select Add Vertical Ruler Guide. Use the vertical ruler to add a horizontal guide.
Creating a Page Background
You can easily change the background of your page from the plain white that you see right now.
To add or change the page background, click the Page Design tab.
Now, click Background in the Page Background group on the far right. Click the Background dropdown menu toward the right side of the ribbon.
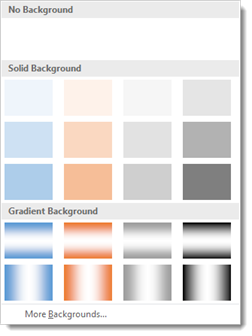
Select the background you want or click on More Backgrounds.
You will then see the Format Background dialogue box, as pictured below.
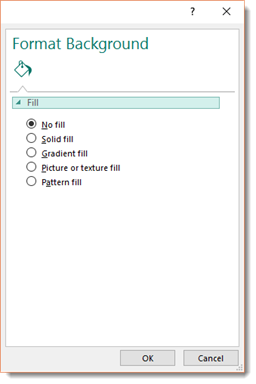
Let's talk about the different types of backgrounds you can create: solid fill, gradient fill, picture or texture fill, and pattern fill.
About Fills
Fills are colors, patterns, and image you add to the background. Remember it like this: fills are what fills the background with color. You can use a solid color fill, such as purple, blue, green, etc. You can also use a gradient fill, pattern fill, or a picture.
Solid Fills
A solid fill is simply one color that completely fills the background of your page. To choose a solid fill, put a checkmark beside Solid Fill in the Format Background dialogue box.

Select the color, then adjust the transparency if needed.
Gradient Fills
In a gradient fill, the color is gradually shaded, usually from top to bottom. A gradient fill is shown below.

As you can see above, the top and bottom of the page is a darker blue than the middle. When you use a gradient fill, the color fades in an out. You can also have more than one color, and the colors will fade in and out.
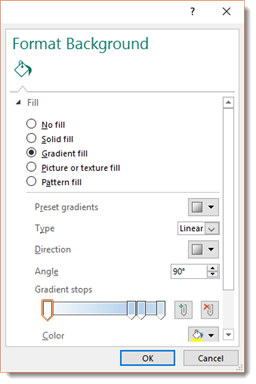
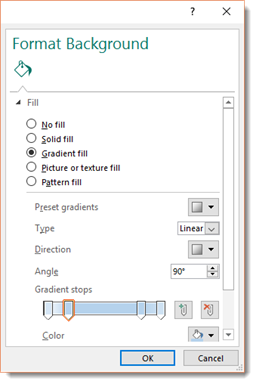
To create a gradient fill, go to the Fill section of the Format Background dialogue box. Put a checkmark beside Gradient Fill, as shown below.
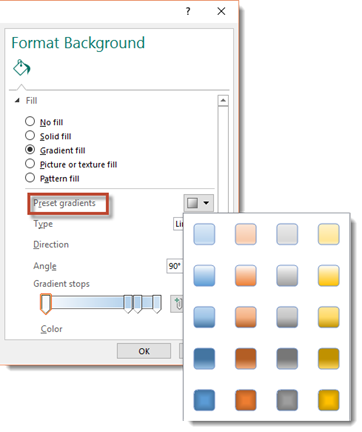
You can then choose a preset gradient if you want. A preset gradient determines how the colors fade in and out in your gradient.
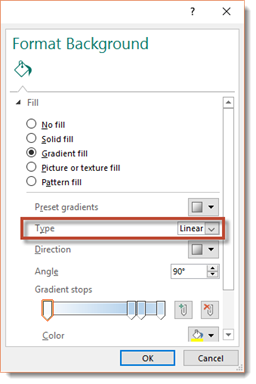
You can also choose a gradient type, either Linear or Path.
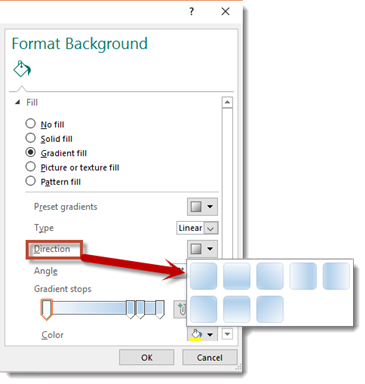
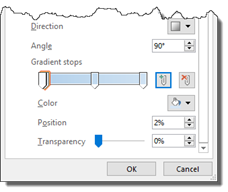
Next, you can choose the direction of the gradient.
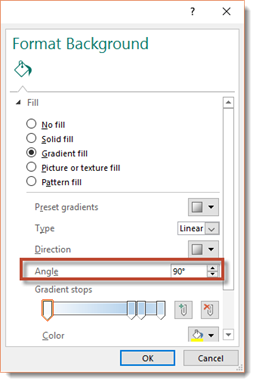
You can also select the angle of the gradient.
Gradient Stops determine the "quickness" of the fade in or fade out effect. In the snapshot above, dragging a gradient stop on the right hand side � toward the left hand side � will make it fade from a light blue to a dark blue quicker, as opposed to a more gradual effect. Take a look below, then compare it to the snapshot above, to see what we mean.
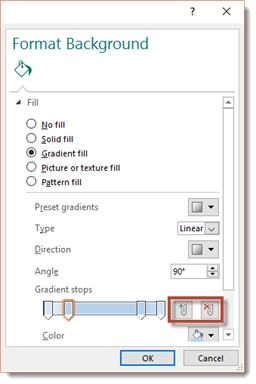
You can add gradient stops by clicking the Add Gradient Stop button. You can delete a gradient stop by clicking on the stop, then clicking the Delete Gradient Stop button. These buttons are highlighted below.
Below the gradient stop buttons, you can also change the color used in your gradient, as well as the position and transparency.
Take some time to explore the different options for creating gradients. The best way to learn how to create gradients is by actually creating them.
Pattern Fill
In addition to using a gradient fill as a page background, you also can assign a pattern as a fill as the background for your page.
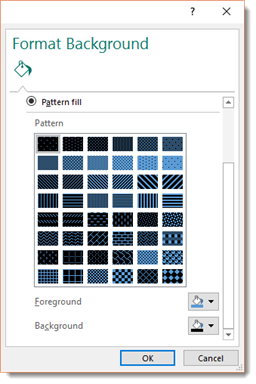
To assign a pattern, select Pattern Fill from the Format Background dialogue box.

Publisher supplies several patterns from which you can choose. Simply select a pattern, then select a foreground and background color for the pattern.
Picture and Texture Fills
If you want to apply a picture or texture to the background instead of a pattern or gradient, click Picture or Texture Fill.
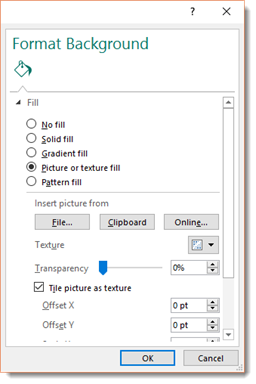
If you want to insert a picture, choose if you want to insert it from:
-
A file on your computer
-
The Clipboard
-
From an image online.
Some images that you might use are too dark for a publication because you can't easily add text over them (and have the text be seen). For that reason, you can increase the transparency of an image you use as the background so it's lighter and more transparent on the page.
If you want to insert a texture, click the Texture dropdown box.

You'll then see different textures you can apply.
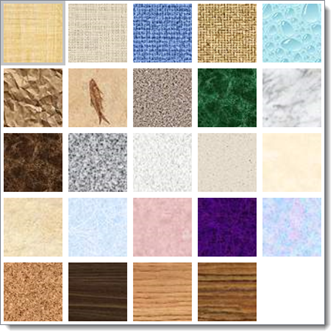
You can then set the transparency of the texture.
When you add a texture as the background, the texture is tiled over the entire area of the background. In other words, it will completely cover your page, but appear behind objects.
If you choose to use a picture as a background and the picture isn't large enough to cover the entire page, you tile the picture so that it does. However, be warned. When you tile a picture, dozens of thumbnail-like instances of the picture will cover the page.
In the example below, we used a clip-art image of a tea cup. We chose to tile the image since it was too small to cover the entire page, and resizing it would have distorted the graphic.
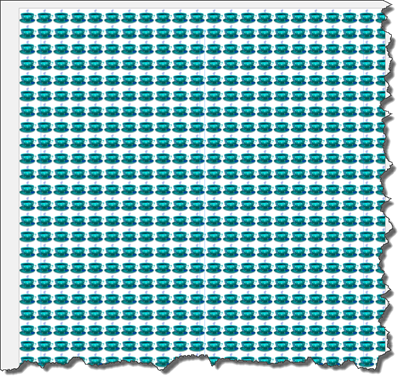
As you can see, we now have dozens of teacups serving as the background of our page.
If you want to tile a picture, put a checkmark in the "Tile Picture as Texture" in the Format Background dialogue box.
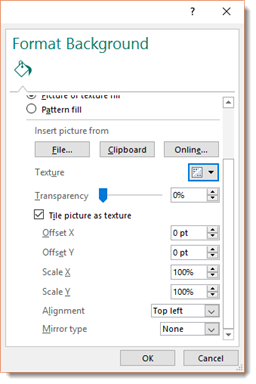
You can then offset it horizontally (X) or vertically (Y), scale it horizontally or vertically, align it to the page, or mirror it.
When you're finished adding your fill, click the OK button.
Creating and Using Master Pages
The ability to create and apply master pages is one of the best features of Publisher. If you've never used them before (and most people haven't), you're in for a treat. Master pages can save you tons of time and hard work, and help you keep your publications consistent.
So what exactly are master pages, you might ask. Master pages are like overlays that contain design elements that you may want to apply to several (or even all) the pages in your publication. For instance, if you were creating a photo album, you might want to create a master page that has placeholders for images. You can use the master page for all pages in the publication or create different masters. This way, you don't have to recreate layouts each time.
Without master pages, you would have to manually enter all of these elements onto every page--a very time consuming, labor-intensive process. Even worse, you'd have to reformat each element and position it precisely.
With master pages, you can insert the element only once, and choose which pages you want that element to appear on. Some common elements used in master pages include page numbers, headers, and footers, but you can also add text boxes, artwork, and custom watermarks.
By default, Publisher 2016 automatically includes one master page every time you create a new publication, but you can easily add more.
To view and edit your master pages, click on the View tab. On the far left, you'll find the Views group.

Click the Master Page button. When you do this, the view will change, as in the snapshot below.
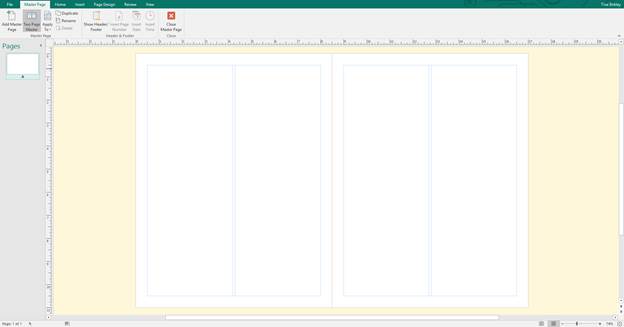
Here you can see that a Master Page tab has been added to the Ribbon. Instead of the pages of your publication, you will only see your master pages in the Page Navigation pane. You can add elements to a master page just like any ordinary page, except that everything you put on a master page will appear on every publication page it is applied to.
To show you how this works, we're going to add a master page, edit it, then apply it to our publication.
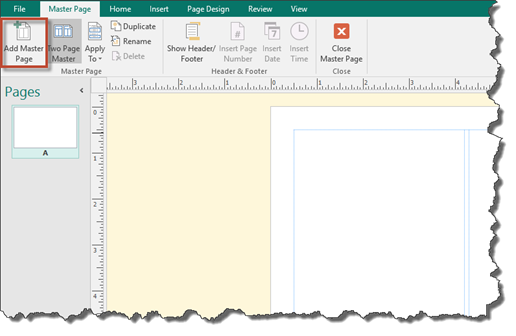
There are two ways to add a new master page. The first, and most obvious, is to click the Add Master Page button, which you can find on the far left side of the ribbon while in Master Page view.
The New Master Page dialog will open.
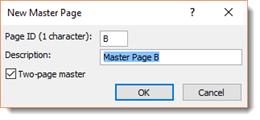
Publisher automatically assigns the new master page an ID. This is basically a numbering system, except instead of calling them page 1, page 2, page 3, etc., we call them page A, page B, page C, etc. You can change this ID if you want, but it's not really a big deal.
In the Description box, you can enter a short description. This can be an easy way to remember what's on a page if you have a lot of them. For instance, you might enter "Title Page", "Chapter Headings", "Artwork," etc.
If you'd like a two-page spread, select the "Two-page Master" checkbox.
Click OK when finished.
Another way to create a new master page is to right click anywhere in the Page Navigation pane and click Add Master Page.
Sometimes you might want to create a master page based on an existing master page. This is convenient if you already have many elements on a page, and you want to add a few more objects, but not apply them to all the pages in your publication. To do this, right click on any master page in the Page Navigation pane. Now select, Insert Duplicate Page. Alternatively, you can select a page and click the Insert Duplicate Page in the Master Page tab.
Now let's apply a master page.
To do so, select a master page in the Page Navigation pane, then go to the Master Page tab.
Click the "Apply To" button in the Ribbon.
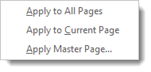
You can choose to apply it to all the pages in your publication, to the currently selected page of your publication, or to apply the master page to a range of pages.
Let's click Apply Master Page. When we do this, a will open, asking us to choose a page, or range of pages.
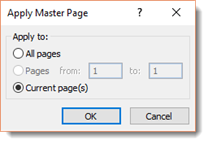
Make a selection, then click OK.
When you are finished creating, editing, or applying your master pages, click the Close Master Page button in the ribbon to return to page view.
You can also use your master pages to apply backgrounds.