Using Layers with Adobe Photoshop CS4
Layers are simply images or effects, laid on top of other images or effects. Imagine taking five sheets of plastic wrap and painting a small picture on each one, then stacking the sheets on top of each other. The five individual pictures would become one new picture when you stacked them together. That is exactly what a layer is. By using layers, you can add effects to an image, alter an image, or create a new one.
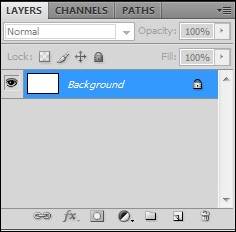
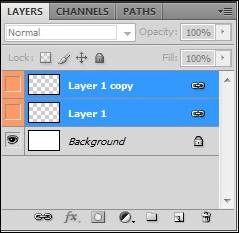
To view all the layers that you have in a Photoshop image, go to the Layers panel. It is grouped with Channels and Path. If you do not see it, go to Window>Layers. There should be a check mark beside Layers.
The background layer is created for you by Photoshop. It is the layer that is created every time you create a new image or document � unless you create a new image with a transparent background. A background layer is locked. This means that you cannot move it. However, you can paint on it, or add images to it.
The background layer is labeled and shown in the Layers panel, as shown below).
Once you have created additional layers (on top of the background layer) you can delete the background layer by clicking on the layer in the Layers Panel, then double clicking on he trash can  in the lower right side of the panel.
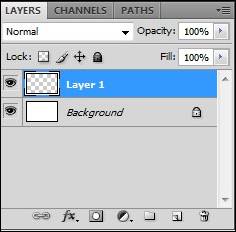
To create a new layer to add to existing layers, click the Create a New Layer icon  , located in the Layers panel.
NOTE: You can also go to Layer>New>Layer.
You will now see the new layer in the Layers Panel.
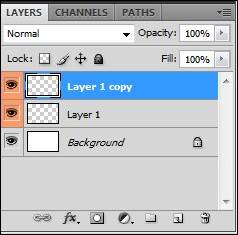
Create a New Layer with Effects from Another Layer
- Start out by selecting the existing layer in the Layers panel, by clicking on it.
- Drag that layer to the Create a New Layer button at the bottom of the layer.
The new layer will now contain the effects of the existing one.
Turn a Selection into a New Layer
First, select the area or object of an image that you want to turn into a new layer.
Then, go to Layer>New>Layer Via Copy or Layer>New>Layer Via Cut to copy or cut the selection; then paste it into the new layer.
When working with individual layers, you can select them to make it easy to work on them. If you are painting or making tone adjustments, you can only work with one layer at a time.
The layer you are working on is called the active layer. The active layer appears in the title bar of the document window. If you want to move, align, apply styles, or transform layers, you can select and work on more than one layer at a time. Select layers in the Layers panel.
To select a layer(s):
- Click a layer in the panel.
- To select multiple, but contiguous, layers, click on the first layer, then Shift+click the last layer. If they are not contiguous, Control+click each layer in the panel.
- If you want to select all layers, go to Select>All Layers.
To deselect all layers, go to Select>Deselect Layers.
You can link layers together so that they maintain their relationship, even if both layers are not selected. When layers are linked together, you can move or apply a transformation to the linked layers. This makes it easier than doing one layer at a time.
To link layers:
Select the layers that you want to link in the Layers panel.
Click the  at the bottom of the panel.
To unlink layers, simply select a linked layer, then click the link icon again.
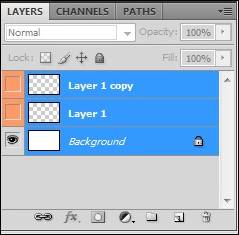
When layers are linked, the link icon will appear beside each linked layer, as shown below.
Delete a Layer
To delete a layer, select it, then click the  icon at the bottom of the Layers panel. A dialogue box will appear asking if you are sure you want to delete this Layer. Click Yes.
When you lock layers, you protect their contents. Photoshop allows you to lock layers fully or partially. A fully locked layer cannot be edited or modified, as long as it is locked. For example, when you are finished with a layer, you may want to lock it fully. However, you may just want to partially lock a layer that has the correct transparency and styles, but still needs to be positioned on the other layers.
Whenever a layer is locked, a lock icon  appears to the right of the layer in the Layers panel. The icon is solid if a layer is fully locked, and hollow
  if it is only partially locked.
To fully lock a layer:
� Select the layer, then click the Lock All option in the Layers panel. The Lock All Option is found above all existing layers. It is the last icon in the row: 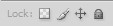
To partially lock a layer:
Select the layer, then click one (or more) of the options in the Layers panel:
 Lock Transparent Pixels. This restricts any further editing to colored pixels in the layer.
 Lock Image Pixels. This makes it so the layer's pixels can not be modified with the painting tools.
 Lock Position. This prevents the pixels in the layer from being moved.
When you merge two or more layers, the layers that you have merged become one layer.
To merge layers:
� Select the layers that you want to merge.
� Right-click the layers and select Merge Layers.
A style is simply defined as an effect that you apply to a layer. You can create your own styles or use pre-set styles that Photoshop provides to you.
To apply a pre-set style to a layer:
Select a layer(s) to apply a style to.
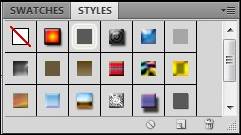
Select a style to apply and click on it to apply it to the selected layers.
To copy a style from one layer to another:
Select the layer that contains the style you want to copy in the Layers panel.
Go to Layer>Layer Style> Copy Layer Style.
Now, select the layer that you want to copy the style to, then go to Layer>Layer Style>Paste Layer Style.
You can fill a layer with the paint bucket tool, pattern, or color. Let's start out by learning how to use the Paint Bucket tool  to fill a layer.
To fill a layer with the Paint Bucket tool:
Select a foreground color in the toolbox.
Select the Paint Bucket tool.
In the Options Bar (shown below), select if you want to fill with the foreground color, or a pattern.

Select the blending mode and opacity for the paint, then enter the tolerance for the fill. The tolerance determines how similar in colors the pixels must be, to the pixels that you click.
For smoother edges, click Anti-Alias.
Leave Contiguous unselected if you want to fill all similar pixels in the image.
If you want to fill pixels based on merged color data from all layers, check All Layers.
Now, click the part of the image that you want to fill.
In an image or document where you have several layers, it may be helpful to organize them into groups. By creating groups, you create a hierarchy of layers. It also makes it easier to find what you are looking for when you need to edit layers. Perhaps you will want to group all layers containing text together, or all groups containing shapes. You can easily do this in Photoshop.
To group layers:
� Select the first layer that you want to group, and drag it to the Group folder  at the bottom of the Layers panel.
� Drag all subsequent layers to the group shown in the Layers panel.
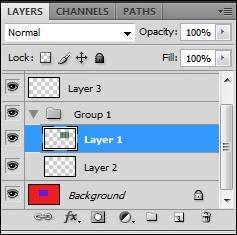
� In the snapshot above, we dragged Layer 1 to the Groups folder, then dragged Layer 2 to "Group 1."

The blending mode that you choose for individual layers will effect how the pixels in the selected layers blend with other pixels in the image.
To select a blending mode, go to the Layers panel and select a layer.
Choose a blending option from the Blend Mode menu .
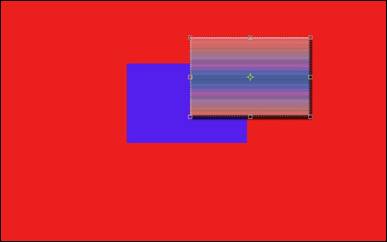
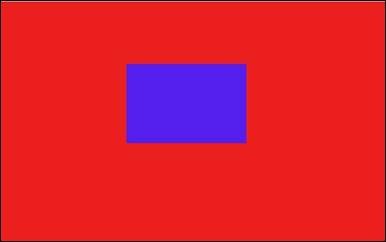
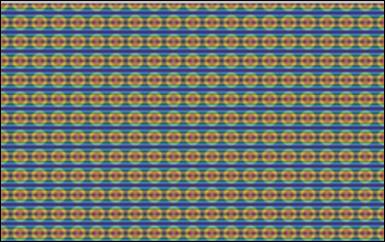
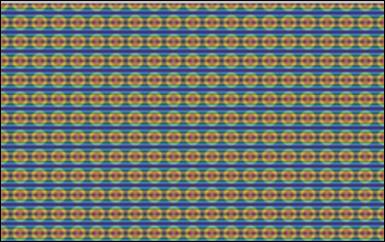
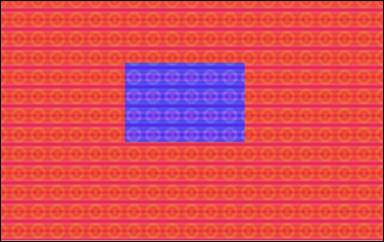
For our example, we are setting the blending mode for Layer 2. We are going to blend the pattern in Layer 2 (shown below) with the solid color in Layer 1 (also shown below).
Layer 1
Layer 2
NOTE: To view a single layer in the workspace, make sure the eye appears beside that layer (and no other layer) in the Layers panel.
From the menu, we are going to select the Lighten blending mode.
In the snapshot below, you can see how the blending mode we chose for Layer 2 affected the underlying layer.

If we would not have selected a blending mode, our image would have looked like this, instead:
Opacity
The opacity of a layer determines how it reveals or obscures the layer beneath.

Now we can set the opacity for Layer 2 to either reveal or hide more of Layer 1. You set the opacity in percentages using the slider. It is located beside the Blending Modes menu in the Layers panel: 
Fill
Fill is located below Opacity in the Layers panel. Fill affects the opacity of the current layer, without affecting any layers beneath.
Auto Blend is new to Photoshop CS4, but as with most Photoshop improvements, it is a very welcome advance. When you use Auto Blend, you can stitch, or combine, images and have smooth transitions in the final image.
Auto Blend works by applying layer masks to each layer as they are needed. This masks out, or covers up, over- or under-exposed areas. However, you can only use Auto Blend on RGB or Grayscale images.
You can use Auto Blend to:
� Blend multiple images of a scene that has different areas in focus.
� Create a composite, by blending multiple images of a scene, each with different illuminations.
� Stitch together different images and create a panorama.
To use Auto Blend:
1. Copy and paste the images that you want to combine in one document or image. Each image should be a separate layer.
2. Next, choose the layers that you want to blend.
3. Align the layers using Auto Align (we will learn how to do that in just a few minutes.)
4. When you have your layers selected, go to Edit>Auto-Blend Layers.
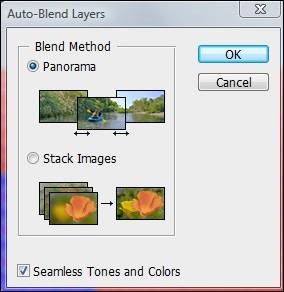
Panorama will blend the overlapping layers into a panoramic image.
Stack Images will blend the details in each corresponding area (as shown with the example in the dialogue box.)
Leave the check mark in Seamless Tones and Colors, so that the color and tonality are adjusted for blending, then click OK.
When you align layers, you align them so that similar content matches up. For example, you might want the corners of the layers to match up. You align the layers so that the image you create comes out as you want it.
Photoshop CS4 will align your layers, using the Auto-Align feature.
You can use Auto-Align to:
Delete or replace areas of images that share the same background. After you align the images, you will use blending effects to combine the parts of each image into one.
Stitch images that have content that overlaps.
To use Auto-Align:
Put all images that you want to align into the same document or image. Each image should be separated by a different layer.
Create a reference layer that Photoshop can use as a reference to align the rest of the layers. Create the reference layer by locking one layer in the Layers panel.
Select the layers that you want to align, including the reference layer.
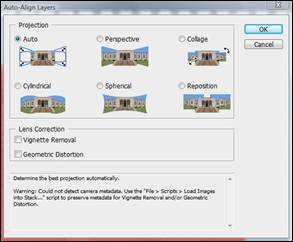
Now, select your options:
Auto means that Photoshop analyzes the image and applies either a Perspective or Cylindrical layout. It will choose the one that will produce the best image.
Perspective means that it will create a composition, by using the middle image, as a reference image. The rest of the images will be transformed in any way that they need to be so that any overlapping content is matched.
Cylindrical means that the images will be displayed as if they were on an unfolded cylinder. Content is matched up, and the reference image becomes the center of the image. This is best used for creating panoramas.
Spherical will align all the images with wide fields of view. It spherically transforms all images, except the reference image, so that content is matched.
Scene Collage aligns the layers and matches content, without changing any shapes.
Reposition Only aligns the layers and matches content, but does not transform any layers.
Use the Lens Correction section to remove any lens issues.
� Vignette Removal will remove the darker edges on images that were caused by a defective lens.
� Geometric Distribution will correct lens distortions, such as fisheye.
Once you have Auto-Aligned your layers, go to Edit>Free Transform to make any necessary adjustments, then combine or merge the layers.
Creating and modifying text will be one of the easiest things you learn to do in Photoshop.
The first thing you want to do is to activate the layer that will contain the text.
Now, go to the toolbox and click on the Text tool . 

First, select if you want the text to go horizontally across your image � or vertically -- by clicking this icon: 
Choose the type of font that you want to use, then if you want it to appear regular, in boldface, italics, etc.

Select how you want the text aligned on your image.
 Justifies all text to the left-hand side.
 Centers the text.
 Justifies to the right-hand side.
Now choose a color for your text.
 icon to give your text the "warp" effect, using predefined shapes:

 to toggle the paragraph and character panel:
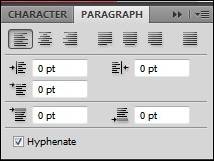
The above Paragraph panel allows you to set indentions and to block text. It also allows for Photoshop to automatically hyphenate text when it wraps from one line to the next.
To add text to your image:
� Click on the area in the image where you want to add text.
� Start typing.
To modify text that you have just typed, simply backspace to correct errors, or click within the text. To modify the format, such as type of font, click so the cursor appears before the first letter of text, then drag across the entire portion of text that you want to modify.