Database objects are components that save and query information. A database contains objects that are used to store and display large, relational data. We're going to talk about the database objects in Access 2016 in this article.
Tables
Creating good tables leads to good database design. Remember, tables contain rows and columns. The column is called the field, and the row is called the record. Relational databases store records across multiple tables with linked data.
Forms
A form is used either to display or enter data in Access 2016. You can also use a form to open other forms and reports within your database. You can also use a form as a custom dialogue box that accepts your input, then carries out an action based on what you enter into the form.
Most of the forms you'll have are bound to one table or more than one table, as well as queries in your database. A form has a record source. This record source is the fields in the tables and queries. A form doesn't have to contain all the fields of a table or query that it's based on. To create a link between a form and the record source, you use graphic objects called controls. The most common control is a text box.
It's important for you to remember that a bound form stores or retrieves data from its record source. Any other information you have in the form, like title, date, page number, is stored in the design of the form.
This article is simply an overview of objects you'll use in Access and in some other databases as well.
Query
A query is what you will use to retrieve information from your database. It consists of questions of which Access will give you the answers in the form of data from tables within your database. Queries are what make it easy to find data, then create new tables based on the queries.
Reports
The good news is reports in Access are just like any other reports you would create. Reports organize and present information from your database in an attractive and easy-to-read format. You can print or display these reports for yourself or to share with others. You can create single or multiple column reports.
Macros
Macros are simply shortcuts. If you've ever used macros in MS Word or Excel, then you are already familiar with what they do. You can create a macro to execute a task that you would otherwise execute with your keyboard or mouse.
In Access, you can use macros to:
- Open a table, form, query, or report in any view. You can also close a table, form, query, or report.
- Open a report in Print Preview or Report view.
- Send a report to the printer.
- Send output data from a report to Rich Text Format or .rtf, Notepad (.txt), or Snapshot (.snp).
- Execute a query.
- Include conditions that test values in a database, form, or report. You can then use the results of the test to determine the next action.
- Emulate keyboard actions.
- Supply input to system dialog boxes.
- Delete objects in your database.
- Save an open object.
- Import, export, and attach other database tables.
- Import or export spreadsheets or text files.
- And any task that would otherwise be done using your keyboard or mouse.
Summary
Navigating MS Access 2016
For those of you who have been anxious to dig in and start using MS Access 2016, you're going to love this article. Now that we've covered the basics of a database and learned some important definitions, we're going to start learning MS Access 2016. For those of you who are totally new to this program, we're going to start from the beginning and advance from there.
If you're ready, let's get started.
Starting Access 2016
Open MS Access 2016 as you would any other Office program on your computer. Either double click the Access icon on your desktop, or go to the Start menu at the bottom left corner of your computer screen, find Access, and click to open it. It will be bundled with any other MS Office software you have on your computer, so if you don't see it, make sure to look in that folder in the Start menu.
Once you open Access, this is what you'll see:
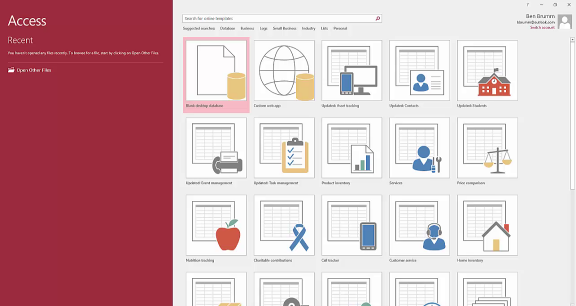
Following is a zoom of the screen above
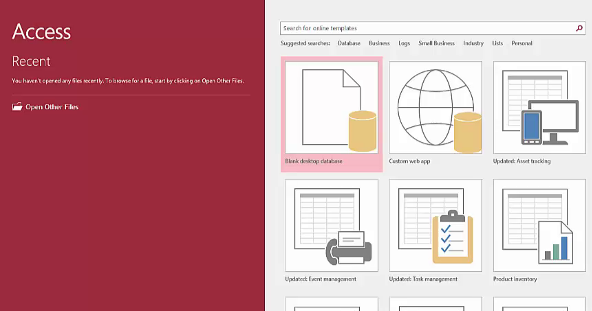
This is the Backstage view .
When you have an Access database open, the File tab is available. You will always click the File tab to get to the Backstage view.
Now, let's learn a little about how to navigate around Access.
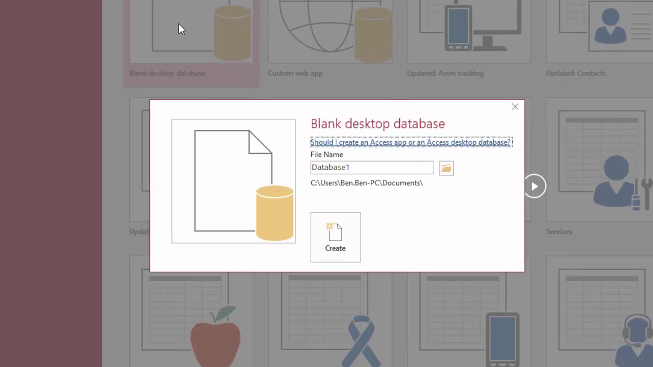
Click on Blank Desktop Database to create a new database and see the rest of the Access interface.
A form will appear and ask you to enter a filename and location. For now, just leave the default values and click Create.
You'll then see the main Access window.
![]()
The Quick Access Toolbar
The Quick Access Toolbar is located in the upper left hand side of your Access window. It looks like this:

The Quick Access Toolbar contains commands that you use the most frequently. If you click on the downward arrow to the right of the toolbar, a dropdown menu will appear and you'll see this:
![]()
The commands with a checkmark by them are the ones that currently appear on your Quick Access Toolbar. You can click on a command, such as New, to place a checkmark by it and add it to your Quick Access Toolbar, or you can click More Commands to add others.
To remove a command from the toolbar, click the command with the checkmark beside it. The checkmark will be removed as will the command from the toolbar. By default, Save, Undo, and Redo appear on the Access 2016 Quick Access Toolbar.
Backstage View
We've already showed you the Backstage View, but let's review it. Click on the File tab. There you'll see the Backstage View.
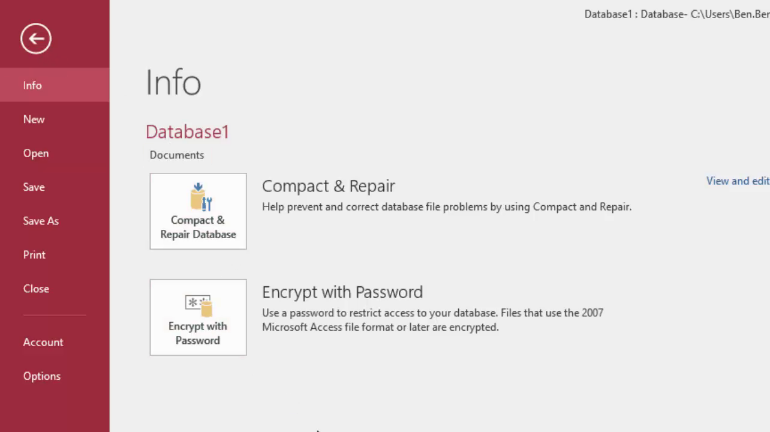
As we mentioned, we have Info highlighted above. Let's look at what we can do here.
In the center of the screen, you'll see two buttons: Compact & Repair Database and Encrypt with Password.
If you select Compact & Repair, Access will compact your database and correct and errors that might cause your database files not to display or open correctly.
If you choose Encrypt with Password, you'll see this window:

Close the database by using the Close command under the File tab. Then click Open under the File tab.
Click on "Computer", then click on the folder where the file is saved, which is probably the My Documents under the Current Folder heading.

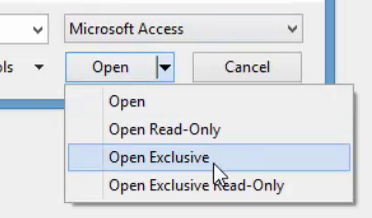
Now, select the database file, and click on the dropdown arrow next to Open, and select Open Exclusive.
Now, go back to the File tab, click Info again, and click the Encrypt with Password button. You'll see this dialogue box:
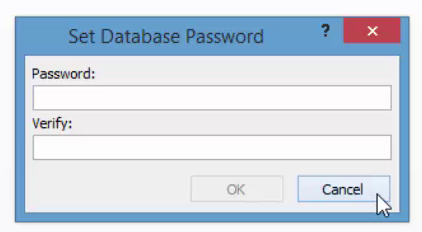
Enter a password. Reenter it in the Verify field, then click OK.
Let's go back and click Info on the File tab again. Go to the far right side of the screen and click View and Edit Database Properties.
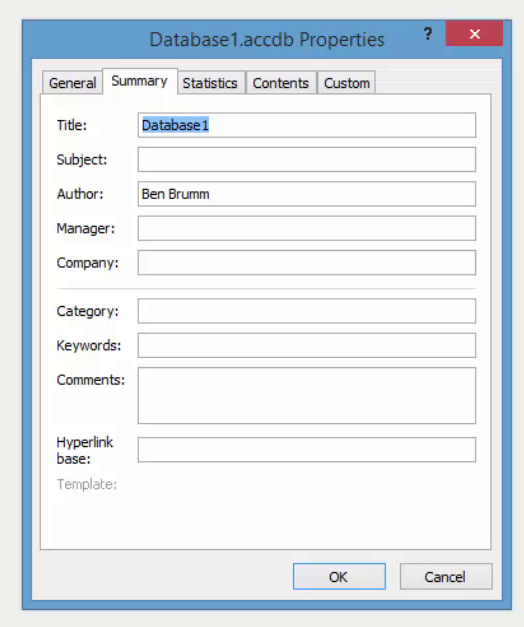
In this window, you can edit the properties of your database. Click OK when you're finished viewing or editing.
Access Options
Also under the File tab, on the left hand side of the screen, you'll see Options. These are your Access Options. Click on Options, and we'll show you what you can do in Options.
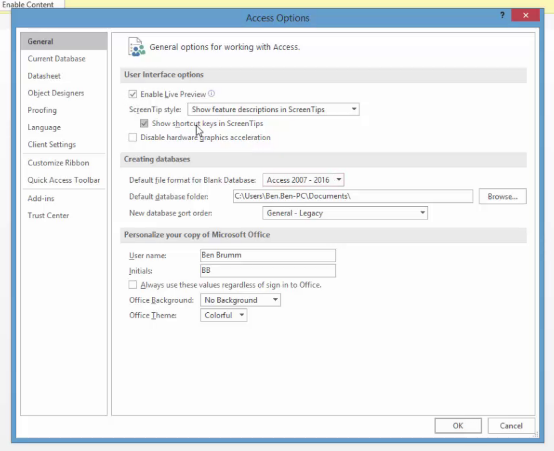
Choose a tab from the left hand side to set the options. You can flip through these tabs to see what features each contains, and what you can do with them.
Tabs and the Ribbon
In Access 2007, Microsoft introduced tabs and the ribbon. This carried over into 2013 and then into 2016. The Ribbon starts with the tabs you see at the top of the page labeled File, Home, Create, External Data, and Database Tools. These tabs are divided into groups which you will see below the tab. These make up the ribbon.
Groups contain toolbars. These groups are in place to provide the features you might need when clicking on that particular tab. The groups are labeled. Those labels are in gray at the bottom of each group. In the Home tab, the groups are Views, Clipboard, Sort & Filter, Records, Find, and Text Formatting. The toolbars for these groups are located just above the labels.

To view additional features for each group, click on the arrow at the bottom right of each group beside the label.
In the picture below, you see the Home tab. To see additional features for Text Formatting, for example, you'd click on the arrow to the right of Text Formatting.
This is where you can set additional Text Formatting options, which we will explain later.
The Navigation Pane
The Navigation Pane opens by default on the left side of the Access window. It looks like this:
You can use the Navigation Pane to search within your database. It also lists all the tables to make navigating to them quick and easy.
Trusting a Database
If you've used previous versions of Access before, you had to make choices whenever you opened a database. You had to choose security levels and if you wanted to run code that could be potentially unsafe.
In Access 2016, you don't have to worry about that. Access disables all potentially unsafe code for you, regardless of what version of Access was used to create the database. You'll find this feature very helpful if you're opening databases you didn't create.
Whenever you try to open a database in Access 2016, you'll see this warning in your Message Bar.

Object Views
Object Views
Object views are simply different ways of viewing the object that you're working on. Some views will allow you to do heavier editing and changes, some are simply for viewing, and others let you complete certain tasks. Let's learn about the different ways to view the objects in Access so you can see exactly what we mean.
Table Views
We already put together the fields for our table in the Design view.
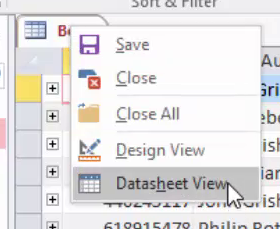
To view the different views, right click on the table for which you want to change the view, as shown below.
![]()
You'll then see your choices:
- Design View is where you design the table by adding fields (columns)
- Datasheet View is where we enter data
Earlier versions of Access included PivotTable and PivotChart views. However, they have been discontinued in Access 2016.
Form Views
If you create a form (which you'll learn to do in the next few lessons), you can then right click on that form to select a view:
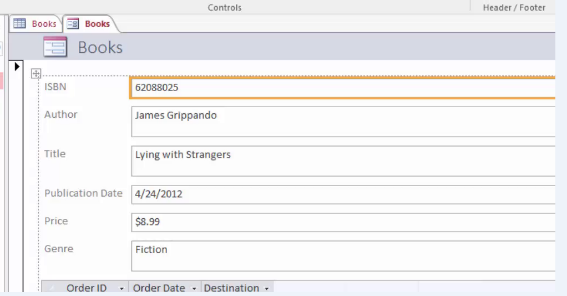
Form View lets you view your form as shown below.
Layout View shows you the layout of your form with all the data fields that will contain information. It is more visual than Design view. Real data is displayed in Layout View. You can use this view to improve the appearance and usability of a form, but there are a lot of tasks that you have to use Design view to complete.
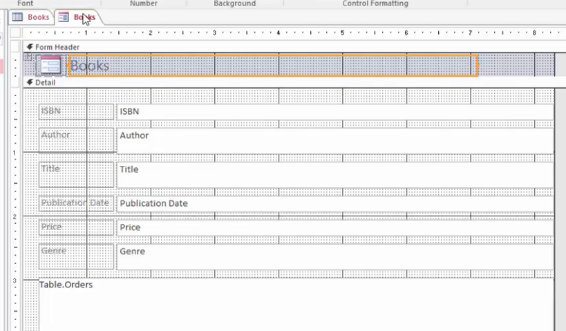
Design View shows you the design of your form in more detail than Layout view. In Design view, you can see headers, footers, and detail sections. You cannot see your data while you're making design changes, but you can do some tasks very easily in Design view whereas they'd be more complicated to do in Layout View such as:
- Add controls to the form. These controls might be labels, images, rectangles, and lines.
- Edit the text box control sources in the text boxes instead of having to use the property sheet.
- Resize form sections.
- Change form properties that can't be changed in Layout View.
Again, don't worry if this all sounds like pig Latin right now. This is simply an overview to make things a little simpler when we start to create our own forms.
Don't worry about knowing what you need to do in each view.
Query Views
There are three query views, which you can see in the snapshot below. You can find these views by right clicking on the query tab, just the same as we clicked on the tab for the form or the table.
A query is simply a way of viewing certain data from your tables.
The Design View allows you to design your query and choose what fields you want using a visual representation of the tables. It looks like this:
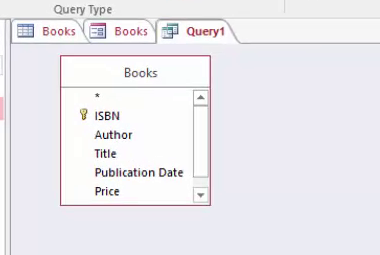
This is where you design your query.
The SQL view displays the code that determines what the query will display, and looks like this:
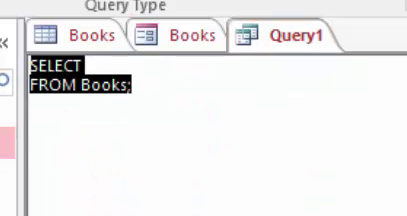
You also have the Datasheet View (where you'll view the data).
Familiarize yourself with the views and how to find them. Remember, design views allow you the most control to edit and design your object.
Report Views
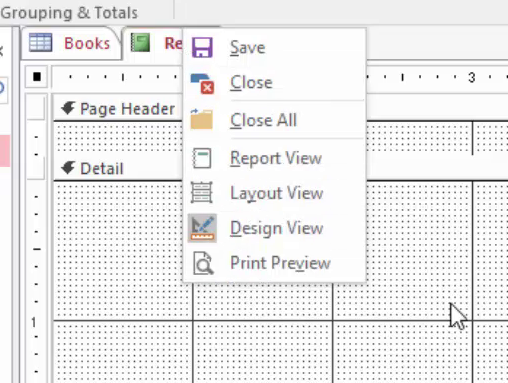
When creating a report, you have four views:
- Report View
- Layout View
- Design View
- Print Preview
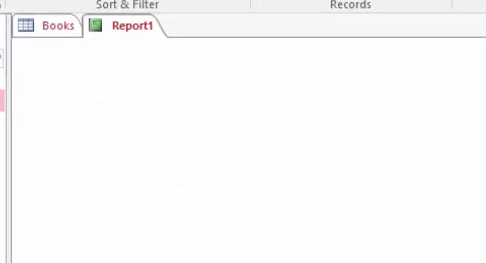
You can see all these pictured below. Again, just right click the report tab after you've created a report.
The Report View is shown below and shows your report.
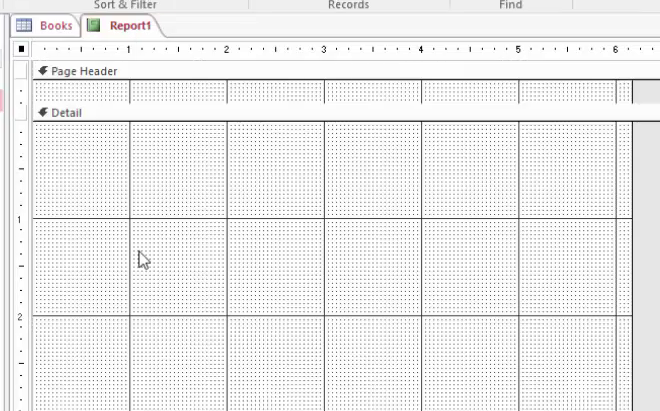
The Layout View shows the layout of your report, just as the name implies. You can use this view to edit the layout, sometimes as simply as using drag and drop. You can see your data in Layout View.
The Design View doesn't show your data, but it shows headers, footers, etc. just like in the Design View for forms.
Print Preview shows how your form will look when printed. You cannot edit your report when in this view.