In this article, we're going to go more in depth and talk about queries.
About Queries
If you want to review, add, or change data in your database, you can use a query. Using a query can make it quicker because you can ask specific questions about the data in your database that would be hard or too time consuming to answer by looking through your data. Queries can also filter data, perform calculations, and summarize data. In addition, they can automate data management tasks and review changes before you make those changes permanent. Of course, you can also use a query to supply data to a report.
Kind of Queries
There are many types and variations of queries in Access. In the next articles that follow this one, we'll do some more complex queries so you know how to do those. For now, though, let's keep it simple so you get comfortable with queries and going more in-depth is as easy as putting Cheese Whiz on a cracker.
The types of queries we're going to talk about in this article are the types you'll find in the Query Wizard.
The types of queries listed are:
- Simple Query
- Crosstab Query
- Find Duplicates Query
- Find Unmatched Query
In this article, we're going to learn about these four queries and how to complete them using the wizard.
Creating a Simple Query
Queries are the "errand boys" of Access 2016. You ask them a question regarding your data, and they bring you the answer. We're going to learn about how you can use a query to navigate a table.
As we said, the query is your errand boy. So, let's say that you want to find a certain type of data within a table. The tables we created as examples are simple tables that aren't overloaded with fields (columns) and rows (records), but in a real database, this wouldn't be the case.
Here's the table we're going to use:
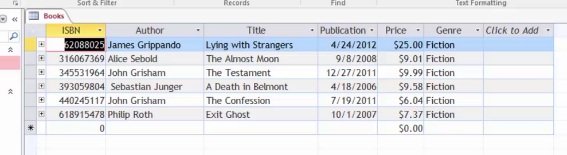
As you can see, for our database, we've decided to create tables for books. Our database will store a book collection.
Now, let's say we want to see all the authors that we have in our collection, and that's the only data we want to see. If we had fifty columns of data, along with hundreds of rows, it could get overwhelming. To find the authors, we're going to run a query to find them.
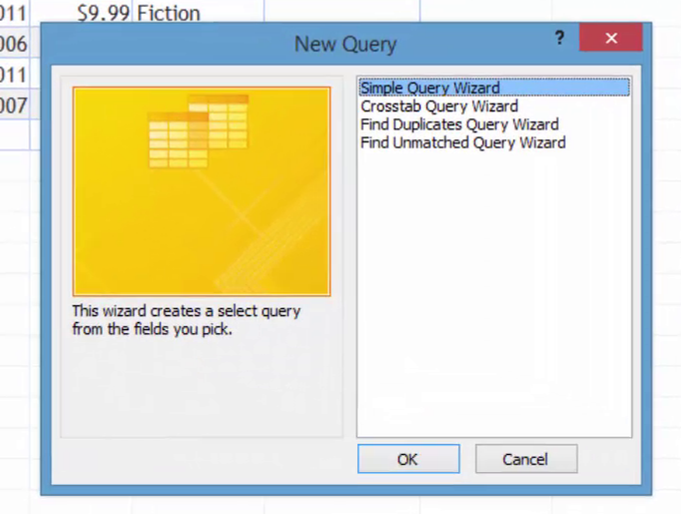
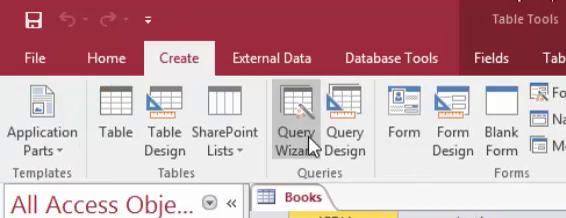
To do this, click the Create tab on the ribbon. Next, click the Query Wizard.
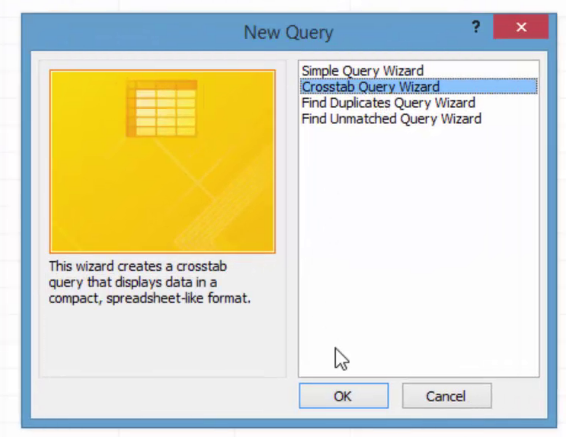
Once you click the Query Wizard, this dialogue box will open:
Select Simple Query Wizard, then click OK.
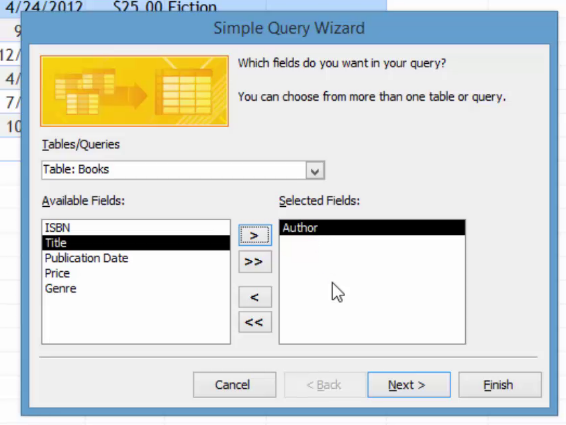
Select "Table: Books" from the Tables/Queries drop-down box, if it's not already selected.
In the snapshot above, we selected Author from the left (it's no longer there), and pushed the top arrow button. That put Author in the selected field.
Click Next.
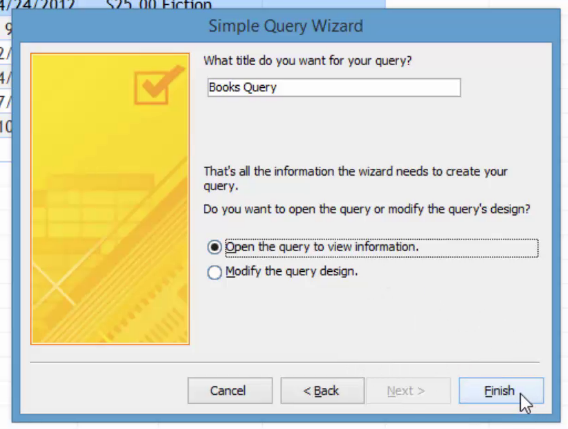
The next window (pictured above) asks us to name the query, then we can either open the query or modify the design. For now, let's just open the query. Click Finish.
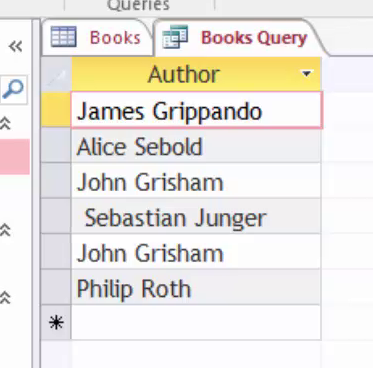
You can now see your query. We already have an Author query, so maybe we'd have created a query to find page numbers in books, cover price, or any other information. This is just an example to show you how easy it is.
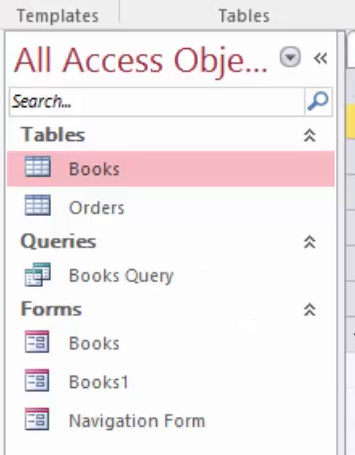
Your query now appears in the Navigation Pane:
Creating a Crosstab Query
A crosstab query takes rows (or records) of data and transforms them into columns. Let's show you how to do it so you can get a good visualization.
Once again, go to the Query Wizard by clicking the Create tab:
Click on Crosstab Query Wizard, then click OK.
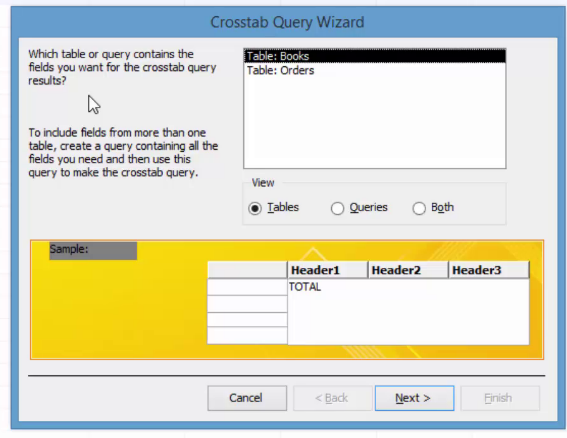
Select a table or query (if you already have performed a query) that contains the fields that you want for the crosstab query.
If you select a table which has no data, you'll get this message:

This is very important for you to remember going forward. In order to perform a crosstab query, you must have a table or query with at least three numeric, date, or text fields.
So, we're going to select Books, just so you we can show you how to do a crosstab query.
![]()
Now we can select which fields we want to be row headings. We're going to select Title.
Select the field by clicking on it on the left, then click the top arrow. The field is now moved to the right.
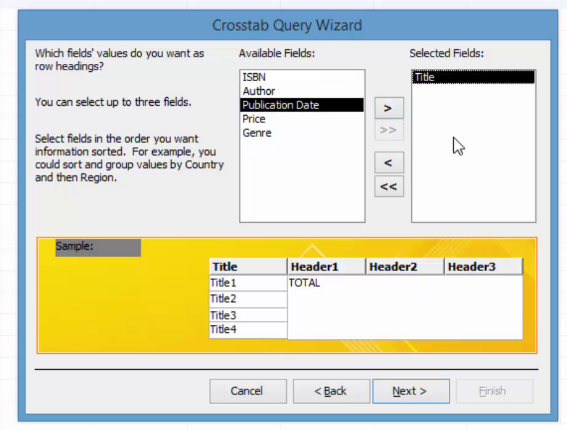
Click Next.
Now we're asked to select column headings.
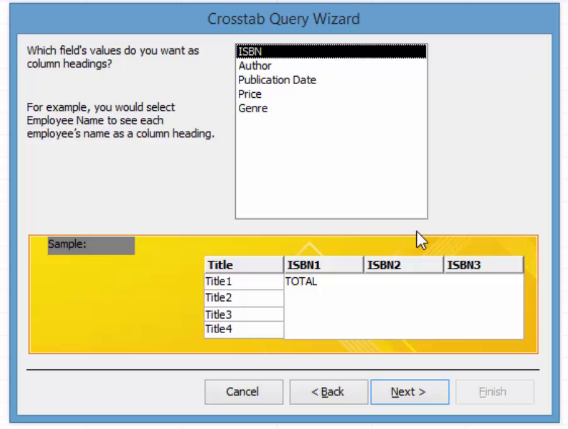
We're going to select Author, then click Next.
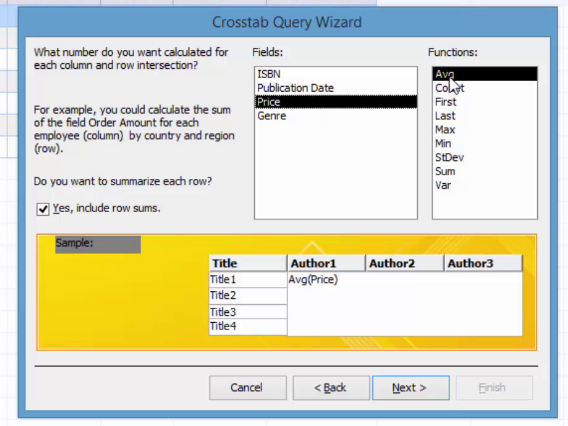
Now, you're asked to select the field that you want calculated in the query on the left. You're also asked to select a function from the right that will calculate and put data in the query.
We're going to select ISBN as the Field, and Count as the Function.
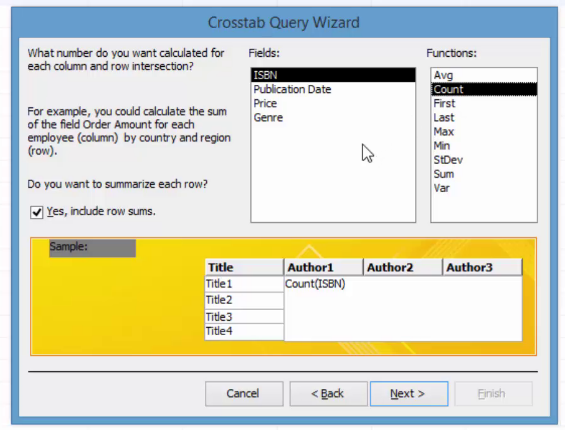
Click Next.
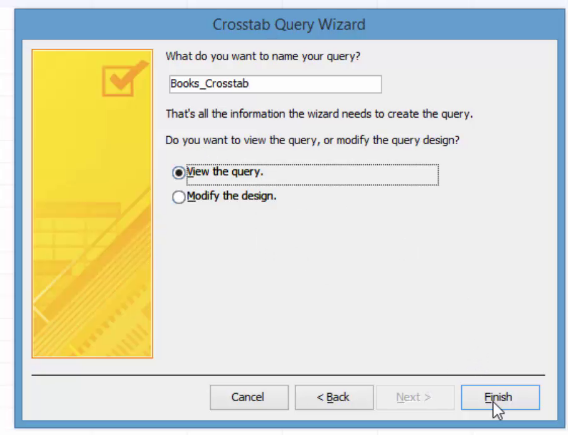
Name your query, then leave the box checked to view it. Click Finish.
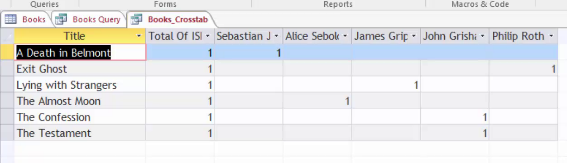
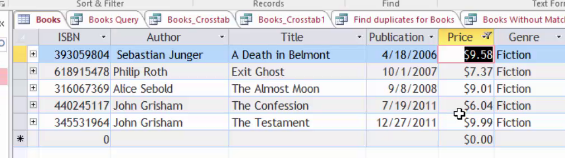
Above you'll see a picture of our query. You can see each titles ISBN number as it is in our Books table. You can also see the number of ISBNs under the corresponding author.
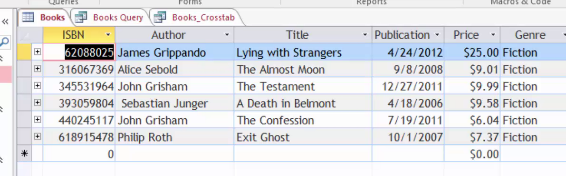
However, let's play with our Books table to show you even more what a crosstab query can do. Let's use the Price for each book in the Books table instead of an ISBN. Just keep in mind that these are real book titles and authors, but fictional prices.
Here's our table again:
Let's do another crosstab query. Our row headings and column headings will stay the same as they were in the other query. The only difference is in the screen where we select the Fields and Functions, we select Price and Avg.
Here's our results:
![]()
Creating a Find Duplicates Query
You can also use a query to find duplicate data in your tables. This makes normalization easier. To do this, go back to the Query Wizard and select Find Duplicates Query Wizard.
Click OK.
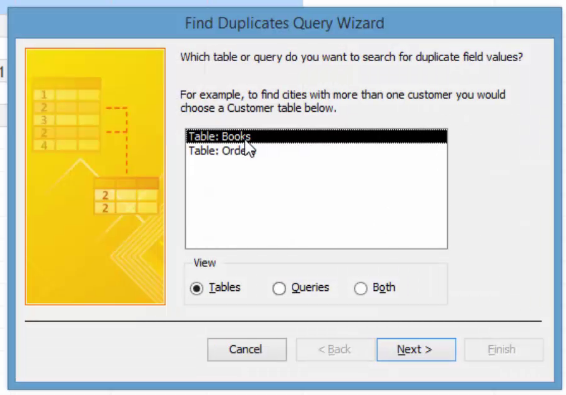
We've selected Books again since it is our only table at the moment. Click Next.
Now, we've selected Author for the field where we want to look for duplicate values.
![]()
Click Next.
If you want the query to show any other fields, pick those in this screen. Perhaps we wanted to see book titles beside duplicate authors. You don't have to select anything.
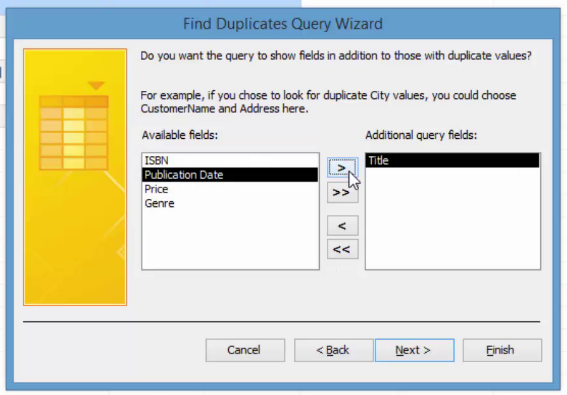
Click Next, then name the query.
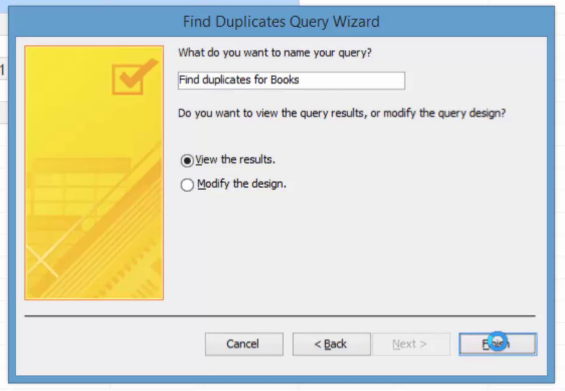
Click Finish.
Below you'll see our query.
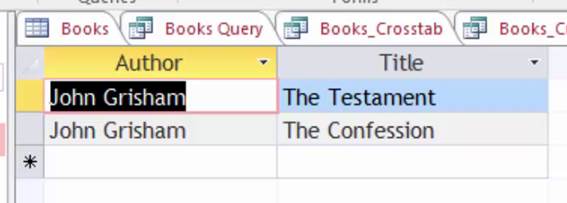
We can see the duplicate data, along with the titles as we requested to show alongside that information.
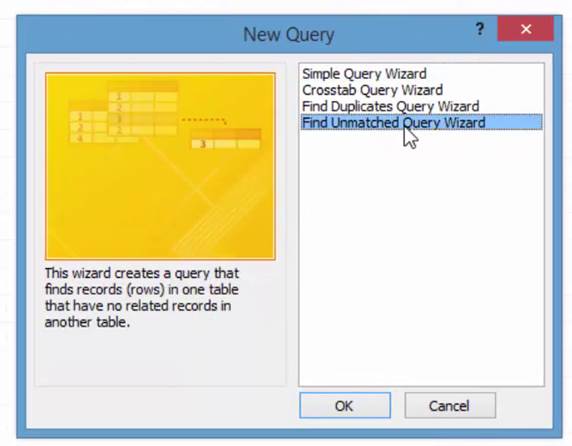
Creating a Find Unmatched Query
If you want to compare tables to identify records in one table that don't have any corresponding records in another table, you use an Unmatched Query.
Let's learn how to do this. Go to the Create Tab and click the Query Wizard. By now, you know exactly where that is.
Click Find Unmatched Query Wizard, then click OK.
Now, select the table that has unmatched records. For example (using our tables), if we had a list of books in our Books table, but there wasn't an order for that book in the Orders table, we would select the Books table.
![]()
Click Next.
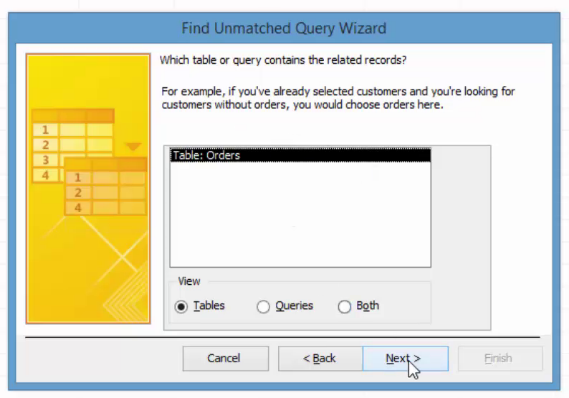
Now, select the table that's related, and click Next.
Now, find fields that the two tables have in common as shown below. They may already be selected, as they are related. In this case, we would select the ISBN fields.
Click Next.
Now select the field that you want displayed in the query, such as ISBN, Author, and Title.

Click Next.
Name your query and click Finish.
This is our result:
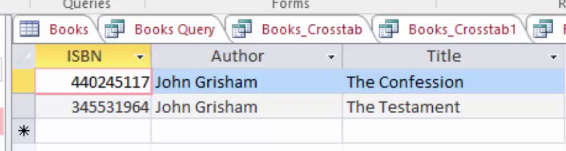
This shows that we have orders for all books except for these listed here.
Sort & Filter
As you can clearly see, you can use queries to find data in your tables or other queries. However, you can also use Sort & Filter to find data. When you filter data, only the records with values that you specify will show. The rest of the data will remain hidden unless you remove the filter.
Access has filters that are built into every view for you. If you can use the filter or not depends on the type and values of the field. For example, you can't filter columns in datasheets or controls in forms that are bound to expressions.
Let's say we want to view books in our Books table that cost a certain price. To do this, go to the Home tab. First, we're going to go back to our table and select the Price column.
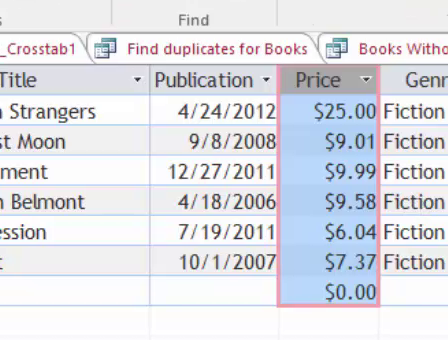
Then, we're going to go to the Sort & Filter group on the ribbon and click Selection.
![]()
We want to see books that do not equal $25.00. (We could also click Between to specify a certain range.)
Here are our results:
Click Toggle Filter on the ribbon to see filtered or unfiltered results.

You can also use Access filters for a certain data type. These filters are menu commands in the following views:
- Datasheet
- Form
- Report
- Layout
You can use these filters:
Common filters filter for specific values or a range of values.
Filter by selection filters all rows in a table that match the selected value in a row. This filters the datasheet view.
Filter by form filters several fields in a form or datasheet, or if you are looking for a specific record. Click on Advanced in the Sort & Filter group to use this filter.
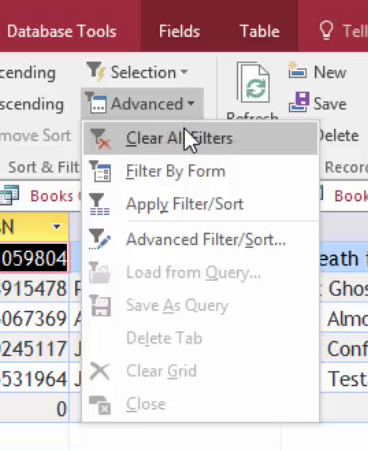
Advanced Filler is a filter type where you define filter criteria. Click Advanced on the ribbon, then Advanced Filter/Sort. We'll learn about criteria in just a few minutes.
Parameter Queries
Whenever you want a query to ask for input each time you run the query, you create what's called a parameter query in Access 2016. Don't worry if that doesn't make a bit of sense right now. We'll teach you exactly what a parameter query is and how you can create them.
As you already know, you use criteria to narrow down the results you receive in a query. Criteria eliminates the expression "looking for a needle in a haystack."
But let's say when running a query, you want to know (using our book collection database as an example) how many books you've recently added to your collection because you share this information with friends who might want to read them. So, you want the query to show all the new books that you've added SINCE you last ran the query and sent out the list to your friends. To do this, you add criteria to a DateAdded field. This shows the date you purchased the book. The criteria tells Access that you want all books added after a certain date (the date you last ran the query). However, wouldn't it be a lot easier if Access prompted you to enter a date? The good news is that you can do this using a parameter query.
Creating a Parameter Query
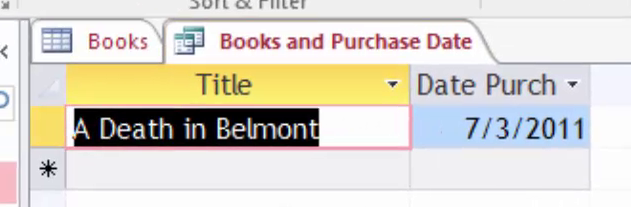
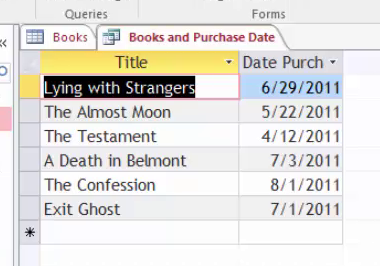
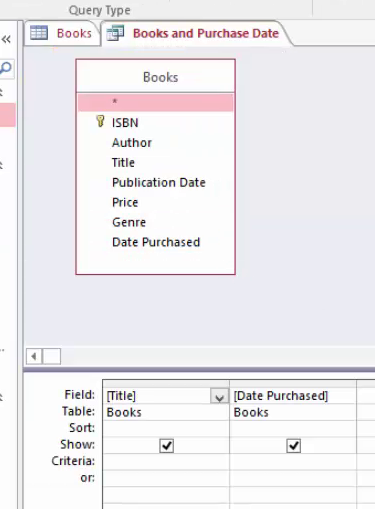
The first thing you do is select the query for which you want to add a parameter to. You can see the one we've selected below. It contains the title of the book and the date it was purchased. This was the query we ran to see purchased books.
You will need to add a Date Purchased field to the Books table, and enter some data.
Now, switch the Design view.
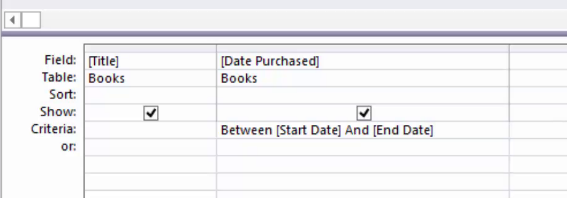
We can now add our criteria in brackets. The brackets indicate that Access should look for a field, or ask the user for a field if there is none.
We're going to enter: Between [Start Date] And [End Date] to see all books purchased within a specified time frame. We enter that in the Date Purchased field.
You can resize the columns by clicking and dragging on the edge of the column to make it wider, to see the full values.
Now, go back to Datasheet view to run the query.
Access now prompts you for values for your parameter in a dialogue box, as shown below:
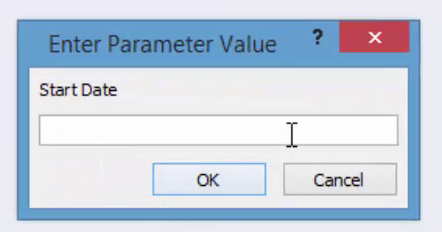
Enter the Start Date for the query.
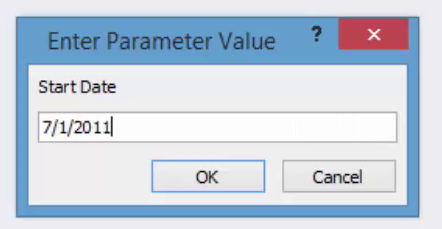
Click OK. Enter an End Date.
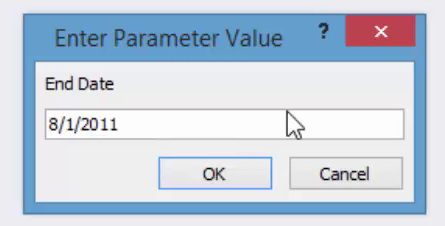
Click OK.
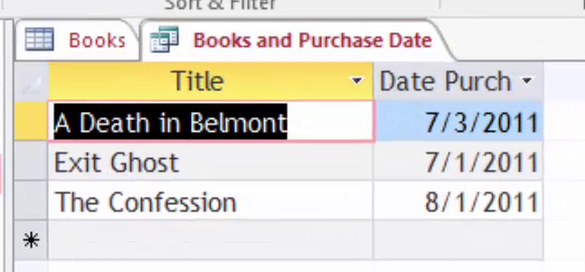
Access now shows us the results of our query:
Changing Parameter Prompt Order
When you enter parameters for your query, the prompts appear the way they do in Design view, from left to right. You'd see the prompt from the first parameter that you entered, etc. But what if you want to change the order in which they appear?
To do this, go to the Design view of your query, then click the Design tab.

Now click Parameters in the Show/Hide group.
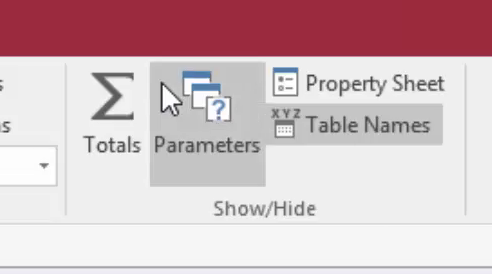
This form will appear.
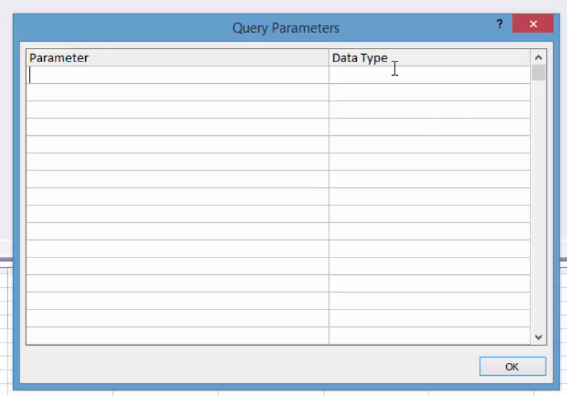
You can enter the names of the parameters, and the data types, in the order that you want them to appear.
Using Wildcards in Parameter Queries
If you want to add variability into your parameter query, you can use wildcards. An example is if you want a query to match a text string in any part of a field. You can do this using Like with wildcard characters.
To do this, open a query, then go to Design view.
Go to the field where you want to apply a parameter. You will type:
Like "*"&[type the text you want to use as a prompt here.]&"*".
So, if you wanted to search for titles in the query, you would enter:
Like "*" & [Title to Search For] & "*"
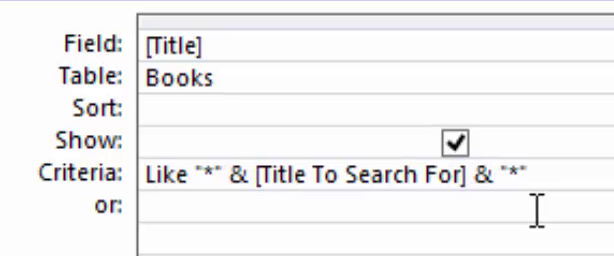
When you switch back to Datasheet view to run the query, Access prompts you, but without the brackets, the word Like, or the wildcard characters. Access will now match values that contain the parameter string.

Enter a value, then click OK.
![]()
Any records that contain this sequence of characters within the Title field will be displayed.