You can also use Quicken to help plan for future expenses and create a savings plan to reach your goals. You can plan for investments, retirement, children's education, and etc.
In this article, we're going to teach you how to plan for your financial future using the tools and calculators that Quicken provides.
The Investment Savings Calculator
The Investment Savings Calculator is a fun little tool to play around with. You can use it to figure out how much money you'll have if you save X amount of dollars for X amount of years in a mutual fund that earns 10% annually.
Here's how to use the calculator:
Go to the Planning tab. Click on the Planning Tools button and choose the Savings Calculator.

If you can't see the Planning tab, go to View>Tabs to Show>Planning.
In the Savings Calculator, enter your Starting Savings Balance.
Next, enter the Annual Yield you expect it to earn. This is in a percentage.
In the Save For field, specify how long you plan to save.
Now, enter the anticipated inflation rate in the Inflation Rate text box.
If you're going to add to your investment each period, enter that amount in the Regular Contribution box.
Put a check beside "Increase Based on Inflation Rate" if you will increase the amount annually to match the annual inflation rate.
Click Calculate.
The Retirement Calculator
The Quicken Retirement Calculator can help you plan for your retirement. You can use it to plan for contributions to your 401(K) and other profit sharing plans to determine how much you need to put back and save for retirement.
Here's how to use it:
Go to the Planning tab. Click on the Planning Tools button, then select Retirement Calculator.
You will then see the Retirement Calculator dialogue box.

Enter your age in the Current Age box, then enter your retirement age in the Retirement Age box.
Next, enter the age for which you want to continue to withdraw from your retirement account. Frankly, this will be when you die most likely, so make the number fairly high.
In the Current Savings box, enter how much you currently have in your retirement account.
In the Annual Yield text box, enter the percentage number that you expect this account to earn.
Now, just as with the Investment Savings Calculator, enter the anticipated inflation rate and the annual contribution amount.
In the Other Retirement Income, enter in any other income you expect to receive, such as Social Security.
Specify whether you plan to save for your retirement in a tax-sheltered investment. This means the amount you save is untaxed, such as an IRA, annuity, or 401(k).
After you've entered all information, click the Calculate button. You can then look at the annual Retirement Income After Taxes field.
The College Calculator
The College Calculator works a lot like the Retirement Calculator. It helps you plan how much you need to save in order to be able to pay for your child's education.
To use the College Calculator, go to the Planning tab. Click on the Planning Tools button and select the College Calculator.
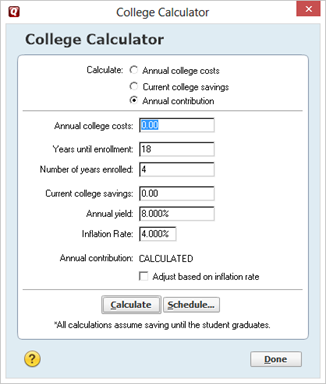
In the College Calculator dialogue box (pictured above), enter the annual college costs in the Annual College Costs box.
Next, enter the number of years before your child will enroll in college.
In the Number of Years Enrolled, type a number that represents the number of years you estimate your child will be enrolled in college.
In the Current College Savings field, type the amount you already have saved for college.
Now, in the Annual Yield box, type the annual yield that you expect the savings to earn.
In the Inflation box, type the inflation rate for college tuition. This should be expressed as a percentage.
Just as with the Investment Savings Calculator, specify if you will increase your contribution to match inflation.
Click Calculate when you're finished.
The Refinance Calculator
The Refinance Calculator is also located in the Planning Tools button menu, just as the other calculators we've discussed.
The Refinance Calculator dialogue box looks like this:

You can use this calculator to discover how much you would save if you refinanced - and shows you if it's even wise to refinance. For example, you may save $50 per month on your monthly mortgage payment if you refinance, but it may cost you $1000 to refinance.
If you're thinking about refinancing your mortgage, this calculator can be a helpful tool to consult.
Just fill in the fields with the required information, then click Calculate.
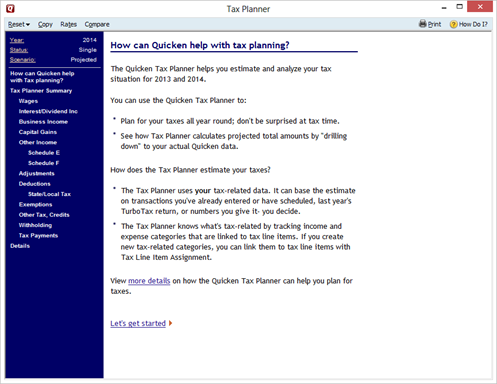
Introducing the Tax Planner
With all the method Quicken offers you to manage your finances, it's not surprise that it also offers you a Tax Planner to help manage your taxes. Using the Tax Planner, you can import data from tax software that you've used, you can change your tax information such as marital status, enter annualized values for income or expenses, and estimate how much you'll owe or the size of your refund come tax season.
Planning for Your Taxes
The first thing you need to do before you use the Tax Planner; however, is to make sure that all your transactions have been categorized. This includes tax lines if you've added categories. Then, you can import data from tax software and enter transactions that aren't listed in Quicken.
The next thing you'll want to do is assemble your tax information. These include:
- Income records. This can be a paycheck stub; it doesn't necessarily have to be a W-2.
- Itemized deductions and tax credits
- Tax publications for federal income tax instruction and information
- Previous tax returns. If you need to import previous tax returns from TurboTax, go to File>File Import>TurboTax File.
- Run the Tax Schedule and Capital Gains Report in Quicken. This will help you make sure that all the tax related information you'll need is in Quicken.
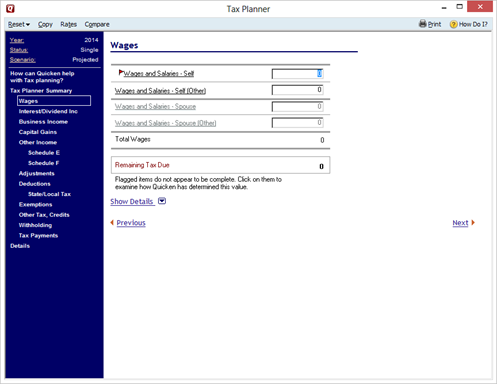
View Tax Planner Data
Now let's learn how to view your data in the Tax Planner.
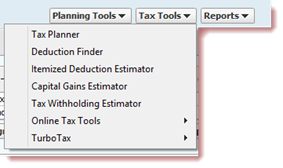
To start, go to the Planning tab. Click the Tax Tools button, then click the Tax Planner button.
In the workspace area, you'll see all the information you've added. In addition, Quicken will estimate total income, etc. for you.
You can click any field that you want to change. If you click a field, it will open the Tax Planner. From there, you can make changes.
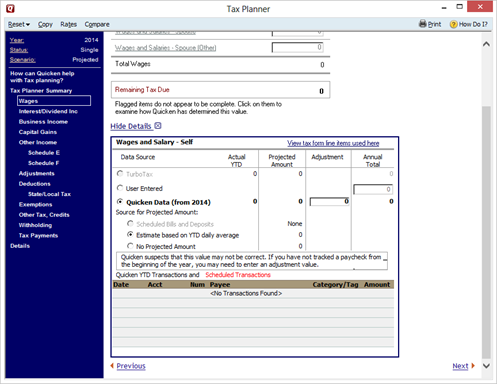
Below, we've clicked Wages in the column on the left.
You can click Show Details at the bottom of any page in the Tax Planner, and Quicken will explain how it determined the values.
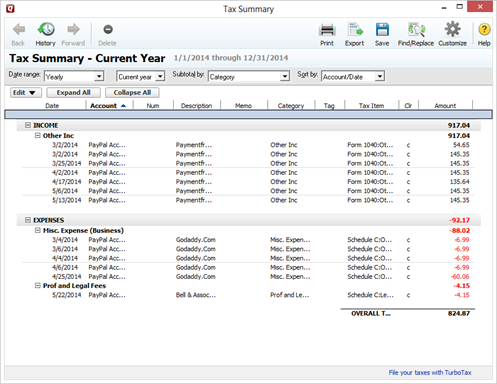
Generating Tax Summary Reports
If we go back to the Planning tab where our tax data is still displayed, we'll notice that at the end of every section, we have the chance to generate a report.
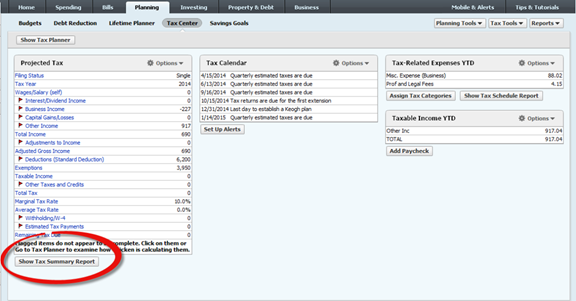
Click the Show Tax Summary Report button:
Additional Planning Tools
Quicken also offers additional financial planning tools. We're going to briefly discuss these tools so that you know where to find them.
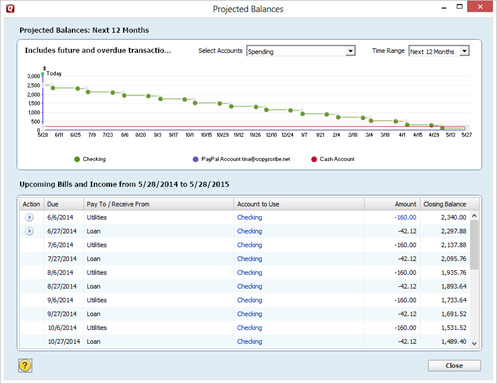
The Projected Balances command is on the Planning Tools menu under the Planning tab.
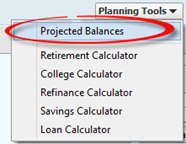
It projects your bank balances using your deposits and withdrawals (based on reminders).
Under the Tax Tools menu, you'll see the Deduction Finder, Itemized Deduction Finder, Capital Gains Estimator, Online Tax Tools, TurboTax menu selections, and the Tax Withholding Estimator. This may be helpful to you as you plan and prepare your taxes.
If you look at the top of the Planning window, you'll find the Debt Reduction Lifetime Planner and Savings Goals.

You can use these to start to get out of debt, plan for retirement, and save for the future. Keep in mind that these are planning wizards that you can decide to use - or not. They are just a few more of the tools and commands that make Quicken one of the top financial management programs designed for personal use.
Maintaining Your Quicken Files
Backing Up Your Files
Backing up your Quicken files in an important task. It's something you want to make sure you do. If something should happen that you would lose your Quicken files, you would have your back up there to use. In other words, you wouldn't lose all your financial data that you had stored in Quicken.
To create a backup, either use a flash drive or a writable CD.
In Quicken, go to File>Backup and Restore>Backup Quicken File.
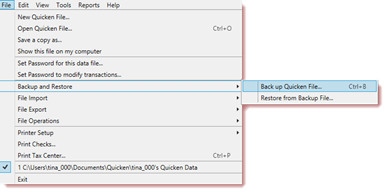
You'll then see this dialogue box:
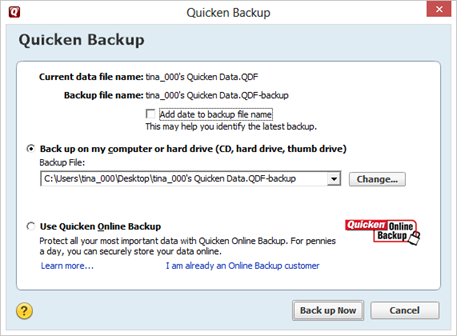
Specify the drive you want to use for the backup. If you're using a CD, specify the CD-ROM drive, etc.
Click the Back Up Now button when you're ready to back up your files.
Using Your Backup Files
If something happens and your Quicken files get damaged or destroyed, you can use your backup files to replace them.
To do so, get the backup disk or drive, then start Quicken.
Go to File>Backup and Restore>Restore from Backup File.
You'll then see the Restore from Backup File dialogue box, pictured below.
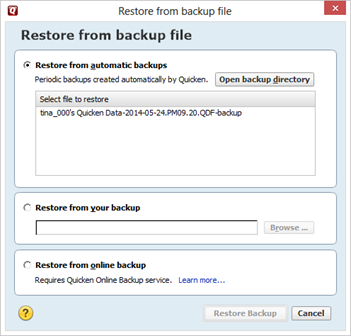
Select the backup copy you want to use, then click Restore Backup.
Creating New Quicken Files
When you set up Quicken in the first few lessons, you created a file. In Quicken, a file is where all your accounts are stored.
You can create more than one Quicken file if you want. Perhaps you and your spouse have separate finances, and you want to use Quicken to manage both. You can do that.
Here's how to set up a new file:
Go to File>New.
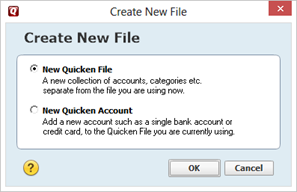
Check the box beside New Quicken file, then click OK.
Next, you'll be asked to enter a name for the file.
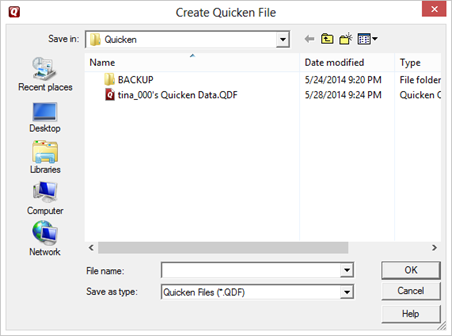
Click OK after you've entered a file name.
Once your new file has been created, you will have to go through and set up all the accounts, following the instructions we've given you throughout the entire course.
Moving Between Files
It's important to remember that you can only work with one file at a time. However, you can switch between files if you need to do that.
To switch between files, go to File>Open.
You will then see the Open Quicken File dialogue box.
Find the Quicken file that you want to open. When you find the file, click OK to open it.
Shrinking Quicken Files
After a while, your Quicken file can start to get too big for its britches. You have so much information in it, that it seems like it takes forever to back up.
Shrinking a file means getting rid of some of the data. In reality, what you will do is decide on a cut-off point for the data that's in your file. For example, you might only show balances and transactions after a certain date. If you have years' worth of data in your Quicken file, this can be a great idea.
However, since you're "messing" with your data, you're also taking a chance on losing it if something goes wrong in the process. For this reason, you always want to create a backup before you shrink your file.
After you create the backup, go to File>File Operations>Year-End Copy.
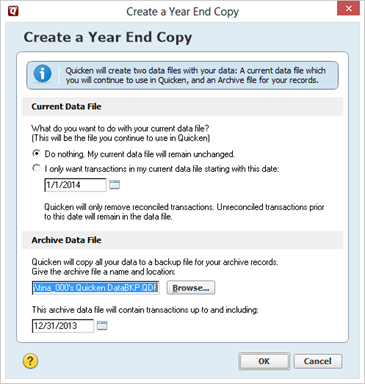
In the dialogue box (pictured above), tell Quicken what you want in the current data file. This is the file that you will work with AFTER you shrink the file.
You can:
- Do nothing and everything will remain the same.
- Enter a date. Only the transactions that occur after that date will appear in your data file
Next, you can specify a backup file name and location. This will be the archive of all your data.
Click OK when you're finished.