In this article we'll learn how to apply a style or formatting to paragraphs. Formatting paragraphs can change the entire look and feel of a document.
Page Margins
Perhaps the most crucial step in formatting your page is setting the margins. The margins will determine how your page looks on the screen and also how it will look when it's printed. A margin is the amount of white space on either side of a page, as well as on the top and bottom.
To set the margins for your document, go to �File' on the menu bar. Select �Page Setup.' A window will appear that looks like this:
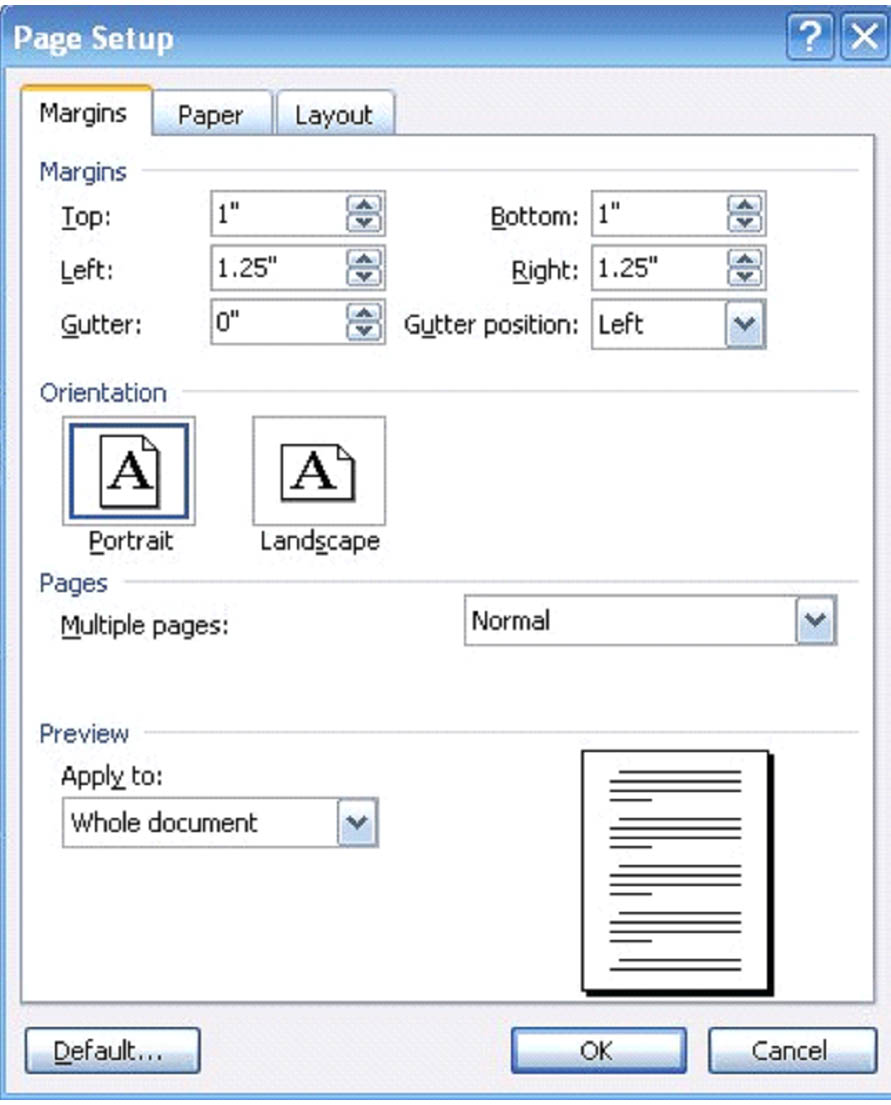
You can then set the margins for the top and bottom of your page, then the left and right sides. Also, you can select if you want to apply to the margins to the entire document or from that point in the document (where the cursor is) forward.
Line Spacing
Line spacing refers to how much space is between each line of text. You've probably heard of the terms �single spaced' and �double spaced' before. Both these terms apply to line spacing.
To increase or decrease the space between lines, you can do one of two things.
- Go to �Format' on the menu bar. Select �Paragraph.' You'll then see the window below.
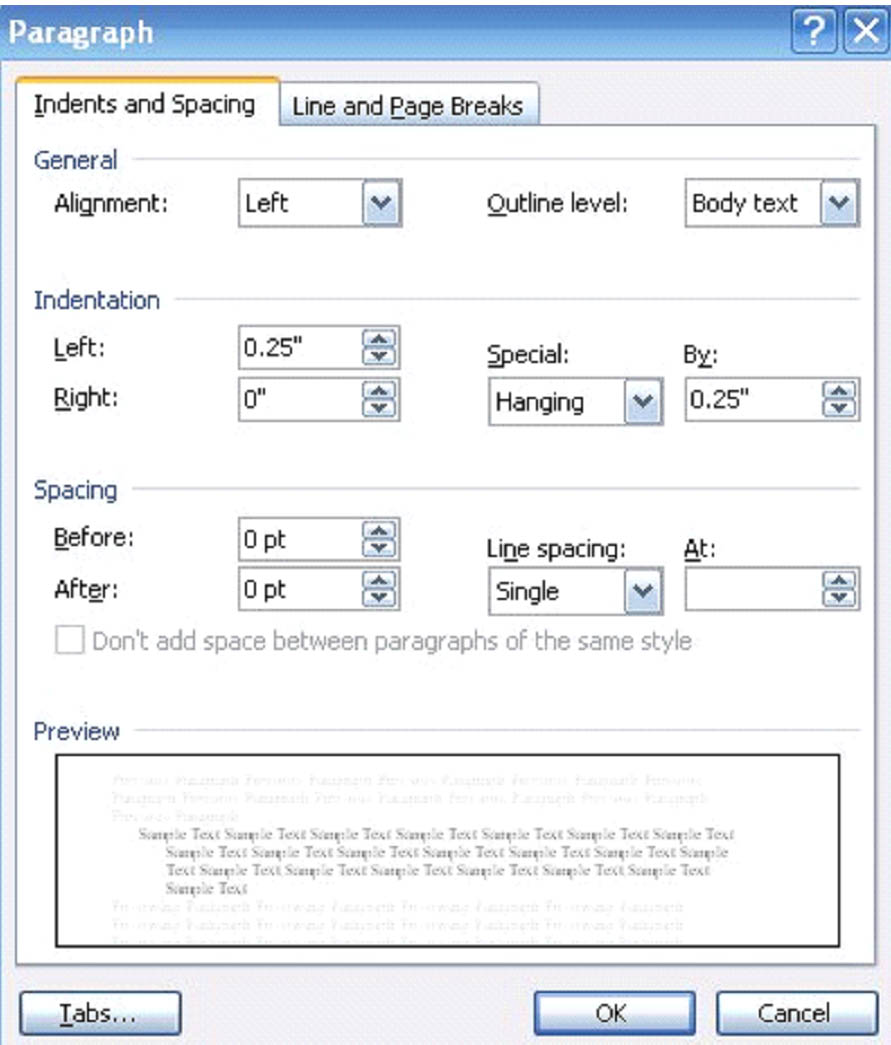
Go down to �Spacing' and select how much space you want between lines from the �Line spacing' drop down box. You can see how the changes will affect your document in the �Preview' section.
2. Go to the �Formatting' toolbar and click the  located next to the alignment icons. You can also click the arrow next to the icon. A drop down menu will appear that allows you to select the line spacing you want.
Indentions
To indent text or the beginning of a paragraph, you can choose to work with commands located in the menu bar or use icons located on the �Formatting' toolbar.
Using the Menu Bar
Go to �Format' on the menu bar.
Select �Paragraph.'

Under the heading �Indentation,' you can select the size of the indention. (The example shows .25". Or you can select a �Special' indentation, either a first line or a hanging indentation.
First line: This controls the left boundary for the first line of the paragraph.
Hanging: Controls the left boundary for every line in the paragraph except the first one.
On the Formatting Toolbar
You can use the  icon to decrease the indention of a line or paragraph, or you can use the
 to increase the indention.
Adding Borders and Shading
You can add borders and shading to any page or paragraph within your document. Adding a border either to an entire page, a paragraph, or throughout an entire document is as easy as click of the mouse.
To add a border to a page:
Go to �Format' on the menu bar. Select �Borders and Shading.'
Click on the �Page Border' tab.

From this tab, you can select the type of border you want to appear around the page, the thickness of the lines, and the color. You can also select what pages you want to apply the border to.
Add a horizontal line within your document by clicking on ![]() . You can then select what type of horizontal line you want to use.
. You can then select what type of horizontal line you want to use.
By clicking on the  button, you can set margins for the border.
If you click on  , the Tables and Borders toolbar will appear on your screen. You can also view this toolbar and use it to add tables or borders to your document by going to �View' on the menu bar, then checking the �Tables and Borders' toolbar. It looks like this:

Using the Tables and Border Toolbar to Create Page Borders
The �Tables and Border' toolbar is pictured above. To create border, you only need to use a portion of the toolbar. That portion is pictured below.
Click on the arrow on the  icon to select the type of line you want to use for the border.
Click on the  icon to select the thickness of the line.
To select the border color, click the ![]() icon.
icon.
The  icon allows you to decide the outside lines for the border. Do you only want the border on the left side of the page? The right side? You can determine all of this by clicking this icon.
 When you click on this, you can select a fill color, or shading, for inside your borders. If you put a border around an entire page, it would shade the entire page with the color you chose.
Paragraph Border
The easiest way to add border to a single paragraph is to select the paragraph, then go to the �Formatting' toolbar. Select the icon. This will put a one-line border around the entire paragraph. If you click the arrow on the icon, you can then choose if you want it applied to just one side of the paragraph or a horizontal line.
You can also go to �Borders and Shading' under �Format' on the menu bar. Instead of clicking on the �Page Border' tab as you did earlier, simply select the �Border' tab.
Shading
Just as you can add border to a paragraph, you can also add shading or color.
To do this:
- Select �Format' on the menu bar.
- Choose �Borders or Shading'
- Click the �Shading' tab.
- You can choose a color or customize your own.

Or you can click on the  icon on the �Tables and Borders' toolbar.
Change Case
MS Word 2003 allows you to also customize the case in a document or a section of a document. To change the case, go to �Format' on the menu bar, then select �Change Case.' This window will pop up:

- Sentence case is the case used in this article.
- Lowercase puts all letters in lowercase.
- Uppercase puts all letters in uppercase.
- Title case capitalizes letters that would normally be capitalized in a title such as a book title.
- Toggle case alternates between upper and lowercase letters.
AutoFormat
AutoFormat allows you to customize MS Word 2003 to automatically correct errors, format the document, or enter text. MS Word 2003 has a lot of features to streamline your tasks and make them easier. This is among the favorites.
To use AutoFormat, go to �Format' on the menu bar and select �AutoFormat.'
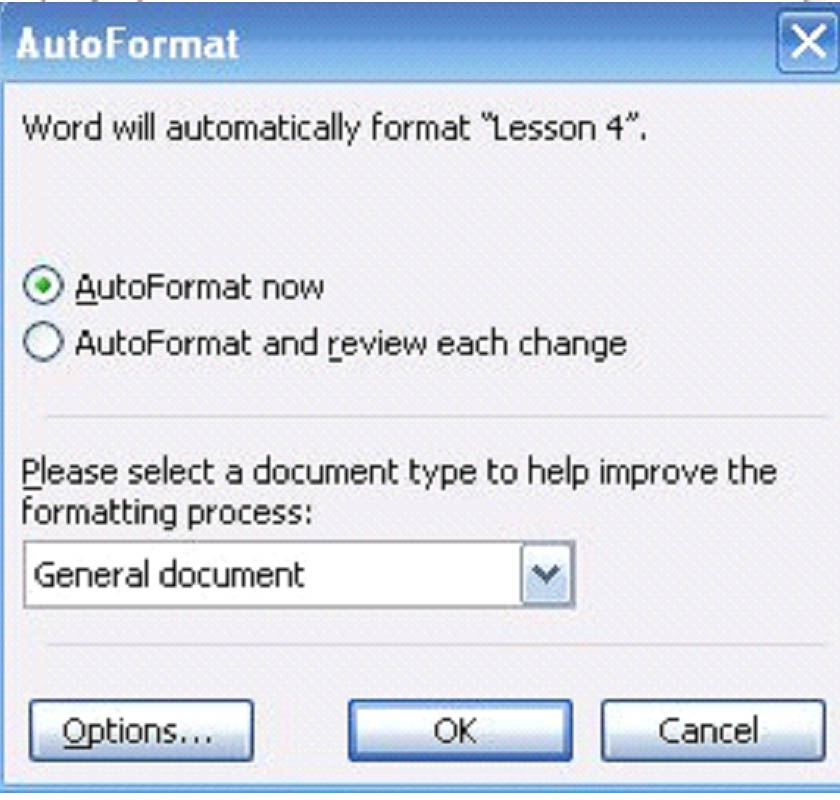
Click on options.
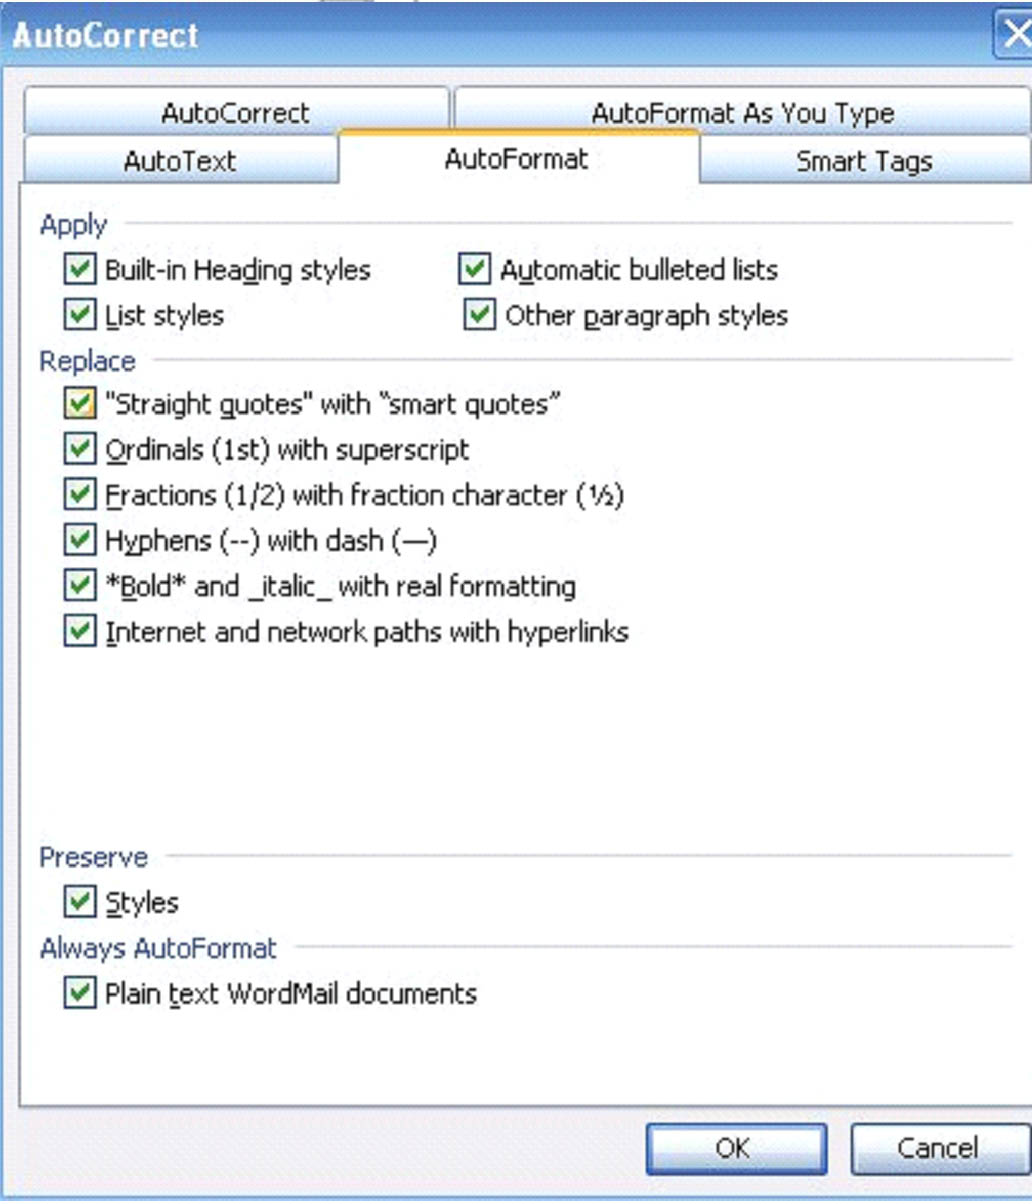
You can set MS Word to automatically format the text and correct errors (a popular one is capitalizing the first two letters of a word instead of just the first one. MS Word can automatically correct this for you.) AutoFormat can also add text in for you, such as names and addresses that you commonly use in a document. Clicking on the different tabs will pull up the windows below. Just look at all the things you can customize MS Word 2003 to do automatically for you:
Automatically enter text.

Format your document as you type.
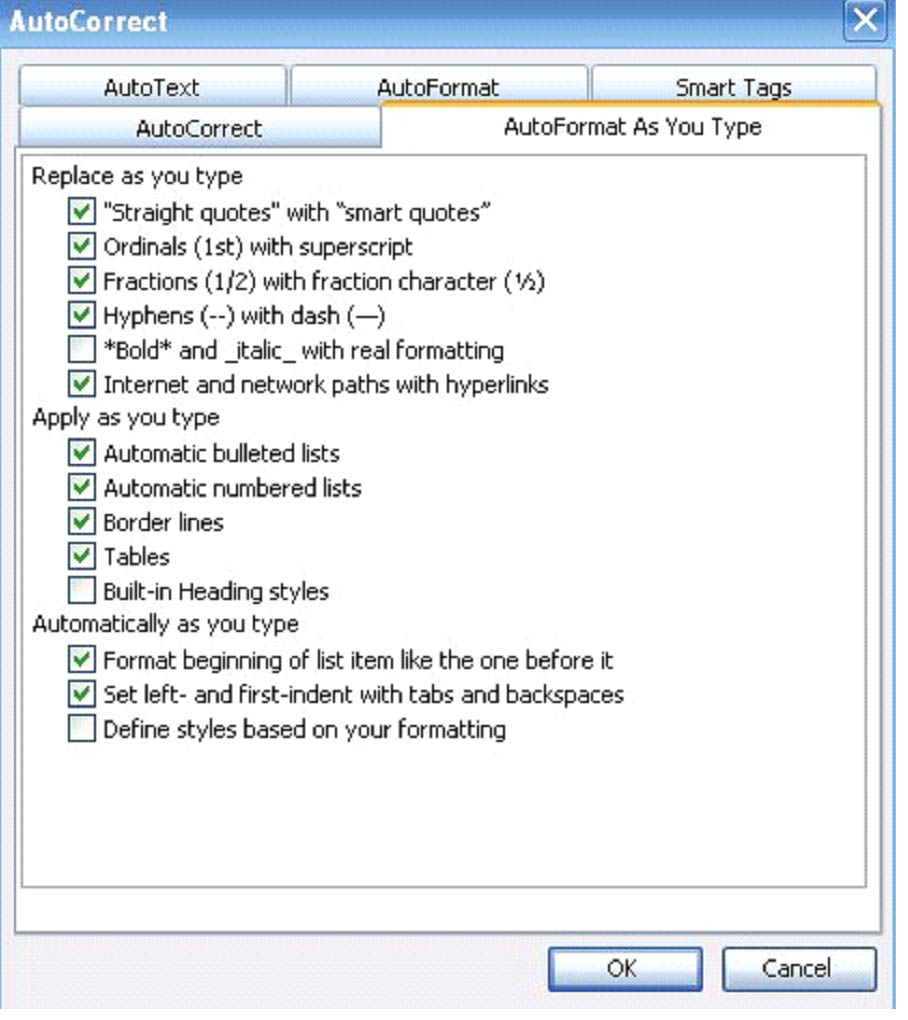
Let MS Word correct errors automatically.

It's well worth your time to learn how to use AutoFormat and to customize it for your use. You'll find that it will save you a lot of time in writing and editing the documents that you create.
Columns
Columns run vertically on a page. Columns can contain text, data, or graphics. If you have more than one column on a page, the columns appear side by side, as you see in newspapers and magazines.
There are two easy ways that you can add columns to your documents.
The first is located on the �Standard' toolbar.
Simply click on the  icon that appears on the �Standard' toolbar.
A drop down menu will appear with four columns on it. Select the number of columns you want in your document with the first column you see in the drop down menu symbolizing one column, the second symbolizing two columns, etc.
On the menu bar, select �Format' then �Columns.'
This window will appear:
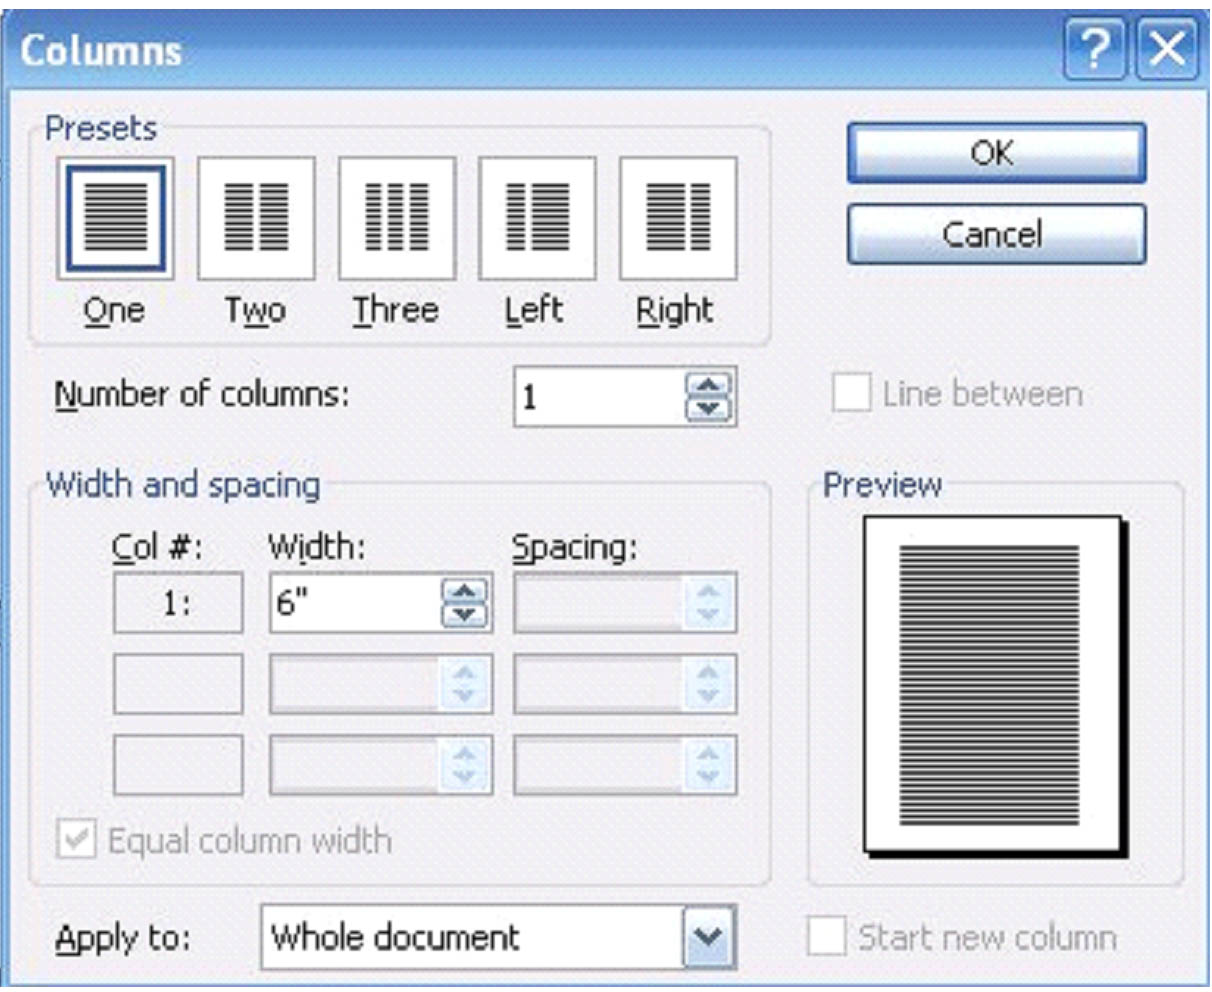
You can select the number of columns on the page from this window, but you can also set the width of the columns, the spacing in between the columns, and if you want them to appear in the entire document or just from that point forward.