Create a Publication in Microsoft Publisher 2013
After this article is through, we'll teach you even more advanced features to use when designing publications so when you start to use Publisher on your own, it will feel like you've been using it all your life.
Start by Selecting a Template or Picking a Background
The first thing you should always do when creating a new publication is decide if you want to use a template, or create one from scratch.
We've decided we are going to create an engagement party invitation from scratch.
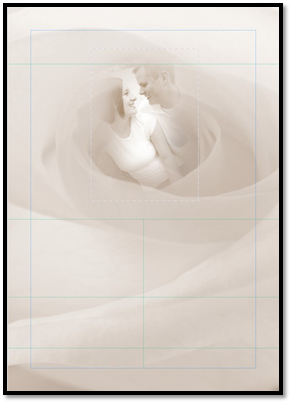
To do this, the first thing we decided on was a background. We decided to use a picture.
Remember, to add a background, go to the Page Layout tab.
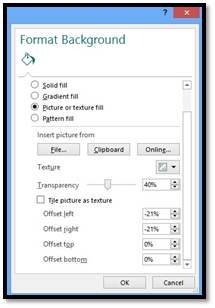
When you add a picture as a background, sometimes the picture can be so dark, it will make it hard to see other objects that you add � or it will draw attention away from the objects. That's where it helps to use the tools Publisher gives you to set transparency and offset images etc.
This is the picture we used as our background.

Here are the settings we used to make it more transparent and not so dark � and to position it as we wanted it on the page. You can offset the picture to the left or right to give you space on the side of the image. You can also offset it by the top or bottom.
Now that we have our background, we can start to add other objects to our publication.
Setting Up the Page
Now that we have our background in place, we can start to set up our page.
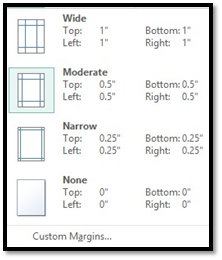
We've set our margins:
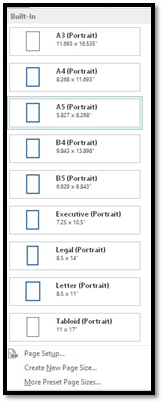
We've also decided to change the page size to A5 instead of Legal.
Now we're going to set up our guides.
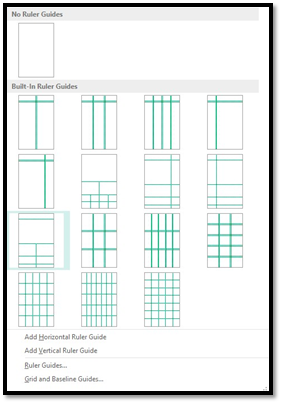
We've chosen a pre-set guide, simply because it works well with our background design.

Now we can start adding objects.
Adding Images
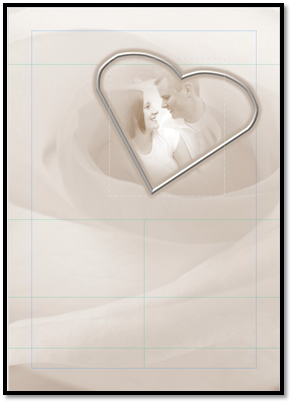
We're going to start by adding an image to the invitation. We want a picture of the couple on the invitation, of course. This will be a very important aspect. It's important to note that when you design a publication from scratch, if you want a certain object to be the focal point of the publication, place that into the publication first and work from there.
Here is our picture inserted and formatted into the presentation.
To make an ordinary picture fit into the background so it looks like the couple is part of the rose, we first re-sized the image by dragging in on the corners until we got the fit we wanted.
Then, we used the Recolor button under the Picture Tools Format tab.
The thumbnail on the left was the original color. We used the third thumbnail on the top row.
From there, we used Picture Effects and gave our image soft edges so it would blend better with the background.
Adding Shapes
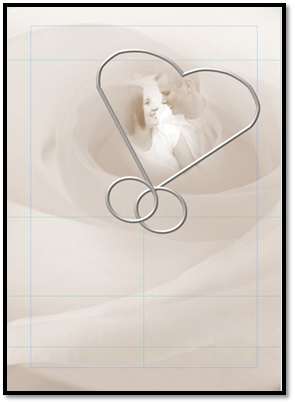
Next, we want to make sure the image of the couple stands out. We also want love to be the symbol all the way through this publication. Because of that, we're going to draw a heart shape on our publication.
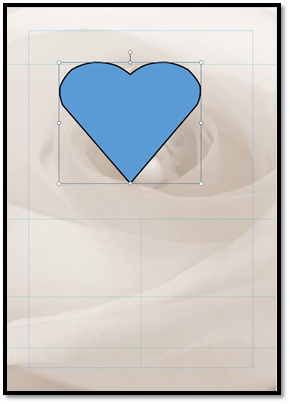
Right now, it looks horrible. However, Publisher makes it easy to change that.
First, we're going to get rid of the fill color. We want it to be transparent � or no fill.
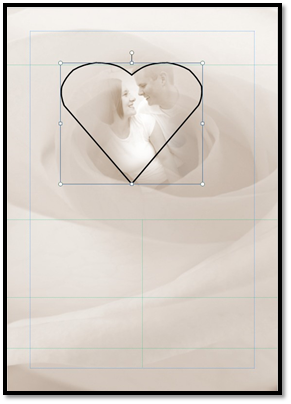
We're going to change the color of the border by using Sample Line Color and sampling the lightest part of the background image. We also increase the weight of the border line.
Now, let's add shape effects so the heart blends in more with the publication, but brings out the image of our couple. We're going to use Bevel and Glow.
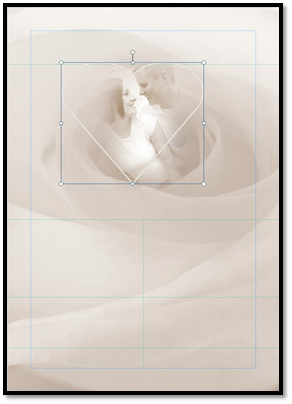
We can also re-size or rotate the heart to make it look like we want.
We also added two new shapes to symbolize rings and help make the heart shape look a little more attractive in the design.
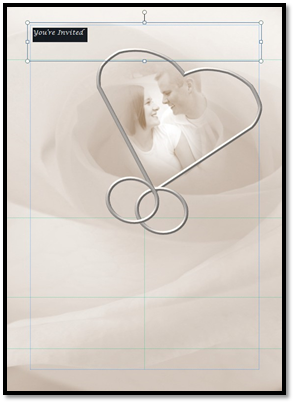
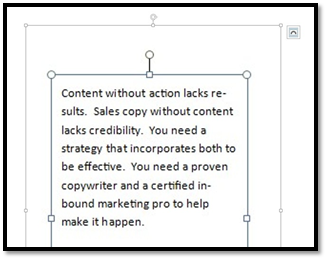
Adding Text Boxes and Text
We're going to add text boxes and text now.
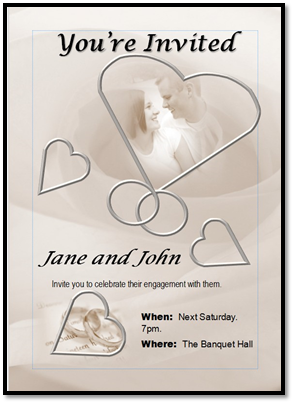
After we add our text boxes and text, then finish up our design, we have our publication:
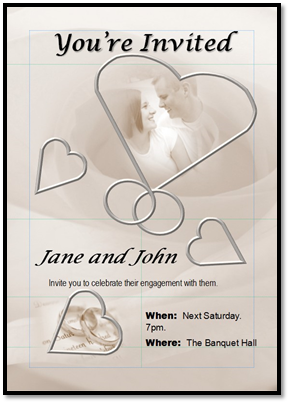
We can now make final adjustments and turn off the guides.
Customize Pages
Publisher is a powerful page layout program. As such, it has many tools to help you create great, professional-looking publications, even if you are complete novice.
In this article, we're going to show you some of the more advanced features. But don't let that intimidate you. They are incredibly easy to use.
Create and Use Headers and Footers
If you've used the header and footer feature in Microsoft Word, this process should be familiar to you; the process is pretty much the same. The difference is that in Publisher, you can only add headers and footers to a master page. If you think about it, though, that makes a lot of sense, since headers and footers typically appear throughout a publication.
You can, of course, add a header or footer of sorts to an individual page just by drawing a text box and typing in it. Beware though, that if you do this and a master page with a header is applied, you might create a conflict between the two.
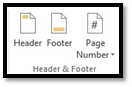
There are a few ways to access the header and footer options. The first is to activate Master Page View and locate the header and footer tools on the ribbon. They look like this:

Another way to gain quick and easy access to these features is by going to the Insert tab. The header and footer buttons can be found on the far right. They look like this:
Clicking the header or footer button will automatically open the master page tab.
The Page Number button can be added easily to a master page without opening the Master Page View. We'll talk more about that in a minute. For now, let's take a look at the header and footer.
The third and final way to access the header and footer functions is to double-click on the header or footer of any publication page. This will automatically open the Master Page tab.
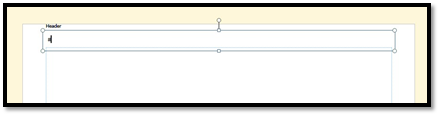
When the tab opens, the header or footer you selected will be active. Being "active" simply means that you can edit it. An active header looks like any other active text box.
You can use the Show Header/Footer button to toggle between them, or you can scroll up or down the page and double-click the header or footer area to make it active.
Text can be entered into, formatted, and edited just like any text box.
Use Page Numbering
There are a couple of different ways to add page numbers to your publication. We talked a little bit about the button on the Insert tab, but let's stay on the Master Pages for a minute.
Take another look at the Header & Footer group on the ribbon of the Master Page tab. The three buttons (Insert Page Number, Insert Date, Insert Time) work identically, so we'll cover them all at once.
Unlike the Page Number button on the Insert tab, these buttons will only insert information at the cursor's current location. When a page number is entered, it shows up as a pound sign (#), but the date and time show up as the date and time they were added.
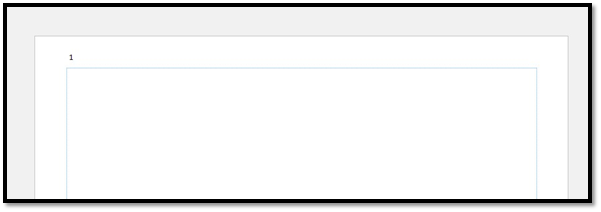
Below is an example of how the page number looks on the Master Page (top) and how an ordinary page looks when the master is applied (bottom).
Note the "#" symbol.
Now we will talk about adding page numbers from the button on the Insert tab.
You can use this button at any location in your publication, at any time. The location of the cursor is only important if you want to insert a page number there. Clicking the button activates a drop-down menu.
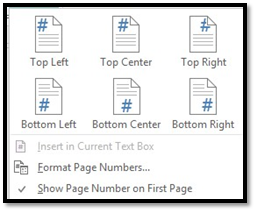
From here, you can choose where you'd like the page number to appear. Just be aware that if you select any of the buttons that put a page number at the top or bottom of a page, the page number will automatically be entered into the header or footer of the Master Page.
You might have noticed that in the above illustration the "Insert in Current Text Box" button is faint. That is because no text box has been selected. To use this button, return to your publication, click into a text box, then press the Page Number button again. This places a page number at the cursor's location in the selected text box.
Now take a look at the Show Page Number on First Page button at the bottom of the drop-down menu. This item has been selected, which is indicated by the check mark next to it. You might want to uncheck it if you have a title page you don't want a page number appearing on. It is on by default.
Clicking the Format Page Numbers button opens a floating window.
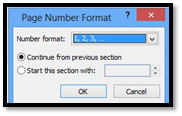
Here, you can choose a number format, such as ordinary numbers, Roman numerals, ABC, first, second, third, etc.
To start with a numeral other than "1," select the "Start this section with:" button, then enter a value to start with. When you are finished, click OK.
Use and Create Color Schemes
Color schemes are just a bunch of colors you can choose for your publication to keep it consistent. You can find the Schemes group on the Page Design tab. It looks like this:

When you select a color scheme, those colors are readily available in the colors palette. You can apply them to text, borders, and other objects.
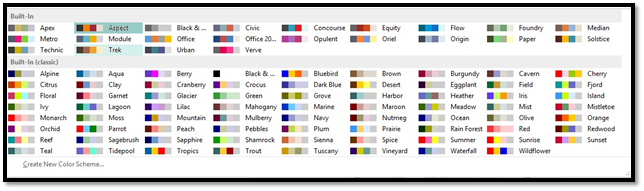
As you can see, Publisher provides an extensive catalog of color schemes. These are colors that tend complement each other.
However, you might want to create your own color schemes. If that's the case, click "Create New Color Scheme."
In the window that opens, you can choose your colors, and name your scheme.
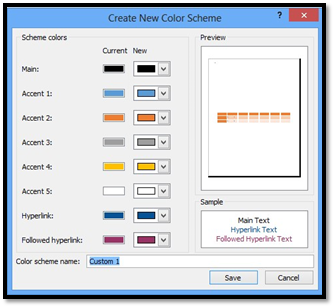
When you are finished, click Save.
To apply any color scheme, simply navigate to the Page Design tab and select it. You should be aware though that all of the objects that you have applied a color scheme color to will change to the corresponding color of the new scheme.
Insert Bookmark
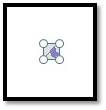
You can insert bookmarks into publications. A bookmark will appear as a graphic, as shown below.
They allow you to add targeted hyperlinks to that location in your publication.
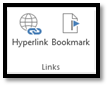
To add a bookmark, go to the Insert tab and click Bookmark.
You'll then see this dialog box:
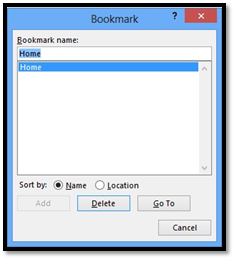
Create a name for the bookmark, then click Add.
Now drag the bookmark graphic and place it where you want it on the page.
Next, you're going to create a hyperlink to that bookmark.
Select the text you want to use as a hyperlink.
Click the Hyperlink button under the Insert tab.
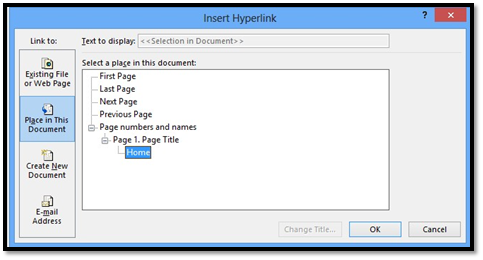
Click the Place in This Document on the left side. Then, select the name of your bookmark, as shown above.
Click OK.
Whenever someone clicks on the link, it will take them to the place in the publication where you put the bookmark.
NOTE: You can also create hyperlinks to websites and email addresses by selecting what you want to use as a hyperlink, then clicking the Hyperlink button under the Insert tab.
Insert File
Inserting a file into your publication is easy. Simply go to Insert File under the Insert tab on the ribbon.
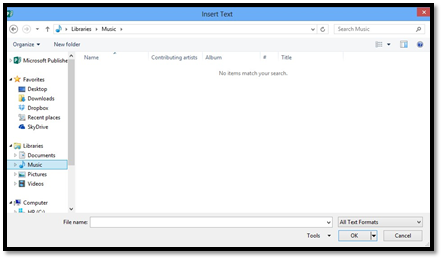
Select the file you want to insert.
Click OK.
NOTE: You can only insert text files, such as files from MS Word.
Other Publisher Tasks
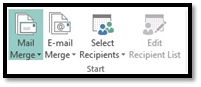
Create Mail Merge
Mail merge is the ability to create a mass mailing based on a single publication template. That means you can create a letter in Publisher and have it addressed to every recipient in your address book, or any other list of contacts. You may have seen this feature in action if you've ever gotten a political mailer with your name on it, instead of the generic "Dear Voter" or "Dear Recipient."
The first thing you need to do before you begin a mail merge publication is acquire a recipient database. You may already have this if you keep all of your contacts in Outlook or some other email client. You can also create your own in a database program like Excel.
Mail Merge may seem like a complicated process to set up, but Publisher provides a wizard to help us do so as painlessly as possible. Let's launch the wizard and we'll walk you through the steps.
To find the Mail Merge button, go to the Mailings tab. Mail Merge is on the far left edge of the ribbon.
Click the bottom of the Mail Merge button and then select Step by Step Mail Merge Wizard. This opens a pane to the right of our publication.
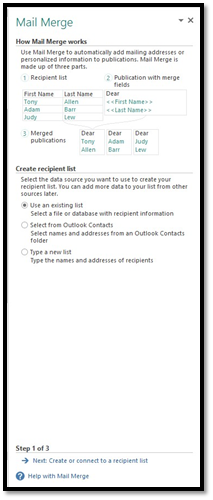
At the top of this pane, Publisher gives us a quick overview of how Mail Merge works. It tells you the first step is to create or acquire a recipient list, which we already discussed. The second step is to design your publication with mail merge fields, and the third is to create a merged publication. We're going to walk you through each of these steps. We'll start with creating or choosing a recipient list.
The second section of Step 1 of the Mail Merge wizard asks us to create a recipient list. It gives us three options to choose from.
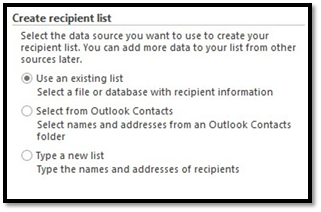
We can:
-
Use an existing list. These are usually created in some kind of database program, like Excel.
-
Use the names and addresses in an Outlook Contacts folder.
-
Or create a new list.
Clicking Use an Existing List opens up a window where you can navigate to the location on your computer where the list is stored.
If we were to select our contacts from Outlook, we'd check that box (as in the illustration above), then advance to the next step of the Mail Merge wizard.
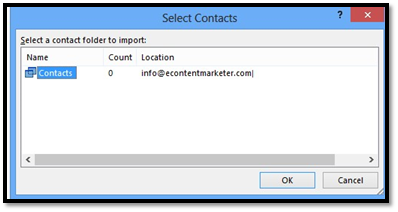
Publisher automatically searches our Outlook folders to find contacts. It then shows us the available lists, and the number of contacts contained in it. This is illustrated in the example above. There is only one folder containing recipients in our Contacts account. Select the account you'd like to use then click OK. This opens another window.
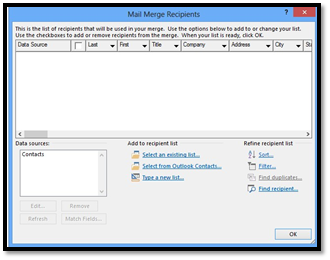
Here we can review the recipient list, and choose the ones we'd like to include. Unchecking a box by a contact name excludes that contact from the list. Click OK when finished.
Now let's create our own custom list. Returning to the first screen of the Mail Merge wizard, we will select the Type a New List button and click Next.
Here, we can create and edit contact information. To add a new entry, click the New Entry button. You can even customize column names that will be available when we create our publication. When you are finished adding names, click OK.
Now that we've created a recipient list, we're ready to move on to the next step of the wizard. Click Next: Prepare your publication.
This is what the next step looks like:
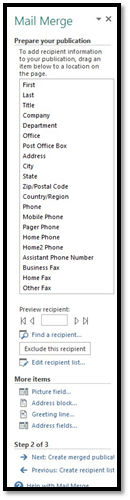
The fields in the large box that dominates the example above are essentially placeholders. What you are going to do is drag those fields to the place in your publication where you want the corresponding recipient information to appear. For example, if you were writing an informal letter, you might want to drag the First Name field to the Dear location in the publication. That way, when you've created your mail merge publication, a recipient's first name will appear there. The first name field inserted into your publication may look like this:

You can easily configure and add commonly used functions, such as address blocks and greeting lines. Let's take a look at that process.
Click Greeting line in the More Items section of the Mail Merge wizard.
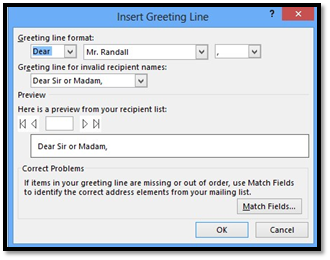
Here you can choose a greeting, a greeting line format, and select the greeting line for "invalid" recipient names. Invalid recipient names might be those contacts for which a first or last name wasn't included in the list. You can also click through your contacts to preview them. In the example shown, we're looking at a preview for contact 3. You can use the Match Fields button to choose the correct field of your recipient database to show.
Click OK when finished.
When you're done creating your publication, click Next: Create merged publications. This is the last step of the Mail Merge wizard. Publisher has essentially created a new publication for each of the recipients in your contact list. If you had seven contacts, Publisher created seven publications. If you had 27, it created that many publications. The great thing though, is that Publisher doesn't have to save all of those publications, taking up valuable disk space. Instead, there really is only one publication with all the data fields inserted into it.
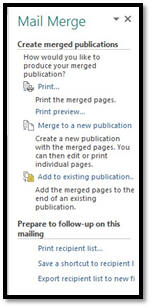
Here we can choose to print the publications, preview them before printing, merge them into a new publication, and more.
To preview the publications to be printed, and perhaps double-check that all of our recipients' information was correctly inserted into our publication, click the Print preview button.
After you've done this a few times, and are familiar with the steps and procedures, you can skip the Mail Merge wizard and use the buttons in the ribbon. They work identically to what we saw in the wizard, just without the explanation for each.
Email merge works identically to mail merge, except when you're finished, instead of printing options, you're given email options.
Create labels
Publisher doesn't have a label button like Microsoft Word that automates the process. Instead, you have to create the labels, just as you'd create any publication. You do, however, have a lot of templates to choose from that work well with Mail Merge.
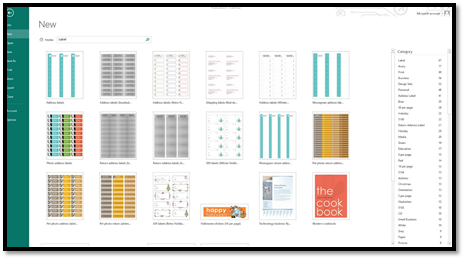
To create a new publication based on a label template, or to create your own, go to File and select New. Click Label to the right of Suggested Searches.

You can choose from a variety of label templates, or you can choose your own. The page size of most labels can be found, including the kind made by Avery, Formtec, and 3M/Post-it. Be sure to select the size that matches your labels. If you don't, the label will not print correctly.
Once a label is open, you can use the Mail Merge functions we mentioned above to create your labels.
Manage Embedded Fonts
When creating a publication in Publisher, you can only use the fonts that are installed on your computer. Further complicating things, is the fact that if you open a publication that uses a font that isn't installed on your computer, a different font will be substituted. This can seriously impact the aesthetic design of your publication.
To prevent this issue, Publisher gives you the opportunity to embed the fonts you used in a publication, directly into the publication file. This means that no matter what computer you open the publication on, those fonts will be available.
There are a few caveats to this. The first is that you can only embed TrueType fonts. The second is that you can only embed the fonts for which this is allowed by its licensing agreement.
To include embedded fonts into your publication, go to the File tab, select Info on the left, then click Commercial Print Settings, and select Manage Embedded Fonts.

This opens a new window that contains a list of all the fonts used in the current publication. In the example below, there is only one font listed. Check the Embed True Type fonts when saving publication to embed these fonts. You can also choose whether or not to embed common system fonts and whether you want to include subset fonts, such as italics or bold.
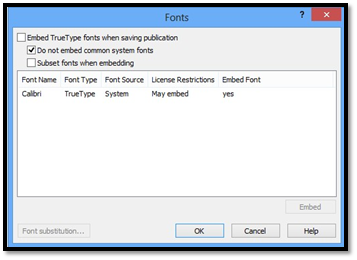
Now look at the License Restrictions column. This tells us that only one of the fonts we used can be embedded into our publication.
For the fonts you don't want to embed in the publication, you can click on its name then click Don't Embed in the bottom right corner. (In the example below, only the button Embed can be seen, though it is opaque. In this case, you will have to click on an embeddable font to activate the Don't Embed button.) Click OK when finished.
Edit Business Information
To view and edit the Business Information that will be included, and associated with, your publication, go to the File tab, then Info. Keep in mind, this isn't a recipient's information, this is the publication creator's information. Yours, in other words.
Click the Edit Business Information button.
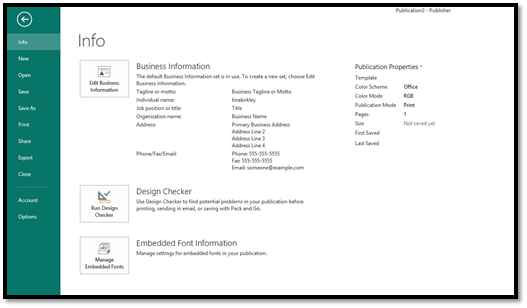
You'll then see this dialog box:
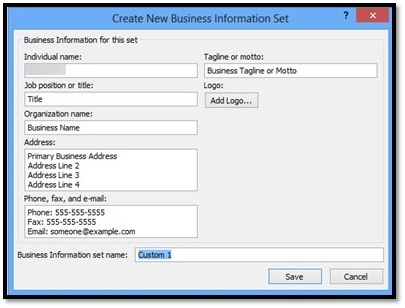
To edit the information, simply click into any field and begin typing. You can even add a logo. Clicking the Add Logo button allows you to navigate to an image file on your computer. Click Save when finished.