Adding pictures and clip art is as simple as adding text, so just take a deep breath and dig in. By the end of this article, inserting pictures and clip art will be as easy as signing your name.
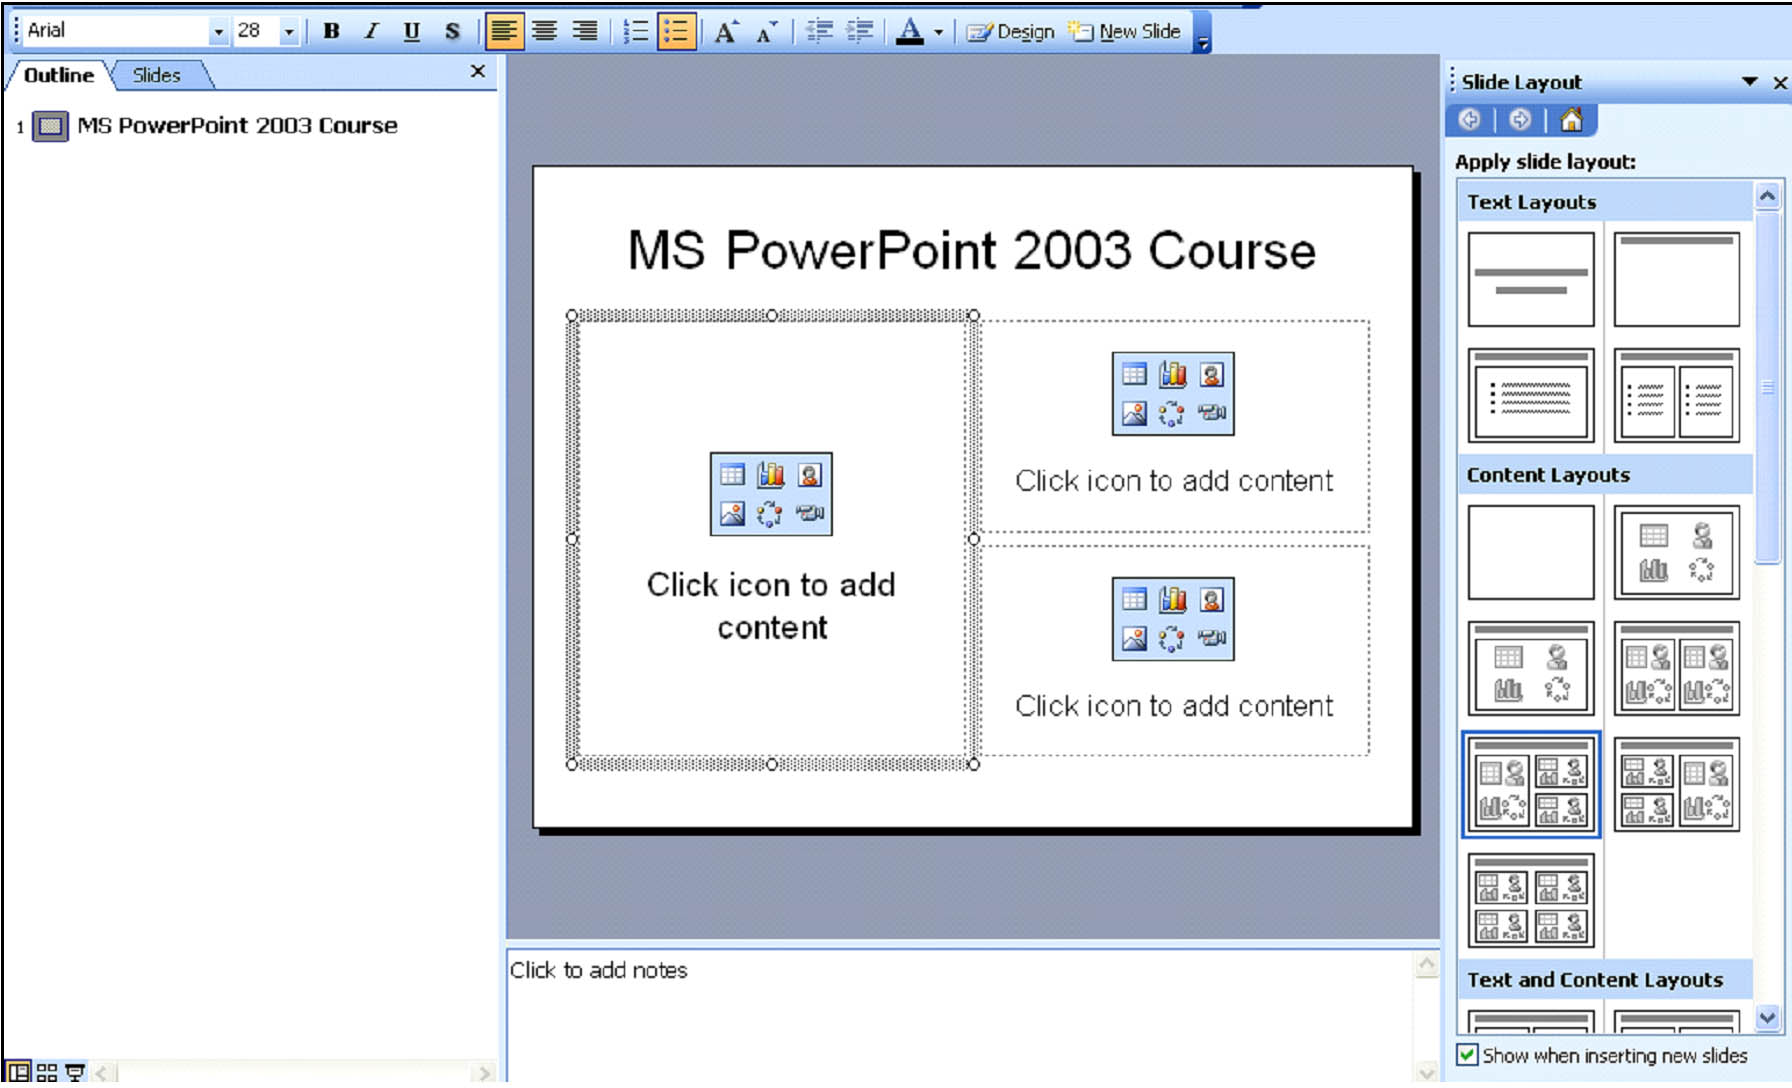
Note: If you're working in PowerPoint, the first thing you need to do is select a slide layout. Remember, there are layouts just for text and those for text and pictures. We've selected the layout below.
Inserting Clip Art
Now that you have your slide open and the layout selected, it's time to insert clip art.
Go to Insert> Picture> Clip Art.
The task pane will open up with the Clip Art Menu, as shown below.
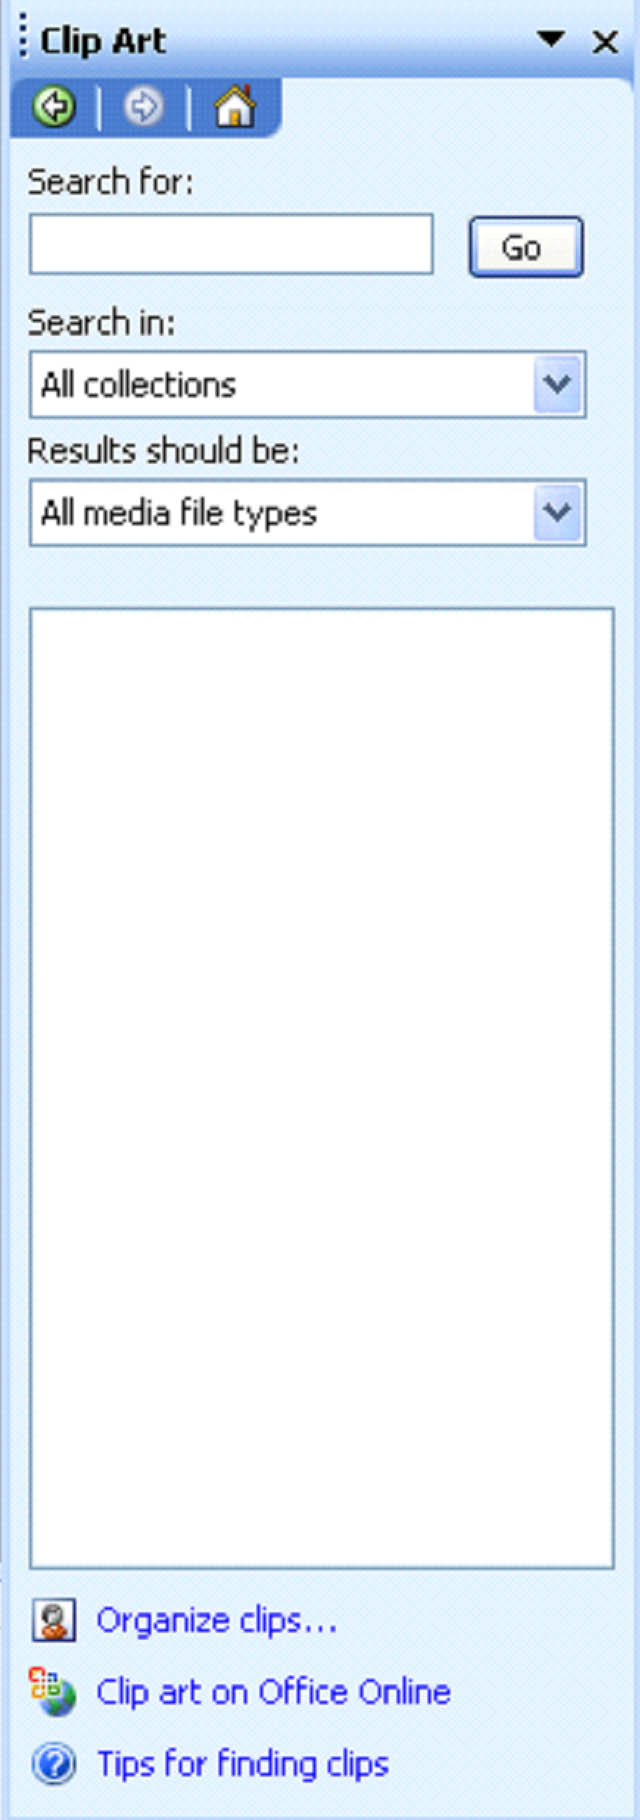
Now, you're going to specify what kind of clip art to look for, where to look, and what types of files you want the search to produce.
- Search for. Specify what type of clip art you want PowerPoint to find. What kind of picture do you want for clip art? For example: software.
- Search in. Where do you want PowerPoint to search? A drop down box is provided, giving you different categories.
- Results should be? Clip art, photographs, music, or sounds.
Make sure the boxes are checked next to the criteria that you want used during the search.
Press GO beside the Search For box when you're finished.
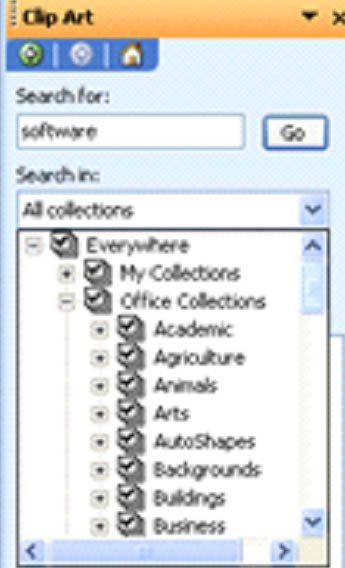
We've searched for software in this example in Office Collections and specified that clip art results only should be shown.
Here is the result of our search:
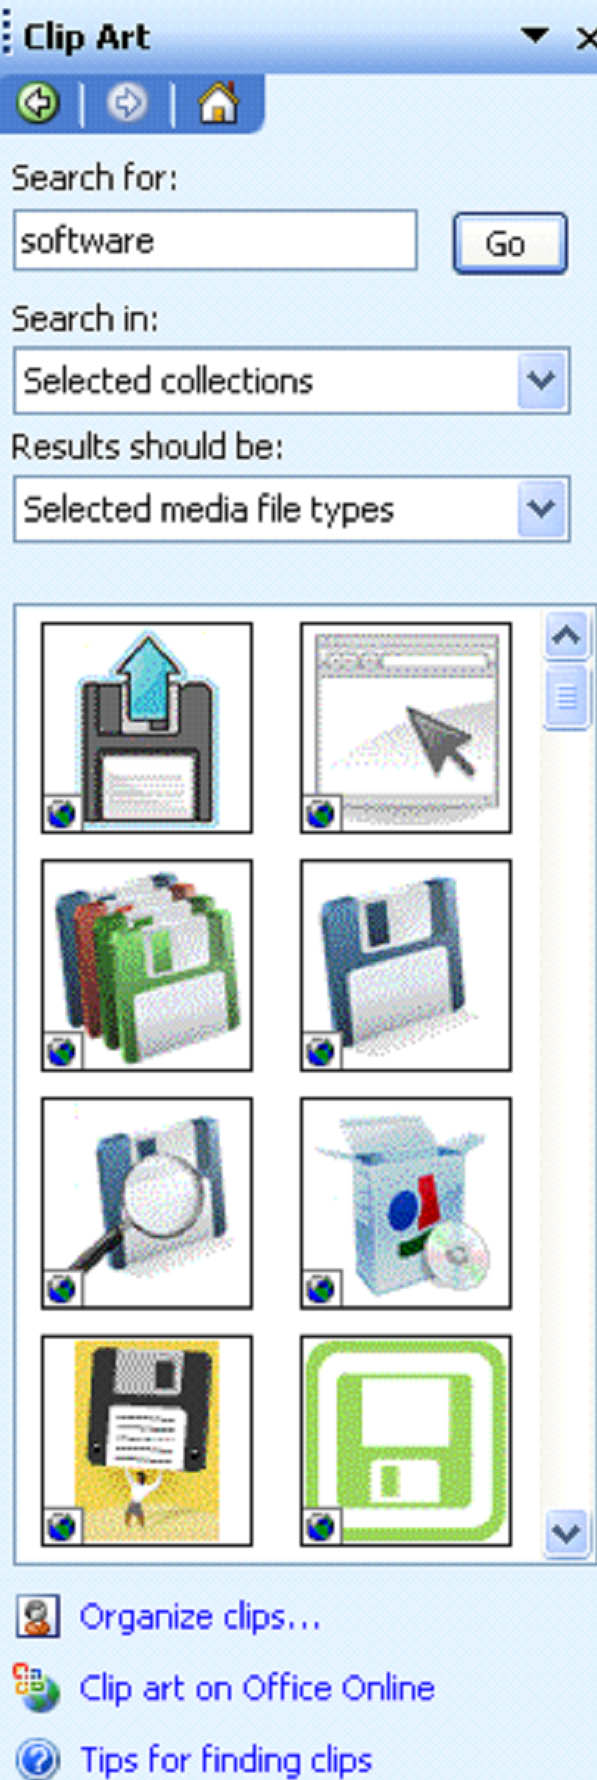
We can now scroll through the results and select the piece of clip art that we want to use in our presentation.
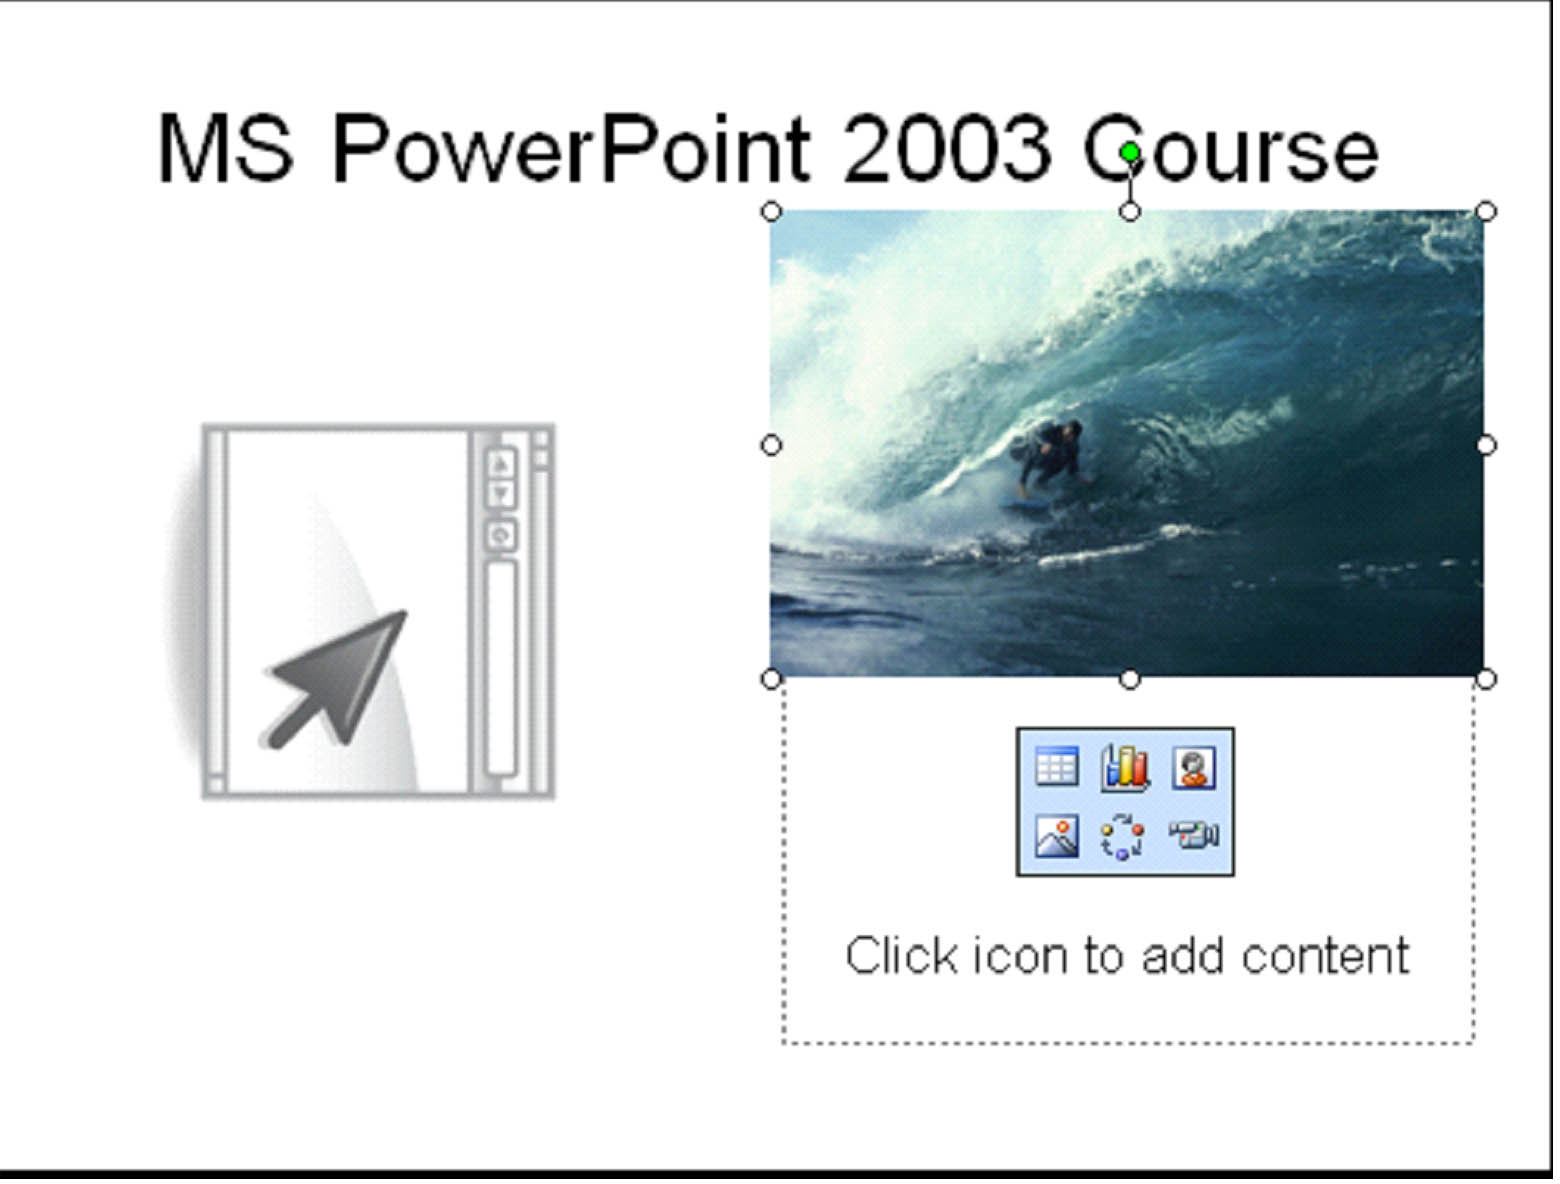
Select the clip art by clicking on it with your mouse. You can right click to insert; however, MS PowerPoint 2003 automatically inserts the clip art onto your slide, as seen in the snapshot below.
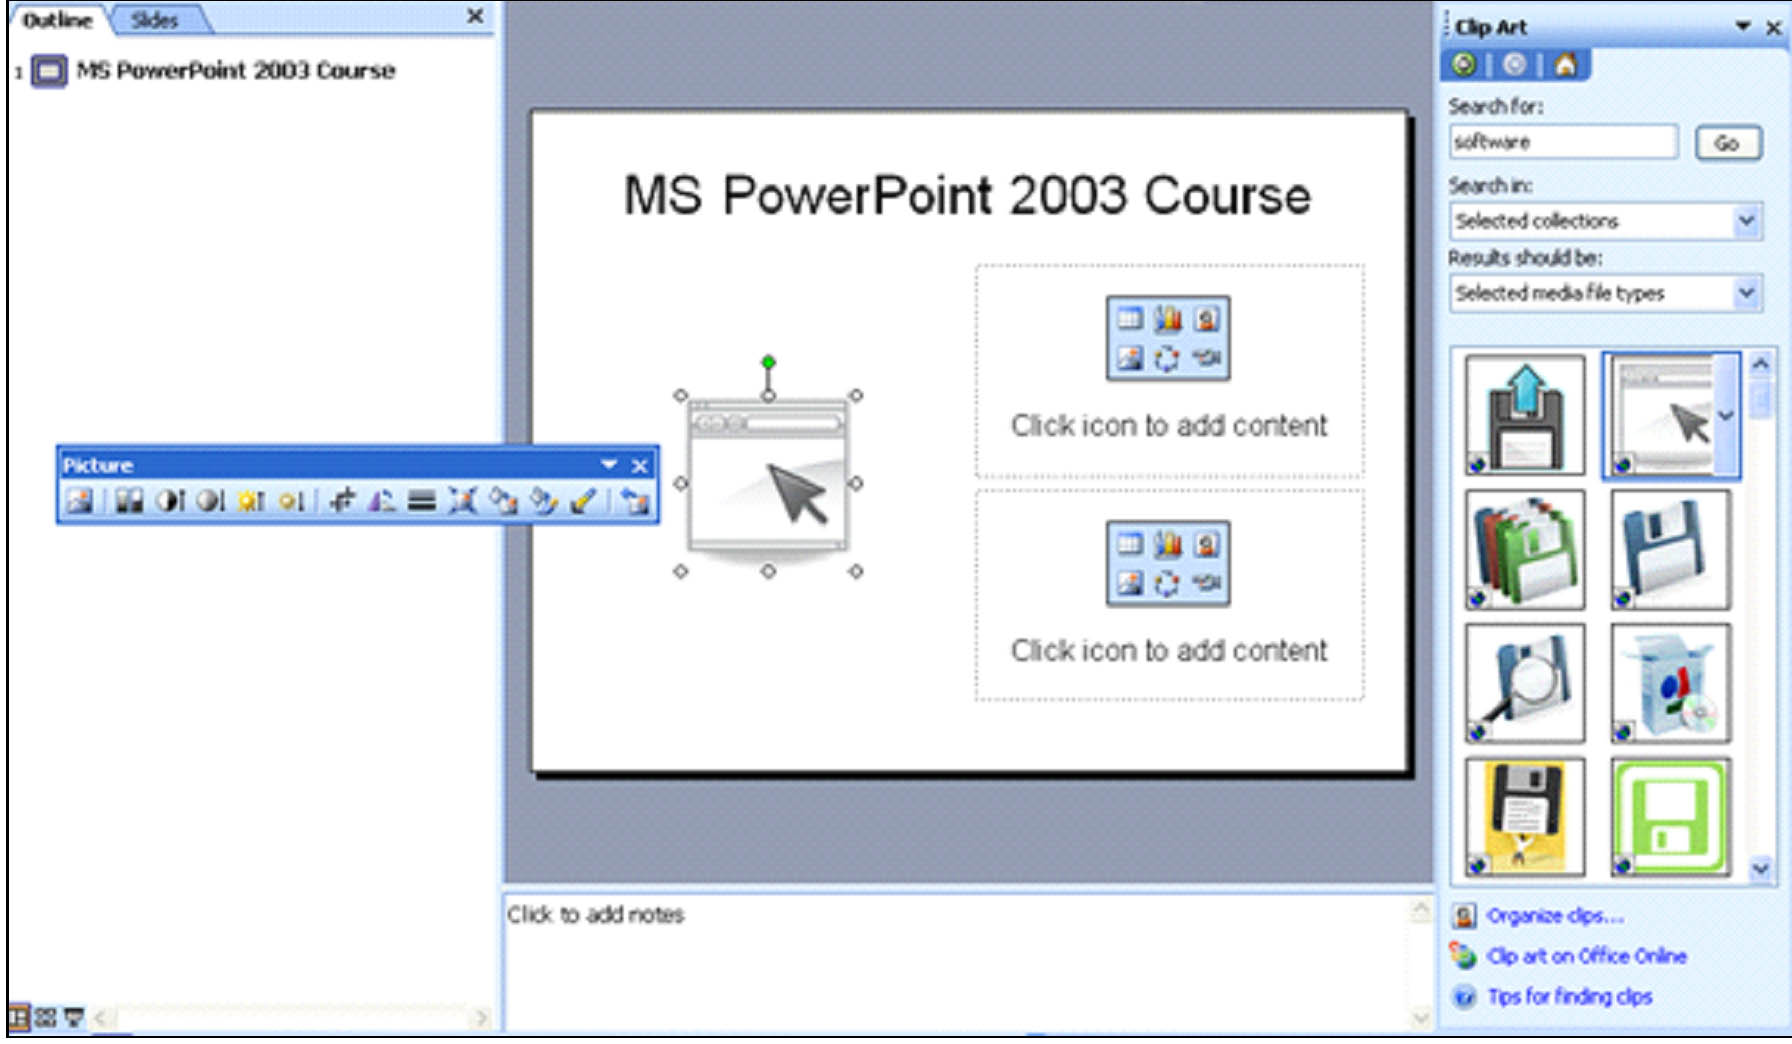
As you can also see, the Picture toolbar appears as a floating toolbar on the screen. Now we can learn how to resize and move the clip art.
The Picture toolbar will be invaluable in editing and resizing clip art � and even pictures. Right now, it's a floating toolbar. However, you can click on it and drag it up to the toolbar area and snap it in wherever you want it to go. It will then become fixed into place.
Below is a snapshot of the Picture toolbar. We will refer to it throughout the rest of this article.

Inserting Pictures
To insert a picture into a slide, go to Insert> Picture > From File. MS PowerPoint 2003 does not contain any pictures that you can use. You'll have to use pictures from your computer or a web source.
Select the file that contains the picture you want to insert.
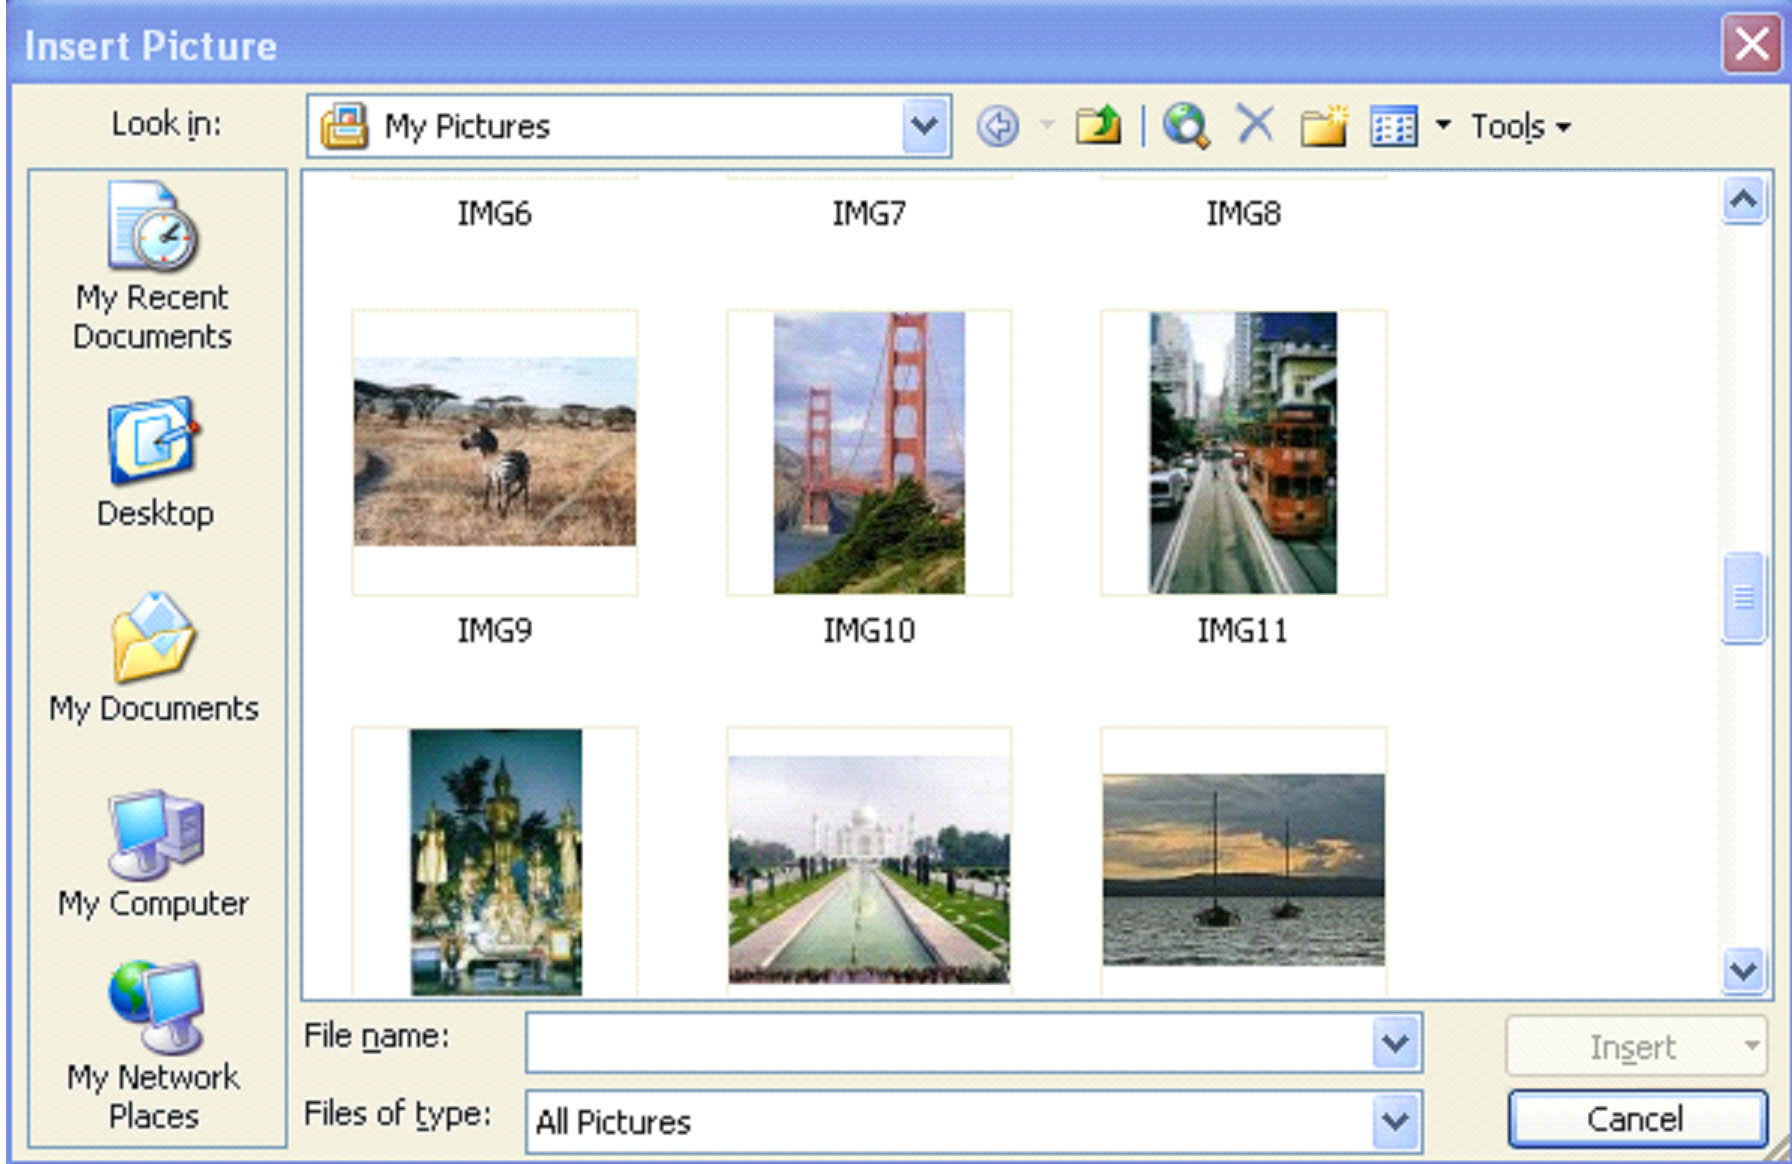
Click on the picture or file name, then click Insert.
The picture will then appear on your slide. If the picture is large, it may completely cover the slide, as shown below.
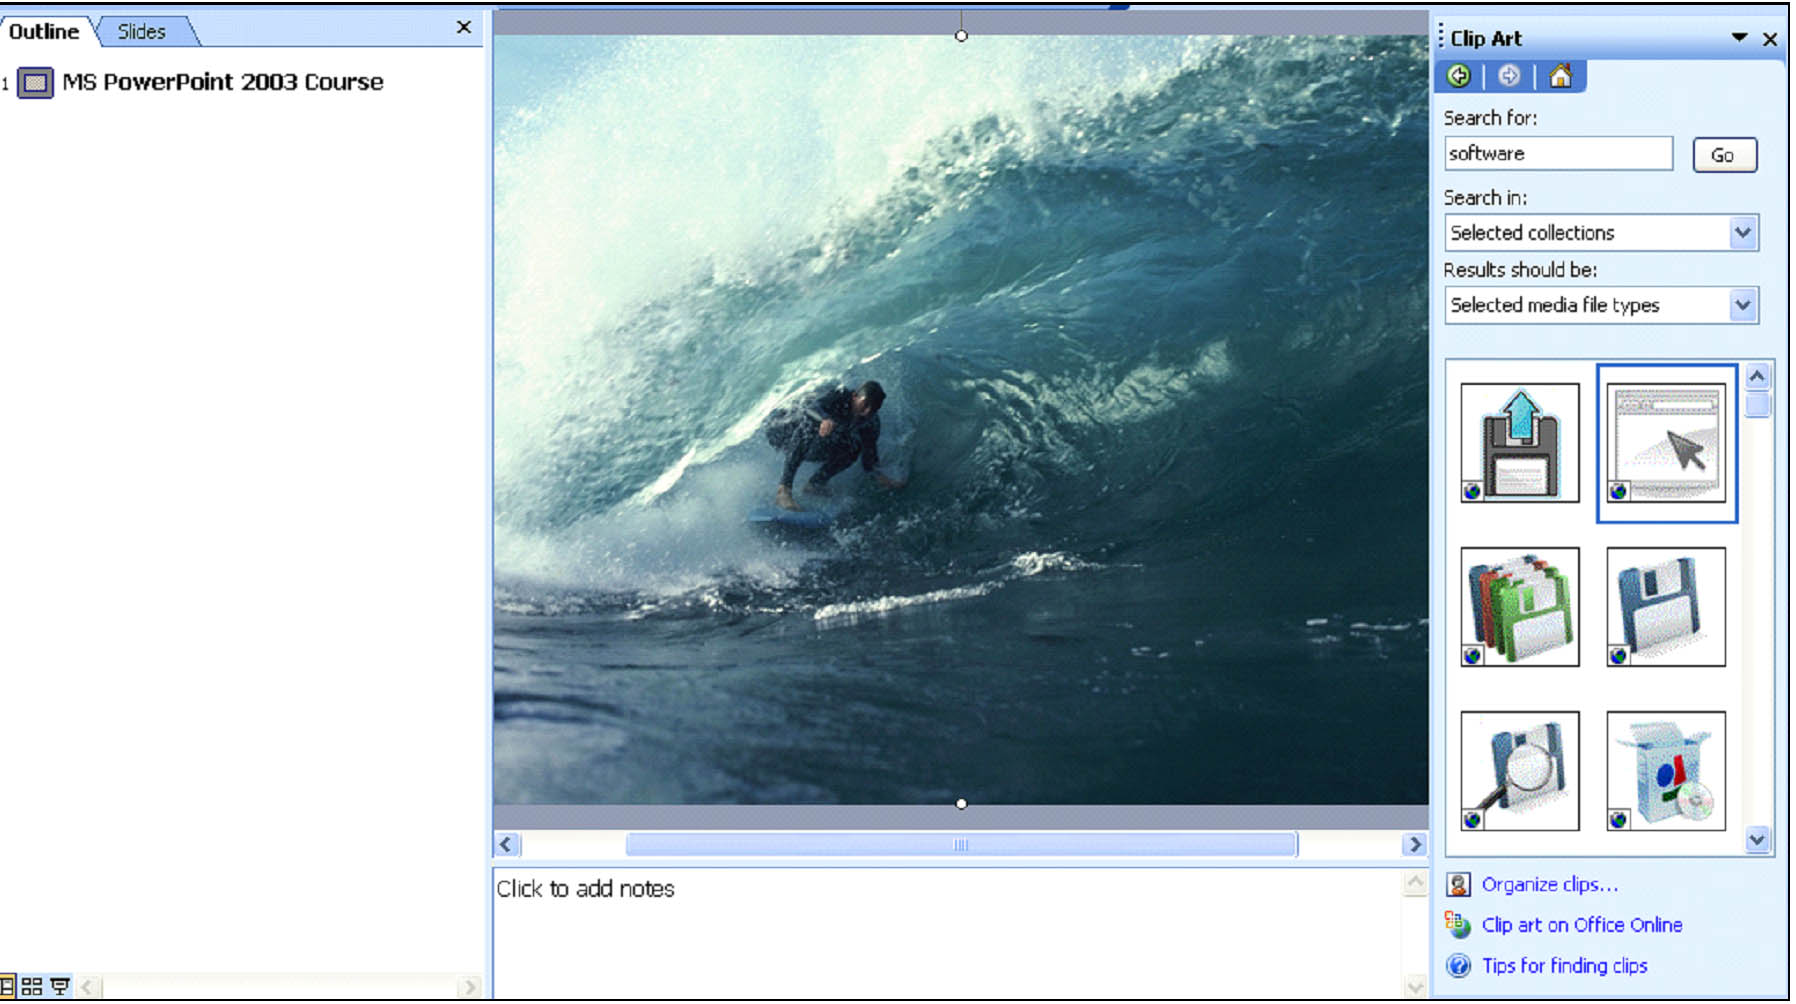
You should also see the Picture toolbar floating on the screen if you haven't locked it into place. Ours is locked into place, which is why you can't see it in the example. Now, let's learn how to resize, crop, and move the photo � as well as the clip art we inserted earlier.
Resizing Clip Art and Pictures
If you want to resize a picture or a piece of clip art, find the format icon on the picture toolbar and click it.
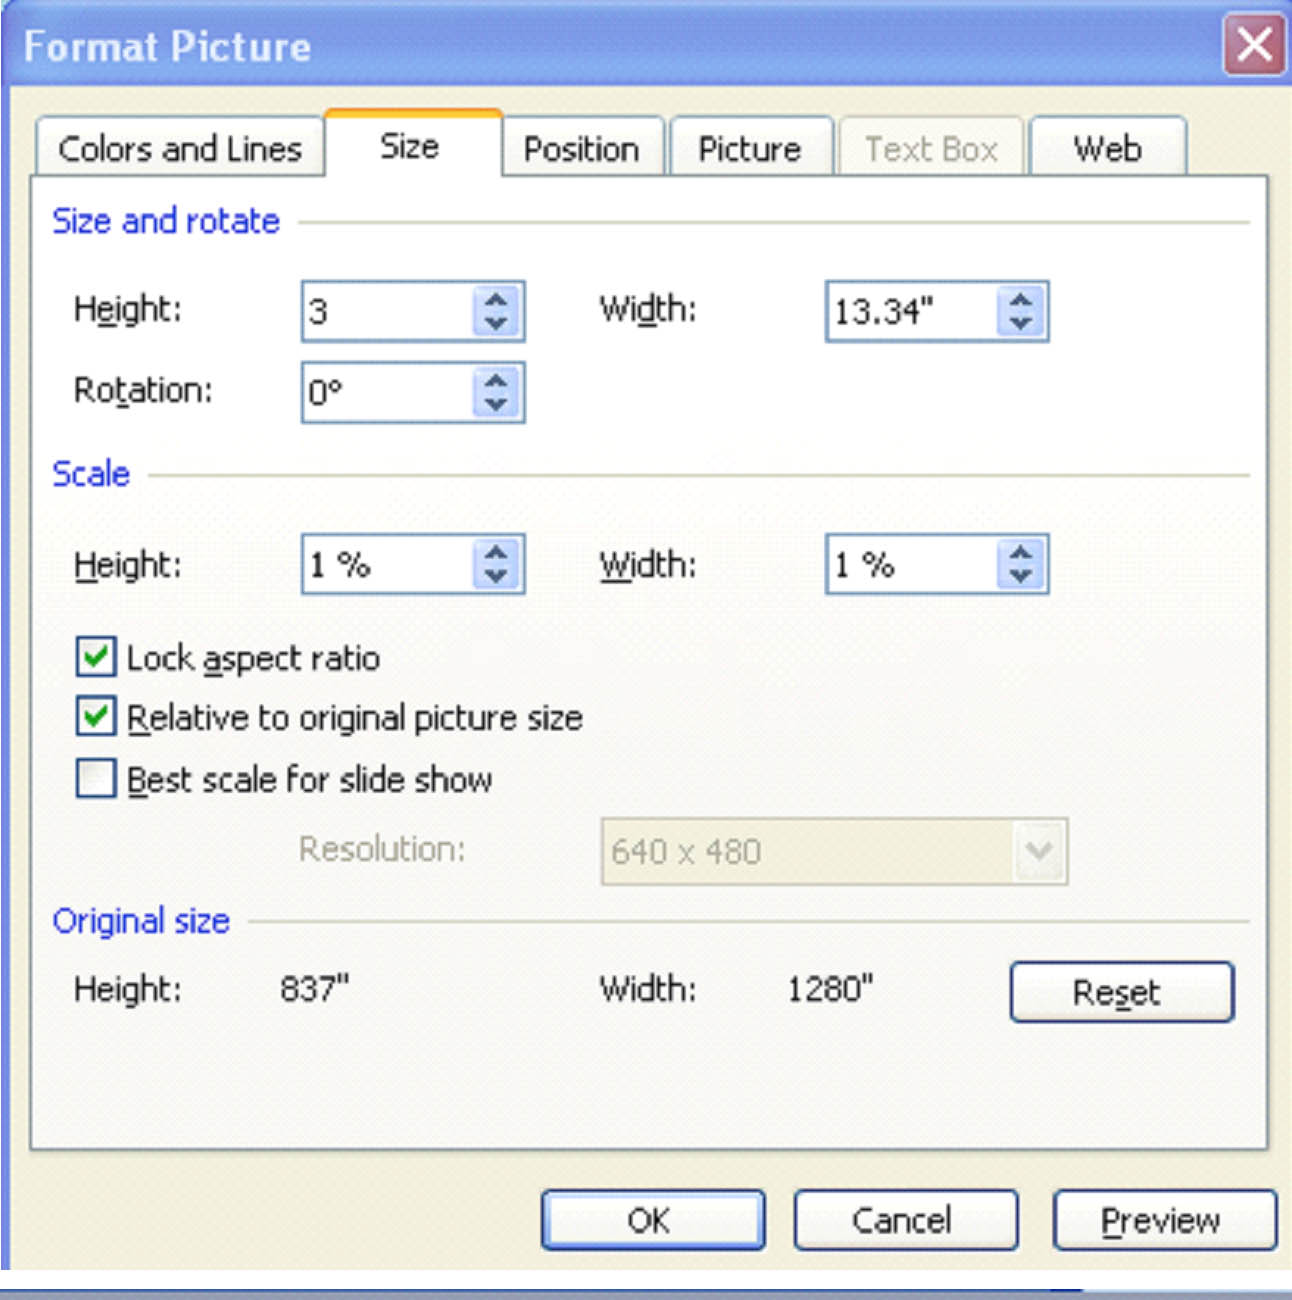
A dialogue box like the one below will appear. Click the Size tab.
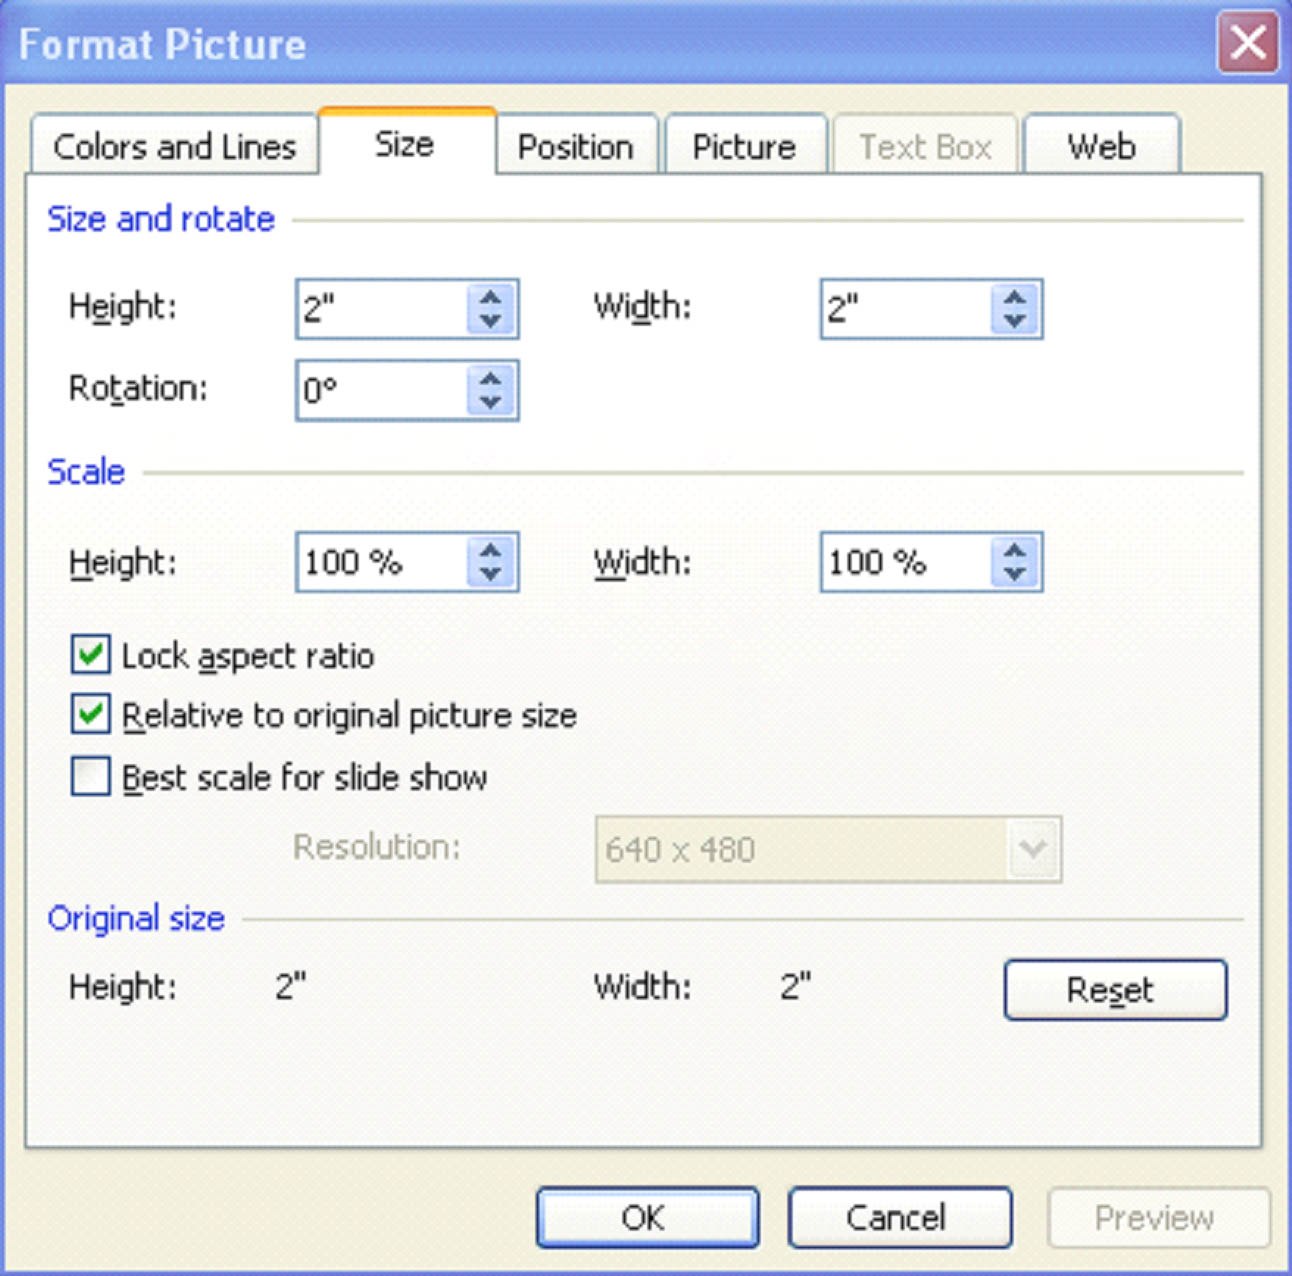
Each section of this dialogue box will assist you in quickly and easily resizing your picture or clip art. Let's discuss each section.
- Size and Rotate. Specify the height and width of the picture or clip art. You can also rotate the picture by degrees.
- Scale. Rather than specifying size, you can specify the scale. You may want to make the resized picture 20% of the original version's height and width.
Lock aspect ratio. When this box is checked, the proportion of height to width will be preserved. If the picture was twice as high as it was wide, MS PowerPoint will preserve that difference no matter what new size you enter in. It is best if you always keep this box checked. If you do not check this box and then change the height and width, your picture may become distorted or pixilated.
Relative to original picture size. Calculates the best scale based on the original picture.
Best scale for slide show. Determines the best scaled version, taking into consideration how the picture or clip art will look in a slide show.
Resolution.Set the resolution of picture.
- Original size. Lets you know the original size of the picture in case you want to change back.
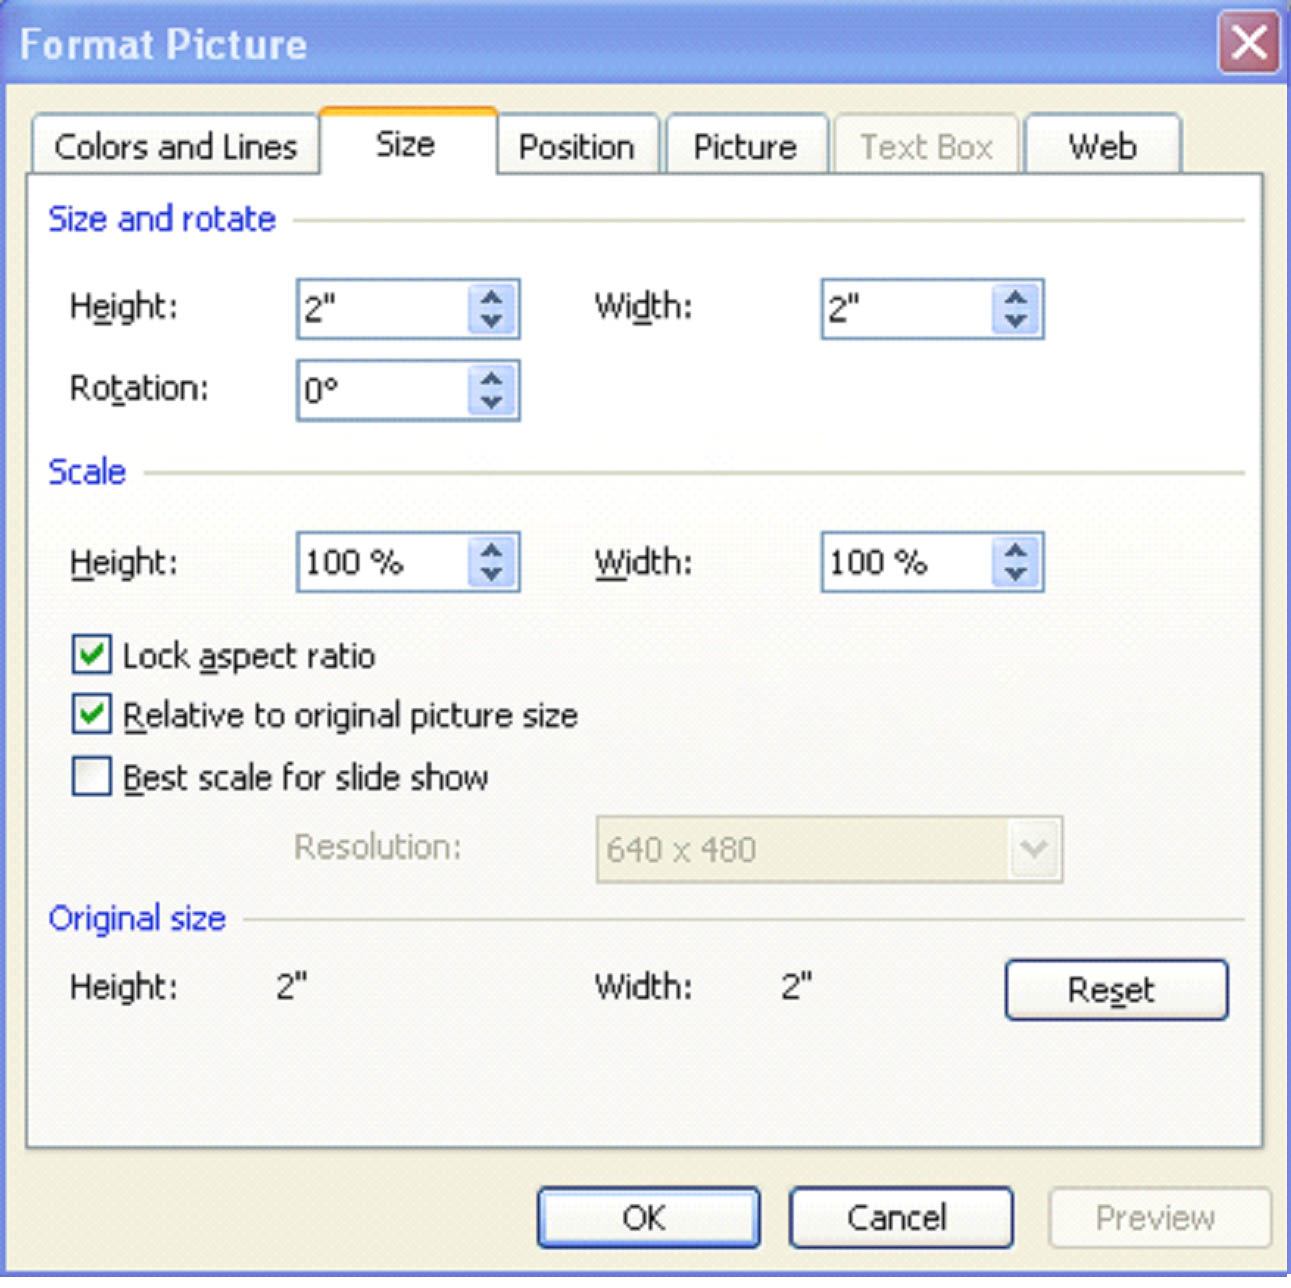
Let's change the size of the picture that we inserted above since it's so large and covering the entire slide.
Below are its current dimensions.

We want the picture to be a lot smaller, so we're going to cut the size down to 1/3 of what it is now. To do this, we're going to adjust the height and width.
Below, we've changed the height to three inches. Note that we haven't changed the width. Since we have "Lock aspect ratio" checked, we won't have to.
Press OK to resize the picture.

Another Method to Resize Clip Art and Pictures
Let's resize the clip art we inserted earlier in this article. If we wanted, we could resize it the same way we did the picture. However, there is another method to resize pictures and clip art. We'll learn that method now.
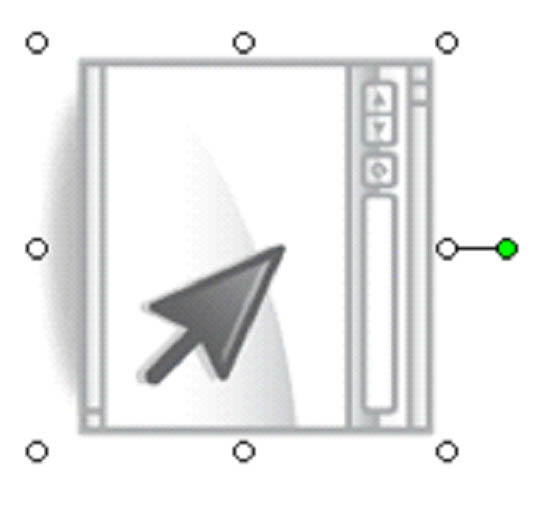
To resize the clip art we inserted above, click on the clip art to make it active. When it's active, little circles will form a box around it. (This also applies to active pictures.) See the example below.

The little circles surrounding the clip art will allow you to resize it by hand, essentially.
Click the circles at the corners of the picture to resize from the corners.
Click the circles at the center points to resize from the center.
For this example, we're going to use the top left circle to resize the clip art. When you place your mouse over a circle, a �� appears. This lets you know that you can start to resize by depressing the left mouse button and dragging it toward the clip art to decrease the size � or away from the clip art to increase the size.
We've increased the size. Look at the before and after snapshots.
Before

After

Rotate Clip Art and Photos
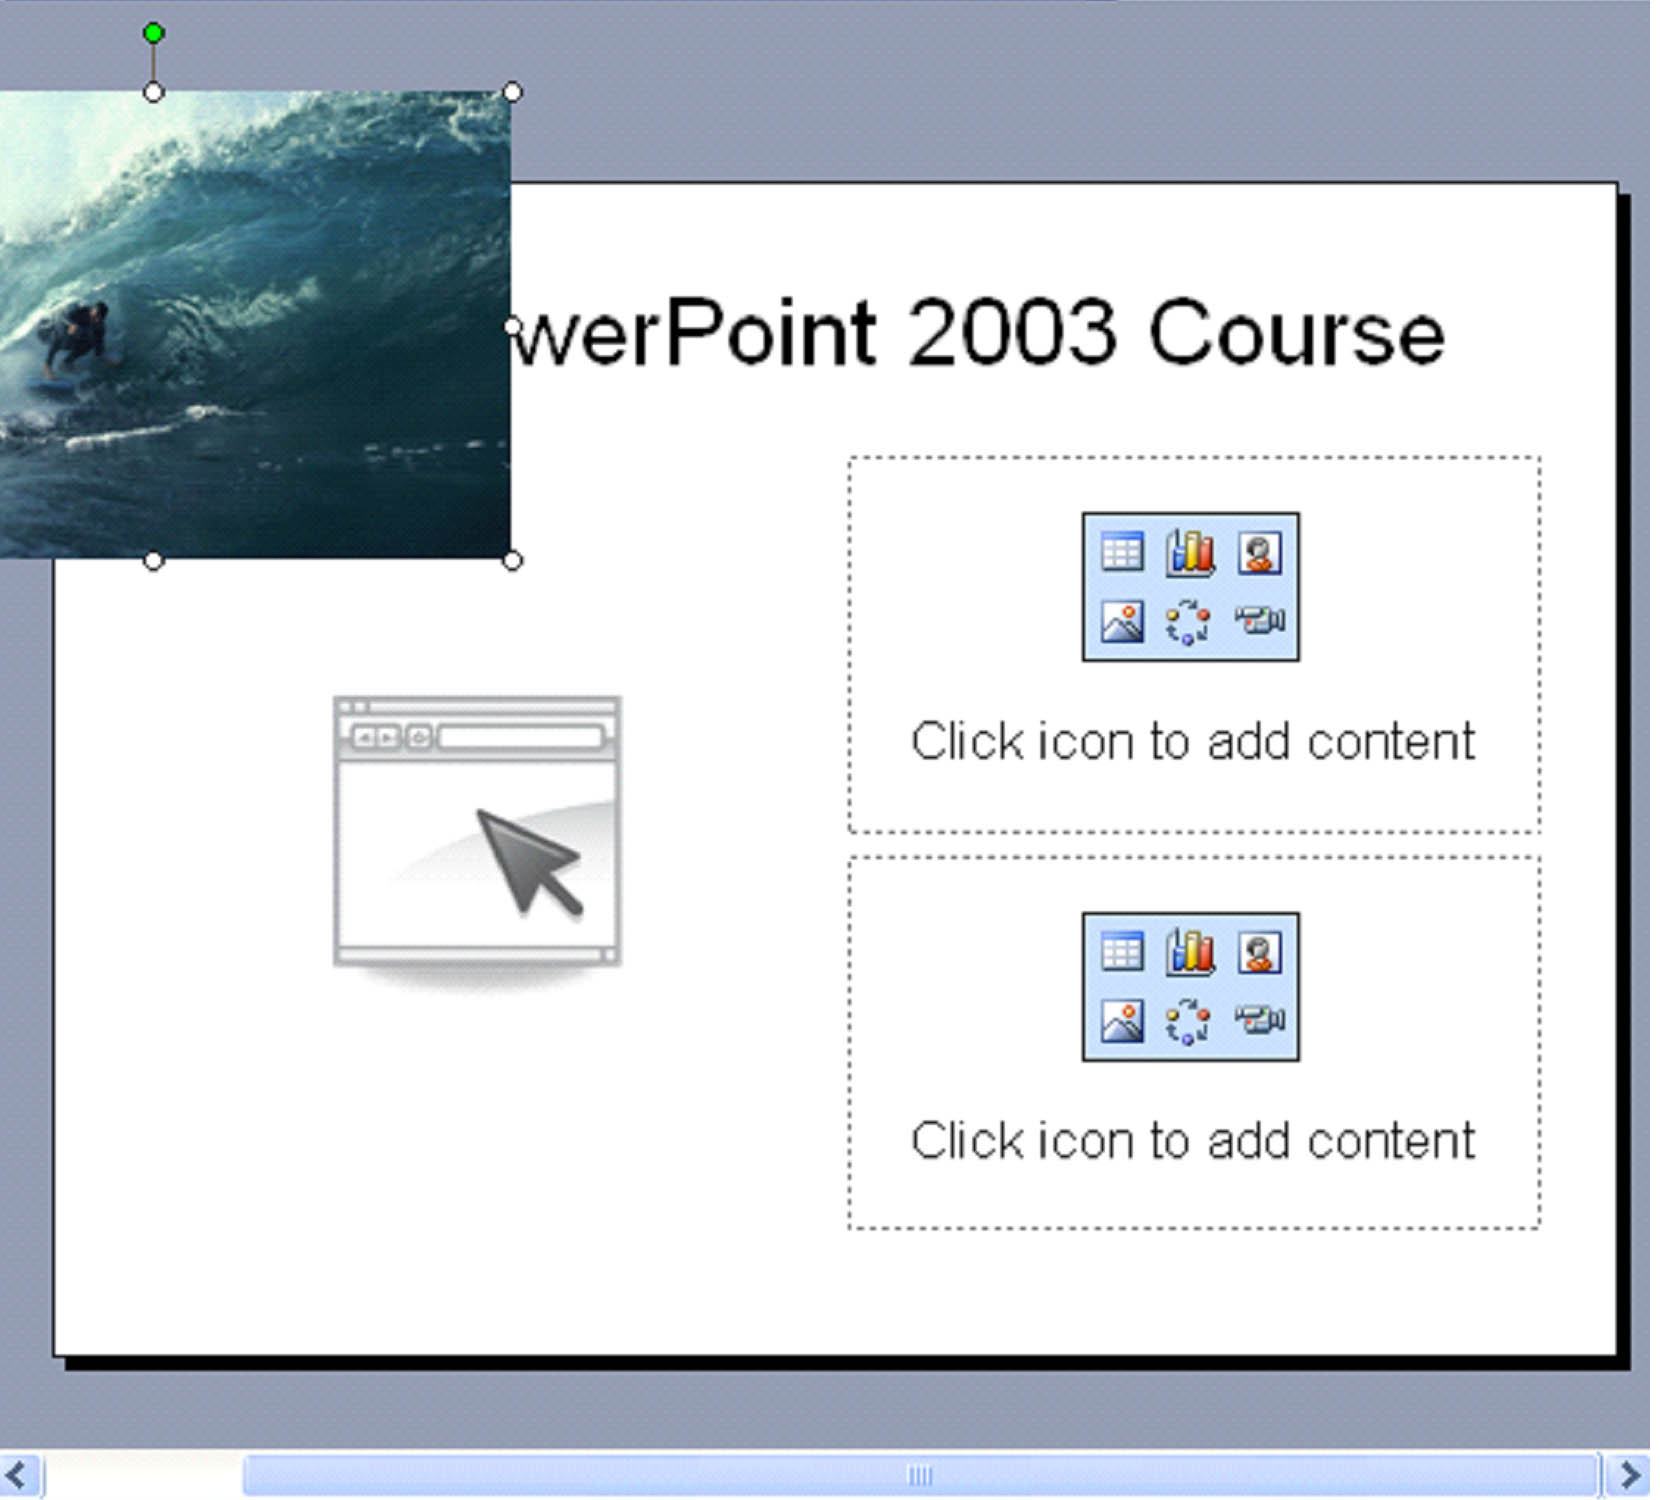
Take a look at the original clip art again, before we resized it.

The green dot above the clip art can be used to rotate it on the slide. Simply place your mouse over the green dot and hold down the left mouse button while you rotate the picture to either the left or the right.
You can also use the Format Picture icon  on the Picture toolbar to rotate the picture.
Click on the Size tab and go to the Size and Rotate section of the dialogue box.
In the Rotation box, specify by how many degrees that you want to rotate the clip art. Remember that you'll be rotating it clockwise.
Let's rotate the example by 90 degrees.

Click OK.
The clip art is now rotated 90 degrees.
Move Clip Art and Photos
When you insert clip art or photos onto a slide, PowerPoint just places them on the screen for you. It's up to you to put them where they need to be.
Let's use the picture that we resized earlier as an example and move it into place on the slide.
As with all MS Office products, there is more than one way to skin the cat, so to speak. You can move the picture using one of two methods.
The first method involves dragging the picture across the slide. To do that, move the mouse toward the center of the picture. You'll see a four way arrow � or a cross. You need to see this to move the picture.
Once you see it, press the left mouse button, hold it in, and drag the picture across the slide until you get it to where you want it. It's that easy.
The second method you can use is going to the Picture toolbar and selecting the Format Picture icon  . Click the Position tab.
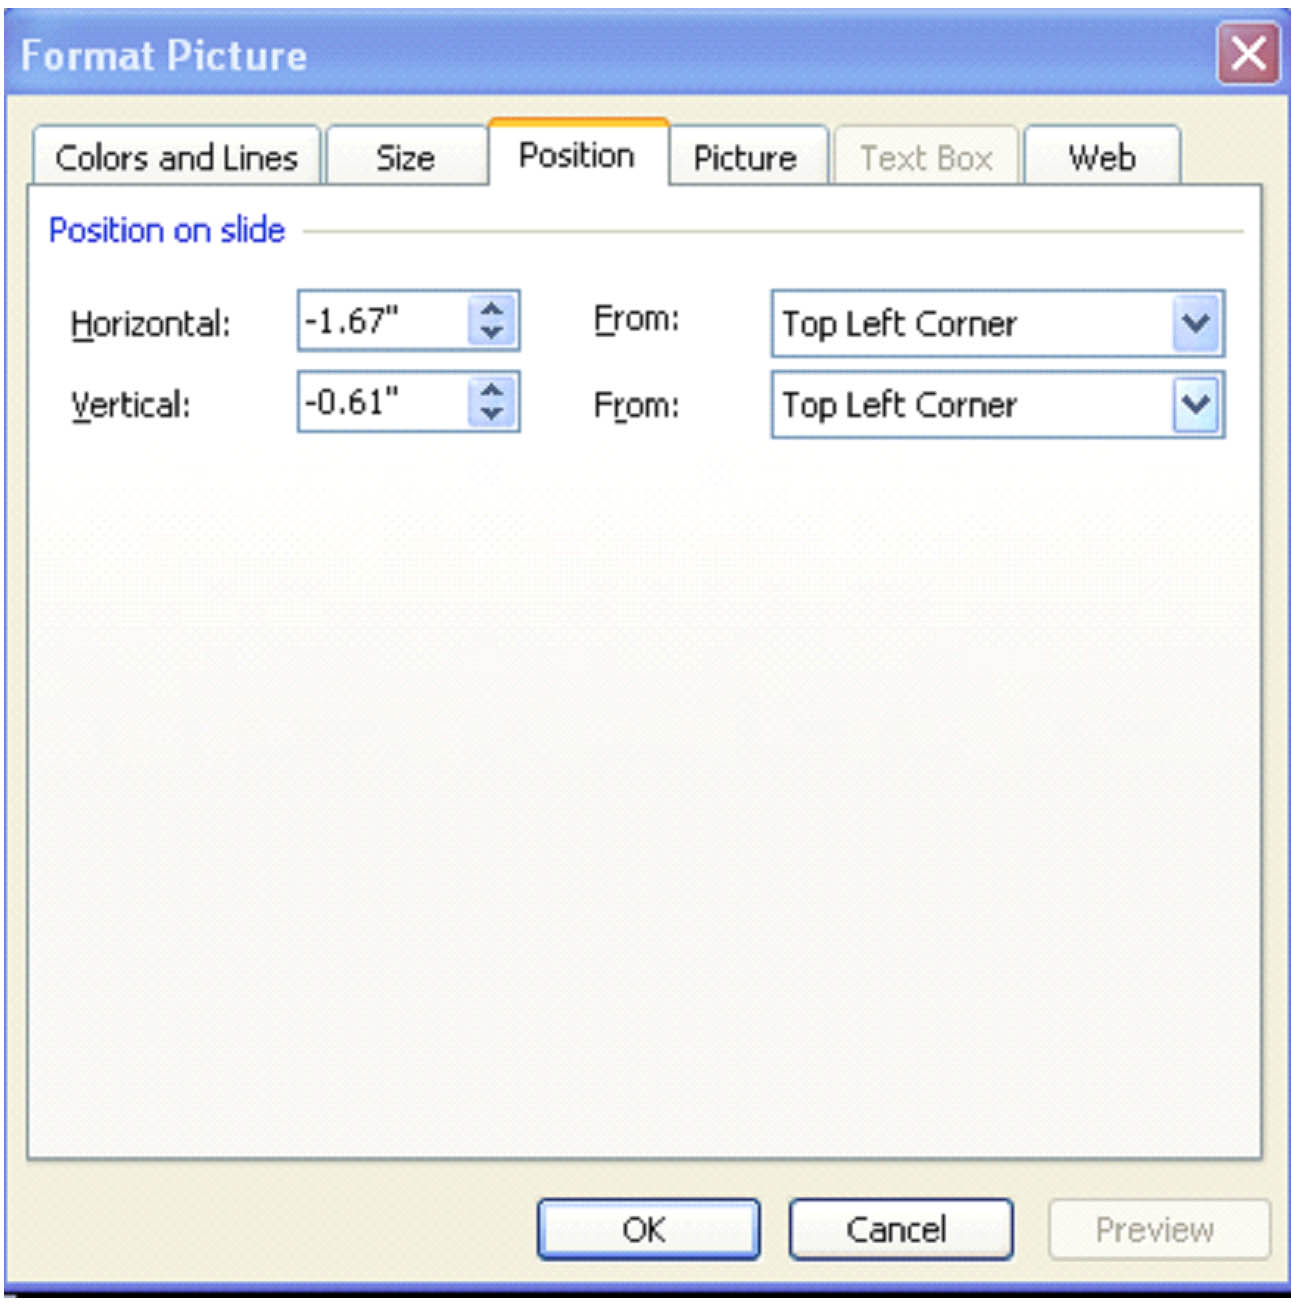
As you can see in the snapshot above, it's currently showing the picture's position as off the slide (the negative numbers). The measurements are taken from the top left corner. Look at the picture again to see that it's correct.

Now we're going to adjust its position. We want it to be on the right hand side of the page, so we've adjusted the measurements from the top left corner.

Press OK and MS PowerPoint 2003 moves the picture to those coordinates.
Of course, the quickest method to moving pictures and clip art is to drag them across the screen. However, it's important that you learn both methods.
Cropping Clip Art and Pictures
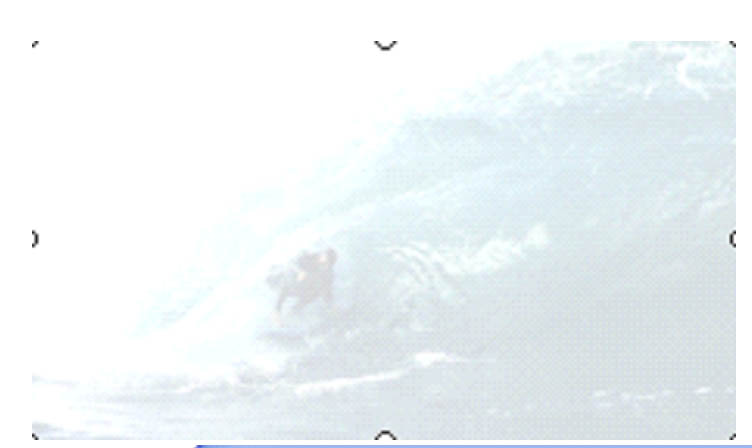
When you crop a picture, you take away from the top and sides. You do not reduce the size of the picture. Instead, you take away parts of the picture. Again, let's use the picture we just moved as an example.
Let's say we adjust the picture to show the man on the surfboard. We don't want the surrounding photo area that shows the wave.
To do this, we first make the picture active, as it is in the snapshot above. We then go to the Picture toolbar and select the crop icon  .
.
A frame will appear around your picture that looks like this:
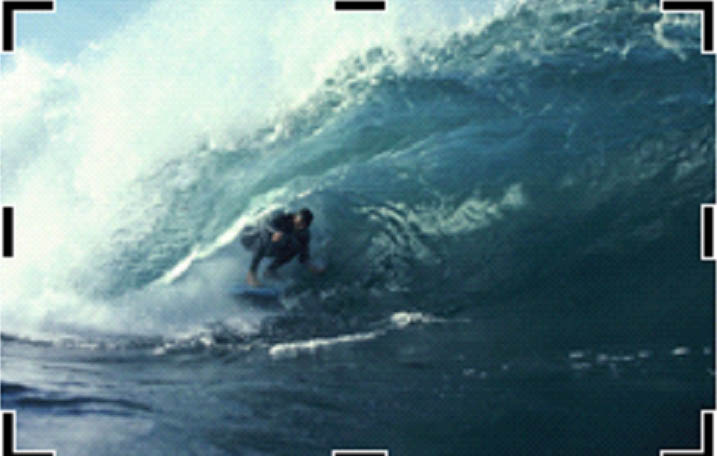
Move your mouse over the lines of the frame until you see an upside down T. Then, while keeping the left mouse button held down, push the line in toward the center of the picture until only the part of the picture that you want remains. Do this for all four sides. You can also crop from the corners.
Look at how we cropped the picture:
Now, you can re-position the picture on the slide.
Adjust Colors, Contrast, and Brightness in a Picture
To adjust the color, contrast, or brightness in a picture, we're going to use this section  of the Picture toolbar.
Color
First, let's adjust color. To adjust color, you will use the first icon on the left.
Make sure your picture is active.
Click the icon.
icon.
A drop down menu will appear, like in the snapshot below.
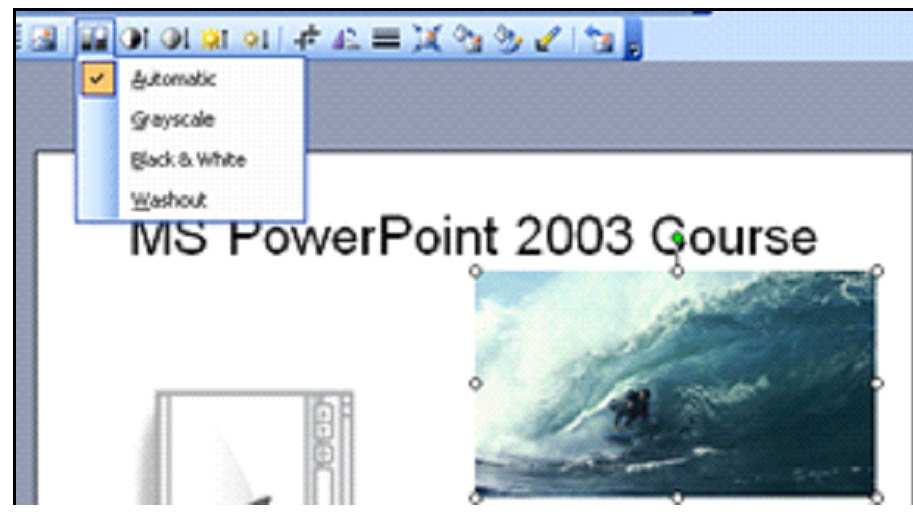
You can then choose whether you want the color adjustments to be automatic (already selected) or if you want to change it to Grayscale, Black & White, or Washout.
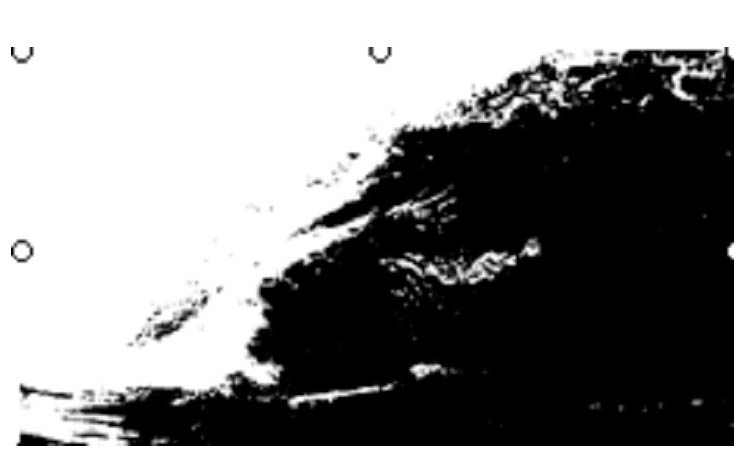
Take a look at the effect each has on the picture:
Grayscale

Black and White
Washout
Contrast
To increase the contract in a picture, click the  . To decrease, click the
  icon.
icon.
Brightness
You can also brighten a picture � or darken it by using the increase brightness icon  and decrease brightness icon
  .
.
Add a Border to Pictures and Clip Art
If you want to add a border to your pictures and clip art, you can do this right from the Picture toolbar. Click on the Line Style icon and select the type of border you want. It will automatically appear around the picture.
Compress Pictures
A lot of slide shows and presentations that you create will be rather large files, especially if they have a lot of pictures. MS PowerPoint 2003 gives you a handy tool to compress the pictures so that they become smaller files while retaining the same dimensions. It does this by reducing the dpi, or the amount of pixels. Keep in mind, though, that when you reduce the dpi, you might be sacrificing the quality of the picture.
To compress a picture, make sure the picture is active, then click the Compress icon  on the Picture toolbar.
This dialogue box will appear:
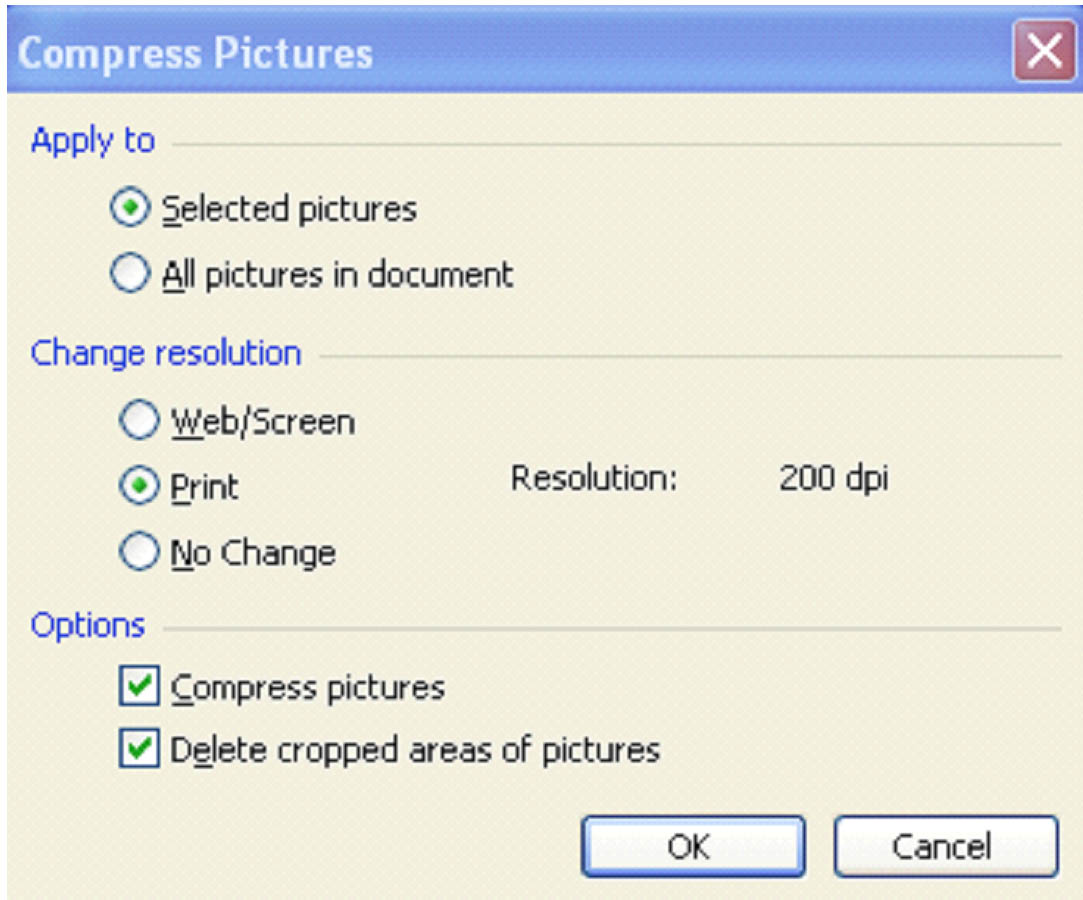
Choose whether you want to compress just the selected picture or every picture in the presentation in the Apply To section.
Next, decide if you want to change the resolution for the web/screen (to reduce file size) or for print (to save ink).
Last, make sure the Compress Pictures box is checked or your pictures will not be compressed. Also, if you've cropped pictures, check the Delete Cropped Areas of Pictures box.
Click OK.
For this example, we've chosen to change the resolution for the Web/ Screen so you can see the difference for yourself.
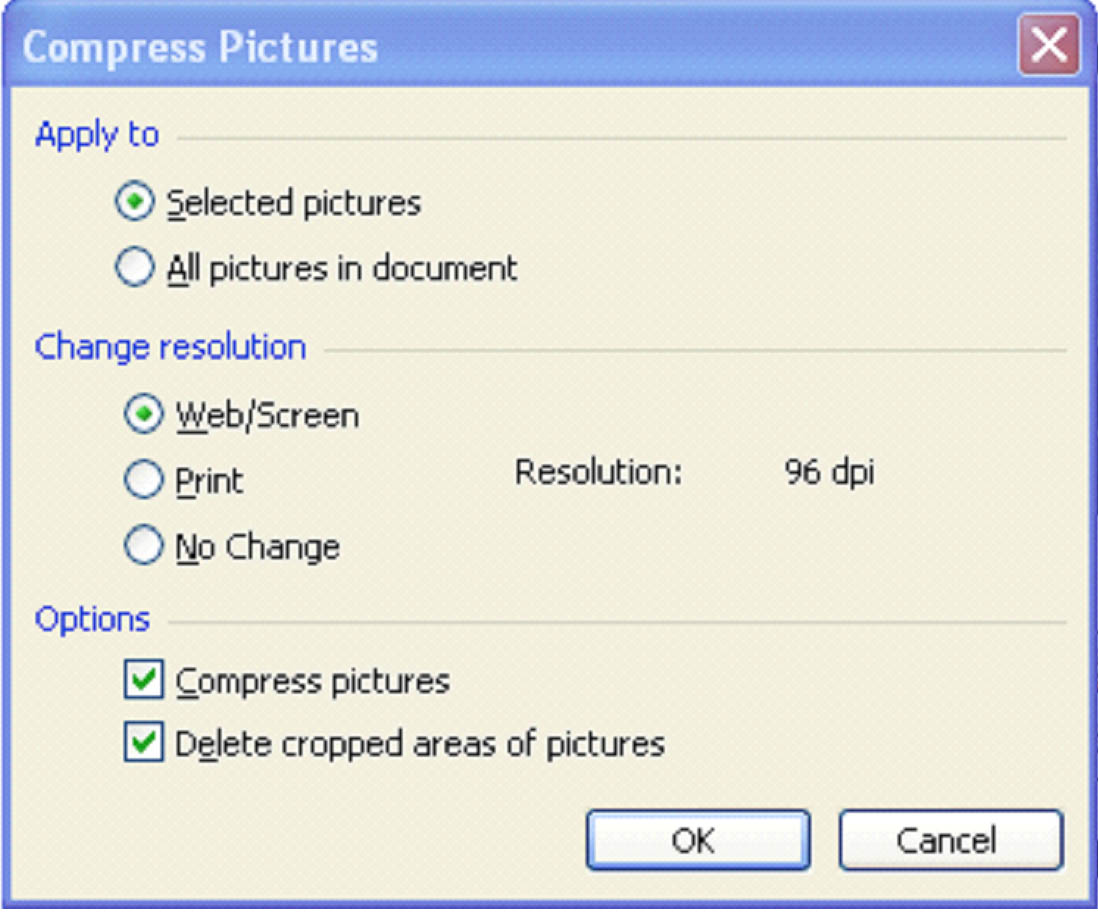
We're going to click OK.
When we do, this dialogue box comes up, warning us that the quality of the picture may be affected by our changes.
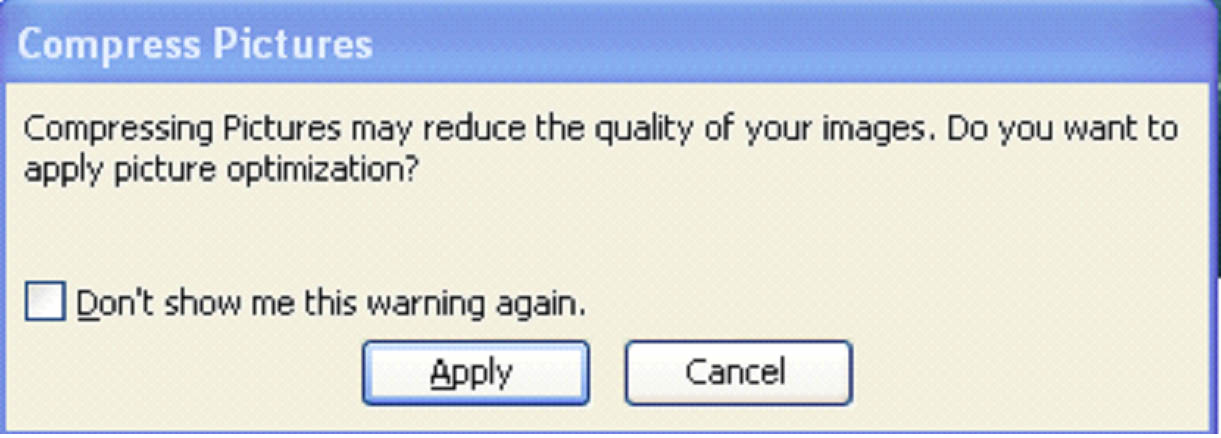
We want to make the changes, so we click Apply.
Create a Photo Album
Did you know that you can use MS PowerPoint 2003 to create a photo album? When you're finished with it, you can also upload it to the web to share.
To create a photo album, go to Insert> Picture> New Photo Album.
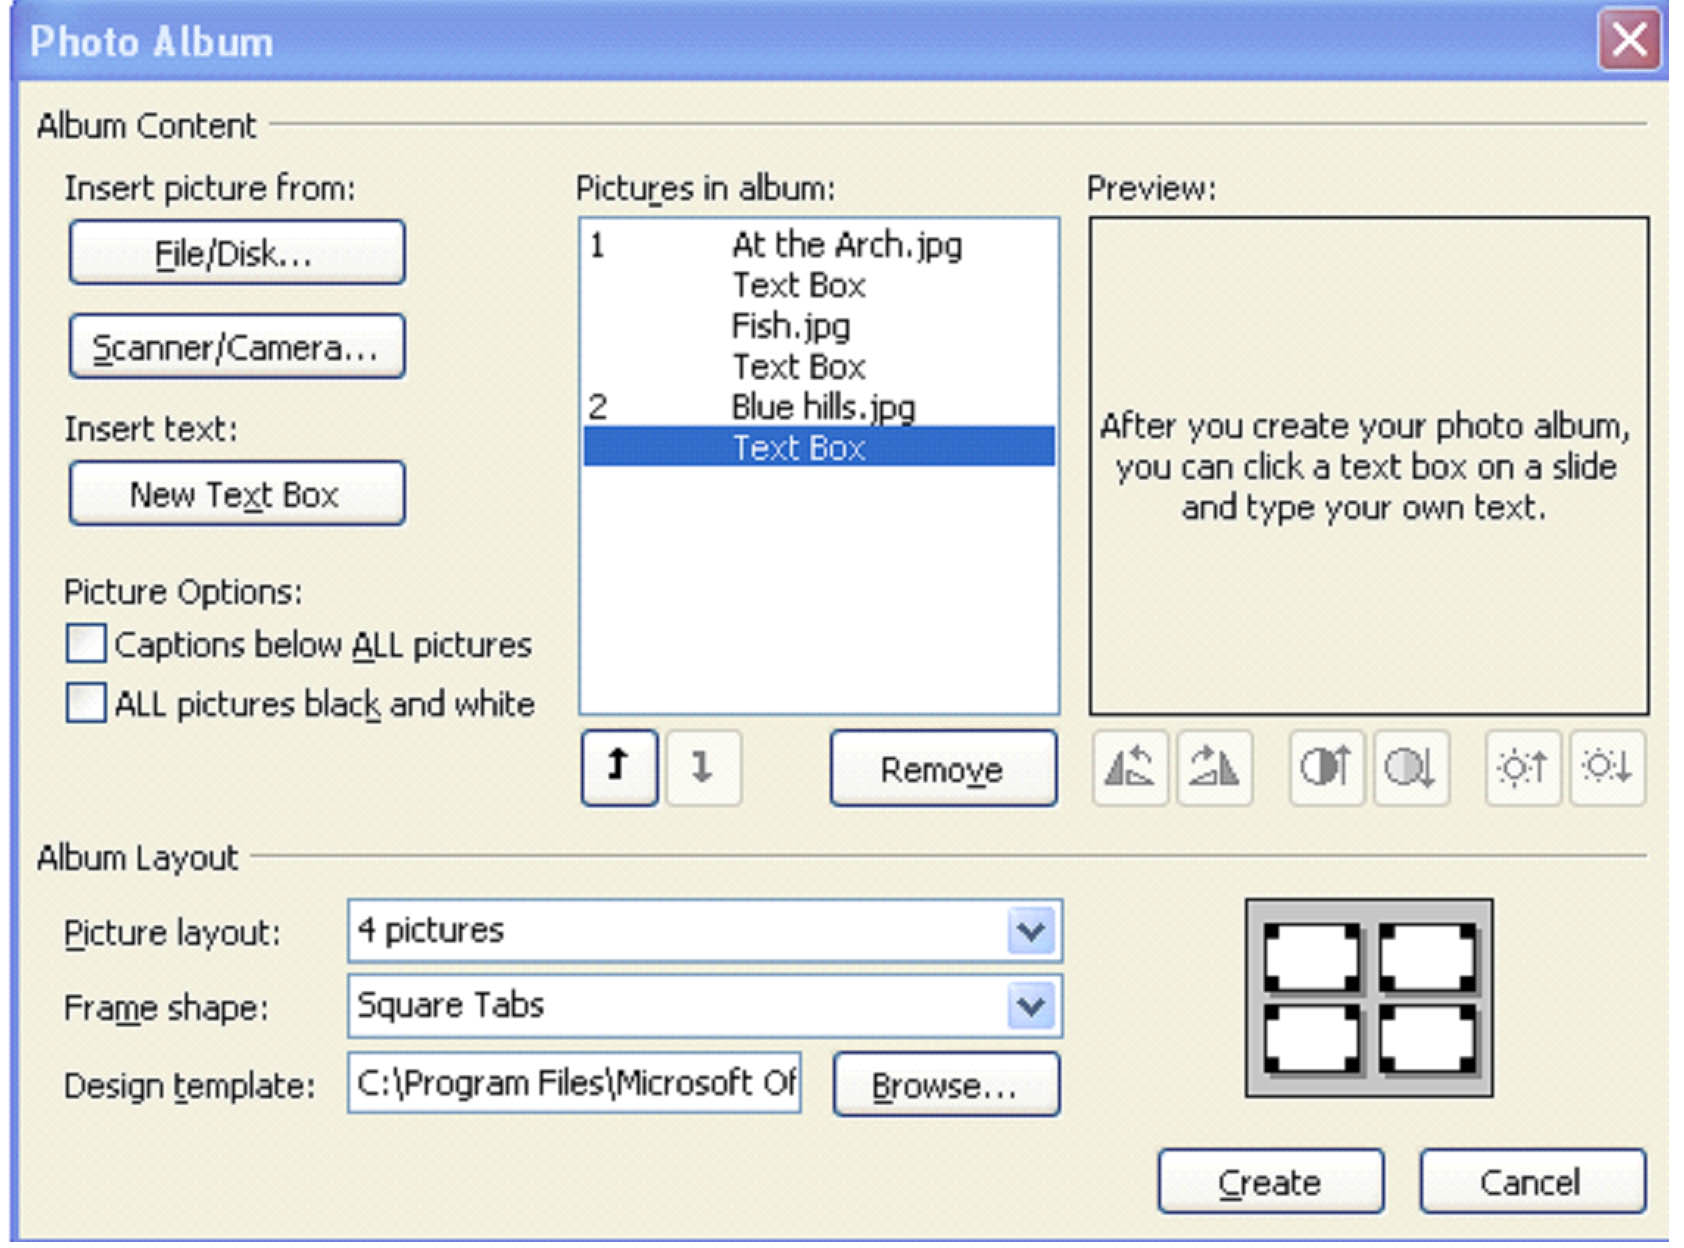
The dialogue box pictured below will appear on your screen.
Select the pictures that you want to appear in this album in the Album Content section. You can import pictures from files or get them off your scanner or camera.
Note: Do not close out this dialogue box until you've selected all pictures that you want to appear in the album. In our example below, we've chosen three pictures from our files.
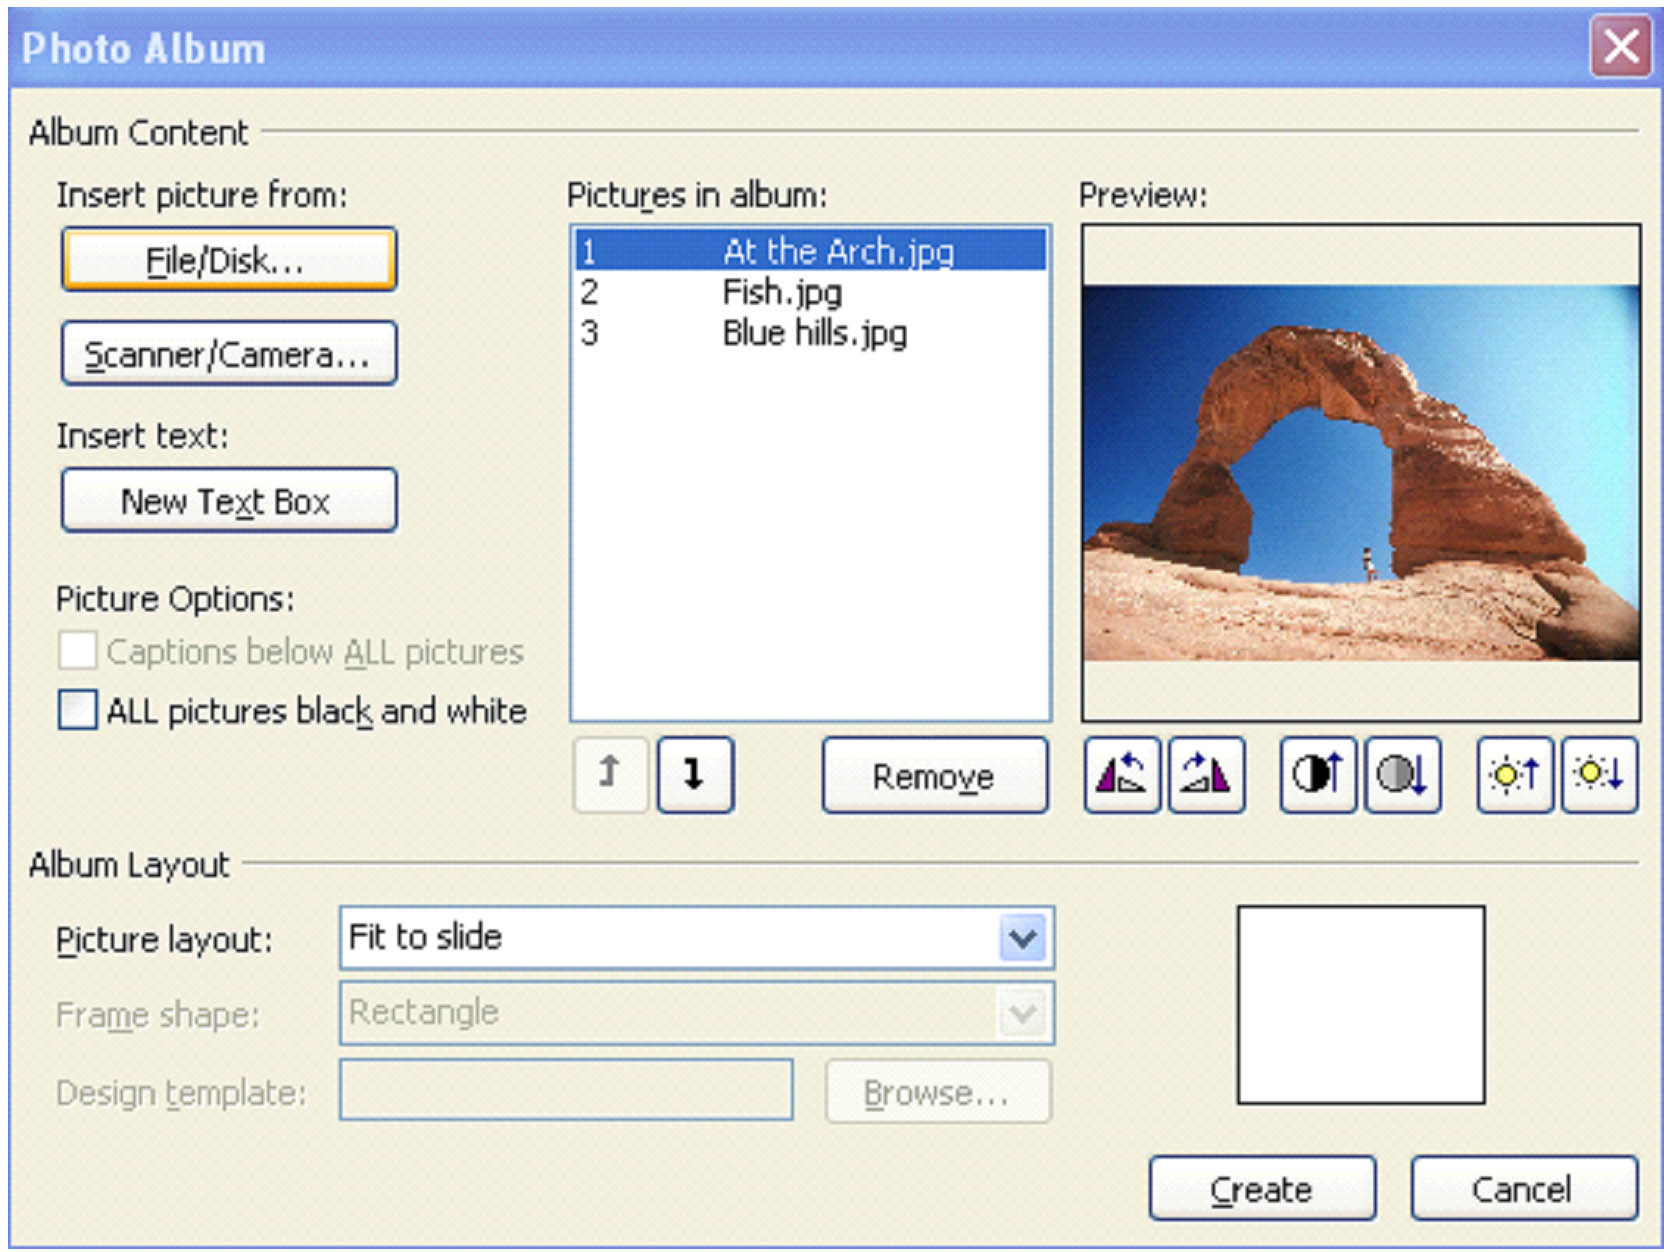
Now, you can select if you want to add text boxes (and text) with the pictures. Of course, we want to do that. We've added text boxes after every picture.
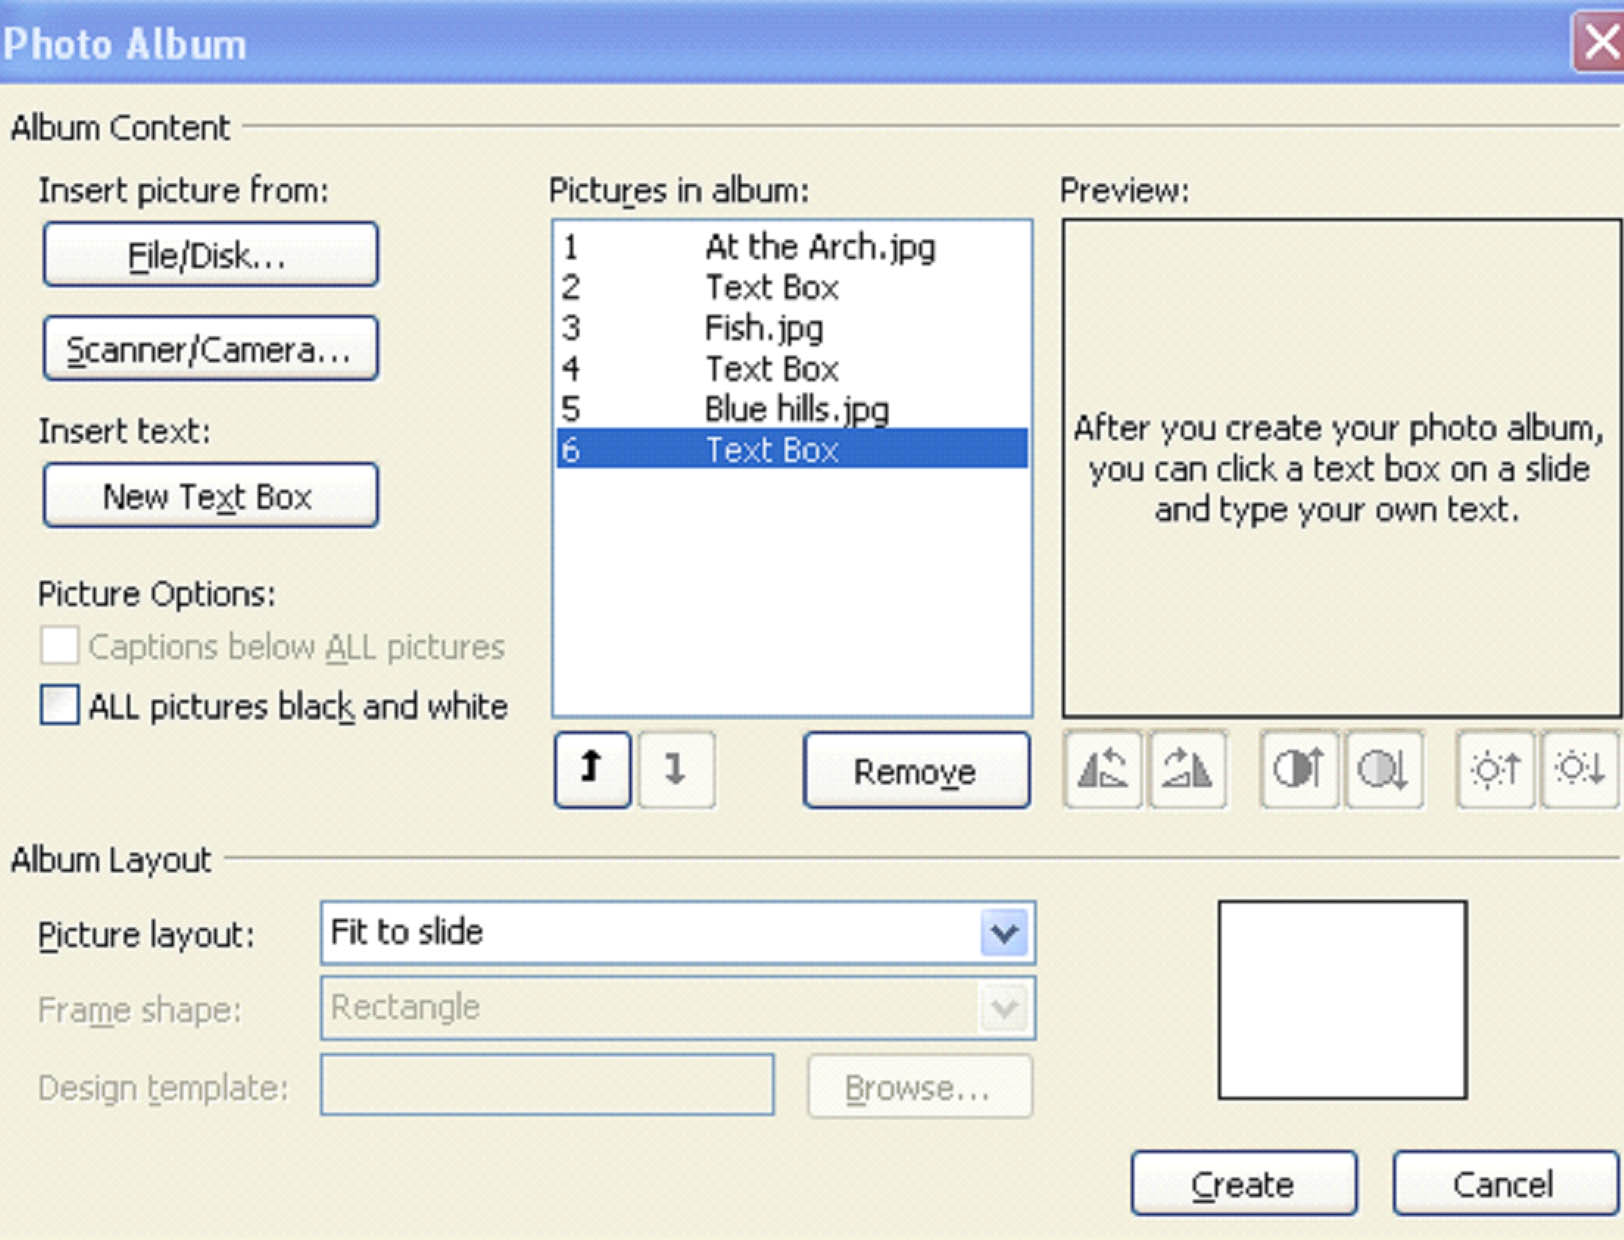
You can always remove text boxes by highlighting them, then clicking remove.
In the Album Layout section of the dialogue box above, we're going to specify our album layout. The option chosen is Fit to Slide. This fits the pictures to the slide.
You can also specify 1, 2, or 4 pictures per slide � or 1 or 2 pictures with a title.
We've selected 4 pictures per slide.
Now, we're asked to specify frame shape in the Frame Shape box.

We've chosen square tabs.
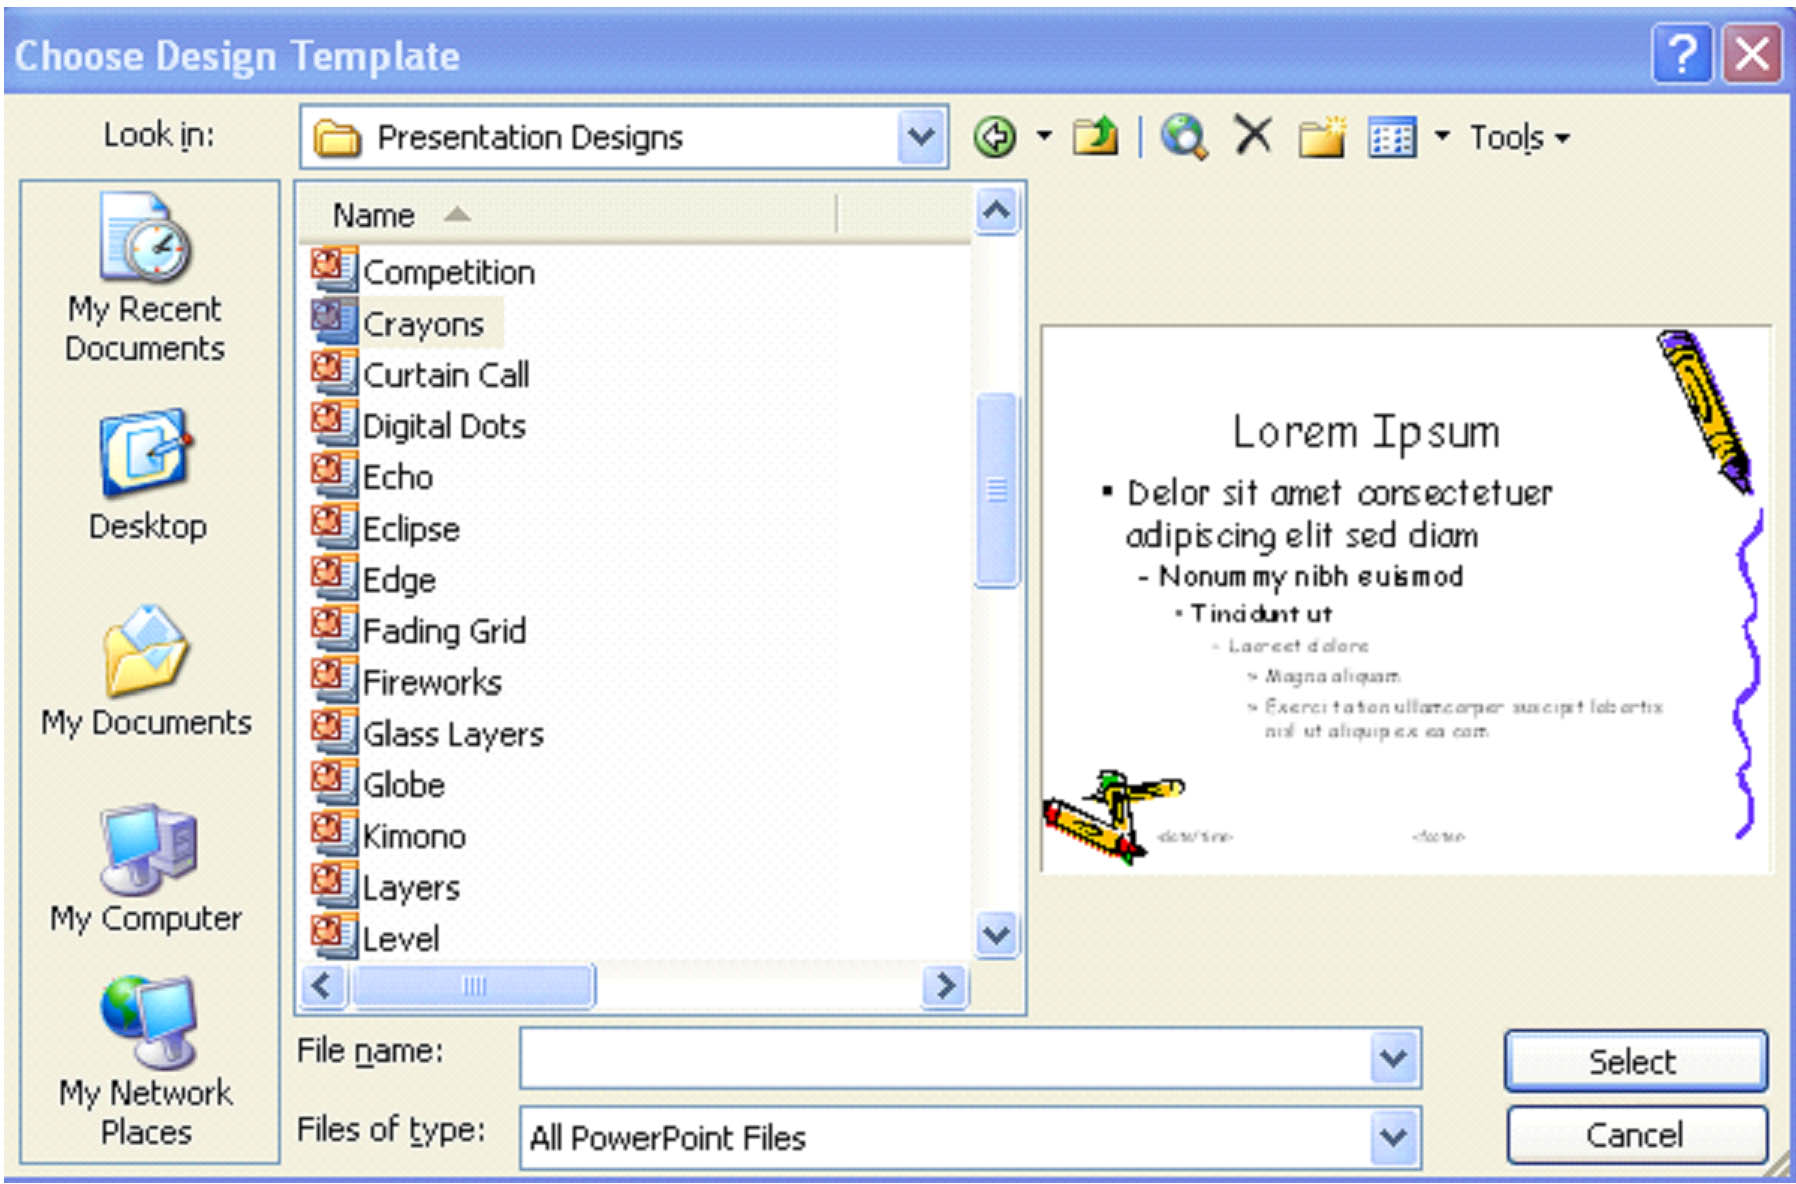
Last, we have to pick a design template. Click Browse. This will take you to the PowerPoint templates.
We've chosen Presentation Designs> Crayons.
Highlight Crayons, then click Select.
Now our photo album is ready. Click Create.
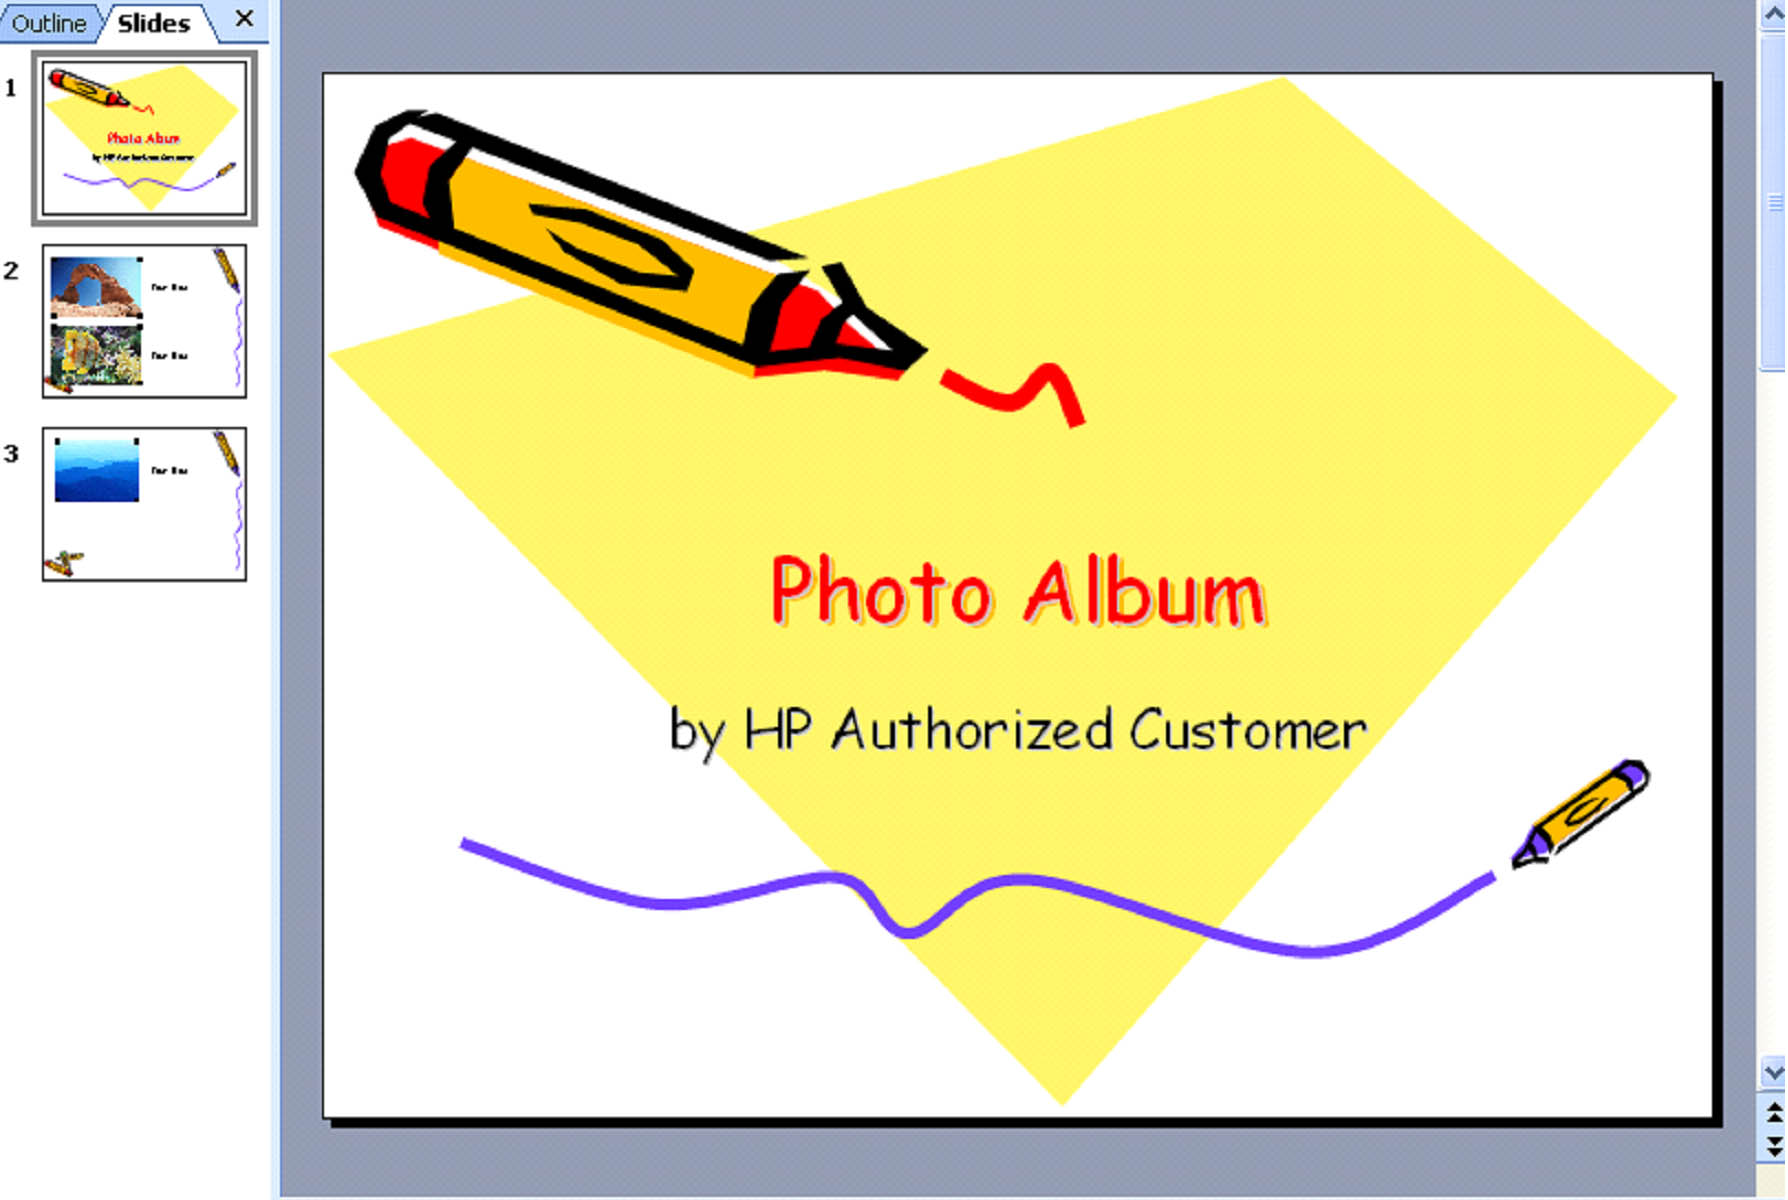
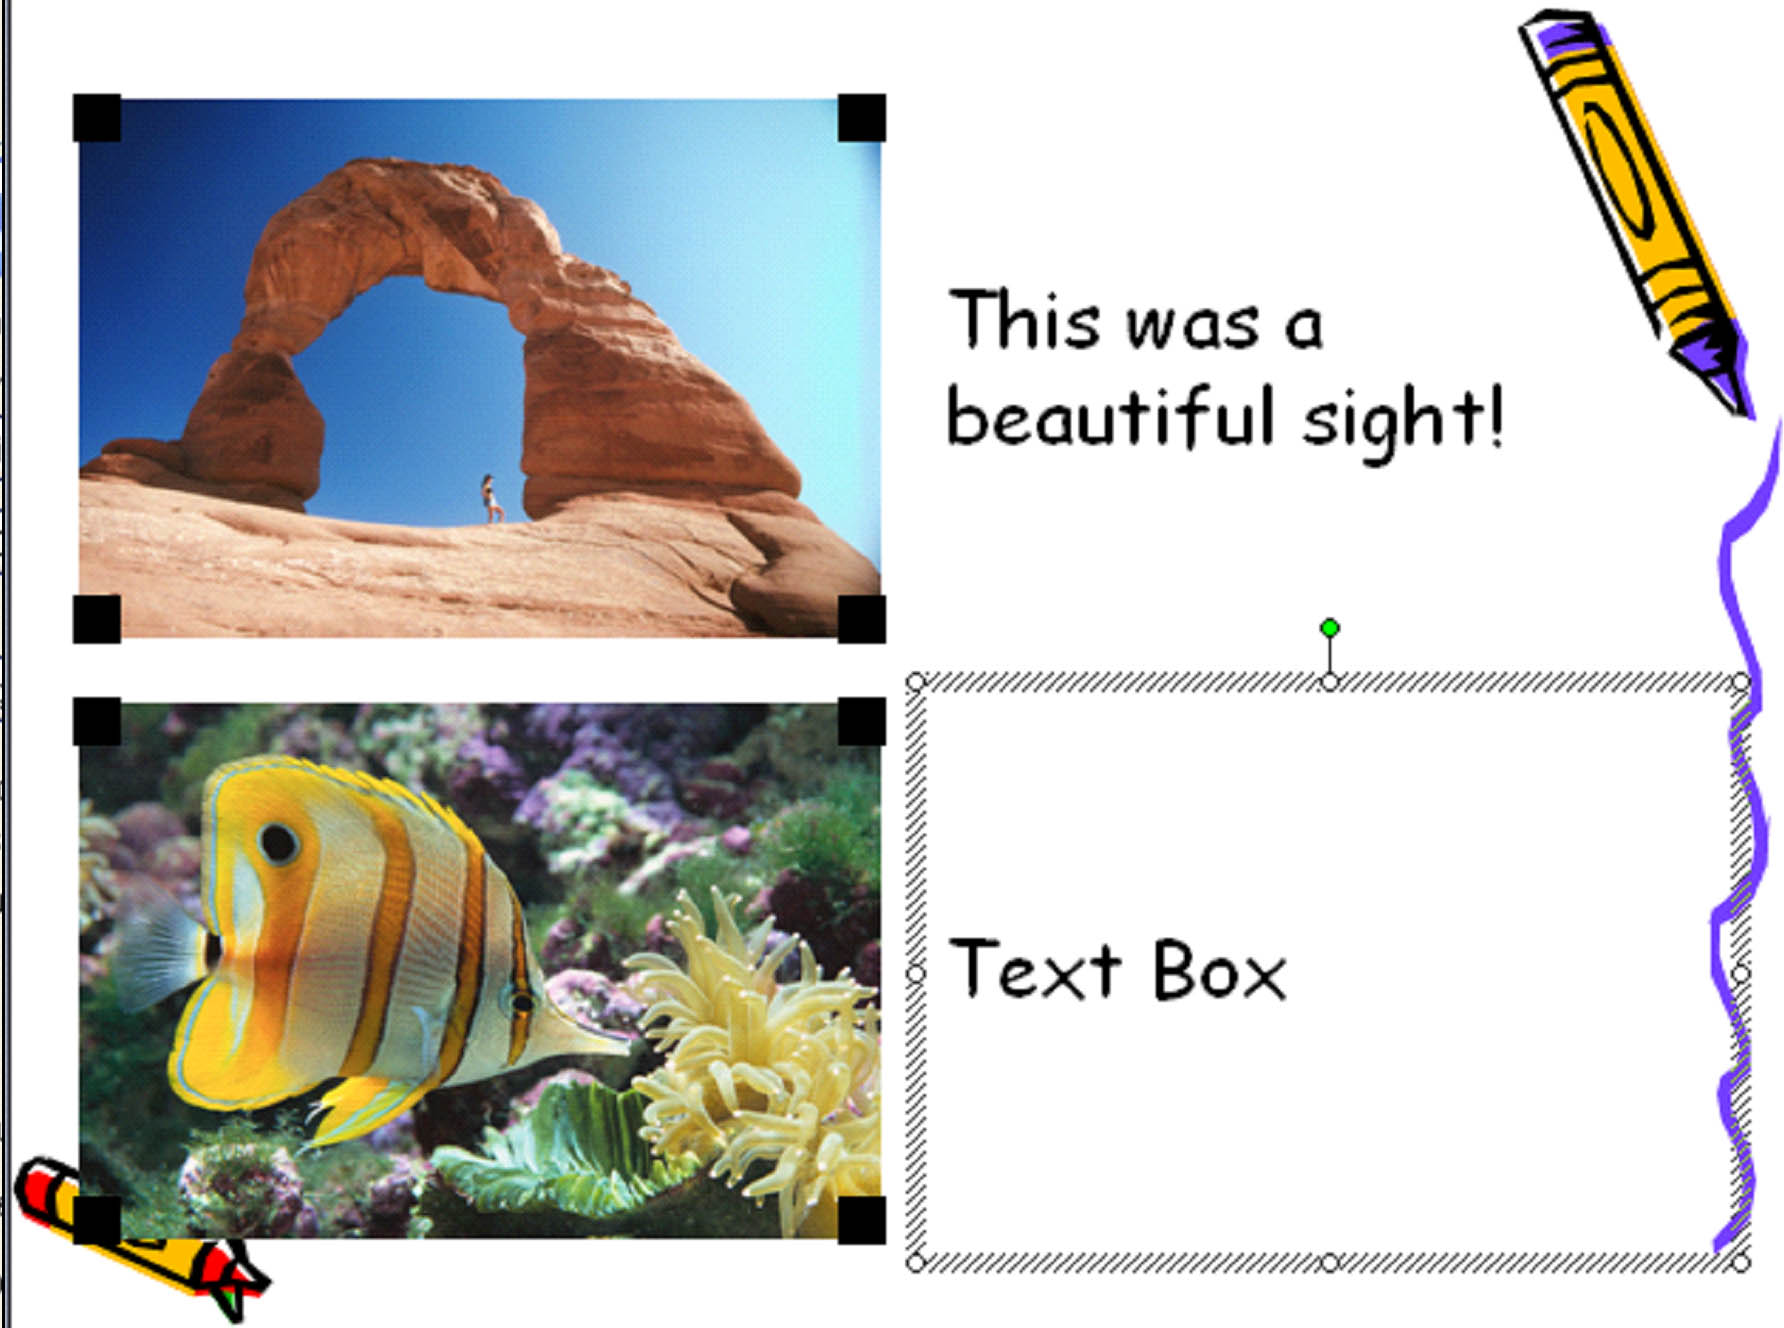
Notice in the Slide/Outline Pane that there are only two pictures per slide. We specified four. There are only two per slide because we've also added text boxes. Those count as a picture.
Now we can go through and edit our text boxes.
Just click on the text and the text box outline will appear along with the cursor. Enter in your text.
When you're finished with your album, you can email it as an attachment, post it to the web, or just keep it on your computer so you can add to it from time to time.