Text formatting allows you to change the appearance and layout of text and other characters within a document. Chances are, you've formatted text before by either boldfacing it or putting it into italics.
Applying a Font
The font determines the way your text appears on your screen and when you print the document. There are more than several different types of font. The more common types are Times New Roman and Verdana.
You can apply a font to either an entire document or to certain portions of a document. The choice is yours. To apply a font, click on the Home tab and go to the Font group.
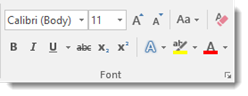
The type of font you're currently using will appear. In the snapshot above, the current type of font is Calibri. You can click on the downward arrow in that window to display other types of fonts available to use.

To change the type of font within a document or for the entire document, simply select the text to be formatted with a new font, then select your new font. It's really that easy.
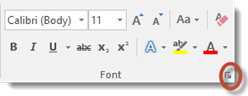
NOTE: You can also do all font formatting by selecting the arrow key to the right of the word Font at the bottom of the section. By clicking on this arrow, you can also alter character spacing.
Changing Font Size
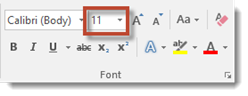
In addition to changing the type of font, you can also change the font size. Next to the type of font under the Home tab is a box that states the size of font currently being used. Our current font size is 11.
Once again, you can use the down arrow key to either enlarge or reduce the font size. To change the size of the font, simply select the text that you want to change, then select the new font size. You can change an entire document or just a portion. The choice is yours.
You can also use the two uppercase A's beside the font size box to change the size of fonts you're currently using.

Pushing the larger A will increase your font size by one for each time it's clicked. On the other hand, clicking the smaller A will decrease the font size by one for each time it's clicked.
Font Attributes
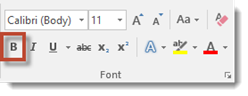
You may want to select boldface, italicize, or underline a section of text. The boldface command in Microsoft Word is represented by an uppercase, boldfaced B.
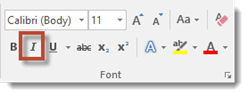
Italics are represented by an uppercase, italicized 'I'.
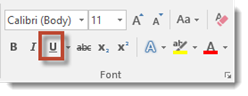
The underline command is represented by an uppercase U with a line under it.
These buttons are located directly below the font type window in the Font group under the Home tab.
To add italics, boldfaced, or underlining to any portion of a text within a document, select the desired text, then click the appropriate button (B for boldfaced, I for italic, or U for underline.)
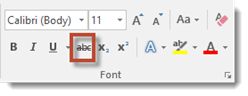
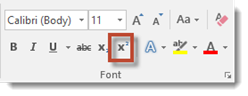
Next to the commands for boldfaced, italics, and underline, you'll see an �abc' with a line through it. (abc) This is for strikethrough. When clicking on this button, it will put a line through any text you have selected. The button is highlighted below.
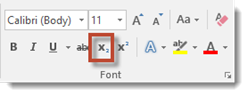
Next to the strikethrough command, you'll see �X2'.
This simply puts smaller text below the text line of the normal text.
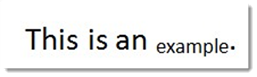
This command was used when typing X2.
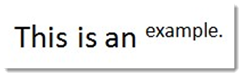
X2 (highlighted above) is just the opposite, putting smaller text above the text line. This makes creating footnotes easier than it had been with previous versions of Word.
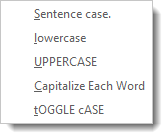
The uppercase A and lowercase A that are situated side by side allow you to change the case of selected text. The button is highlighted below.

You can change from lowercase to uppercase or vice versa , toggle tHe CaSe, or select other common capitalizations by clicking the downward arrow to the right of the button.
Font Color
Changing the font color is just as easy to do as changing the font. By default, your text in Word 2016 appears in a black font. If you want to change the font color, look for the uppercase A with a colored bar under it in the Font group as highlighted below.
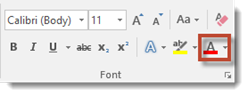
Select your text, then click on the button to choose the color you want to apply to the selected text.
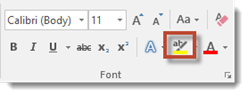
Highlight Text
You can also highlight selected text. Highlighting text doesn't change the font color, but provides a highlight as background, much as you'd do with a highlighter marker.
To the left of the font color button, you'll see a lowercase �ab' with a marker near it. It is highlighted in yellow. Simply select the portion of text you want to highlight, click the button, and select the color of highlight that you want to apply.
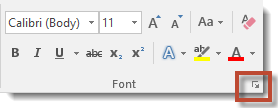
Clear Formatting
To clear formatting within a document or a specified portion of text, simply select the text, then click on the  button in the Font group.

By selecting the text and clicking on this button, it will remove all formatting done to the text and leave you with the default font and font size for the document.
The Font Dialogue Box
Click the arrow in the right side bottom corner of the Font group to access the Font Dialogue box.
The dialogue box looks like this:
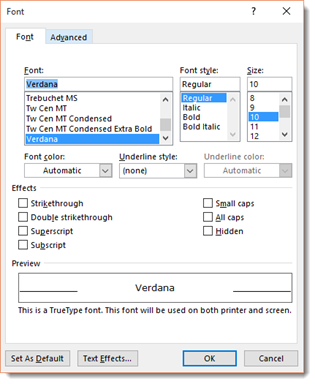
From this dialogue box, you can format your text just as you did from the Ribbon. The Preview section of the dialogue box lets you preview your changes before you apply them.
If you click the Advanced tab at the top of the dialogue box, you can set character spacing as well as other character settings.
Click OK when you're finished making changes to apply them to your document.