Before we identify the different parts of a table, let's go ahead and insert one into our document. To do this, position the cursor at the point in the document where you want to put the table. Don't worry if it's not exactly right--you can always move or manipulate it later.
You'll find tables under the Insert tab in the Tables group. The Tables button looks like this:

Click the Tables button.
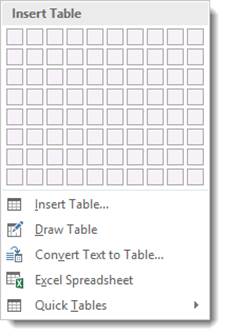
You'll see a bunch of boxes at the top.
The easiest way to insert a table is to drag your mouse over the rows and columns until you have the amount you want.
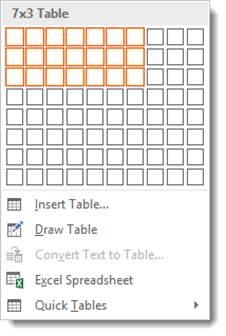
As you can see above, we dragged our mouse to make a table that has seven columns and three rows, or 7x3.
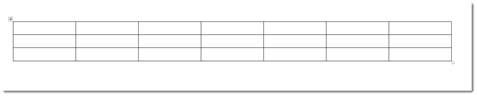
As we drag the table appears on our document:
To insert this simple table, click the mouse.
We now have a basic table.
Let's identify the parts.
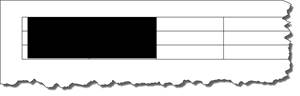
Each box that you see in a table is called a "Cell." There are 21 cells in the table above. We have highlighted a cell in the snapshot below.
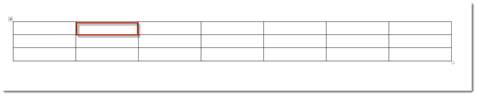
The "Rows" go from top to bottom. There are three rows. Rows go horizontally across the screen.
Columns go from left to right. There are seven columns above. Columns are vertical.
So now that we've identified the parts of a table, let's take a look at the other ways in which we can add them.
Using the Insert Table Dialogue
Once again, we're going to move the cursor to the point in the document where we want the table to appear. Now go back to the Insert tab, click the Table button, and select "Insert Table" instead of dragging your mouse over the boxes (which really represent cells, as we learned a second ago.)
A dialogue launches in the center of your screen. It looks like this.
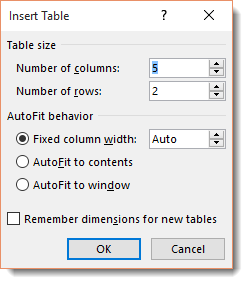
From here you can select the number of rows and columns. In this example, there are going to 5 columns, and 2 rows. Select your preferences in the AutoFit behavior section. You can set a fit column width, make the width of the cells and table fit to the content, or make the table size fit to the window.
Click OK.
Drawing a Table
If you know your table is not going to be uniform (regularly sized columns and rows), you can "draw" a table. This is particularly helpful when using tables to create complex page layouts.
To do this, click the Table button and select Draw Table. Your mouse pointer will transform into a pencil tool and you'll be able to draw individual cells anywhere in your document. You can even draw cells within cells.
Click and hold the left mouse button, drag the cell into the desired size and shape, and then release. It's that simple.
Selecting parts of tables
To select part of a table, simply click inside the upper left cell that represents the first cell you want to select. Hold the left mouse button down and drag across the remaining cells you want to select.
Adding Text to a Table
Adding text to a table is as easy as clicking into a cell and then typing. You will be able to change any attributes of that text, too, and even apply a Quick Style.
Position Text within a Cell
Just like in an ordinary document, you can choose whether to center text within a cell, or whether to align it right or left, or toward the top or the bottom. Go to the Alignment group under the Table Layout tab.
To reach the Table Layout tab, click the box above the left top corner of the table. This selects the table.

The Alignment group is pictured below.
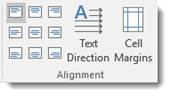
Using the graphics on the left as guides, select how you want text positioned within cell in your table.
NOTE: You can format the text position for just one cell, multiple cells (by selecting the cells), or the entire table (by selecting the table).
Converting Text into a Table
You can convert text into a table. This is especially handy if you've already written information that you think would be more effectively conveyed in a table.
To do this, you'll have to carve up the text into columns and rows using commas and new paragraphs. That's how you tell Word to separate the text into individual cells. Simply place a comma between the text you want to put into a column and place a paragraph where you want to begin a new row. An example of the text might look like this:
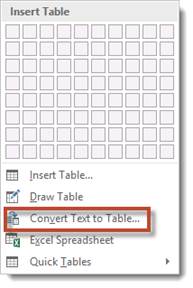
Now select the text, click the Tables button under the Insert tab. From the dropdown menu, choose "Convert Text To Table."
You can now specify the number of columns, as well as how to separate text. You can separate text into cells by paragraphs, commas, tabs, etc.
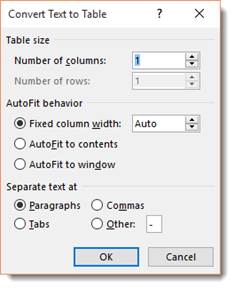
We chose two columns and to separate text at commas.
Look at the example below to see the final result.

Quick Tables
Word 2016 comes with a group of table templates for you to use and quickly customize to fit your needs. You can access them by clicking the Tables tool and choosing Quick Tables. Scroll through the templates and choose the one that best suits your needs. As with other kinds of tables, Word automatically inserts Quick Tables wherever the cursor is positioned in the document.
Once the Quick Table has been created, click the template text and start typing to replace it... You can also create your own Quick Tables by selecting a table that you've created and clicking the Save to Quick Table Gallery button at the bottom of the Quick Table menu.
Formatting Tables with the Table Tools
Whenever you create or select a table, the Table Tools will open automatically over the Design and Layout tabs in the tool bar. It allows you to easily apply table styles, borders, and shading attributes and more. Below is an example of the Design and Layout tools available for tables.

The Design tab (shown above) lets you customize the look and appearance of your table.
Let's look at the Table Style Options group. But first, look at our table below:

In the Table Style Options group, we see that Header Row, First Column, and Banded Rows are checked.
Let's learn what all these options mean so you can decide what you want checked � and what you don't.
-
A Header Row is the first row in a table that contains headings (labels) for all the columns, as shown our table above.
-
When First Column is checked, it means the first column is also headers or labels. Same goes for the Last Column.
-
You can also choose to have banded rows or columns. Banded Rows formats even and odd rows differently so they are easier to read. If you choose Banded Columns, it formats even and odd columns differently.
-
Total Row means to create a row for mathematical totals.
In the Table Styles group, you can pick a new table style or apply shading to your table by clicking the Shading button.
In the Borders group, you can use Border Styles add borders to rows and columns to customize the look of your table.
Now, let's click the Layout tab.

The Layout tab, when associated with the Table Tools, allows you to easily insert rows and columns, and format text and objects within cells.
Selecting Cells, Rows, and Columns
Selecting cells, rows, and columns in Word 2016 is easy.
To select a cell, click within the cell so the mouse cursor is blinking.
Go to the table Format tab, then the Table group. Click Select>Select Cell
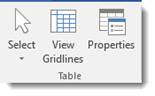
To select a row, click in the first cell in a row go to Select>Select Row.
To select a column, click the first cell in a column, then go to Select>Select Column.
The Border Painter Tool
The Border Painter tool was a feature added in Word 2013. It makes applying different widths and borders to your table easier than ever before. To find the tool, select your table and go to the Table Tools Design tab.

To use the border painter, first apply formatting to some borders in your table, then click the Border Painter button. Click on any border to apply the formatting. You can also click and drag the mouse to apply it to a whole line.
Border Sampler
The Border Sampler works with the Border Painter tool. The Border Sampler is located at the bottom of the Border Styles Gallery. To access it, click the Border Styles button in the Borders group under the Table Tools Design tab.
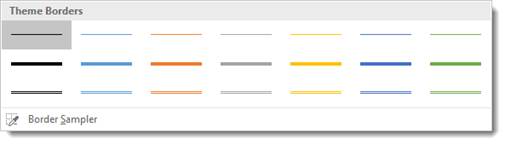
Simply click on Boarder Sampler. An eyedropper will appear. Click on a table border that you want to sample. Word then switches to the Border Sampler. You can apply the same formatting somewhere else in the table.
Adjusting the Width of Individual Columns
There are several ways to adjust the width of individual columns:
1. Position your mouse pointer over the edge of the column and then drag it to the desired width.
Adjusting Width of All Columns
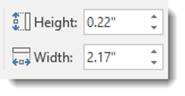
To fix the width of all of the columns at once, select the entire table and use the Width box under the Layout tab to adjust the columns to the desired size.
You can also use the Distribute Columns button to make all of the columns the same size.
Adjust rows in the same way, except use the Height field.
Adding Rows and Columns
There are two ways to add a new row or column to a table.
You can select a cell, row, or column and right click on it, then select Insert from the menu.
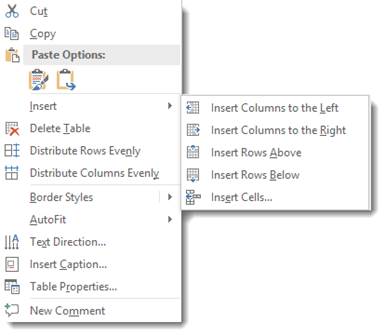
You can then choose to:
-
Insert Columns to the Left
-
Insert Columns to the Right
-
Insert Rows Above
-
Insert Rows Below
-
Insert Cells
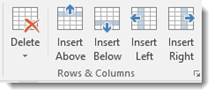
In addition, you can also select a cell, row, or column, then go to the Table Tools Layout tab. Choose an option from the Rows & Columns group.
You can also add rows or columns simply by mousing over a row or column.
Look at the snapshot below.

When we moused over the row, look at the little plus sign that appeared.

Click the plus sign to add a row.
For columns, move to the top or bottom of the column and the plus sign will appear.
Deleting Cells, Rows or Columns
To delete a Cell, Row or Column, simply select it, navigate to the Layout tab, go to the Delete group, then select if you want to delete cells, rows, or columns, or the entire table from the dropdown menu.
You will then have the option of deleting a cell, a row, a column, or the entire table. You can also delete cells, rows and columns by right-clicking inside a cell. In the menu select Delete Cells. Click the appropriate command and click Ok.
Merging Cells and Splitting Cells
To merge cells, drag your mouse over the cells while holding the left mouse button to select them. In the Layout tab, select the Merge Cells button from the ribbon. It looks like this:

The Merge Cells button is located in the Merge group on the ribbon. Alternatively, select the cells you'd like to merge and click the right mouse button. Select the Merge Cells from the menu.
To split a cell, select it by clicking on it, then click the Split Cell button on the ribbon.

This button is also found in the Merge group. Choose the number of rows and columns you'd like to split the cell into then click OK.
Split a table by clicking the Split Table button. It looks like this:

The Split Table button is located in the Merge group under the Table Tools Layout tab.
Doing Math in a Table
You can do math in tables in much the same way that you do in spreadsheets and Excel. However, Word's math commands are simpler, so they're easier to use.
For this example, let's do a sum.
To figure out a sum of values in a table, create the table and add the values you want to add. You can put values in rows or columns. You should go ahead and do the layout and design for your table at this time. Just make sure the last cell in the row or column (wherever you're doing your values) is empty.
Now, click in the cell where you want to place the mathematical formula.
Go to the table Layout tab.
Go to the Data group. Click the Formula button.
Select Sum from the Paste Function menu, then click OK.