Now that we've learned how to create basic email messages, it's time to learn how to format them to give them the look and feel that we want. We can change or add color, create lists, apply styles, and format the text with no more than a few clicks of the mouse button.
Applying a Font
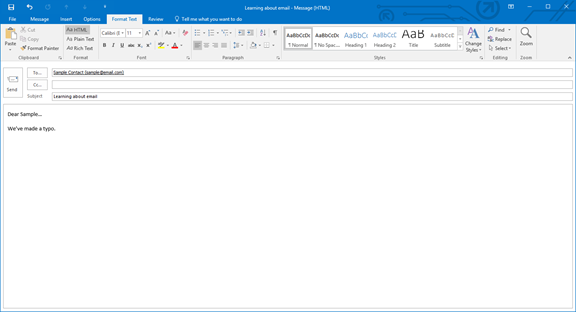
You can apply a font to either an entire email or parts of an email. The choice is yours. To apply a font to the body of an email or selected text within the email, click on the Format Text tab in the Ribbon. You'll see the toolbars, or groups, as pictured below.
The type of font you're currently using will appear in the Font group. Our current type of font is Calibri. You can click on the arrow in that window to display other types of font available to use.

To change the type of font for the entire email or just a selection of text within the email, select the text, then choose the font from the Ribbon. It's really that easy.
Changing Font Size
Next to the type of font under the Format Text tab is a box that states the size of font currently being used. Our current font size is 11.

Once again, you can use the down arrow key to either enlarge or reduce the font size. To change the size of the font, simply select the text that you want to change, then select the new font size. You can change an entire email or just a portion. The choice is yours.
You can also use the two uppercase A's beside the font size box to change the size of fonts you're currently using.

Pushing the larger A will increase your font size by one for each time it's clicked. On the other hand, clicking the smaller A will decrease the font size by one for each time it's clicked.
Font Attributes
You may want to select text to either boldface, italicize, or underline a section of text. The boldface command in Outlook 2016 is represented by an uppercase, boldfaced B. Italics are represented by an uppercase, italicized 'I', and underline by an uppercase U with a line under it. These buttons are located directly below the font type window.
To add italics, boldfaced, or underlining to any portion of a text within an email, select the desired text, then click the appropriate button (B for boldfaced, I for italic, or U for underline.)

Next to the commands for boldfaced, italics, and underline, you'll see an �abc' with a line through it. (ABC) This is for strikethrough. When clicking on this button, it will put a line through any text you have selected.

Next to the strikethrough command, you'll see �X2'. This simply puts smaller text below the text line of the normal text. This command was used when typing X2 into this article. X2 is just the opposite, putting smaller text above the text line. This makes creating footnotes easier than it had been with previous versions of Word.
The uppercase A and lowercase A that are situated side by side allow you to change the case of selected text. You can change from lowercase to uppercase or vice versa , toggle tHe CaSe, or select other common capitalizations.

Font Color
Changing the font color is as simple as changing the font. Look for the uppercase A with a red bar under it as pictured below.

Select your text, then click on the button to choose the color you want to apply to the selected text.
You can also highlight selected text. To the left of the font color button, you'll see a lowercase �ab' with a marker near it. It is highlighted in yellow. Simply select the portion of text you want to highlight, click the button, and select the color of highlight that you want to apply.

Clear Formatting
To clear formatting within an email or a specified portion of text, simply select the text, then click on the �As' with the eraser beside it. It's located to the right of the two uppercase A's that allow you to increase or decrease font size. (See the picture below.) By selecting the text and clicking on this button, it will remove all formatting done to the text and leave you with the default font and font size for the email.

Text Alignment
As with all word processing programs, you can either left, right, center, or justify your text. You can either do one of these things to a portion of text or to the entire email.

The following text, selected from this article, is justified so that it is aligned between the left and right margins, adding space between letters if necessary. It gives the email a clean look.

In the picture, the Left Align button is highlighted in the Ribbon under the Format Text tab. Beside it is the Center Align, followed by Right Align and Justify. To use these, simply select the text you want to align, and click on the appropriate button.

Deleting Text
You can delete text by using the Backspace and Delete keys. But you must remember that Backspace removes characters to the left of the cursor, and Delete removes characters to the right.
To delete blocks of text, select the text to be deleted and press either the Backspace or Delete key.
Moving Text
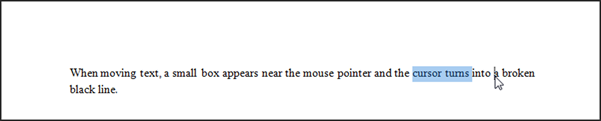
You can move selected text by holding the left mouse button and moving the cursor to the desired location in the email. When moving text, a small box appears near the mouse pointer and the cursor turns into a broken black line. You position the cursor in the place you want the text and release the left mouse button.
Working with Email Messages
One of the convenient features in Outlook when it comes to working with emails has to be the ability to sort your messages by conversation. It helps to keep your inbox more organized, and it also helps you to see what's being discussed in emails. By default, the conversations feature is turned off. But don't worry. We're going to show you how to turn it on, how it works, and how you can use it.
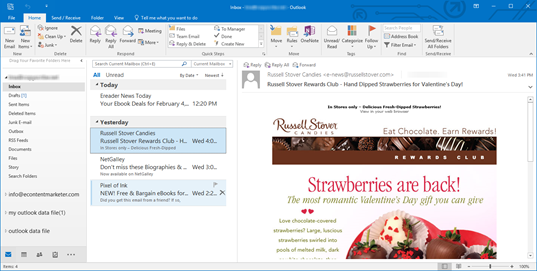
Right now, your emails are simply organized by date in the Information Viewer, as shown in our inbox below.
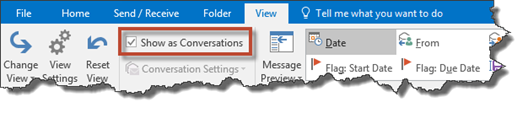
To view your emails by conversations, click on the View tab. Then, put a check mark in the box Show as Conversations in the ribbon (shown below).
A box will appear asking you what folders you want to show as conversations.
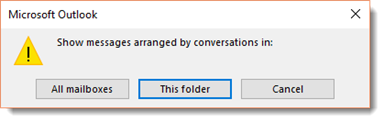
Since we only have one email account tied to Outlook, we're just going to select This Folder. If you have more than one email account, you may want to select All Folders.
Now, emails within a conversation will have a white triangle beside them as shown below. You can click on the triangle to view all the emails in the conversation.

You can also edit the way you view conversations. Go back to the View tab and click Conversation Settings.
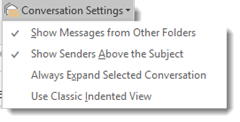
In the dropdown menu, you can choose to show the sender of the email above the subject line, expand conversations (so they're not collapsed like in the above snapshot), or indent conversations as they go down like threads on an online discussion board.
Creating an Auto Signature
An auto signature is something that is automatically put at the end of every email that you send. It might just be your name, so you don't have to type it out each time you create an email. It could be your name, phone number, and address. However, it could also be something such as a favourite quote or saying. Whatever it is, it becomes your signature, so to speak, because it appears at the end of all your emails � just like your name would appear at the end of a handwritten letter.
Putting an auto signature at the end of your emails is optional. However, if you want to do it, here's how.
Click on the File tab, then click Options on the left.
Click the Mail category on the left, then go down to Create or Modify Signatures for Messages (it's right below Spell Check).
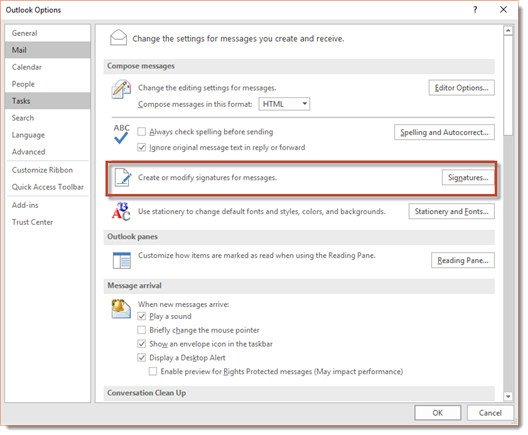
Click on the Signatures button.
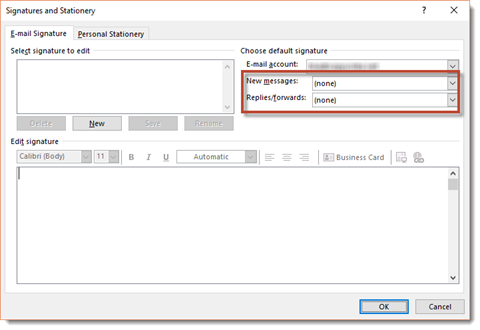
The Signatures and Stationary dialogue box will now appear:
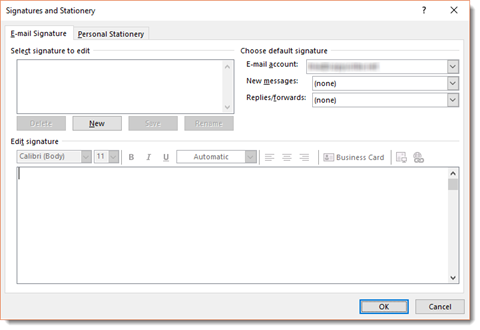
To add a new signature, click the New button under Select Signature to Edit field.
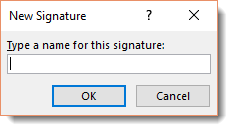
Enter a name for the signature, then click OK.
Select the email account for which you want to add a signature.
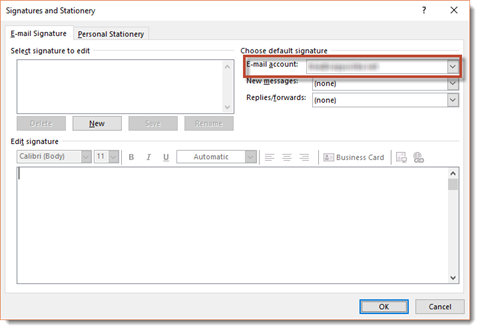
Also select if you want it to add it to New Messages and Replies/Forwards in the Choose Default Signature box.
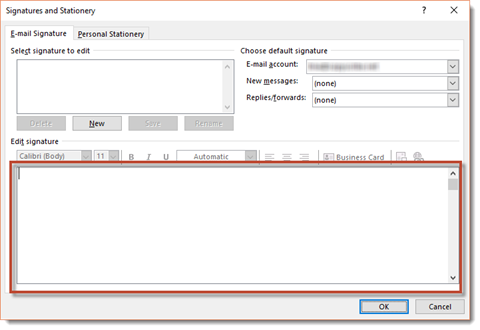
Now, in the Edit section at the bottom of the window, you can create your signature.
You can also add a business card as your signature by clicking Business card.
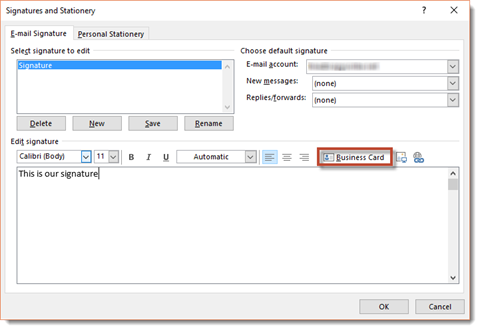
If you select this option, you'll then see the window below:

As you can see, you can insert a business card from your contacts.
Also, you can insert a picture from your computer or a link to a website: .
.
When you're finished, click OK.
Add Attachments to Emails
If you've ever attached a file to an email before, then this is going to be easy for you. An attachment is a file (picture, document, spreadsheet, folder, etc.) that you attach to an email so that it sends with the email.
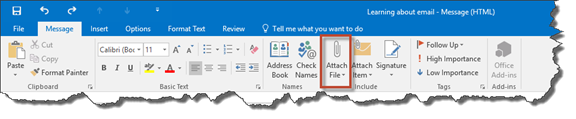
To add attachments to your emails in MS Outlook 2016, click on the Home tab and select Attach File under the Message tab.
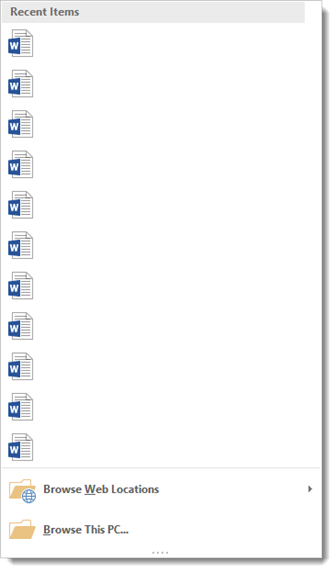
You can then choose to attach a file you've recently worked on, such as a Word document.
You can also browse web locations, such as OneDrive, or browse your computer for the file.
We are going to choose "Browse This PC".
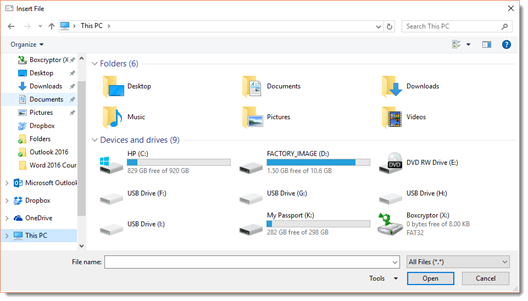
Select the file, then click the Open button.
Attaching Items
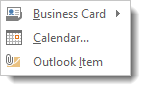
You can also attach items such as your business card, calendar, or Outlook items. To do this, click on Attach Item, then select the item you want to attach.
Set Importance and Sensitivity
When you set the level of importance for a message, you tell the recipient if the message needs their attention quickly or if they can just read it later. Your recipients will know if you've set a level of importance by a visual indicator in their inbox.
You can also add a sensitivity setting. This advises the recipient on how to treat the contents of your email message.
Change the Importance Level
In your email message window, click the Message tab. In the Options group, select High Importance or Low Importance.
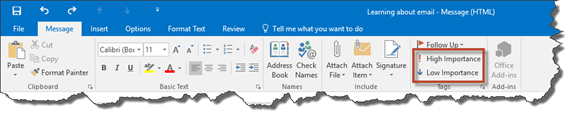
This changes the importance level for just the one email message.
To change the importance level for all email messages, go to the File tab, then click Options on the left.
Click on Mail in the left column, as shown below.
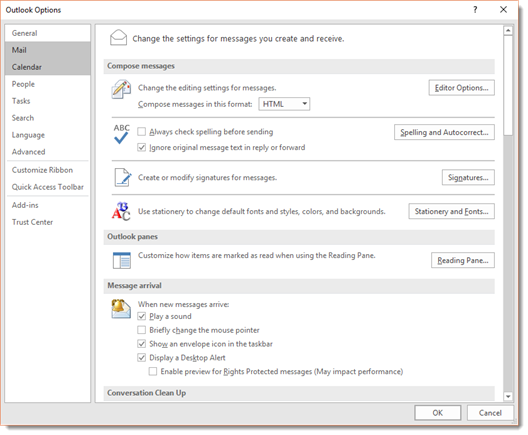
Under the Send Messages section, change the Default Importance Level to high, normal, or low.
Click OK when you're finished.
Change Sensitivity Level
Remember, a sensitivity level is only an advisory on a message. Recipients can still do what they want, including forwarding the message to others, even if you don't want them to.
When you assign a sensitivity level to a message, a recipient will see one of the following messages in the InfoBar of the message.
-
Normal � nothing is in the InfoBar because it's a normal setting.
-
Private � the recipient will see Please Treat This as Private.
-
Personal � the recipient will see Please Treat This as Personal.
-
Confidential � the recipient will see Please Treat This as Confidential.
To add a sensitivity setting to an individual email, click on the Options tab in your email message window. Click the arrow to the right of the More Options group.

You'll then see this dialogue box:
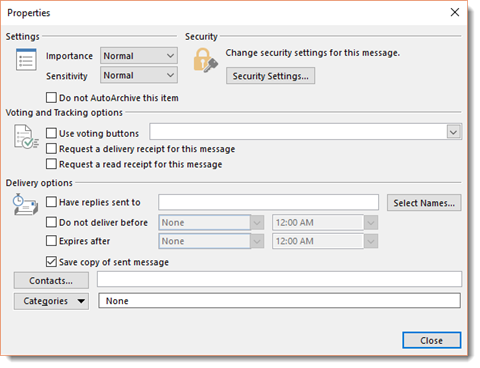
In the Settings section, set the sensitivity for the message. Click Close when you're finished.
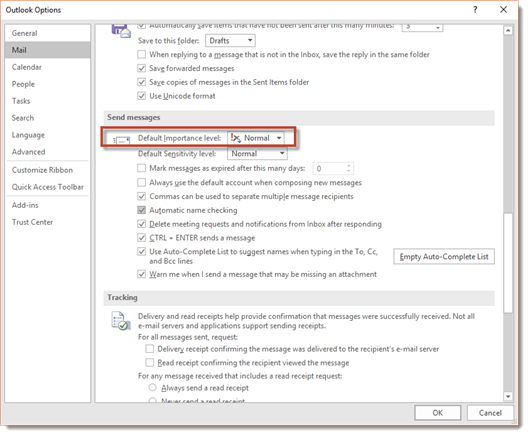
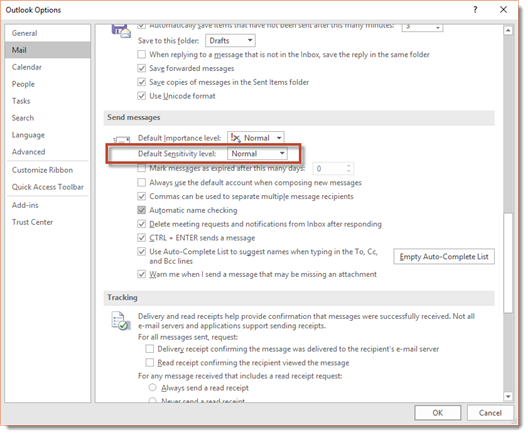
To change the sensitivity level for all emails, go to the File tab, click Options.
Click Mail in the column on the left.

Go to the Send Messages section and change the default sensitivity level.
Read and Delivery Receipts
Read and Deliver Receipts are just as they sound. A Read Receipt is a receipt that you can request that will tell you when the recipient of an email has opened and viewed the email. On the other hand, a Delivery Receipt will let you know when the email has been delivered to the recipient's email server.
To request Read Receipts or Delivery Receipts for all emails that you send, go to the File tab, then click Options. Select the Mail category from the left, then scroll down to the Tracking section.
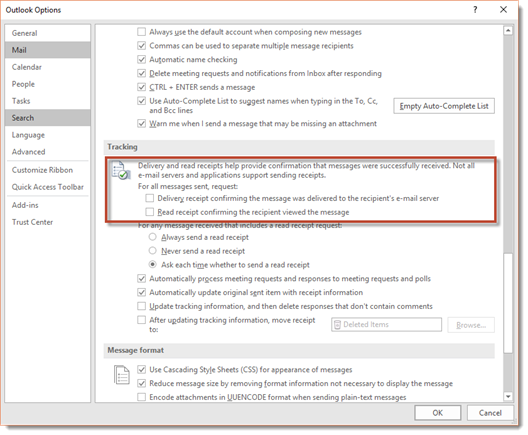
If you want notification when emails are delivered, put a check mark next to Delivery Receipt Confirming the Message Was Delivered to the Recipient's Email Server.
If you want a Read Receipt, put a checkmark next to Read Receipt Confirming the Recipient Viewed the Message.
Click OK.
To request a Read Receipt or a Delivery receipt for an individual email message, click the Options tab, then in the Tracking group put a check in the box requesting a Read Receipt or a Delivery Receipt.

Have Replies Sent to Someone Else
Let's say you send out an email for your boss. Since the email is from your boss, and you are just sending it for him, you do not want the recipient to reply to you. Instead, you want the recipient to reply to your boss. In Outlook 2016, this is easy to do.
In your email message window, click on the Options tab.
In the More Options group, click the Direct Replies To button.
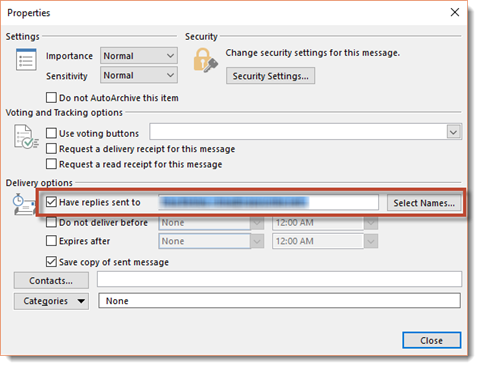
Add the email address of the person you want replies directed to. You can click on the Names button to select names from your contacts or type an email address in. Click Close. Now if anyone replies to your email, it will be sent to the person you specified instead.
Expires After, Do Not Deliver Before Options
You can request that Outlook 2016 not send a certain message before a specified date. Outlook will wait, then send your message on the date you requested. At the same time, Outlook 2016 can also mark an unread message as expired after a specified date. An expired message will have a line through it. This is helpful for time sensitive materials (for example, announcing a meeting), so that once the day has passed, there's a line through the email and the recipient knows he/she doesn't have to bother reading it.
To set Expires After or Do Not Deliver Before Options, go to the Options tab in your email window. In the More Options group, click the grey arrow at the bottom right side.
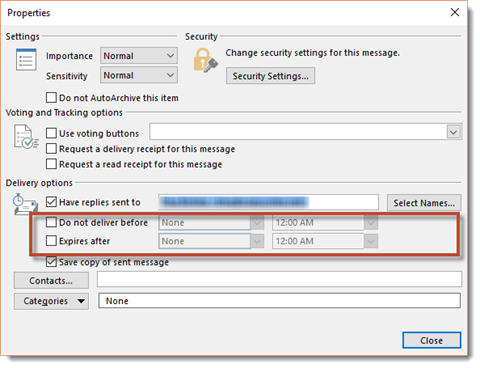
Set your options, then click Close.
Voting Buttons in Messages
Outlook 2016 provides you with a way to add voting buttons to the emails you send. When you add voting buttons, people who read the message can vote for options that you give in the email. You get the votes returned to you as a special email message.
To add voting buttons to an email, start a new email or look at an existing one you're creating.
Click on the Options tab, then click on Use Voting Buttons in the Tracking group.

Now you'll get a list of voting options.
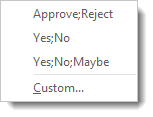
You can select one of these options.
Once you select an option, you'll see a message saying that you've added a voting button to your email. It appears above the To line.
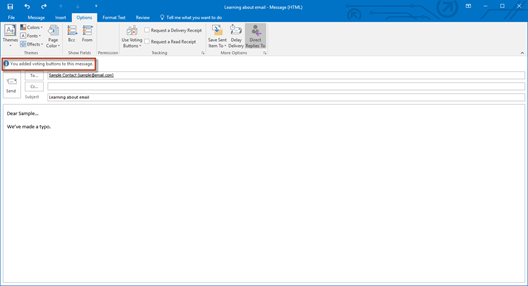
Now you can send the message, and your recipients can vote. You'll receive special email messages letting you know how each recipient voted.
Flagging Messages
In Outlook 2016, you can flag messages that require action � either as a reminder to you or to a recipient. It's a way of saying, "Hey, you need to take care of this now" without actually saying it or putting it in the body of an email. In fact, you or a recipient will see the message is flagged for action without even opening the message.
Here's how you flag messages in Outlook 2016:
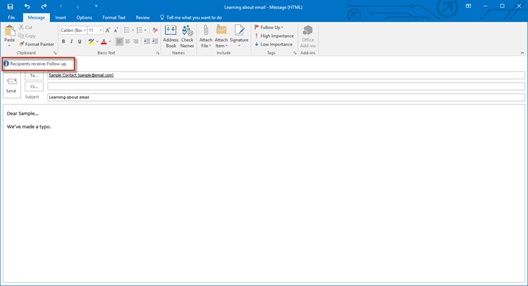
To flag a message as a reminder to yourself to follow up with the recipient about the email, go to the Message tab in your email message. Go to the Tags Group.

Click the dropdown arrow beside the Follow Up button.
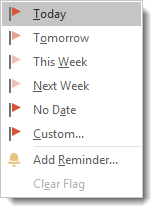
Select when you want to follow up.
You'll now see a message in the email, above the To line.
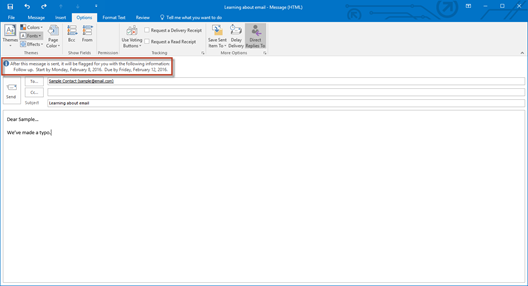
If you want to be reminded about this flagged message, go back to Follow Up and click Add Reminder.
To flag messages for recipients of the email, go to the Message tab, then click Follow Up in the Tags group.
Click on Custom.
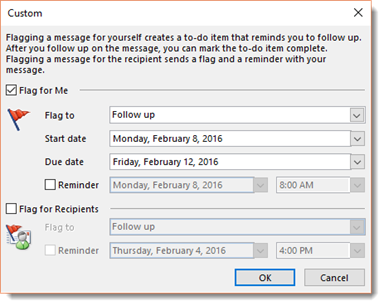
The Flag for Me box will be checked by default. If you don't want to flag this message for you, uncheck it. Put a check in the Flag for Recipients, then enter your information. Click OK.
There's now a note in your email letting you know that you've flagged it for the recipient.
When a recipient receives the email, they'll see this icon: .
.
Assigning Messages to Junk
If you get a lot of spam or junk mail, you can make it so you don't have to even look at it in your inbox. To assign mail to Junk, go to the Home Tab and in the Delete group, click on Junk.
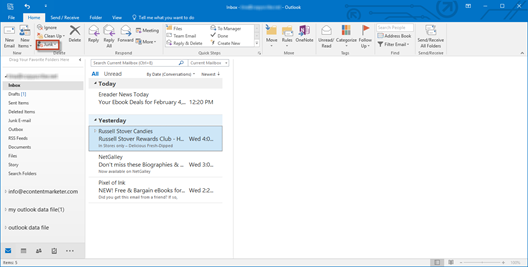
If you select an email in your inbox (don't open the email, just click once on it), you can choose to block the sender so you don't get the email messages, never block the sender, never block the sender's domain (the name after the @ sign), or never block the group or mailing list.
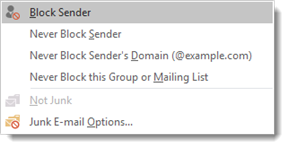
You can also click Junk E-Mail Options to be more specific.
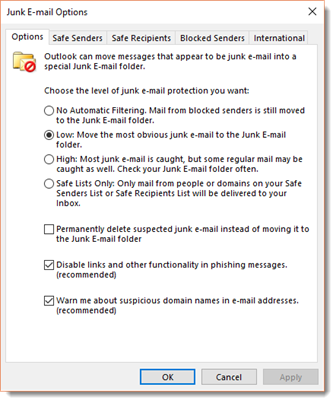
Under the Options tab (shown above), you can tell Outlook what you want to do with junk mail.
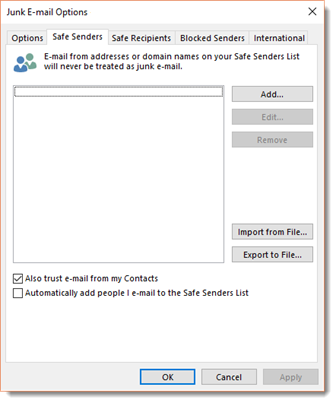
If you click on Safe Senders, you can make sure that mail that's important to you is never marked as junk by adding those names to the list.
Under the Safe Recipients tab, you can make it so that anyone you send an email to will not be put on your junk mail list.

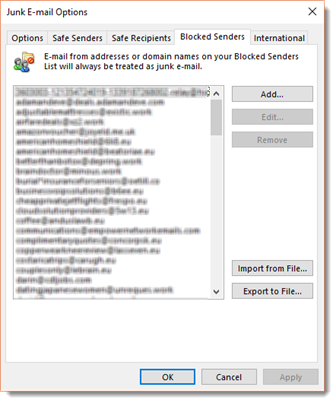
Under the Blocked Senders tab, you can list email addresses that will ALWAYS be treated as junk mail.
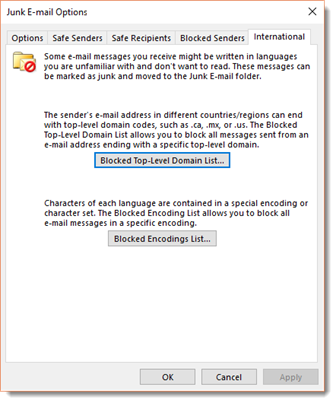
Under the International tab, you can block emails written in different languages, or those with foreign domain codes such as .de or .ca.