If you save a lot of your email in Outlook rather than deleting it after reading, you may want to arrange them into folders. By creating folders, you could save all emails from Tom, for example, to a folder named "Tom." You could also save all emails from Jane to a folder entitled "Jane," and so on.
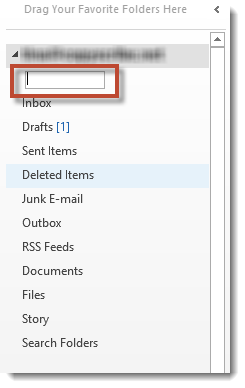
To create a mail folder, go to the Mail module, then the Folder pane.
Select the email address for which you want to create a new folder. Right click on it and select New Folder.
A text field will appear below your email address in the Folder pane, as shown below. Type in a name for the new folder, then hit Enter on your keyboard.
The folder will then appear in your folder list beneath the appropriate email address.
Move Mail
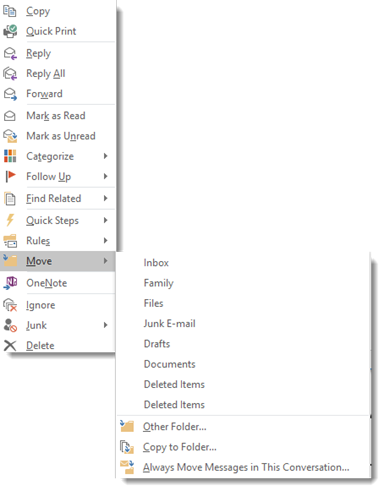
To move an email message from your inbox to another location, click on the email in the Information Viewer that you want to move.
Right click on it, then select Move from the context menu that appears.
When you click on move, a menu will appear to the right. You can then choose to move it to an email folder or another folder in Outlook. You can also choose to have all messages in the conversation moved.
Deleting Emails
Deleting emails in Outlook 2016 is easy. You can empty a whole folder of emails, delete every email in your inbox, or delete individual emails.
To delete all the emails in an email folder or your inbox, click on the email folder. Right click, then select Delete All.
To delete a single email, click on the message in the Information Viewer, then right click and choose Delete.
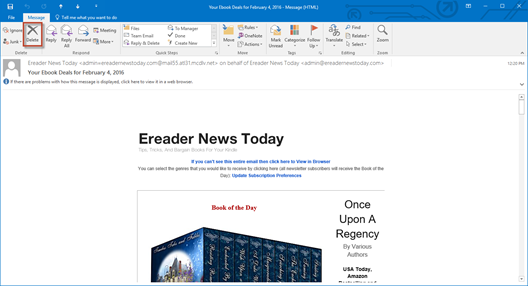
To delete an open email message, click the Message tab, then click Delete.
Sort and Find Messages
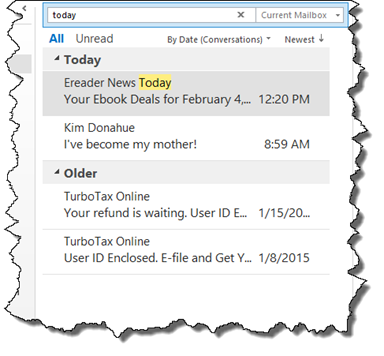
If you have a lot of emails in Outlook 2016, it can get hard to find an email that you need. If you know who sent the email or the subject line, you can use the search box at the top of the Information Viewer.
But if you're not sure of any of this, it can make it almost impossible to find the email you are looking for. However, don't despair. You can use the sort feature of Outlook 2016 to find the email you need using parameters that you specify.
To sort emails, first select the folder that you want to sort.
Then, click the View tab.
In the Arrangement group, there are different options that you can select to sort your emails.

Choose an option to sort the emails. You can then click Reverse Sort in the Arrangment category to view emails in alphabetical order.

You can click Columns to add more columns to add more information about the emails that you've sorted.

Instant Search
We mentioned Instant Search briefly in the last section when we showed you how to type in information about an email into the search bar. Now, let's learn more about it.
To start, select a folder in Outlook that you want to search. Now, enter keywords to start searching in the box above in the Information Viewer. Keywords could be the sender, the date, the subject, etc. These keywords can be as vague or as exact as you want. We're going to learn to refine the results too.
You'll then see all the search results that contain the keywords you entered.
After doing that, click on the Search tab in the Ribbon.

Now, you can further filter your search results using the options in this ribbon. For example, if you want to search for attachments, click Has Attachments in the Refine group.

You can also choose other options in the Refine group to further refine your search. Click From in the Refine group to search for emails from a particular person.

Click More to see even more options to refine your search.

Advanced Find
Go to the Search Ribbon again, this time click Search Tools in the Options group.
Select Advanced Find from the drop down list.
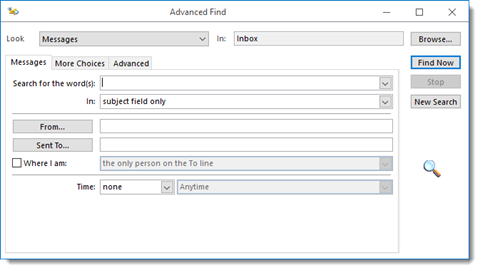
You can use this to enter in all sorts of search options. You can also easily navigate through the tabs in this window and enter different criteria. Everything in this window is self-explanatory and simple to use. All you do is enter the information that you know regarding the email you're looking for. Outlook 2016 does the rest.
Clean Up Mailbox
Outlook 2016 also gives you options to clean up your mailbox to get rid of deleted emails and maximize the space in your Outlook program.
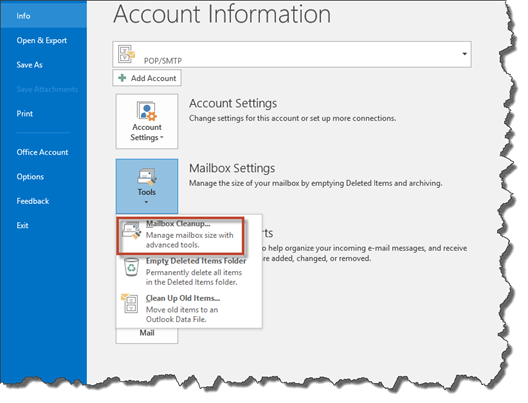
The best way to learn what cleaning up your mailbox does is by actually learning to do it. That said, go to the File tab.
Click Info on the left, then click the dropdown arrow beside Tools and select Mailbox Cleanup.
You will then see this dialogue box:
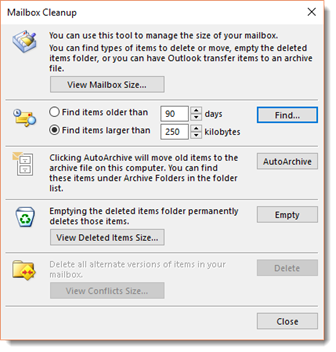
You can use the window to find old items you want to delete, large items you want to delete, archive old items, or empty the Deleted Items Folder. When you're finished, click Close.
Categories
Categories are helpful to use if you know how. Using categories basically like flagging an email, but in a way that is meaningful to you. For instance, let's say you get an email from a client seeking a certain kind of information, but before you can release that information, you have to discuss it with your boss. So instead of just flagging the email for follow-up (which certainly doesn't give you any information other than you have to answer the email) you can Categorize it with a special tag. So the next time you open Outlook, you'll see the tag and be reminded that you must discuss it with your boss.
The Categorize button can be found on the Home tab of the Ribbon.

To Categorize an email, you must select it, then click the Categorize button. You'll see a dropdown menu that looks like this:

Select a color. If it's the first time you've applied this particular category, you'll see a window that looks like this:
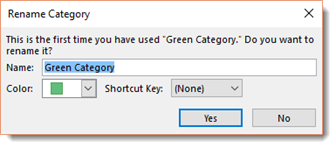
From this window, you can customize the name of the category. For instance, you may want to call it "Check with Boss". You can also select another color and even create a shortcut key. When you're finished, click Yes.
Any email that is categorized will have a box next to it indicating which category it is in.
You can also arrange your emails by categories. To do this, go to the Arrange By box in the Arrangement Group (under the View tab) is set to Categories, Outlook 2016 sorts the emails into their respective categories.
You can change the names and colors of these categories at any time by clicking the Categorize button and selecting All Categories.
A new dialog will open that looks like this:

From within this window, you can rename the categories, delete them, add a custom shortcut key, or change their colors.
Filters
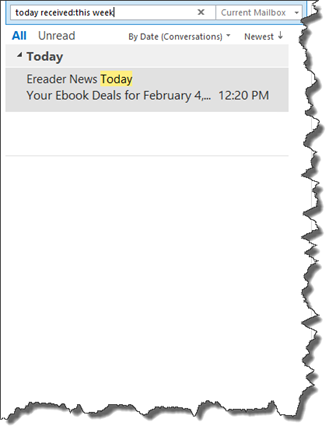
Using filters is just another tool Outlook 2016 gives you to help you sort through your email. To find the Filter Email command, navigate to the Home tab, and locate the Filter Email button in the Find group. When you click on it, a dropdown menu appears. It looks like this:

As you can see, you can filter your email by those that are unread, have attachments, or were received this week, and more. Let's try "This week" and see how it works.
It's our goal to show you everything that you can do in Outlook 2016, and show you how to use all the features. With that, you will learn how to use all the features.
That said, this article is going to be all about managing your contacts and your address books. Let's delve right in.
About Address Books
If you've used other email programs before, you already know that you can have several address books. You can organize them by different types of contacts, such as work, family, friends, etc. Just like with other email programs, these address books are several separate lists of names and email addresses.
If you click on the People button in the Navigation Pane, you will be taken to your address book.
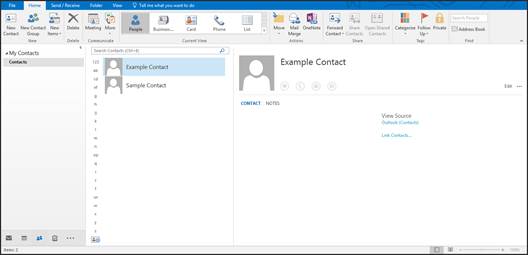
In the Folder pane, you will see your various address books. We only have one entitled Contacts. It is created for you by default.
To the right, you will see your contacts listed from that address book in the content area.
You can click on a letter of the alphabet in the Contact Index to see contacts whose names start with that letter.

Depending on your view, you may also see the Reading pane.
Creating Address Books
When you open the People module, your address books are located in the Folder pane. Address books are essentially folders that contain contacts. Address books are also known as contact folders.
To create a contact folder, right click on any folder in the Folder pane, then select New Folder.
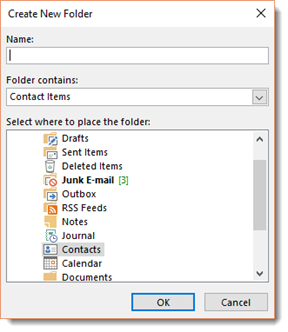
Enter the name for the folder, then specify Contact Items from the Folder Contains dropdown list.
In the "Select where to place the folder" section, choose Contacts.
Click OK.
Your new folder will appear in the Navigation Pane. You can now add contacts to it.
Adding a New Contact to an Address Book
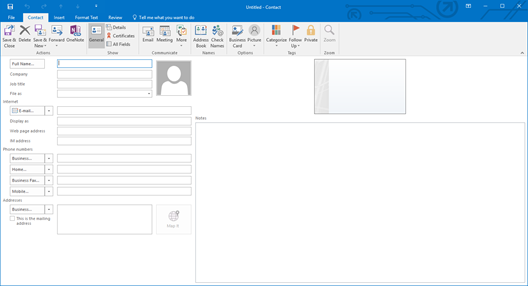
Adding contacts in Outlook 2016 is unbelievably easy. Simply double click in the Contacts Area or go to Home>New Contact in the Ribbon.
A window will open up that allows you to add as much or as little information about the contact as you wish.
Now, click the Full Name button. This dialogue box will appear:
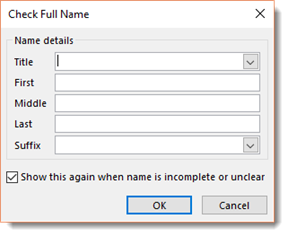
Click the downward arrow to select a title, such as Mr, Mrs, etc.
Enter the contact's first name in the First textbox, then follow suit with their middle name, last name, and suffix (such as Jr.)
Type a middle name or initial in Middle, and their last name in Last.
Click the OK button.
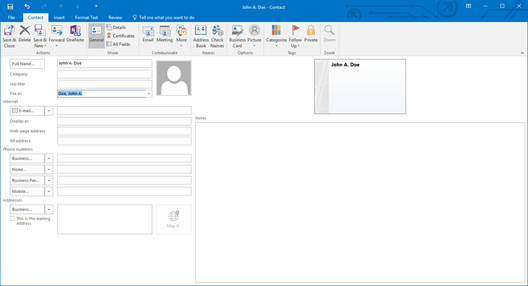
Now you're back to the New Contact Form. You can enter as much or as little information as you like. You don't have to fill in every box. If there's a dropdown list beside a text box, you can choose an option from the dropdown list, or type in your own. It is not mandatory that you select an item from the dropdown list as it is with other programs.
You can also select how the contact is filed. If you don't want to file it by someone's last name, for example, you can click in the File as box and state your filing preference.
Click in the Email text box and type the contact's email address. You can also add a website address if you want.
In addition, you can enter business phone number and home phone by entering the numbers in the appropriate boxes in the Phone Numbers section. However, you do not have to add Business, Home, etc. You can click the downward arrow beside any phone number button and select from nineteen different ways to classify phone numbers. See the snapshot below to see what we mean.

In the Address section, you can do the same thing and choose from Business, Home, or Other. If this is the mailing address where you send mail to, make sure the This is the Mailing Address box is checked.
You can simply click in the Notes section and add anything you want about or regarding the contact.
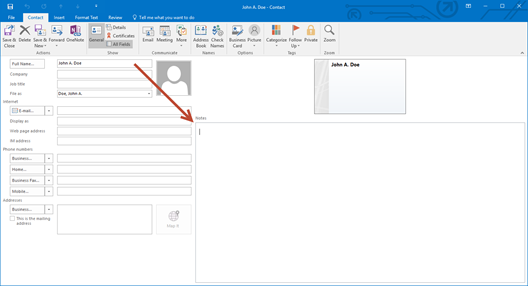
When you're finished, click Save & Close on the left hand side of the ribbon.
Moving Contacts to Different Address Books
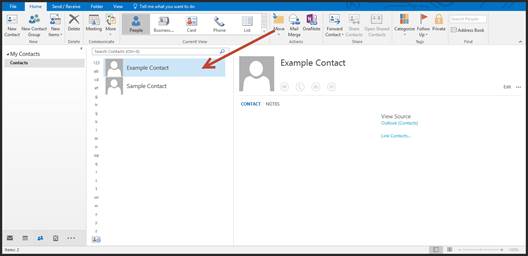
To move a contact from one address book to another, select a contact from the Contact Area in the People module and drag it to the address book in the Folder pane.
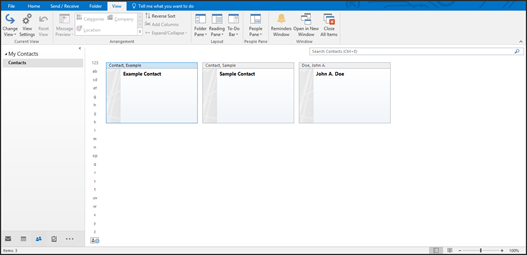
Viewing Contacts
Once you've entered your contacts, you have several ways in which you can view them. The way you view them will be determined by how you want the information arranged. These are called views. Outlook 2016 comes with 5 to 12 predefined views in each different module. Plus, you can easily alter any view. You can then name and save the altered view to use again in the future.
Here's how you change the view:
-
Click the People button in the Navigation Pane.
-
Pick the view you want by going to the View tab, then clicking the downward arrow on the Change View button.
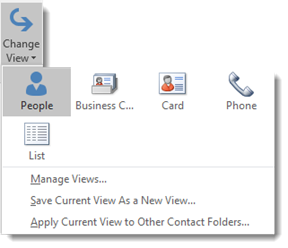
We've selected Business Card view.
To create a new view, click the downward arrow in the Current View group. Select Manage Views.
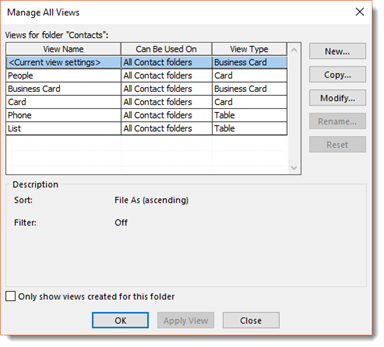
In the window shown above, you'll see all your current views and what types of folders it can be used on. You'll also see the view type. To modify a view, click Modify. You'll then see this window:
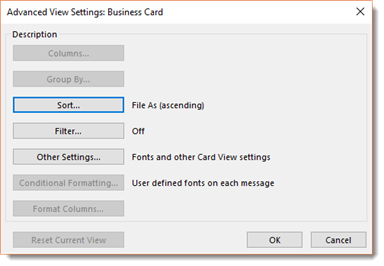
You can now alter the columns, how your contacts are sorted in that view, the fonts, etc.
Click OK when you're finished.
To add a new view, click Manage Views on the downward arrow in the Current View group again.
Click New.
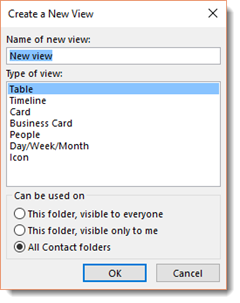
Now, create a name for the view, then select the type of view. Also select who can view this view.
Click OK.
Next, specify the columns, etc. just like you did when you altered a view.
Click OK when you're finished.
Outlook Contact Options
Contact options allow you to specify how names are entered into your Contact Lists, such as Last, Middle, First or First, Middle, Last, as well as how they are filed. You can specify preferences to help customize Outlook to better suit your needs.
To set your options for Outlook 2016, click on the File tab. You'll see the window below.
Now click Options on the left.
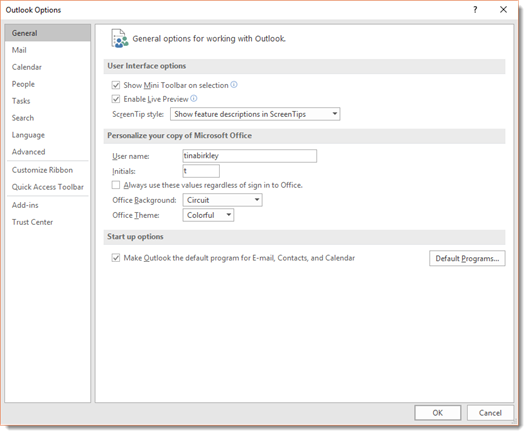
Click People in the column on the left.
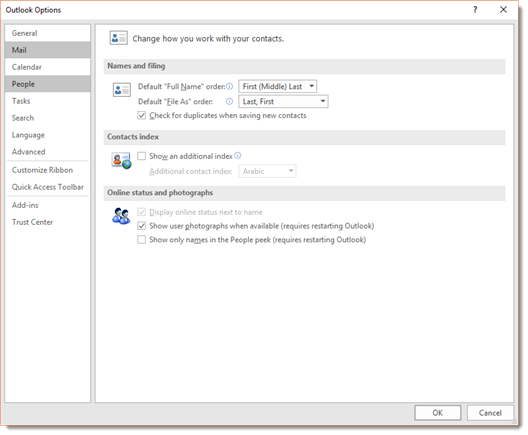
Under Names and Filing, you can specify how your contacts are organized, as well as how they are filed. Set your options, then click OK.
Adding Contacts from Email Using Quick Contacts
Let's say that you receive an email from someone new, and you want to add that person to contacts. For example, you get an email from a new co-worker who has never emailed you before, and you need to add them to your contacts for future emails. You can do so by using Quick Contacts.
Quick Contacts is a tool that's available to you in the Reading pane of the Mail module.
Just hover your mouse over their email address in the Reading pane. A box will appear to the right of the email address. Click the downward arrow in the lower right corner. The box expands and looks like the snapshot below.

Click Add in the upper right hand side of the box.
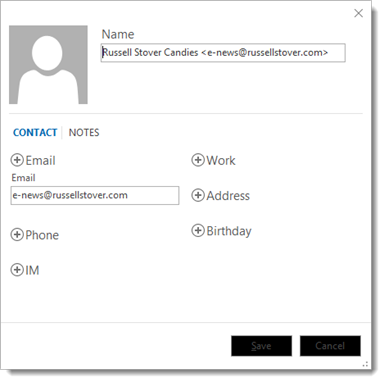
Click Save.
Contact Groups
Let's say you have a group of people that you email often, and you send each person in the group the same email. Maybe you send newsletters to family or friends, or you regularly email members of your team at work. Whether than typing in all the email addresses into the To line of an email, you can instead create a contact group, and email the group. Outlook will send everyone in the group your email.
To create a contact group, go back to the People module.
Under the Home tab, click the New Contact Group button. You will then see this window:
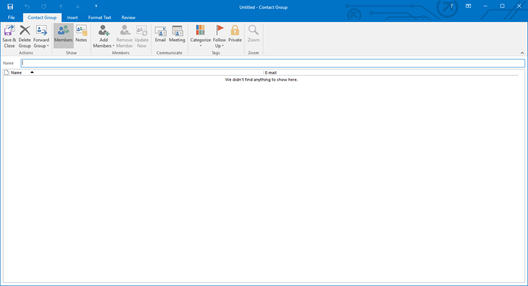
In the Name field, enter a name for this group of contacts.
We're going to name ours Family.
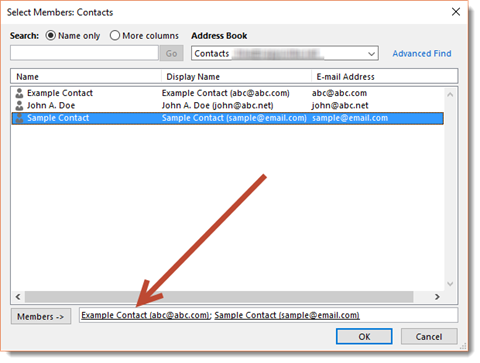
Next, go to the Ribbon. Under the Contact Group tab, click the Add Members button.

As you can see, this displays a dropdown menu. You can choose to add people from Outlook Contacts, the Address Book, or add a New Email Contact.
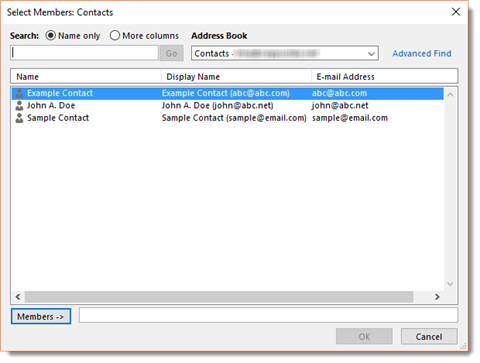
Double click on the name of a contact.
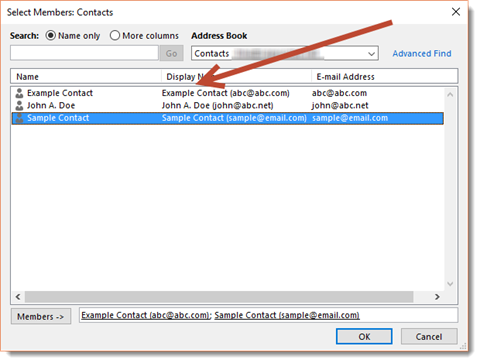
That contact will then appear as a member of the group.
Click OK when you're finished.
Importing Contacts from Another Email Program or File
If you're setting up Outlook for the first time, you can import your contacts from other email programs you've used. To do this, you will use the Import/Export Wizard.
Click on the File tab, then click Open & Export on the left hand side.
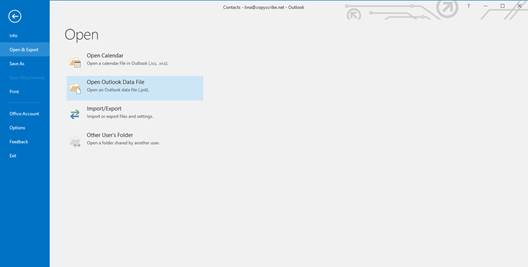
Click Import/Export.
This opens the wizard.
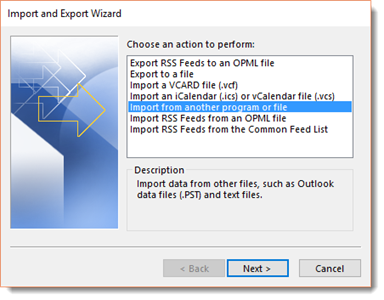
From the "Choose an action to perform" list, click on "Import from another program or file," then click Next.
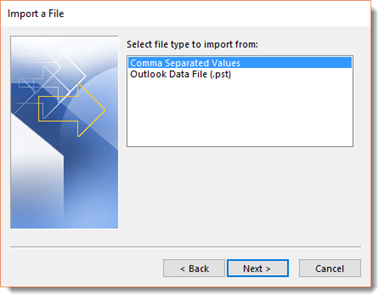
Select if you are importing a CSV � or Comma Separated Values � file, or if you're importing an Outlook Data File (.pst).
We are going to choose Outlook Data File.
Click Next.
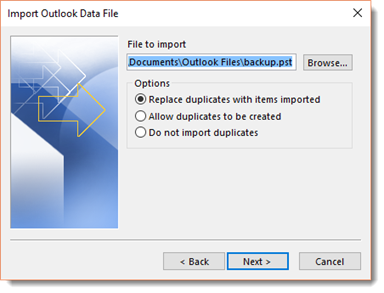
Click the Browse button and locate the file you want to import.
You can then choose to:
-
Update any contact information currently in your Contacts with the imported information by replacing duplicates with the imported items.
-
Allow duplicates to be created.
-
Tell Outlook to not import any duplicate items � or add items that you already have in your contacts.
Click Next.
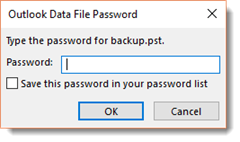
If needed, enter the password for your backup file, then click OK.
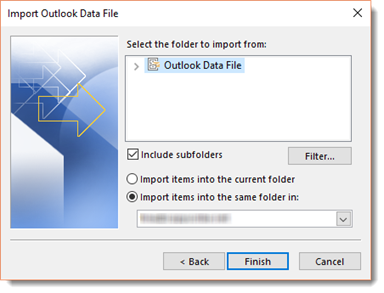
Click the arrow beside Outlook Data File.
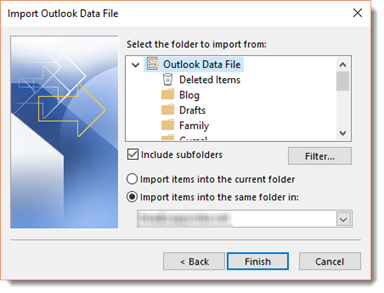
Select the records that you want to import, then choose if you want to import them into the current folder (or the address book you selected in the People module), or into the same folder. If you want to import them into the same folder, choose the account for which you want to create an address book in which to store the records.
Click Finish.
Electronic Business Cards
You can also create and use electronic business cards in Outlook 2016. You can add this business card to your emails. Twenty years ago, you might have stuck a business card in an envelope with a letter you were sending to someone. Now you can do the same thing with email.
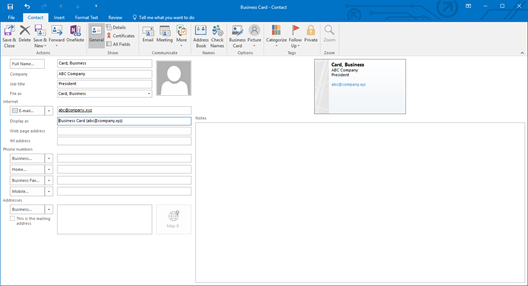
By default, whenever you add a new contact to Outlook, a business card is created for them.
As you can see, we've added a new contact in the window below. You can see the business card displayed on the right.
You can edit the business card by changing its layout, font, and background color.
To do this, go to the Contact tab in the Ribbon. In the Options group, click the Business Card button.
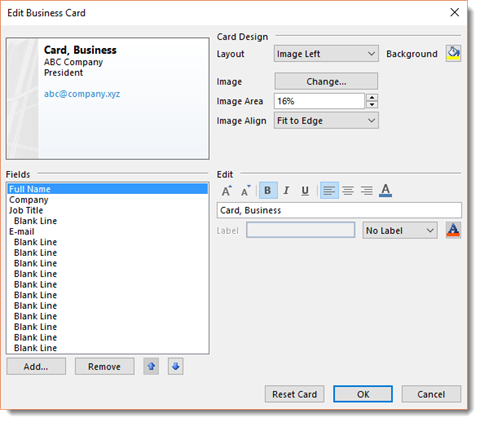
When you're finished making changes to the layout and look of the business card, click OK.
If you want to add a picture to the business card, click Picture under the Contact tab in the Ribbon. It is located in the Options group. You can then select an image file from your computer to use as the picture on the business card.
NOTE: You can also create a business card for yourself by adding yourself as a contact.
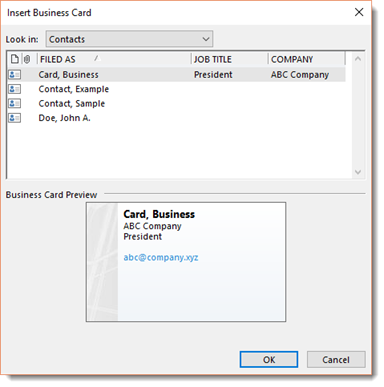
If you want to send a business card to someone else, go to the Mail module and create a new email message. Under the Message tab, choose Attach Item>Business Card>Other Business Cards.