Headers appear at the top of a worksheet. Footers appear at the bottom. Both can contain page numbers, and headers often contain the title of the worksheet and perhaps the date.
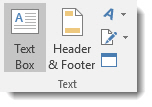
To insert a header or footer, go to the Insert tab and choose Header & Footer.
Click the Header & Footer button. This is what you'll see in your spreadsheet:
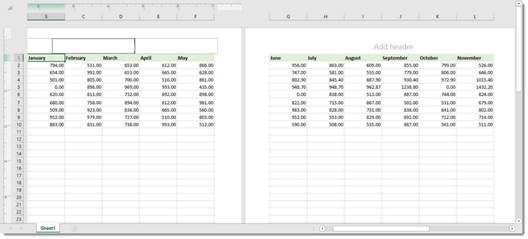
When you add Headers & Footers, Excel takes you to Page Layout view.
Also, when you add a header, the Header & Footer tools appear in the Ribbon.

As you can see above, you can add page numbers, number of pages, date, time, sheet name, a picture, etc.
We just added text.
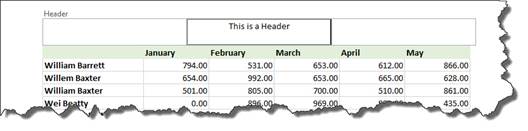
Click outside of the header to apply it to your worksheet.
Now, you can scroll down your worksheet to add a footer:

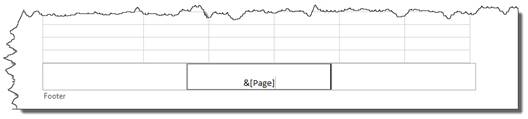
Click to add the footer.
Here we're going to add the page number.
This is what you'll see:
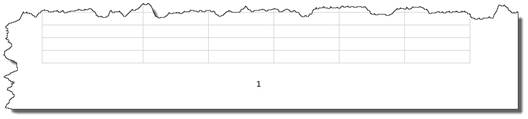
Click outside of the footer area, and your page number is added:
When you're finished adding headers and footers, go to the View tab, then click Normal view to exit out of Page Layout view.
About Printing Worksheets and Workbooks
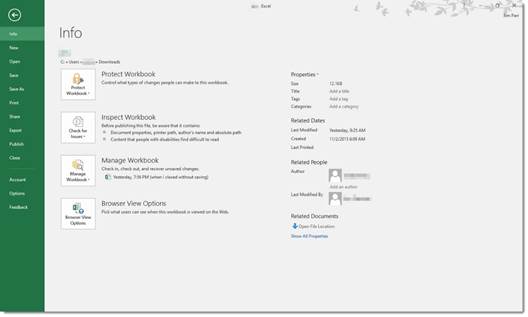
When you're finished creating the worksheets in your workbook, you may want to print them out. Printing in MS Excel is very easy. Excel makes it that way. To print your workbooks and worksheets, click the File tab to get to the Backstage area.
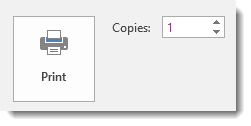
Click Print on the left.
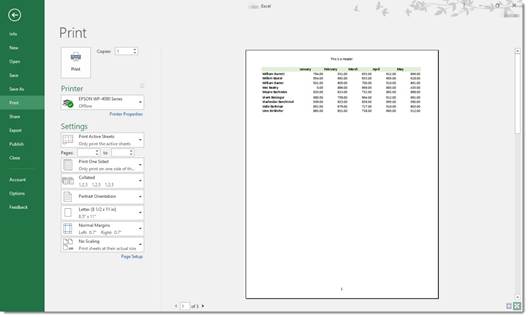
On the left hand side, you'll be able to set your print options.
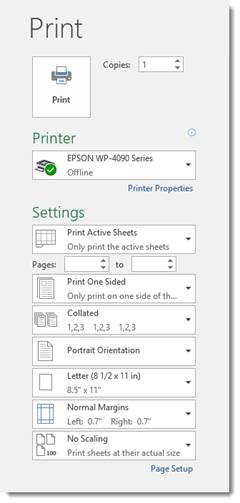
On the right hand side, you'll see the print preview. This is what your workbook is going to look like when you print it.
To prepare your workbook or worksheets for printing, first select your printer in the Printer section on the left.
Then, specify your settings.
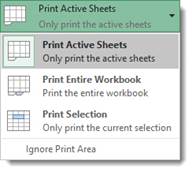
Under Print Active Sheets select what parts of your workbook that you want to print. This allows you to print all or just portions of your file. You can choose:
-
Print Active Sheets to print the worksheet that is currently active (or being displayed) in Excel.
-
Print Entire Workbook to print all worksheets in the workbook.
-
Print Selection to print just the cells that you have selected.
Under Collated, you can select how you want multiple copies to print. For example, let's say you print 10 copies each of Sheet1 and Sheet2. Do you want the printer to print 10 copies of Sheet1 first, followed by 10 pages of Sheet 2? Or would you prefer to print Sheet1, Sheet2, then Sheet1, Sheet2, etc., until all copies have been printed?
Next, decide if you want to print in Portrait (the shortest side of the paper is horizontal) or Landscape (the longer side of the paper is horizontal) orientation.
Finally, select Paper Size, Margins, and if you want to print the worksheets at their full size or scale them down to smaller sizes to fit easier on paper.
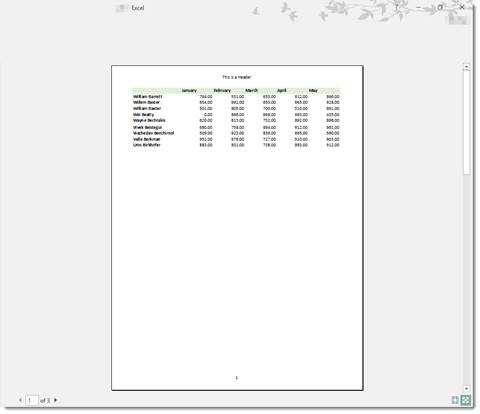
Now, let's look at the right side of the Print screen � or the print preview. In the right bottom corner, you'll see these two icons:

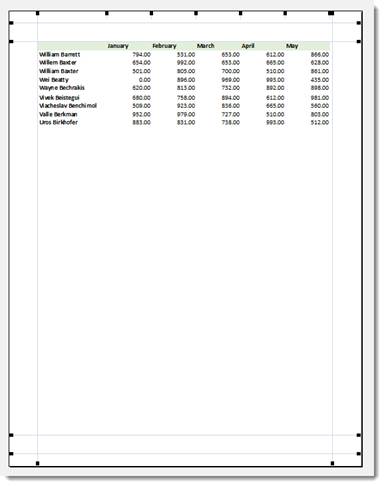
The first icon (from left to right) is the Show Margins icon. When you click this, Excel will show you the margins in Print Preview as you have them set:
The next icon is Zoom to Page (highlighted). This shows you the active worksheet as it appears at 100% magnification. As you can see below, the active worksheet takes up more of the screen and is easier to read, although you may have to scroll down or up to see the entire page.

You can flip through to view other worksheets by either entering a page number or pushing the back or forward arrows located in the left hand corner of the print preview area:
Setting Page Margins
Margins are the space around all edges of your spreadsheet when you print it. It's just the same as if you print a workbook in Microsoft Word or any other program.
To set margins, first select the worksheets that you want to print by clicking on the File tab, then clicking Print. We already covered print settings.

To set margins, click on the downward arrow beside Normal Margins.
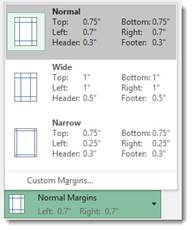
You can select one of the predefined margins, or click Custom Margins to customize your margins:
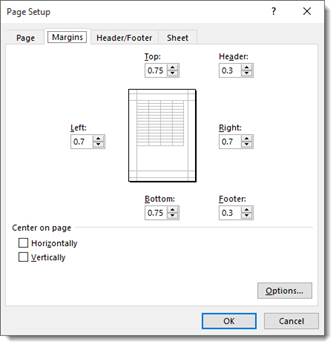
In the Top, Left, Right, and Bottom boxes, enter the margin size that you want. Margins are measured in inches.
If you want to center the page vertically or horizontally, you can check either box below the Center on Page section.
Setting Margins for Headers and Footers
In the same dialogue box as pictured above, you can also set margins for your headers and footers.
To enter a new distance from the top of the page to the header, change the number in the header box.
Note: Do not switch over to the Header/Footer tab.
To enter a new distance from the bottom of the page to the footer, change the number in the footer box.
When you're finished, click OK.
Select Print Area
Selecting the print area simply means that you will define the parts of the spreadsheets and workbooks that you want to print. If you do not wish to print an entire workbook or an entire spreadsheet, you'll need to do this.
To do this, click on the File tab, then Print.
Page Setup is a text link at the bottom of your print options, as circled in red below:

Click on Page Setup, then click on the Sheet tab in the dialogue box.
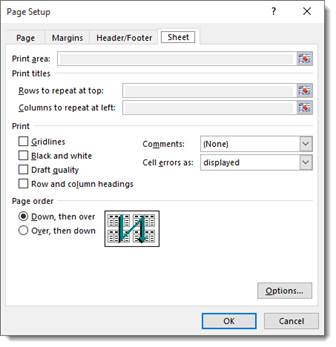
In the Print area box, select the range of cells that you wish to print. For example: A1: B10. This would print all cells in columns A and B, and rows one through ten.
In the Print titles section, you'll set the row that you want to set as a title. If it's row 1, you would type $1:$1. This row will print at the top of every page. You could also type $1:$2 to print rows one and two at the top of every page.
For columns that you want to appear on the left of every page, type, for example, $A:$C to print columns A through C on the left of every page in the Columns to repeat at left box.
In the Print area, you can select preferences, including if you want the gridlines to appear on your printed worksheet.
Using the Page order section, you can tell MS Excel 2016 in which order to print your sheets.
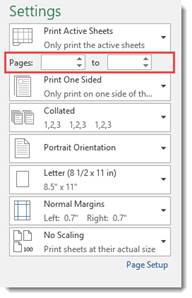
Print a Range of Pages
If you don't want to print the entire worksheet, you can set the pages that you do want to print.
Click the Print Active Sheets under Settings in the Print section of the Backstage area. We already talked about this earlier. Here you can print active sheets, the entire workbook, or a selection.
Below this box, you'll see Pages. You can enter the pages that you want to print. The pages must be within a range. For example: pages 2 through 5.
Printing
To print your MS Excel 2016 workbooks and worksheets, click the File tab, then after all your options are set, set the number of copies you want and click the Print button.