
In Excel 2016, charts and diagrams can show trends, averages, high and low points, and more. Not only do they make your worksheets more visually appealing, they also serve a definite function. They make it easier for your intended audience to sort out and understand the information you are presenting to them. This is especially true when dealing with data.
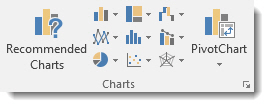
There are many different kinds of charts available in MS Excel--pie charts, bar charts, line charts, even organizational charts. What's more, MS Excel provides you with several tools to help you create them. You'll find those tools under the Insert tab in the Chart group:
Throughout this lesson, we're going to discuss how to create charts for your worksheets and workbooks. Even if you don't have any idea how to work with charts right now, sit back and relax. By the end of this lesson, it will all be easy.
Chart Recommendations
In prior versions of Excel, you had the Chart Wizard to help you create charts. That was a great tool and a great help, but Excel 2016 offers you something even better: Recommended Charts tool. This is under the Insert tab on the Ribbon in the Charts group (as pictured above).
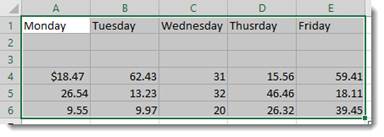
To create a chart this way, first select the data that you want to put into a chart. Include labels and data.
When you click on the Recommended Charts button, a dialogue box opens like the one pictured below.
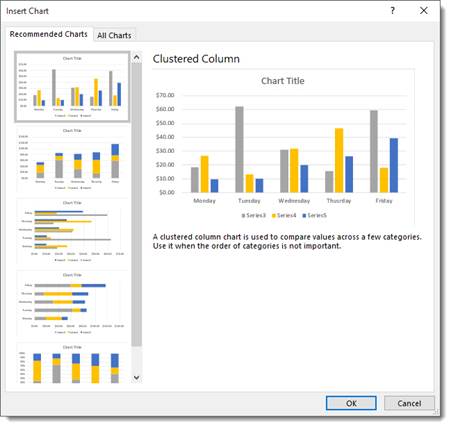
Based on your data, Excel recommends a chart for you to use.
On the left side of this dialogue box is all the chart recommendations.
On the right is a preview of what the chart will look like with your data.
Choose the chart that you want to use, then click OK.
The chart is embedded in your worksheet for you:

You'll also notice that the Chart Tools Format tab opens in the Ribbon:

The tools shown above will help you customize your charts. We'll discuss all of these options later in this lesson.
Types of Charts
To the right of the Recommended Charts button on the ribbon, you'll see this:
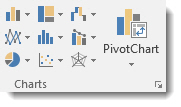
You can use these buttons and their dropdown menus to create these types and styles of charts. We're going to go from left to right, starting at the top left, and cover all the buttons above.
Insert Column or Bar Chart. This is the first button, located in the top left corner. With this, you can preview data as a 2-D or 3-D vertical column chart or as a 2-D or 3-D horizontal bar chart.
Insert Hierarchy Chart. Use this chart to compare a part to a whole or to show the hierarchy of several columns or categories.
Insert Waterfall or Stock Chart. The waterfall chart is used to show how a starting value is affected by a series of positive and negative values, while the stock chart is used to show the trend of a stock's value over time.
Insert Line or Area Chart. This lets you preview data as a 2-D or 3-D line or area chart.
Insert Statistic Chart. Use these charts to show a statistical analysis of your data. Chart types include Histogram, Pareto, and Box and Whisker charts.
Insert Combo Chart. These charts are best when you have mixed data or want to emphasize different types of information. You can preview your data as a 2-D combo clustered column and line chart � or clustered column and stacked area chart.
Insert Pie or Doughnut Chart. You can preview data as a 2-D or 3-D pie or 2-D doughnut chart.
Insert Scatter (X,Y) or Bubble Chart. Preview data as a 2-D scatter or bubble chart.
Insert Surface, or Radar Chart. With this, you can preview data as a 2-D stock chart that uses typical stock symbols, a 2-D or 3-D surface chart, or even a 3-D radar chart.
New Chart Types in Excel 2016
Word 2016 brings with it some new chart types to help you better illustrate data that you include in your worksheets.
These chart types include:
- Treemap. A treemap chart displays hierarchically structured data. The data appears as rectangles that contain other rectangles. A set of rectangles on the save level in the hierarchy equal a column or an expression. Individual rectangles on the same level equal a category in a column. For example, a rectangle that represents a state may contain other rectangles that represent cities in that state.
- Waterfall. As explained by Microsoft, "Waterfall charts are ideal for showing how you have arrived at a net value, by breaking down the cumulative effect of positive and negative contributions. This is very helpful for many different scenarios, from visualizing financial statements to navigating data about population, births and deaths".
- Pareto. A Pareto chart contains both bars and a line graph. Individual values are represented by bars. The cumulative total is represented by the line.
- Histogram. A histogram chart displays numerical data in bins. The bins are represented by bars. It's used for continuous data.
- Box and Whisker. A Box and Whisker chart, as explained by Microsoft, is "A box and whisker chart shows distribution of data into quartiles, highlighting the mean and outliers. The boxes may have lines extending vertically called �whiskers'. These lines indicate variability outside the upper and lower quartiles, and any point outside those lines or whiskers is considered an outlier."
- Sunburst. A sunburst chart is a pie chart that shows relational datasets. The inner rings of the chart relate to the outer rings. It's a hierarchal chart with the inner rings at the top of the hierarchy.
Creating Charts Using the Ribbon
By using the chart options we discussed in the last section, we can quickly and easily create a chart, then embed it into our worksheet.
Let's insert a bar chart into our worksheet below.
Start out by selecting the data you want to use in the chart.
Now click the Insert Column or Bar Chart button on the Ribbon.
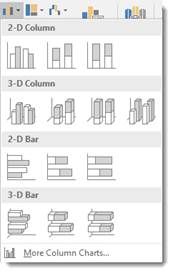
Choose the bar chart you want to use, or click More Column Charts.
If you click More Column Charts, this is what you'll see:
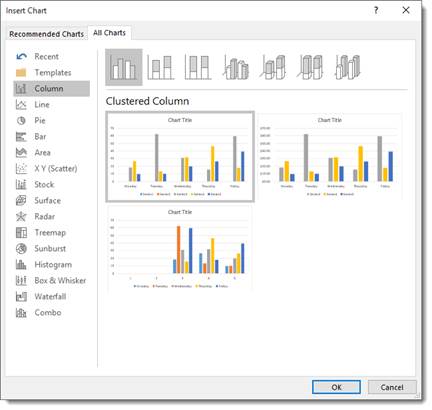
On the right side of the window, you will see a list of different chart types. Click Bar.
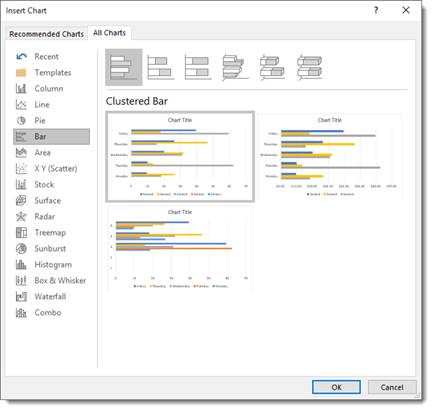
At the top, you'll see bar charts illustrated in gray. These are different styles of bar charts. You can click on any of the styles and see a preview of your data in that style of chart (in color) in the box below.
Select the type of chart you want, then click OK.
Excel embeds the chart in your worksheet for you:

Creating a Chart from Scratch
So far in this lesson, we've taught you how to create charts by selecting your data first. However, you don't have to do it that way (although it's the easiest). In other words, you can start to create your chart without selecting data first.
Let's learn how.
Click the Insert Column or Bar Chart button on the Ribbon again. However, this time, don't select any data before you do it.
Select the type of bar chart that you want to use.
You'll see a blank area on your worksheet where your chart will be embedded, and you'll also notice the Chart Design and the Chart Format tabs open on the Ribbon.

Click the Select Data button under the Design tab.

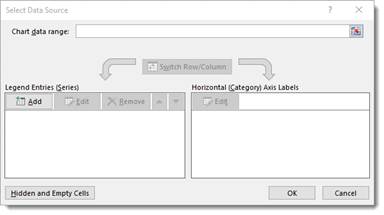
The Select Data Source dialog window will open.
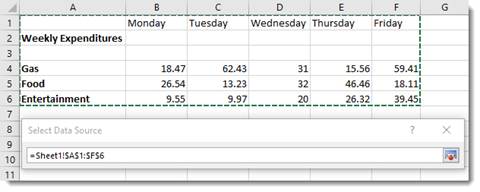
The data range refers to the number of cells you'd like to use. For instance, "=Sheet1!$A$1:$G$8" refers to cells A1 through G8 on worksheet one.
It's actually much easier to select the data range by dragging your mouse over it. To do that, click the Data Range button  next to the text box.
You'll see another box that looks like this:

This window is simply asking you to define the data range, and you can do it easily by clicking on a cell, holding the mouse button, and dragging it over all of the cells you'd like to add. MS Excel automatically enters the selected cell coordinates into the data range window. When you are finished, you can either click the button on the right  or push Enter.
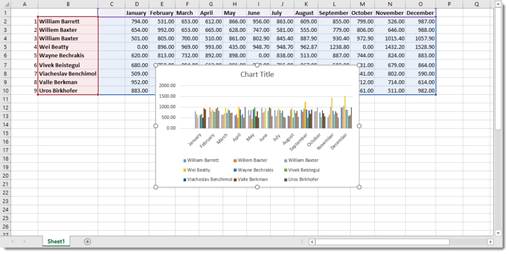
When you hit Enter, the chart appears in your worksheet:
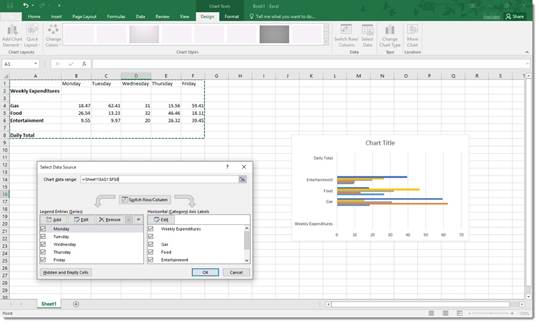
Now you can use the Select Data Source dialogue box to add legend entries � or edit and remove them.
You can also edit your axis labels.
Note that your axis labels were your row labels. These appear as colors representing each day of the week.
Your legend entries were your column labels. These appear on the left, vertically.
Your data appears as the bars.
If you want, you can switch rows and columns so that the days of the week appear on the left and your axis labels become legend entries.
Uncheck any entries that you don't want to appear in the chart.
Click OK when you're finished.
Creating Charts Using the Quick Analysis Tool
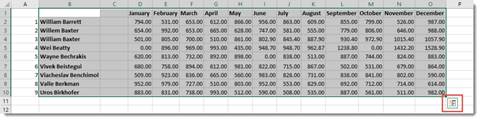
To use the Quick Analysis tool for creating charts, select that data that you want to include in chart. Click on the Quick Analysis tool button at the bottom right of the selected data (circled in red below):
Click Charts (circled in red):
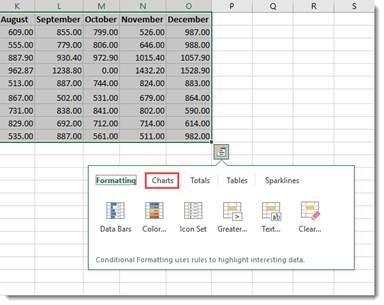
Select the type of chart you want.
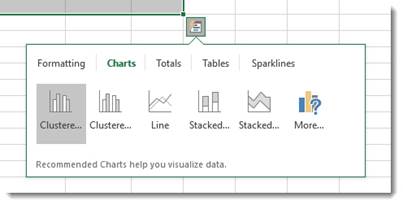
We're going to choose a clustered chart.
The chart is embedded in your spreadsheet:
Modifying and Moving a Chart
There are a number of ways to modify a chart after it's made.
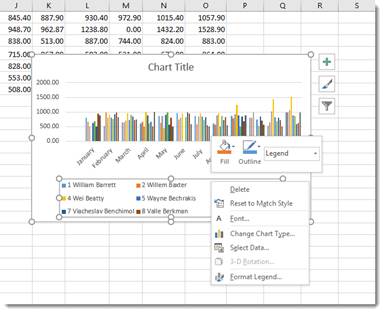
You can right click on the plot area as we've done below.
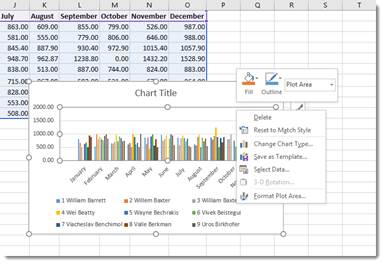
From the menu, you can delete the chart, reset, change the chart type, save the chart as a template, or select data to include in the chart. You can also format the chart area.
You can also click on the chart's title to change or format it.
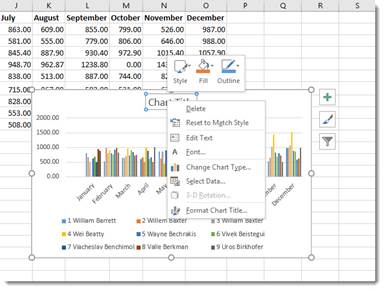
You can also right click on the legend or any other aspect of the chart to move it around and make changes. We're going to talk about modifying chart elements in another section.
If you want to move a chart, simply click and drag any of its bounding box borders:
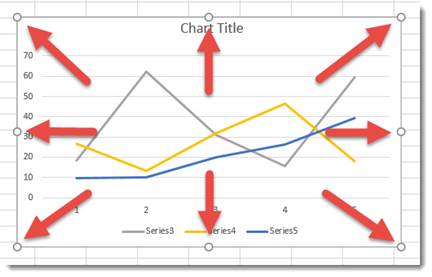
You can use the handles on the bounding box (the little circles indicated by the arrows above) to resize your chart. Drag it in to make it smaller, out to make it larger.
Chart Sheets
If you want a chart to appear on its own sheet in the workbook, simply click somewhere in the plot of the chart or select the data in your spreadsheet. Hit F11 on your keyboard.
The chart is moved to its own sheet as a clustered column chart.
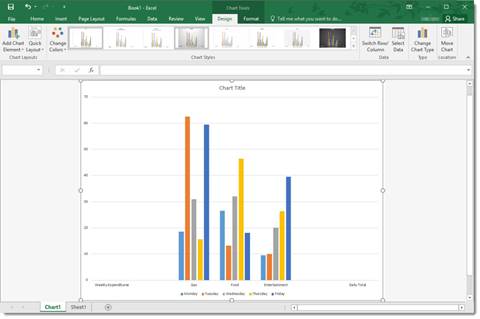
Note that the sheet is named Chart1 by default. You can change that name the same way that you change any other worksheet name.
The Design Tab and Customizing Charts
The tools on the Design tab help you to customize your charts so that you achieve the look, feel, and purpose that you want.
The Design tab is pictured below. You can mouse over any tools to learn their names.

We're going to cover all the aspects of the Design tab, starting with groups and breaking them down into tools.
Chart Layouts is the first group on the left. It contains the Add Chart Element tool and the Quick Layout tool. The Add Chart Element tool allows you to modify some elements, such as titles, data labels, legend, etc. The Quick Layout tool allows you to select a new layout for your chart.
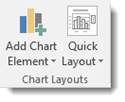
Chart Styles gives you different styles of charts to choose from. You can also change the colors used in your charts using the Change Colors tool.

The Data group allows you to reverse rows and columns in your chart. We also talked about doing this earlier in the lesson. It also gives you the Select Data tool, which we used in a prior section.
The Type group contains Change Chart Type. You can change the type of chart by using this tool.
The Location group has the Move Chart tool that allows you to move the chart to a different place within your worksheet � or to another worksheet.
Customizing Chart Elements with the Chart Elements Button
The Chart Elements button appears as a plus sign whenever your chart is selected.
In the snapshot below, you can see it to the right of our chart.
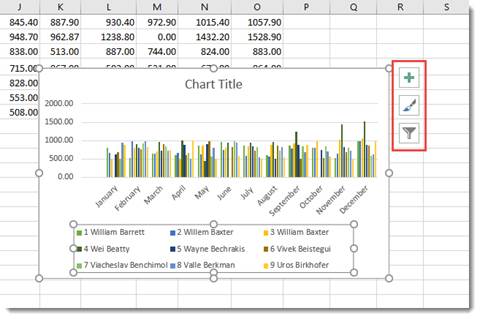
When you click it, you'll see a list of chart elements that you can add to your chart.
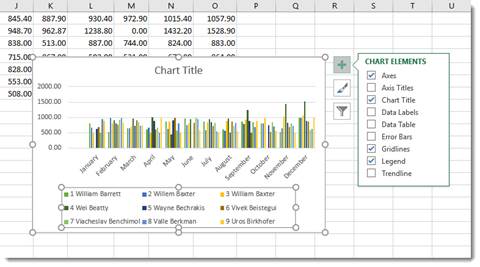
The elements that are in your chart have checkmarks beside them. You can uncheck them to remove the elements. To add an element, simply put a checkmark in the box beside it.
If you want to remove or add just a part of an element, or specify its layout as with Data Labels, you'll use the Chart Elements continuation menu.
Here's how to do this.
Start by putting a checkmark beside Data Labels (as an example).
You'll see an arrow appear to the right of the word Data Labels (indicated in red below.)
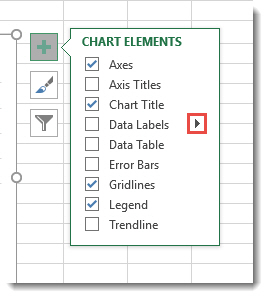
Click the arrow and you'll see the continuation menu.
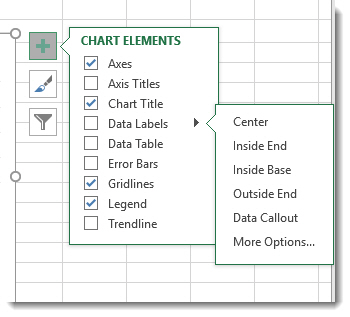
Select a layout option.
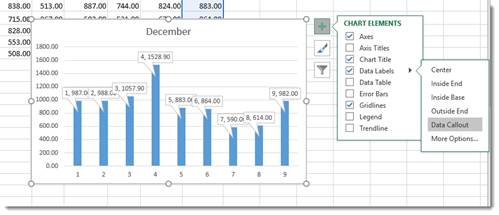
We're going to choose Data Callout.
Formatting a Chart
To format a chart, you can double click in the plot area or the chart area. If you double click in the chart area, it opens the Format Chart Area pane on the right side of your window. If you double click in the plot area, it opens the Format Plot area on the right side of your screen, as shown below.
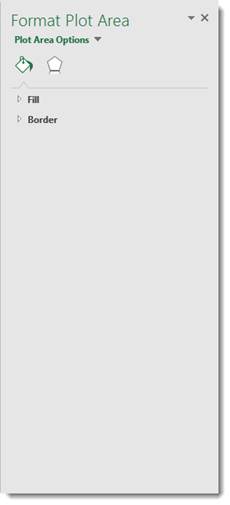
At the top of the pane, are the options.

Fill & Line looks like a bucket pouring green paint and allows you to format the fill and lines of your chart.
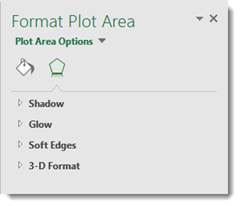
The Effects button is the one on the right, which allows you to add special effects to your chart to customize the look.
Take time to play around with the different formatting options for your charts. It's a lot of fun to do, and you will discover interesting combinations of effects that will produce charts you'll love.
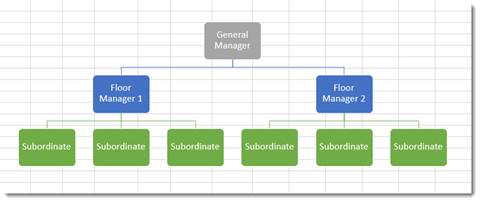
Organizational Charts or Diagrams with SmartArt
While an ordinary chart simply represents data, diagrams and organizational charts explain the causal relationship between elements. The following organizational chart, for instance, explains the relationship between managers and subordinates.
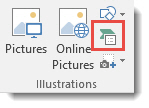
The simplest way to create an organizational chart is to click the Insert tab, then SmartArt. The SmartArt icon has been scaled down in Excel 2016, so we've circled it in red below.
The SmartArt dialogue box appears:
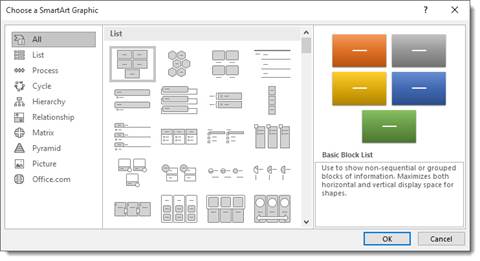
Choose the type of organizational chart or diagram you want on the left. You can choose a style from the middle section called List.
Once you choose your chart or diagram, click OK.
It appears in your spreadsheet:
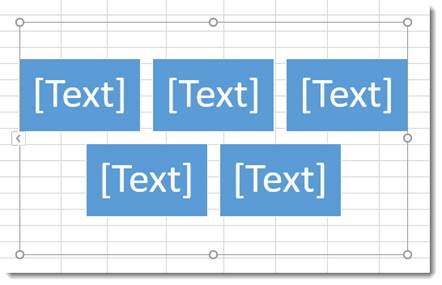
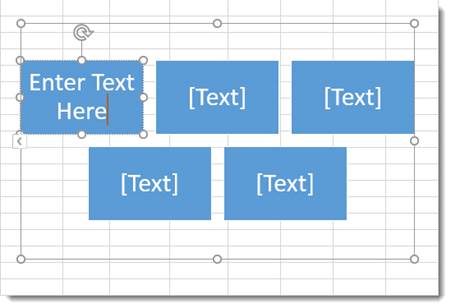
Click on the areas marked text to add your own.
In the Ribbon, the SmartArt Design and Format tabs appear.

You can use these tools to change the layout, apply a style, change the colors, and other formatting elements.
View Animation in Charts
One of the debated new features in Excel 2016 is the animation added to charts.
Here's how the animation works.
After you create a chart, then change the data for the chart in the spreadsheet, you can watch your chart and see it change too � in full animation.
In other words, if you have a bar chart, and you change the data so that a bar will be shorter, you can watch the bar slowly become shorter right after you change the data.
Sparklines
A sparkline is simply a small chart that's aligned with a row of your data. It typically shows trend information.
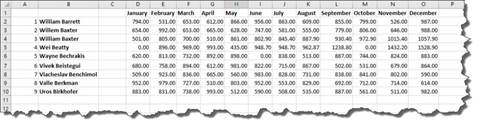
Let's learn how to add one in the spreadsheet below:
To insert a sparkline, go to the Ribbon, click the Insert tab, then the Sparklines group.
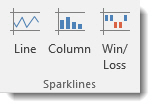
Choose the type of sparkline you want to add.
We're going to choose Line.
You'll see this dialogue box.
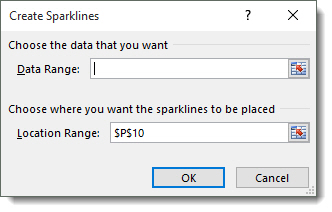
Select the cells in your spreadsheet that you want to use for your sparkline. Just drag your mouse to select the cells.
Next, enter the absolute reference for the cell where you want the sparkline to appear.
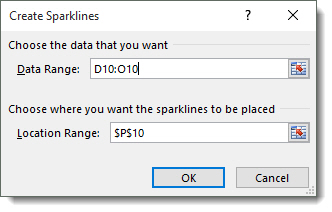
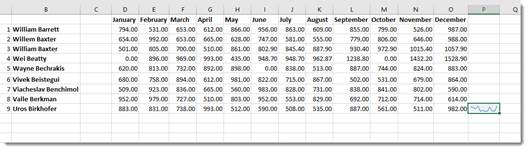
Click OK.
The sparkline now appears in the location you specified.
You can also format your sparkline using the Sparkline Tools Design tab that opens in the Ribbon.


