Composing New Emails
To compose (or write) a new email message, click the Compose button above your label list, as shown below.
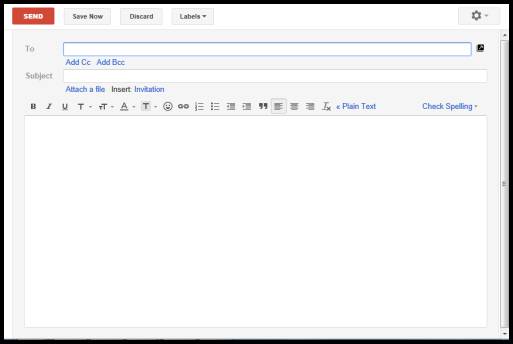
When you click Compose, you'll see the new message appear.
Add Recipients to a Message
To add recipients to a new message, start typing the recipient's email address in the "To" text field of the email (as shown above).
Note that if the recipient is one of your Gmail contacts, you do not have to type in the entire email address. In fact, you can just start typing the person's name. Gmail will pull up the email address for you.
Look at the snapshot below. We started to type the name of our recipient. Gmail noticed that the letters we typed matched the letters of either a.) one of our contact's names or b) one of our contact's email addresses and pulled up the information for us. It appears in a dropdown box below the "To" line.

Click on the correct recipient from the dropdown box. Gmail will then place that information in the "To" line for you.
CC and BCC
Below the "To" line, you'll see "Add Cc" and "Add Bcc." Cc stands for Carbon Copy. Bcc stands for Blind Carbon Copy. If you are not familiar with these, we'll explain what they mean.
A carbon copy is a copy of an email that you send to someone in addition to the intended recipient. For example, let's say you are sending an email to your boss Joe. You put Joe's name in the "To" box because the email you are going to compose (write) is to him.
However, you also want to send a copy of that email to your two coworkers Jack and Jill. The email is not TO them, but you want to keep them in the loop and aware of your email to Joe. In this case, you would add Jack and Jill's email addresses in the Cc line.
To add names to Cc, click "Add Cc."

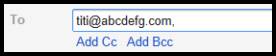
Now, type in their email addresses. Separate email addresses with a comma.
Bcc stands for Blind Carbon Copy, as we said. It's just like Cc, but it's blind, meaning that person's email address will not show to the other recipients. Here's an example. Let's say you are sending an email to a client. You want your boss to get a copy of the email; however, you don't want the client to KNOW that you sent a copy to your boss. Put your client's email address in the "To" line, then click Bcc. Type the email address of your boss.
Composing Your Message
When your client receives the email, he will see any email addresses that you've typed in the "To" and "Cc" lines, but he will NOT see your boss' email address - or anyone you've entered into the Bcc line.
After you've addressed your email to the proper recipient(s), add a subject line in the Subject Line text field, then click in the body of the email - or the big white space pictured below.
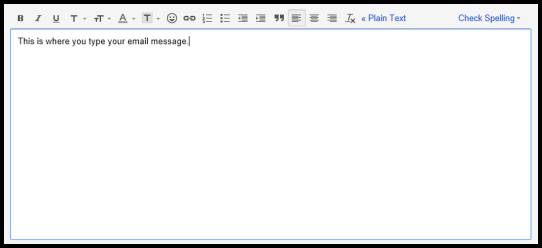
When you click in the white area, a cursor will appear. You can then start typing your email message.
Formatting Messages
Above the body of your email, you'll see icons and buttons. These buttons allow you to format your email messages.

Formatting means adding boldface, changing the font, using bullets, and much, much more - as you are about to learn.
Let's go over all the formatting buttons pictured above and learn what they do. Some of these you may already recognize from word processing programs.
Boldface, Italics, and Underline
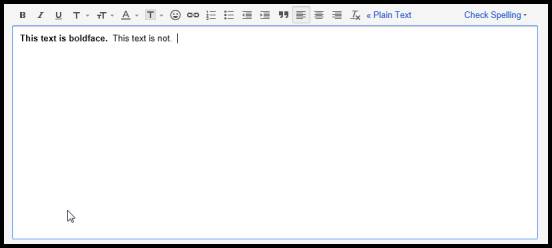
The first one you see (going left to right) is an uppercase B. It looks like this:  . This is for boldface type. Select the text you want to boldface by holding down your left mouse button and dragging it over the text.

Then click the boldfaced button. The text will now appear in boldface.
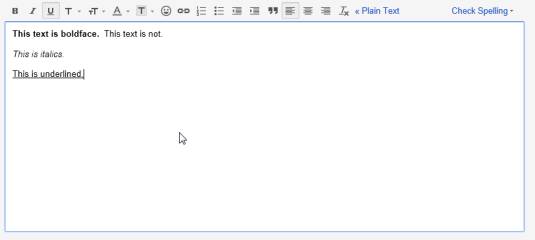
You can also put text into italics by clicking  or underline it by clicking
  . Just remember to select the text first by holding down the left mouse button and dragging it over the text you want to format.
Change Font Type, Size, and Color
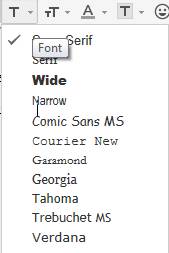
If you click the downward arrow beside the uppercase T button ( ), you can change the type of font. When you change the type of font, you change the way the letters look on the screen. You can see the different fonts and how they'll look in the dropdown list. Sans Serif is used by default.
You can select a font before you start typing to apply it to the entire email, or you can select parts of text, then click the "T" button and change the font type.
Click the downward arrow beside  to change the font size, as shown below.

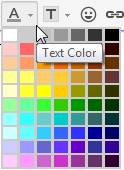
Click  to change the color of the font. Again, you can select text to apply the changes to. You can use several different font types, sizes, and colors in one email if you want.
Click the downward arrow beside the next "T" to choose a highlight color.
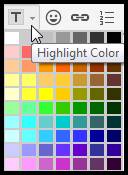
This highlights text, as demonstrated below.

Add Emoticons
Emoticons are little smiley faces that are used in instant messenger systems, in texts, and even in emails. The most common emoticon is the little smiley face that you can create using a colon and end-parenthesis.
You can easily insert emoticons into your Gmail by clicking in the body of the email at the location where you want to add the emoticon, then clicking the Emoticon button. Simply select which emoticon you want to insert and click on it. Gmail inserts it into the email for you.

Insert a Hyperlink
A hyperlink is a link to a URL or website address. Let's say you want to insert a link to Google.
Start by selecting the word or piece of text that you want to turn into a link. In the snapshot below, we want to turn the word "Google" into a link, so we've selected it.

Now click the  button.
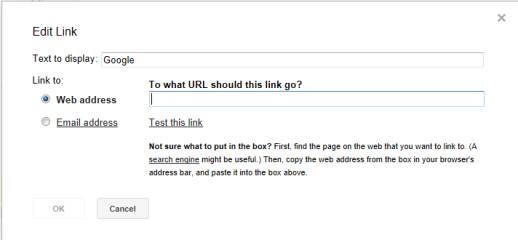
Now, type the web address in the Web address box. You can also choose to make it a link to an email address. If you want, you can test the link to make sure it works.
Click the OK box when you are finished.
Bulleted and Numbered Lists
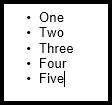
Bulleted lists are lists of items. A symbol (usually a dot) precedes each item, as shown below.
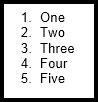
A numbered list is a list of items. Each item is numbered with the first item in the list given the number 1, as shown below.
To create a bulleted or numbered list, select the text that you want to turn into a list. This can be single words, sentences, or paragraphs. Then click either the numbered list or bulleted list button. They are pictured below. The numbered list button is on the left.

Indentions
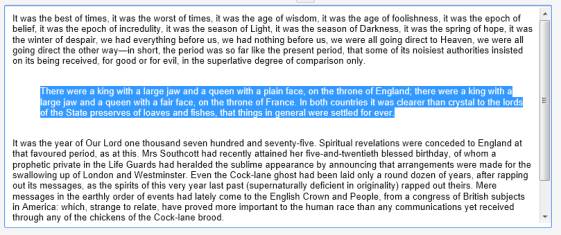
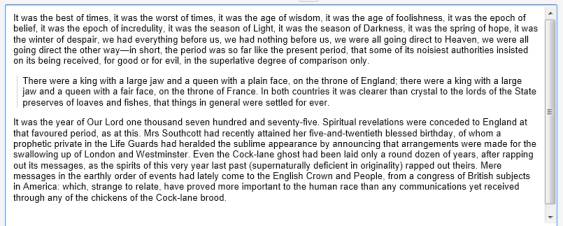
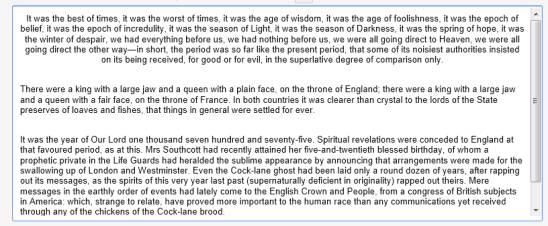
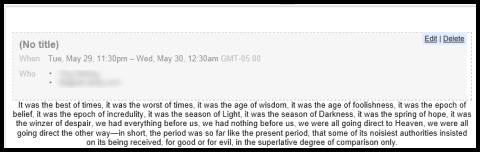
You can also indent selections of text. We've inserted an excerpt of Charles Dickens' "A Tale of Two Cities" to use in the body of this email so we can demonstrate indentions.
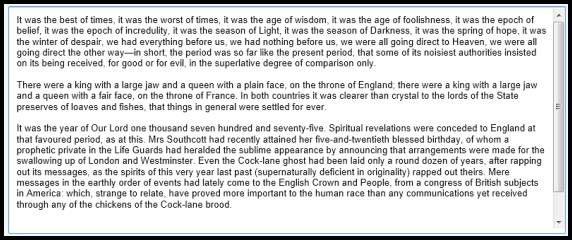
Let's say we want to indent the second paragraph.
First, select the text in the second paragraph.

Then click the Indent More button  .
.
As you can see, the text is now indented. We can increase the indentation by clicking the Indent More Button again.
We can also decrease (or remove) the indentation by clicking the Indent Less button  .
.
Quote
You can also turn text into a quote. Select the text that you want to turn into a quote. We've selected the second paragraph again. Then, click the Quote button  .
.
Align Text
You can also align text to the left of the page, to the right of the page, or to the center. By default, text is aligned to the left of the page. This means when you type, the text starts at the left margin and goes to the right margin.
You can align text to the center or to the right by first selecting the text, then choosing to Align Right  or Align Center
  by clicking on the button. This is the button for Align Left:
Here's how the first paragraph of our text looks when we align it to the right:

And aligned to the center:

Remove Formatting
If you want to remove formatting from your message, select the text that you want to remove the formatting from and click the  button.
Let's remove formatting from the second paragraph of our text.
When you select text, then click to remove formatting, it will remove ALL formatting including boldfaced fonts, quotes, font colors, etc.
Plain Text
You can click Plain Text ( ) to convert your email message to plain text. You'll see this message box appear if you click "Plain Text":
Check Spelling
Once you are finished composing your email, you can have Gmail check it for spelling errors.
Click Check Spelling ( ).
).
Select a language from the dropdown menu. If you want U.S. English, scroll down and select it.

Click on Check Spelling again, if needed, to run spell check.
Any spelling errors will be highlighted in yellow.
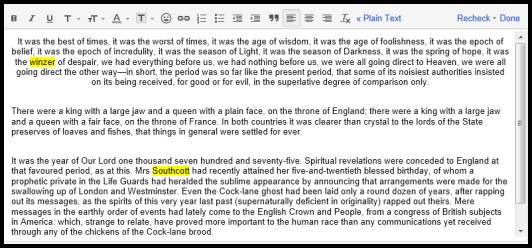
Correct the errors. Then, select Recheck or Done, if you are finished correcting the errors.
Adding Attachments
An email attachment is a file on your computer that you attach to the email before you send it to a recipient. The recipient will receive your email message with the attachment, which they'll have to open. You can attach images, documents, spreadsheets, audio, and video.
To add an attachment, click Attach a File (below the Subject Line).

A window will pop up that will allow you to search your computer for the file you want to attach.
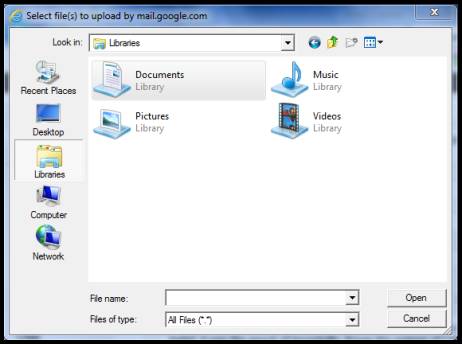
Locate the File, select it by clicking on it, then click the Open button.
You'll then see the file listed below the subject line of your email:
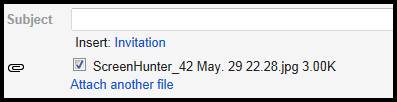
You can add more files if you want using the same steps.
Insert an Invitation
You can create an invitation to a meeting, event, or even a party in Gmail. Simply click on  below the subject line of your email.
You'll then see this window:
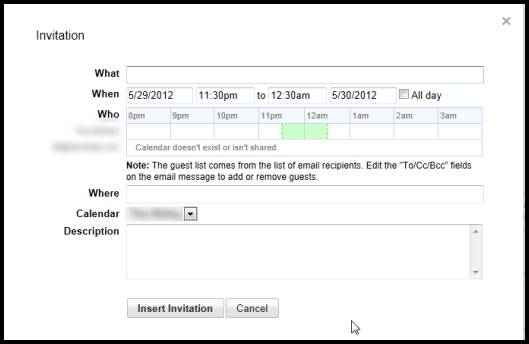
Enter a name for the Invitation in the "What" box. It might be "Employee Meeting" or "Birthday Party."
Then, edit the date and time in the "When" box.
Gmail fills in the "Who" by adding all the email recipients. If they have a shared Gmail calendar, you'll be able to see if they're free on the date you've entered in "When." If they don't have a shared calendar (as our second recipient does not), Gmail will let you know the calendar does not exist or it isn't shared.
Next, add where in the "Where" box.
Select the calendar that you want to add the date to.
Then, you can enter a description.
Click the Insert Invitation button when you are finished.
The invitation will then be inserted into the body of your email.
You can then edit or delete the invitation.
Saving Messages as Drafts
There may be times when you compose an email, but you don't want to send it right away. If this is the case, you can save the message as a draft.
The good news is that Gmail automatically saves messages as you write them. It saves your messages every few minutes. You'll know if Gmail has saved a draft of your message by looking at the top of the message. If it's been saved, you'll see:

You can also see that the button next to the Send button is not active, and it says Saved, meaning your message has been saved.
If Gmail hasn't had time to save your message for you, you can click Save Now, as shown below:

You can also click Discard to delete any message. If Gmail has saved it as a draft, it will also delete the draft.
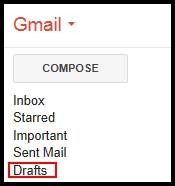
To retrieve a draft, go to the left side of the Gmail window and click Drafts.
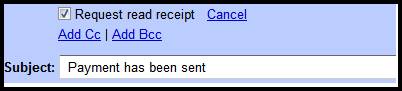
Request a Read Receipt
Read receipts are not available in personal Gmail accounts. They are only available for business, government, and education accounts.
A read receipt is a notification that's delivered to you once the recipient opens your email. It just confirms that your message was seen, but you have no real way of knowing if they actually read it.
To request a read receipt, compose your message as normal. Before you are ready to send it, put a checkmark in the box that says "Request Read Receipt." It's located right below the "To" line. Gmail will request a read receipt from all recipients in the "To" and "Cc" lines.