Over the years, Word has become the end-all be-all of word processing programs. Part of the reason you can do so much is because it offers so many tools and methods to format � or customize -- your documents. We've only just begun discussing the various capabilities.
Text Effects
Text Effects are visual effects that you can apply to words in your Word document. Shadow, glow, and reflection are examples of the visual effects that you can add. That said, when you add visual effects to your text, you want to select a visual effect that matches the look you want to create. You don't need to worry about what type of effect is.
To add visual effects to text, go to the Home tab and look at the Font group. You'll see this button:
Using this tool, you can apply visual effects to text. You can turn the word Lorem Ipsum in Calibri font into:

Or you can turn it into:

Let's learn how to add text effects.
Select the text for which you want to apply a visual effect.
Click the downward arrow beside the text effects button. This gives you all your options for adding text effects.
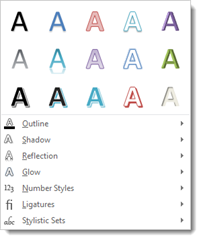
At the top, you can pick a text effect preset. These are visual effects that have already been created for you. If you click on a text effect preset, it will be applied to the selected text.
If you want to customize your own visual effect, then take a look at the bottom half of the dropdown menu.
You can pick:
-
Outline which will create an outline around the letters of your text.
-
Shadow which will add a drop shadow to your text.
-
Reflection which will create a reflection of your text.
-
Glow which will add a glowing effect to your text.
-
Number Styles which will apply a style, not a colorful effect, to numbers if you have numbers selected.
-
Ligatures are decorative or joined characters. They are available for certain characters in certain fonts. For example, it can join an "f" and an "I' in a word such as "fill."
-
Stylistic Sets allow you to use a font's alternate characters. For example, you can replace a lowercase "b".
By clicking on any of these effects in the dropdown menu, you can see the various options for the effect.
Below are the options for the outline effect.
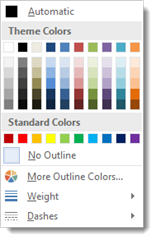
As you can see, you can choose the outline color or the weight of the line that serves as the outline. You can also choose to use dashes as the outline.
Take a look at the example below. We used orange as the outline color and selected dashes.

As you can see, our font color remained black, but there is a thin, orange outline around our text.
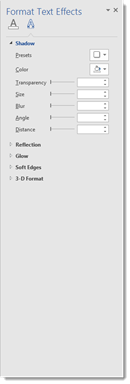
Next, let's apply a shadow. Below the options for the shadow effect are pictured.

Select the text for which you want to apply a shadow, then choose the type of shadow you want to apply.

If you want to change the side of the shadow or even the color, click Shadow Options at the bottom of the menu.
The Format Text Effects pane opens up on the right side of your Word document.
Take some time to experiment with all the different options, and learn what they do.
The Format Painter
The Format Painter tool is located under the Home tab in the Clipboard group. It looks like this:

The Format Painter looks like a broom, but it acts more like a paintbrush. Using it, you can "borrow" the formatting from certain texts or paragraphs, then apply that same formatting to text somewhere else in your document. It operates a lot like the "copy" function in Word, except instead of copying text, you're copying formatting.
To use the Format Painter, place your mouse cursor in the middle of the text that has the formatting you want to copy.

As you can see above, we placed our cursor in the middle of the text.
Next, click the Format Painter button. You'll notice that the cursor changes to a paintbrush.
To apply the formatting to another area of your document, select the text you want to paint it with the borrowed format.
Bulleted and Numbered Lists
The types of lists you can create are really simple and easy to remember. Bulleted lists have bullet points, numbered lists have numbers, and outline lists can contain letters and numbers. We're going to learn how to create all three.
Creating a Bulleted List
To create a bulleted list, first either select or create a list in your document.
Select the list.
Go to the Paragraph group under the Home tab. Click on the Bullets button. It looks like this:

Your list now looks like this:
If you click the dropdown arrow beside the Bullets button, you can select another type of bullet.
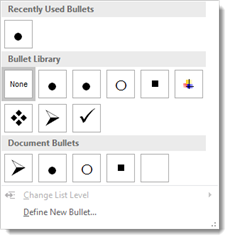
You can select an already-bulleted list, then choose and apply a different type of bullet � or you can select your un-bulleted list, then click the dropdown arrow to select the type of bullet you want to use.
If you want to use your own bullet from a file on your computer, select Define New Bullet from the dropdown menu.
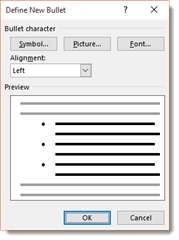
You can choose to use a symbol, picture, or font as a bullet.
Creating a Numbered List
Instead of adding bullets, you can also number your list, such as in the snapshot below.
To create a numbered list, select your list, then click the Numbering button in the Paragraph group under the Home tab. It looks like this:

Just as with bullets, you can click the downward arrow next to the Numbering button to choose from different number formats.
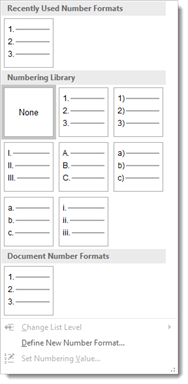
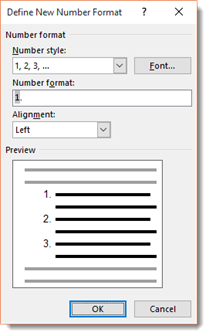
If you want to create your own number format, click Define New Number Format in the dropdown menu.
Creating a Nested List
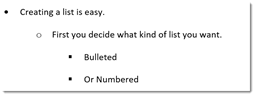
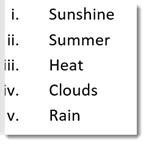
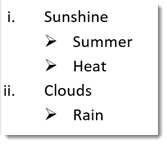
A nested list is defined as a list with several indentions in the text. Nested lists are often used for outlines. A nested list looks like the example below:
To create a nested list as the one above, click the Multilevel list button in the Paragraph group under the Home tab. It looks like this:

If you want to change the formatting of the nested list, click the dropdown arrow beside the button.
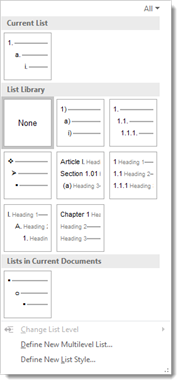
Select Define New Multilevel list to create your own formatting.
Once you've formatted your multilevel list, click on the Increase Indent button to create an indention. To do this, place your cursor before the text you want to indent. Remember, the Increase Indent button is found in the Paragraph group and looks like this:

Our nested list now looks like this:
If bullets aren't added to the lines you've indented, place your cursor before the text in a line, then click the Bullets button. You can also select the text that follows a bullet to change the bullet.
Sorting Lists
Once you create a list, you can also sort it alphabetically ascending or alphabetical descending. If you need to have your list in alphabetical order, this will be a huge time saver because you don't have to worry about putting things it alphabetical order as you type. Word 2016 will do it for you.
To sort a list, start out by selecting the entire list or the part of the list that you want to sort.
Go to the Paragraph group under the Home tab. Click the  button.
You will then see the Sort Text dialogue box.
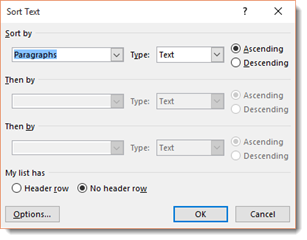
Put a check by either Ascending or Descending.
It's really that easy.
Take a look at our sorted list.
The original bulleted list looked like this:
- Mango
- Orange
- Apple
- Fig
- Grape
- Apricot
But when you select the text in the list, then click , the list is alphabetized for you.
Take a look:
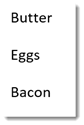
- Apple
- Apricot
- Fig
- Grape
- Mango
- Orange
You can sort paragraphs of text or lists using the sort ascending or sort descending button.
Add Borders or Shading to a Paragraph
Just as you can add a border or a color to an entire page, you can also add a border or color to an entire paragraph or a group of paragraphs.
To do this:
Click the Home tab on the Ribbon.
Click the Borders button in the Paragraph group. The button looks like this:

A dropdown menu will open and allow you to select what type of border you want.
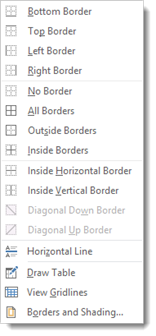
As you can see, you can specify where you want the borders to appear around your paragraph, such as top, bottom, right, or left.
You can also choose to add a horizontal line.
To apply color to a selected paragraph, click Borders and Shading in the dropdown menu.

Under the Borders tab, you can specify the setting, style, color, and width of your border.
Click the Shading tab to select a shading for your paragraph.
Click Fill and select a color.
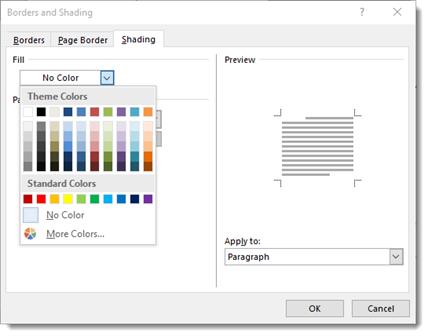
Take a look at the snapshot below. We added borders to the top, bottom, right, and left side of our paragraph, then added a light blue fill.

NOTE: To add shading, you can also select the text, then click the Shading button in the Paragraph group. It looks like this:

Adding Tab Stops
Tabs are used to line up texts, create lists, and even create indentions. You can see the default tab stops in your document by looking at the ruler. To look at the ruler, go to the View tab, then put a checkmark beside Ruler in the Show group.

The tab stops appear as little black symbols on the ruler.
To set a tab stop on the ruler, make sure the left tab stop is displayed on your ruler. It looks like this:

Next, click on the ruler at the spot where you want to add the tab stop.

You can see the little black "L" looking thing before "1" on our ruler, as circled above. This is a tab stop.
Now, if we hit the Tab key, Word will take us to our first tab stop.
Formatting your text and paragraphs in Word can start to seem like a daunting task. We've already covered so many ways that you can format your document, it can seem too overwhelming to even try to do it yourself. You have to think about font size, font type, font color, line spacing, and the list goes on.
Word offers you five different types of styles:
1. Paragraph. This style contains paragraph and text formatting such as indents, tabs, text size, and fonts.
2. Character. This style only formats characters.
3. Linked. This style can be applied to paragraphs and characters.
4. Table. This style is applied to tables to add lines and shading.
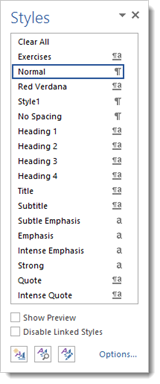
You'll find the styles that Word offers under the Home tab in the Styles group, as pictured below.

Please note that the Styles menu shown above only contains Word's recommended styles.
Click the arrow in the lower right hand corner of the Styles group to bring up the Styles task pane, as pictured below.
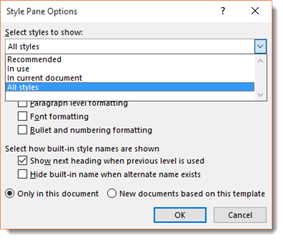
Click Options in the lower right corner.
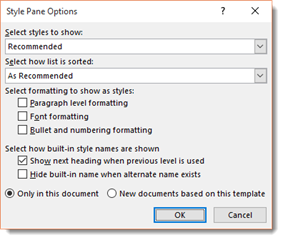
Choose "All Styles" from the "Select Styles to Show" dropdown box to show all styles on the Ribbon in the Styles group.
Applying a style is the same as working with any other formatting. The big difference is that when you apply a style you are applying several formats all at once.
You can apply a style by selecting the text, then choosing the style you want.
You can also choose a style, then start typing.
Heading styles will be a big deal to you if you're creating longer documents such as books, etc. Longer documents usually contain a Table of Contents. You need to add headings to your document if you want to be able to create a Table of Contents.
It's important that you know that Word offers you several heading styles.
Heading 1 is for the document's main parts, such as chapter titles.
Heading 2 is a step down the ladder. You may use Heading 2 to create sections of a chapter.
There is also Heading 3, 4, etc.
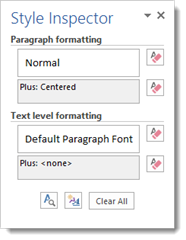
The Styles Inspector is located at the bottom of the Styles task pane. It looks like this:

Word also allows you to create your own styles. This can come in handy, for example, if you write your company's newsletter every month and want each newsletter to be formatted the same way.
To create your own style, format the document.
Next, mark your paragraph as a block � or select the text that contains the formatting you want to use to create a new style.
Go to the Styles group on the Ribbon under the Home tab, and click the downward arrow in the Styles Gallery.

Select Create a Style.
Type a name for your style.
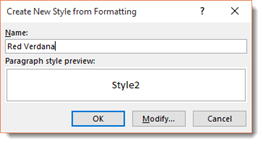
For our example, we selected text that was formatted with a red Verdana font.
Click OK.

You don't have to use existing text in a document to create a style. You can create a style from scratch �even if you're staring at a blank document.
Go to the Styles task pane and click the New Style button. It looks like this:

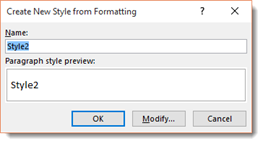
You will then see the Create New Style from Formatting dialogue box.
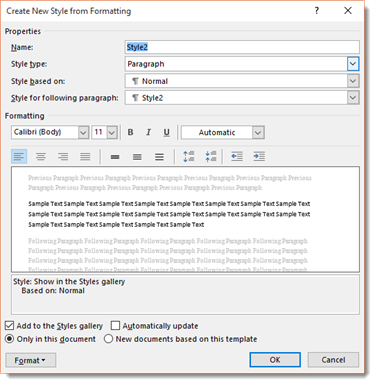
Enter a name for your new style.
Choose if your style type is paragraph or character. For example, a character style is red, Verdana, 12 pt.
Now, select an existing style that you want to use for the basis of your new style. If your new, custom style shares some features of an existing style, then that's the style you want to use in the Style Based On field.
Next, you can set your formatting using the controls, such as font, font size, bold face, etc.
If you want to modify a style, you can do that using the Styles task pane.

Simply hover your mouse over any of the styles listed.
You'll see an arrow appear to the right of the style.
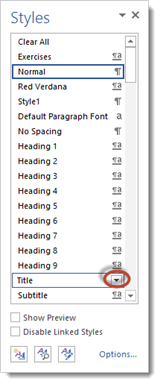
In the snapshot above, we hovered our mouse over the Title style and the arrow appeared.
Click on the arrow and select Modify.
You will then see the Modify Style dialogue box.
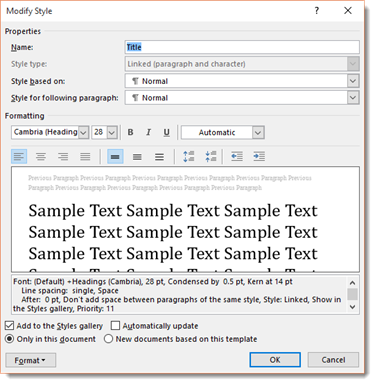
You can see the formatting involved with this style in the dialogue box above. Make the changes you want.