Create Envelopes and Labels
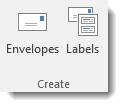
To format text for an envelope so you can print the envelopes with addresses and other information on them, go to the Mailings tab.
Select Envelopes from the Create group.
Enter the information for the envelope.
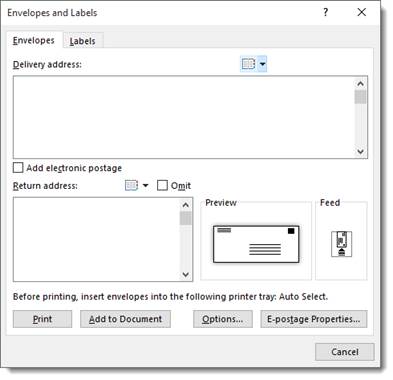
Fill out the information, then print or add to the document.
You can also click Options to set the envelope size and printing options.
You will see the same dialogue box when you create labels. Enter the information for your labels and either add it to the document or print it.
Creating a List for Mail Merge
If you need to send out a letter to a bunch of different recipients, as in a form letter, you can use Mail Merge to do this without typing the same letter over and over. Mail merge will use fields in places where you want different information filled in for each recipient. For example, the field:
City and State would be filled in with your recipient's City and State when mail merge is executed.
The first thing you need to do is create a list of recipients for mail merge. To do this, go to the Start Mail Merge group under the Mailings tab and click Select Recipients.
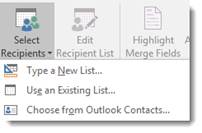
From the dropdown list (shown above), you can create a list by typing out a new list, by using an existing list, or by creating a list from your Outlook contacts.
Select Type New List for this example.
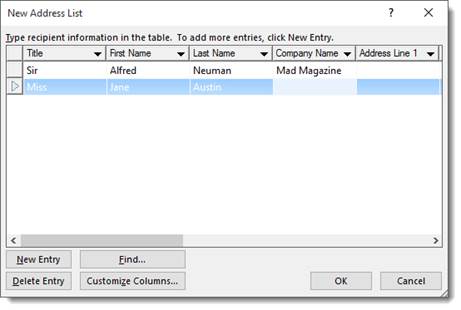
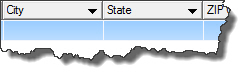
Now you can enter your recipients in the columns. If you need to customize the columns and add new fields, click Customize Columns.
Click OK when you are finished.
Mail Merge
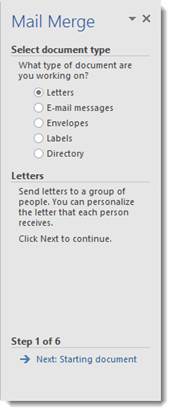
To execute Mail Merge, simply select Start Mail Merge from the Start Mail Merge under the Mailings tab.

Choose the appropriate selection (letters, emails, etc.) from the dropdown menu, and left click your mouse. Microsoft Word will merge your lists with your documents. You can also select Step by Step Mail Merge Wizard. This wizard will appear on the right side of the screen and will walk you through each step.
Comparing, Merging, and Protecting Documents
The Document Inspector
The Document Inspector lets you check your documents for hidden properties and personal information before you share it with other people. Since you may share your document and have lots of people viewing it, it is nice to make sure all your personal or private information is also not out there for everyone to see.
To use the Document Inspector:
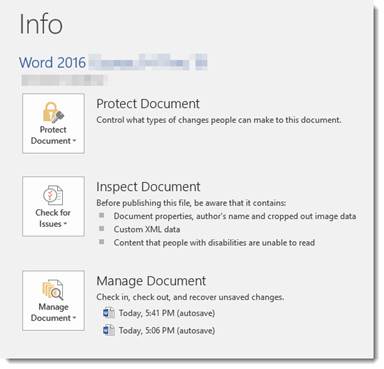
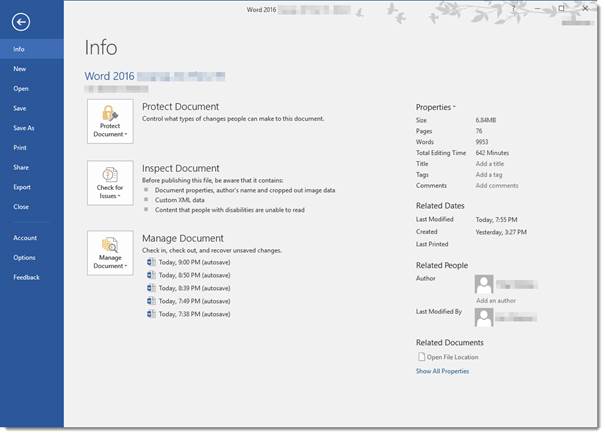
Click File, Info, then click the Check for Issues button, then Inspect Document.
You will then see this warning dialogue box.

Make sure you save the file by clicking Yes.
You will then see this window:
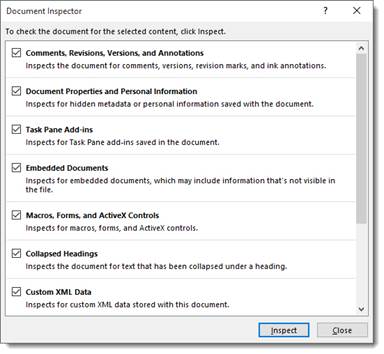
This shows you everything the Document Inspector can check. Everything is checked by default. Uncheck anything you do not want the inspector to look for, then click the Inspect button.
When Microsoft Word is finished checking your document, you will see a results window:
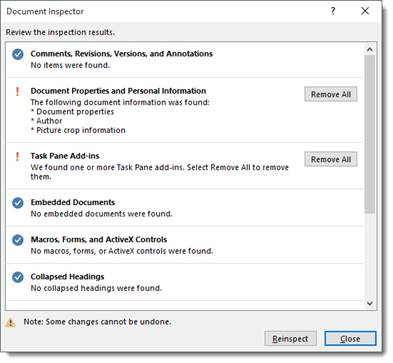
Click the Remove All button to remove the information that the inspector found. When you are finished, either click Reinspect to make sure everything was fixed, or click Close.
Compare Documents
Microsoft Word 2016, like previous versions, allows you to compare and merge edited documents. These features can be found in the Review tab in the Compare group.
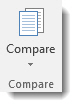
The Compare and Merge features are located under the same dropdown menu. Simply select compare in the Compare group and select whether you want to compare or combine (merge) the two documents.
To compare two documents:
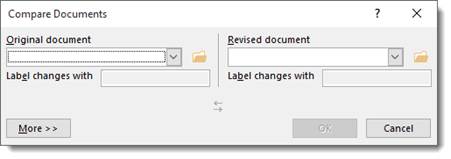
- Select Compare from the dropdown menu.
- It will ask you to select an original document, then a revised version. Keep in mind that you must compare an original and a revised or different version. Microsoft Word will pick out changes and differences in the documents.
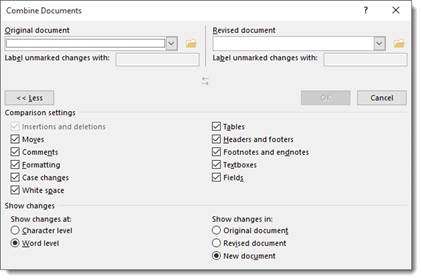
Click on More to see comparison options.
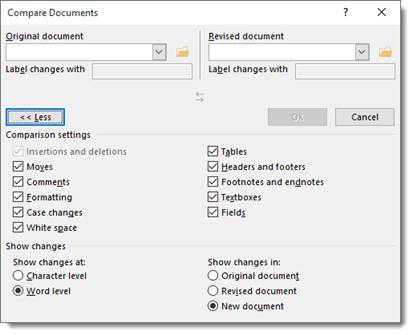
You can choose how you want changes and differences between the documents noted, and if you want them in one of the two documents or in a totally different document.
Combine Two Documents
Combining documents gives you the same dialogue box as Compare, except the two documents you enter will be combined.
Protect Document and Restrict Editing
Microsoft Word 2016 also lets you protect your documents so that nobody else can edit, reformat, or make changes to your it. This is nice if you are creating a document or file for work and you do not want changes to be made. You can also restrict access so that only people you choose can view your document.
To protect your document:
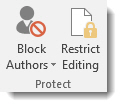
Go to Review tab in the Ribbon.
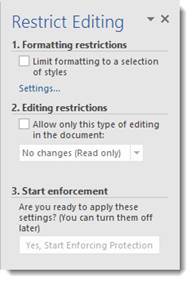
- Select Restrict Editing from the Protect group.
A dialogue box will open on the right side of the screen. From there, you can name the restrictions, as well as decide when you will start enforcing them.
Password Protect
Microsoft Word 2016 gives you the ability to password protect your documents to keep unauthorized people from viewing them.
To password protect a document:
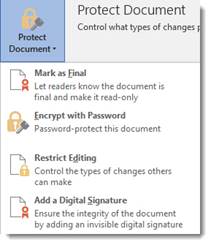
Click the File tab, then click Info on the left, then click the Protect Document button.
Choose Encrypt with Password from the dropdown menu.
Enter a password in the text field, then click OK. Just remember that you will not be able to recover the password, so make sure it is one you can remember.
Macros
Macros are defined as advanced editing features that you can utilize to record menu selections. When you record these menu selections, you can complete a series of actions quicker and easier. For example, instead of clicking on several buttons and menu selections to add text to a document, you can record a macro and do all this in one step. The �center align text' button on the Home tab is a macro. You can create macros just like this to format text size, highlight text, and anything you need to do within a document. Instead of clicking on tabs and going through groups, when you create a macro, getting your task done is as simple as a click of a button.
To record a macro:
- Go to the View tab on the Ribbon.
- Click Macros in the Macros group.
- Click Record Macro from the dropdown list.
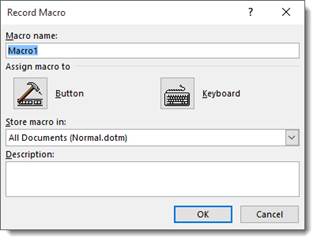
You will then see this window:
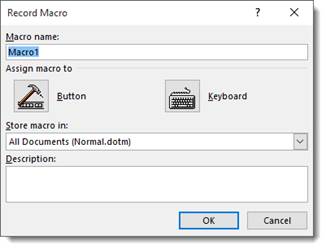
- Enter a name for the macro. Do not add spaces.
- Click whether you want it assigned to the Quick Access Toolbar or the keyboard. For the Quick Access Toolbar, click Button, then Customize Quick Access Toolbar.
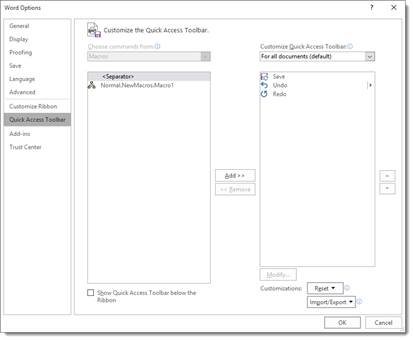
- Choose the document for which you want to use the macro.
- Under choose commands, select the macro which you are recording.
- Click Add then click OK to record the macro.
- Perform whatever actions you want recorded in the macro
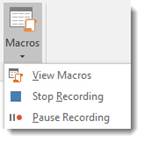
- Click Macros
- Click Stop Recording Macros
To create a keyboard shortcut:
- Click Macros, then Record Macro, then click the Keyboard button.
- Where it says Press New Shortcut Key, type the sequence, then click Assign.
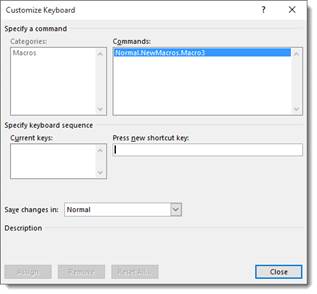
- Click Close to begin recording.
- Perform the actions that you want recorded.
- Click on macros.
- Click on Stop Recording Macros just as you did in the last section.
Running a Macro
To run a macro from the Quick Access Toolbar, simply select the Macro button:

If you do not see it, click the downward arrow to the right of the Quick Access Toolbar, then click More Commands. You can then add your Macros by adding the icon using the Choose Commands From and finding Macros.
Customizing and Expanding Word
In Microsoft Word 2016, you can customize the ribbon to your liking. You can change the order of the tabs, or rearrange the groups that appear on each tab. You can even create custom tabs and groups. This is so you can have quicker access to the features that you use the most to make using Microsoft Word even easier than before.
To customize the ribbon, click File, then Options.
Click on Customize the Ribbon from the column on the left. You will then see this window:
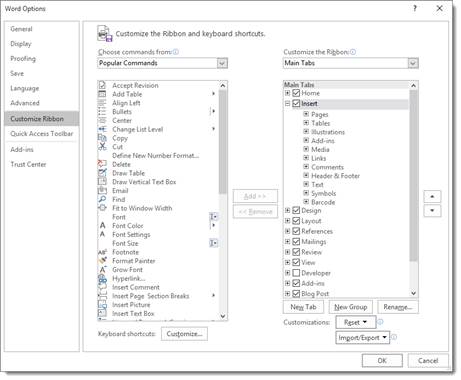
The list on the right represents the ribbon. Clicking the + next to the name of each tab will expand it. In the example above, you can see that we have expanded the Insert tab. Now we can see the groups arranged on that tab--pages, tables, illustrations, etc. Clicking the + next to each group will show you its commands.
To change the order of each item in the list, click on it and drag up or down. Alternatively, you can select the item then click the up or down arrow on the far right.
You can create your own custom tab by clicking the New Tab button.
Add a new group to a tab by clicking the New Group button.
Add Commands to a Group
Once you create a new group, you will want to add commands to it. There are hundreds of commands to choose from. Only a fraction actually made it onto the ribbon by default. Basically, what you are going to do is browse for commands on the left, and when you find the one you want, you are going to select it, and move it over to the right.
Click the "Choose commands from" box and select Commands Not in the Ribbon. Scroll through the commands until you find the one you want and click on it.
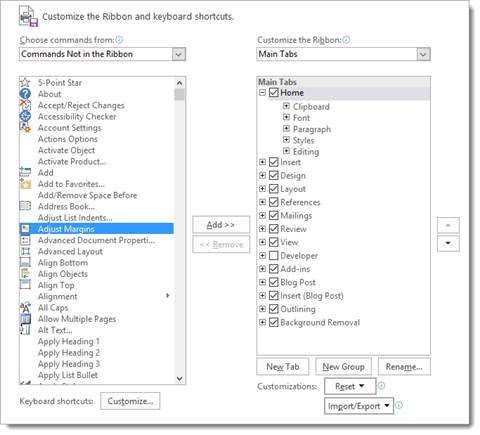
In the example above, we have selected the Adjust Margins command. We can see that it is selected because it is highlighted in blue. You may also notice that the Add button has become active. Click the Add button to move the command to the Ribbon on the right.
Once you add a command to Ribbon, you can easily move it to wherever you like.
That said, to make it easier to find the command you are looking for, you can filter them by using the dropdown list on the top left. By default, it says "Popular Commands." You can also filter by:
- Commands not in the ribbon
- All commands
- Macros
- File tab
- All tabs
- Main tabs
- Tool tabs
- Custom tabs and groups
Customize the Quick Access Toolbar
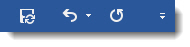
In addition to customizing the ribbon, you can also customize the Quick Access toolbar. This toolbar is located at the top left of the application window, above the File and Home tabs. It is pictured below.
To customize it, click the downward arrow to the right of the toolbar, then click More Commands. Alternatively, you can go to File, then Options, then Quick Access Toolbar.
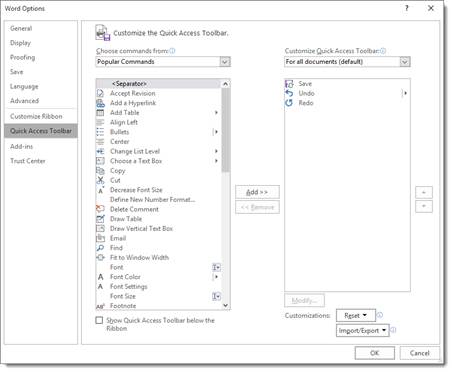
Customize the Quick Access Toolbar the same way as you did the ribbon. On the right, we see the commands that are currently displayed in the toolbar. We can choose commands from the list on the left and click Add to add them to your toolbar.
Customize Document Properties
You can also add to or edit document properties quicker and easier than ever before. To see what we mean, click the File tab.
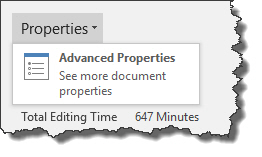
On the right hand side of the screen, click Properties, then Advanced Properties.
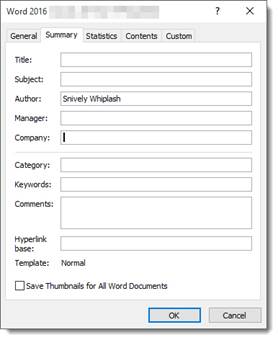
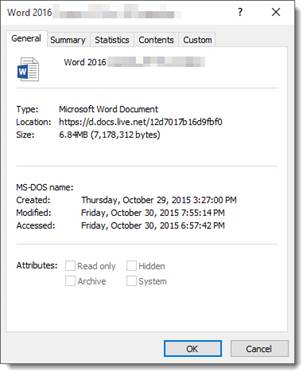
The document properties window will open. It has four tabs: General, Summary, Statistics, Contents and Custom. The Summary tab is active by default. On it, you can enter a title, a subject, the name of an author, and more.
The General tab shows you basic information about your document, like where it is stored, when it was created or last modified.
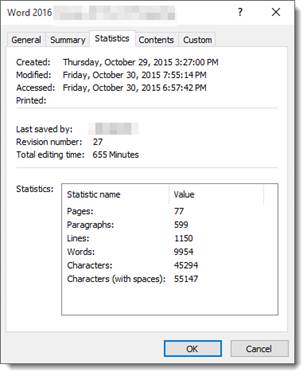
The Statistics tab shows you total editing time, number of pages, paragraphs, and lines. You will also see the word count.
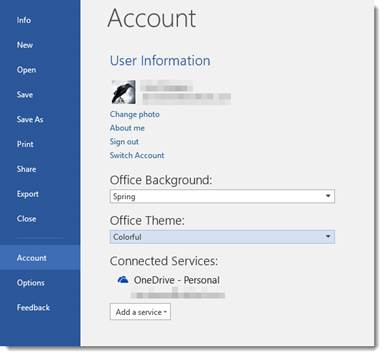
Customize Word Colors
Right now, you are probably seeing Microsoft Word 2016 with a dark blue bar at the top and a bluish-gray background because that is the default. Microsoft calls this collection of colors a theme. You can choose between three themes. The default theme is called "Colorful."
Below is the Dark Gray theme:
The final theme is called "White" and was the default theme in Word 2013.
To change the color scheme, click File, then Account. Under Office Theme, use the drop down menu to make a selection.
Changing the Office Background
Word 2016 also comes with 15 "backgrounds." They are really just simple silhouettes that appear in bar at the top of the Word application window. Below is the background called "Spring":

This one is called "Underwater":