
Adding Protection to Worksheets
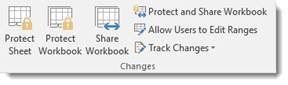
To protect a worksheet, go to the Review tab, then click Protect Sheet in the Changes group.
You can add a password that someone has to enter to be able to make changes.
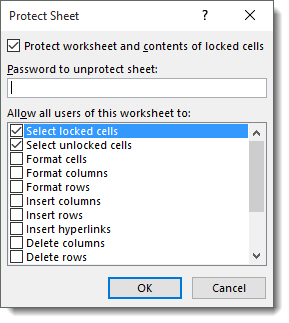
In the Allow All Users of This Worksheet To section, specify what other users CAN do to the worksheet.
Click OK.
Adding Protection to Workbooks
You can also add protection to entire workbooks.
Go the Review tab, then click Protect Workbook in the Changes group.
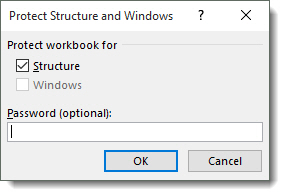
Again, you can add a password.
You can protect the workbook for structure or windows. Protecting it for windows prevents anyone from changing the size and position of the windows when the workbook is opened. Protecting it for structure prevents anyone from viewing worksheets that you've hidden; moving, deleting, hiding, or changing the names of worksheets; and inserting new worksheets or charts, or moving or copying worksheets.
Saving a Workbook
Let's say that you've created a new workbook and wish to save it to your computer to use again later. You can do this quickly and easily in MS Excel 2016. Click File, then choose either Save or Save As on the left.
-
Clicking Save will enable you to save the file under its current name and keep it saved at its current location. Keep in mind that if this is a new workbook, it will save the file by the default name of Book1. When you click Save, if another file of the same name exists, MS Excel will prompt you to either enter a new file name or to replace the existing copy with the new version you are currently saving. If you want to save the file to a new location, you must choose Save As.
-
Clicking Save As gives you a lot more options to saving your work. First of all, when you click Save As, you must specify a file name. You must also specify the format that you want to save the file in. Click File, then choose Save As on the left.
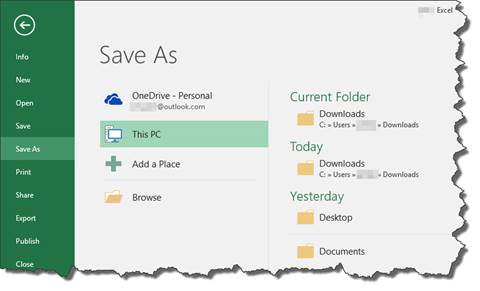
Now you can choose where you want to save it. You can save it to OneDrive (on the cloud) if you have this feature configured, other web locations, your computer (This PC), or you can add a place to save it.
Let's click on This PC.
Choose the location on your computer where you want to save the file. You can also click Browse to find a location. We're going to choose Desktop.
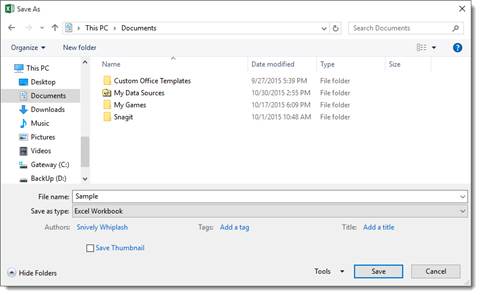
Enter a name for the file, choose the format you want to save it in, then click Save. The default file type is Excel Workbook.
You can also save a workbook by clicking the picture of the floppy disk that is located to the left of the Quick Access button. However, this will save the file under the current name. You will not be able to change the name the file or select another format. It's a good idea to click this button every so often while working in a workbook to save it in case of a power outage, computer freeze, or anything else that may cause you to lose your work.
Warning: Do NOT close MS Excel without saving your workbook. You MUST save your workbook using one of the methods listed above or your work will be lost forever.
Sharing Workbooks
You can easily share workbooks without having to send them via email as large attachments. To be able to share your workbooks with others for review or editing, click the File tab, then click Share.
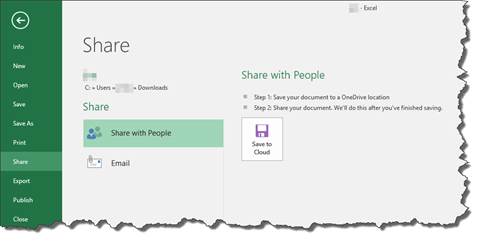
Now, choose how you would like to share the workbook.
Invite people is cloud-based sharing. First, save your workbook to your OneDrive cloud storage, then invite the people who you want to be able to view it.
Email allows you to send the file by email using your default email program.
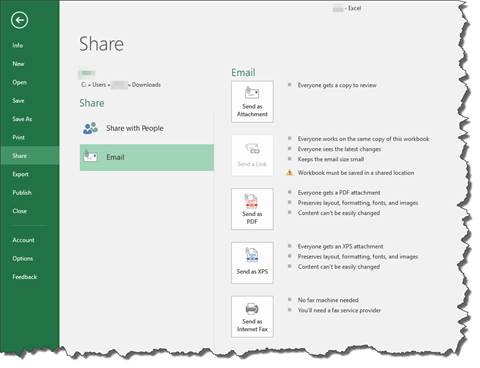
You can choose to send it as an attachment, send it as a PDF, or as an XPS � or even as a fax.
If you want to save your workbook to shared location, such as a company server, you can also send a link to the workbook by choosing Send a Link (above).
The Share Button and Co-Authoring
Excel 2016 makes collaborating on workbooks easier than it was it previous versions with the introduction of the Share button. The Share button allows you to share workbooks as you work on them in Excel. In other words, you can share an open workbook so that you and the people you are sharing the workbook with can work on it at the same time. In previous versions of Excel, you were required to save the workbook to OneDrive, and only one person could edit the workbook at a time.
The Share button in Excel 2016 is located on the upper right hand side of the screen above the ribbon.
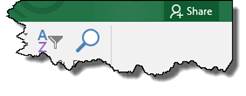
To share the workbook that you currently have open, click the Share button. You will then see the Share pane on the right hand side of your screen.
Click the Save to Cloud to save your workbook to OneDrive.
Once you've saved the workbook, go back to the Share pane.
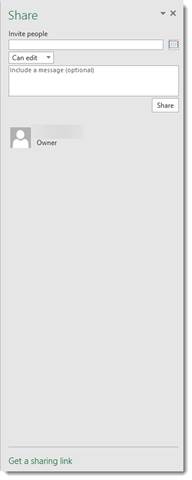
In the Invite People field, enter the email addresses of the people with whom you want to share the workbook.
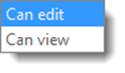
In the dropdown field below the Invite People field, specify what these people are allowed to do to the workbook.
When you're finished, click the Share button.
An email will be sent to the people with whom you've shared the workbook. It will contain a link for them to view the workbook in OneDrive.
You can also share the workbook by sending people the link to the workbook in OneDrive. To do this, go to the bottom of the Share pane, and click the "Get a Sharing Link" link.
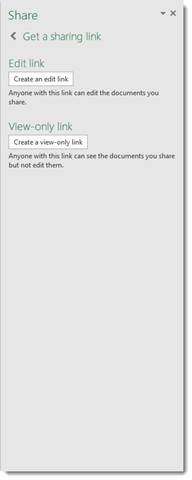
You can then choose to create an editing link, which means anyone who receives this link will be able to edit the workbook � or a view-only link. If you send someone a view-only link, the recipient will be able to view the workbook, but won't be able to make changes to it.
Whenever someone is editing your open workbook, you will see a message below the Share button that lets you know who is making changes.

You will also see a flag in the Excel workbook. The flag represents the cursor of the person who is also viewing and editing the workbook. Each person with whom you share the workbook will have a different color flag.

The changes and additions they make to your workbook will appear in real-time. You do not have to wait until they save and close the workbook to see the changes. This is the new real-time typing feature in Excel 2016.
About Power BI
Using the Power BI interface, you can create visualizations of the data in your report, and you can customize the reports by selecting only the data you want to use. If you have OneDrive for Business, you can use Power BI to collaborate and share with your colleagues and clients as well.
When you publish your workbooks to Power BI, you can use Power BI to create a dashboard and reports from your data. Reports are simply visualizations of your data. The reports become tiles that make up your dashboard.
Let's learn how Power BI works.
Once you're finished with your workbook, click File to go to the Backstage area.
Select Publish> Publish to Power BI.
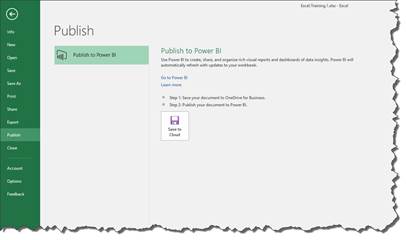
Click Save to Cloud, then save your workbook to your OneDrive.
NOTE: You can use Power BI to create dashboards and reports even if you do not have OneDrive for Business. However, you must have OneDrive for Business in order to be able to collaborate using Power BI. If you have OneDrive for Business, you will connect to your group files on OneDrive.
Once you've saved your workbook, sign into Power BI. If you do not have a Power BI account, you can create an account for free at powerbi.microsoft.com.
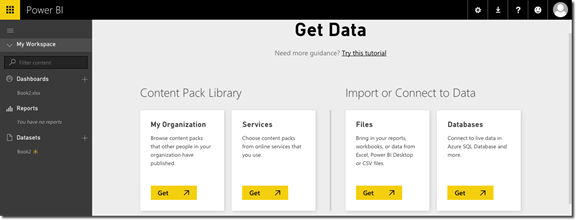
After you've created an account, click the Get button under Files. This will walk you through the steps of getting your data from OneDrive.
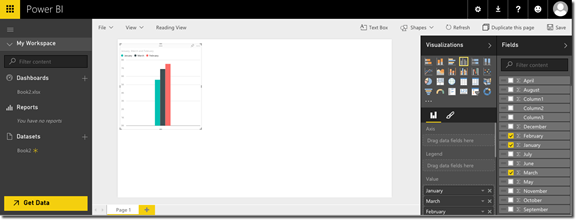
Your Power BI workspace then looks like this:
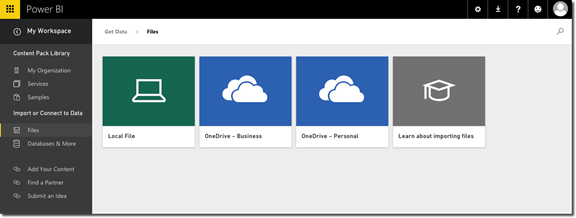
Click OneDrive-- Business or OneDrive--Personal, depending on which one you use.

Select your file as we've done above.
Click Connect on the upper right hand side of the window.
NOTE: Your data must be formatted as a table.
You will then see your dataset appear in Power BI under Datasets on the left. The yellow asterisk means it's a new dataset.
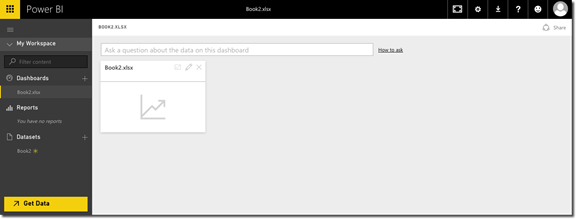
Power BI also created a new Dashboard for us under Dashboards on the left.
Select the dataset image to explore your data.
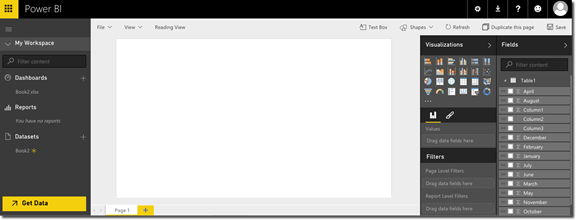
On the right, you can see a Fields list. This lists all the fields in your worksheet. We used the worksheet from earlier in this lesson that contained monthly sales figures for employees.
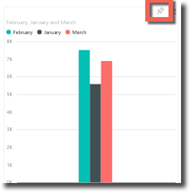
We put checkmarks beside January, February, and March in order to create a visualization of the sales from those months.
You can also add additional visualizations. These visualizations are the tiles we talked about earlier in this section.
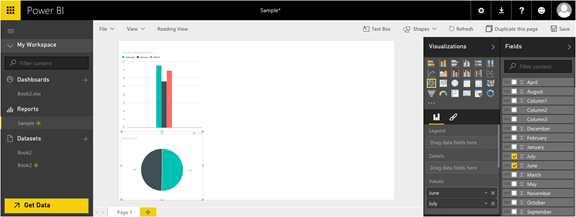
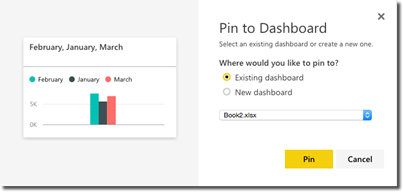
After you create a visualization you want, hover over it, then click the Pin icon. The visualization is then stored on your dashboard.
You can then pin it to the existing dashboard or create a new one.
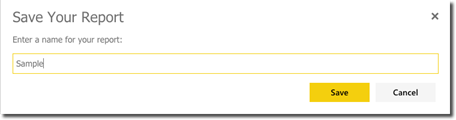
You can also go to File above your visualization and save it as a report. If it's a new report, make sure you choose Save As as the saving method.
Installing and Inserting Add-Ins
Excel 2016 gives you the ability to download apps (called Add-Ins in Office 2016) from the Office store that you can use in Excel. These apps include a thesaurus and encyclopedias. In previous versions of Office, these Add-ins were called simply Apps.
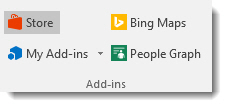
To search for and download Add-ins, go to the Insert tab, then click the Store button.
We're going to search for an install a dictionary. So go ahead and click the Store button. This will bring up the store window. Many Add-ins are free, but some of them are not. Others may only offer a free trial.
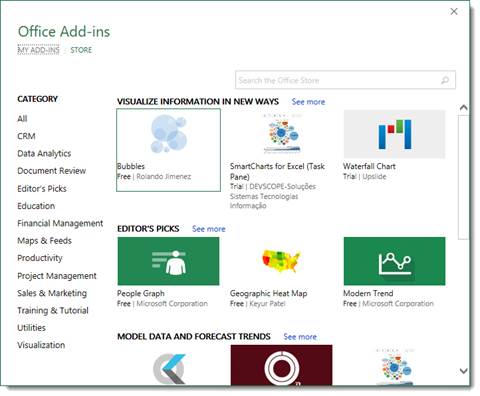
As you can see, there are lots of different kinds of Add-ins, including new charts and maps and other helpful tools that will help you get the most out of Excel 2016.
In the Search the Office Store box, type in "Dictionary."
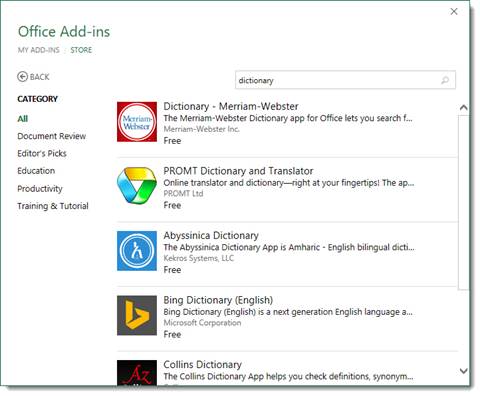
Go ahead and click on the Merriam-Webster entry at the top of the list.
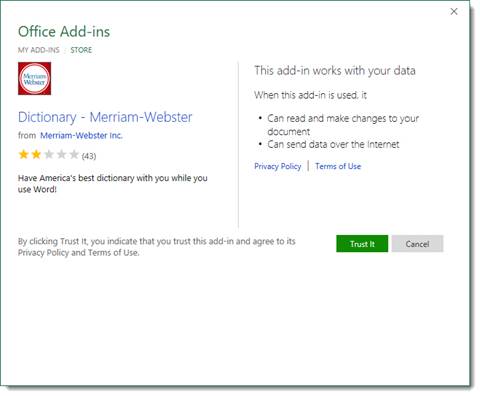
Here you'll find a description of the add-in, user reviews, and a warning about what services the add-in may access on your computer. Click the Trust It button to enable the add-in.
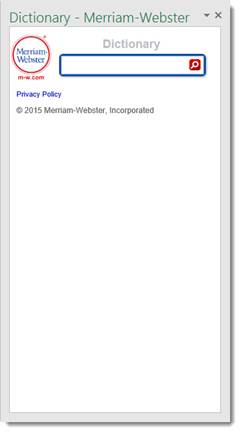
The Merriam-Webster Dictionary add-in will open as a sidebar on the right side of the Excel application window. To use it, simply type the word you want to search for in the search bar.
To see the add-ins that you've installed, go back to the Insert tab and click My Add-ins.
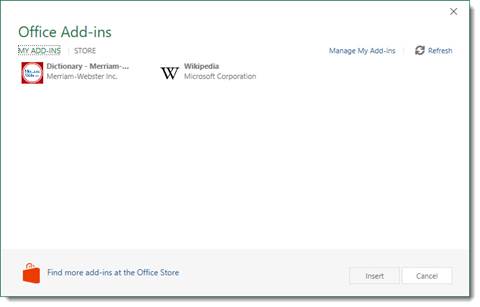
You can access the store from the My Add-ins window by click STORE.
To activate an add-in, simply select it and click Insert. You will have to do this every time you want to use an Add-in as Office 2016 no longer creates an icon for the add-in in the ribbon.


