In this day in age, it's rare to find a website without a YouTube video, map, or even Facebook like buttons on it. This is the day of social media, and it's common to place these things on your page. It's more uncommon if you don't.
This article is dedicated to showing you how to place videos, Twitter feeds, Facebook buttons, maps, and even more on your page. We've been so focused on the design of your site so far that this article should be enjoyable as you learn all the options you have with Adobe Muse CC.
Add a Google Map
Maps are always a nice touch to add to your site. You can show visitors where you're located or where something is located that you talk about on your website.
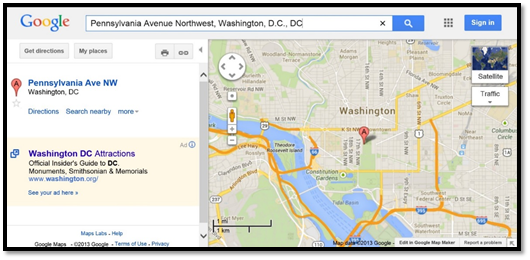
To add a map to your site, you have to start out by getting a code for a map from Google by going to http://maps.google.com.
You'll see the Google maps page. Type the address that you want displayed on the map, then click the Link button.
The link button looks like this:

When you click the Link button, you'll see this:
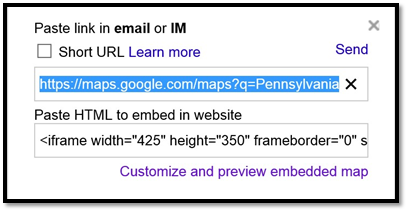
Click Customize and Preview Embedded Map.
You'll then see the Customize page.
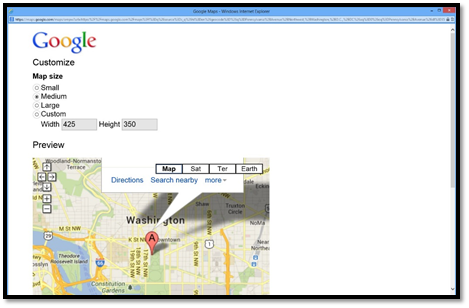
Click Custom, then enter a size for the map.
Select the code Google gives you at the bottom of the window.
Select the code, then right click in the code window and select copy.
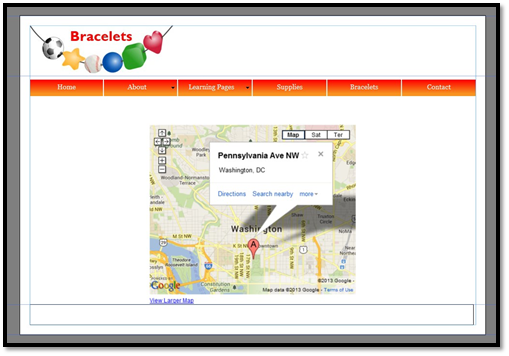
Now, you can return to Muse CC so we can place the map on your page.
In Design view, click the Selection tool. Click on the location on the page where you want to place the map. Then, go to Edit>Paste to paste the map on your page.
Muse reads the code for you and places the map on your page.
Adding a YouTube Video
To add a YouTube video to your site, you have to start out by going to the YouTube site at www.youtube.com.
When you get to the site, you can search for the video that you want to embed on your site.
Click Share, then Embed.
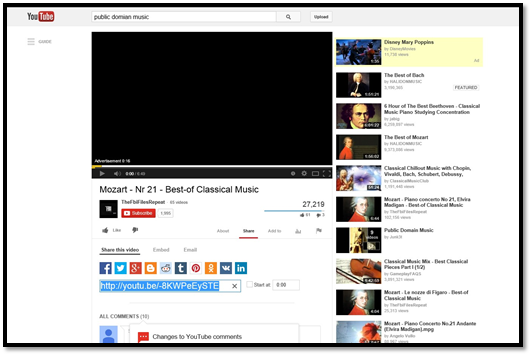
Share is underlined in red above.
You'll find the Embed link below it, to the right of Share This Video.
When you click Embed, you'll see code:
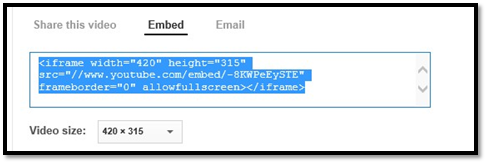
Select the code, then right click and select Copy.
Next, go back to Muse CC and the page where you want to embed the video.
Using the Selection tool, click the location where you want to place the video.
Go to Edit>Paste.
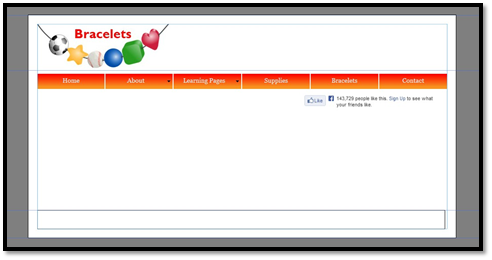
The video now appears on your page.
Adding a Facebook Like Button
You want your visitors to be able to like your website on Facebook. This is a good way to draw additional visitors to your site. However, just as with YouTube and Google, you first have to go to Facebook to make this happen.
Using your web browser, go to http://developers.facebook.com/docs/reference/plugins/like.
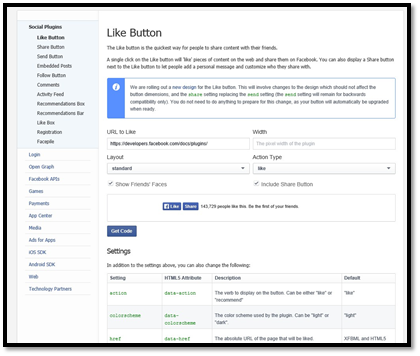
Under the heading Step 1 � Get Like Button, fill out the form.
Deselect the Send Button option. You won't need this.
When you're finished, click Get Code.
You'll then see the "Your Plugin Code" screen.
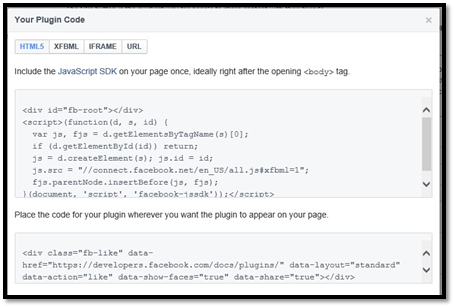
Click the iFrame button, then select the code. Right click and select Copy.
Next, go back to Muse and go to the page where you want to add the Like button.
Go to Edit>Paste.
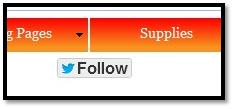
Adding Twitter Buttons
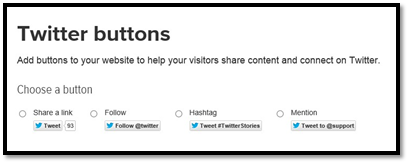
To add Twitter buttons, go to http://twitter.com/about/resources/buttons.
Choose the type of button you want to use on your site.
Once you select your button, you'll see a form appear that you need to fill out to receive your code.
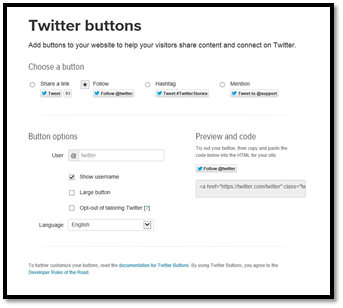
Now, select the code, then right click and select copy.
Go back to Muse CC, and click Edit>Paste.
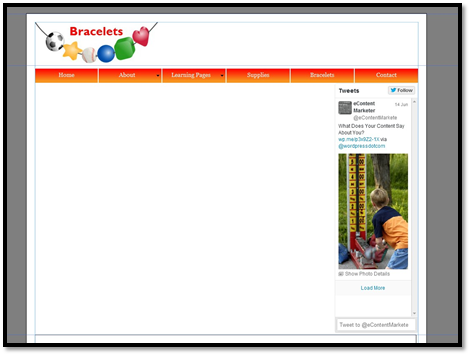
Displaying Your Twitter Feed on Your Site
You can also display a Twitter feed on your site if you want. To do this, start about by going to Twitter at https://twitter.com/settings/widgets/new. You'll need to sign into your Twitter account to do this.
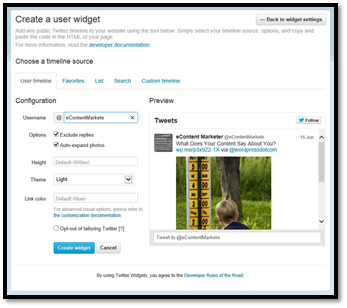
Fill out the information, then click the Create Widget button.
You'll see the code appear in the box on the bottom right side of the page.

Select the code, then right click and select Copy.
Now, go back to Muse and paste the code onto the page where you want your feed to appear.
Displaying Excel Data
At that time, you were told that Excel data wouldn't remain formatted when you imported it, which could mess up your data. However, that doesn't mean you can't display Excel data on your page. You can.
To do this, open the Excel spreadsheet you want to use.
Go to File>Save As in Excel. In the File Type, set it to Web Page. Yes, you want to save it as a web page.
Now, save the file in the location where you want it, and name the file. The name you choose cannot have spaces.
Click the Save button.
Now, return to Adobe Muse CC.
Go to Object>Insert HTML.
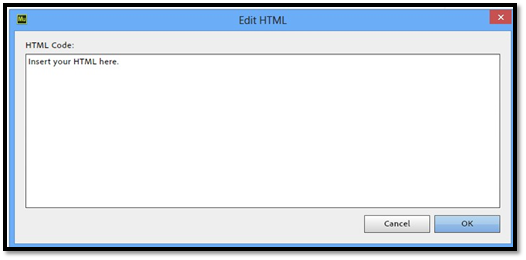
In the dialogue box (pictured above) type this:
<iframesrc="filename"width="100%"height="100%"frameborder="0"scrolling="no"></iframe>
Please note that the word filename in the example above should be changed to the name of your Excel file.
Click OK and the Excel content is added to your page. It will appear correctly after you publish your website.
Insert HTML
You don't have to know how to write code to use Adobe Muse CC. You don't even have to use code to use Muse CC. However, if you want to insert HTML code into Muse CC, you can.
To insert HTML code into your Muse CC website, copy the HTML code that you want to use.
In Muse CC, click Object>Insert HTML.
Paste the code, then click OK.
Adding Google Analytics
Google Analytics lets you track the traffic that come to your site to see how many visitors you get. It tells you where they came from, how long they stayed on your site, what pages they viewed, etc. It's a valuable tool to have, especially if you're paying for advertisements to bring people to your site. You want to make sure it's working.
To install Google Analytics on your website, go to www.google.com/analytics. You'll need to sign up for a Google account if you don't already have one. In addition, you'll have to start using Google Analytics.
Fill out the information that Google requires to create your account.
Go to your Google Analytics dashboard. Scroll down the page to find a code box. Select the code, then right click and select Copy.
Now, go back to Muse CC and open the page where you want to add the code.
Click in the header of the page. This is important.
Now, go to Object>Insert HTML.
Right click in the box where you add HTML.
Select Paste.
Publishing Your Site to the Web
Adding Metadata
Before you upload your site to the web, it's important that you add metadata to it. Metadata is information about your page that the search engines will read.
There are two types of data you need to worry about: keywords and description .
The keywords you use should relate to your website. You can also use common misspellings of keywords.
The description is a short paragraph that describes the purpose of your site. This description might appear on search engine results so that visitors know what to expect if they click through to your website.
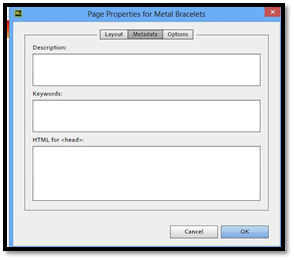
You'll enter metadata for every page of your site. However, let's start with the Home page. Go ahead and open it now in Design view.
Once you have it open, go to Page>Page Properties.
Enter the description for your site in the Description box. Remember to keep it brief.
In the Keywords box, enter your keywords. These keywords should be related to the page. Enter as many keywords as you want. Separate the keywords with a comma.
Click OK when you're finished.
Deciding Which Pages to Publish
Once you've entered your metadata, you're almost ready to publish your site to the web. Before you do, however, you need to decide if you want to upload all your web pages to the Internet. There may be a few that you don't want to publish yet. Perhaps they're not ready, and you want to wait until later to upload them. You can do this, but just remember that if you've linked to pages that you don't upload, you will have broken links on your site. Your visitors will see error messages.
If there is a page you don't want to upload, right click on the page in Plan view.
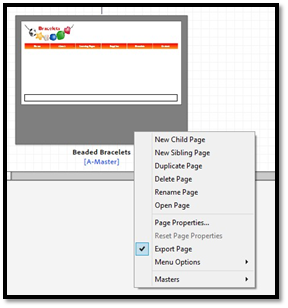
Click on Export Page to remove the checkmark beside it.
Finding a Host
Now that your website is ready to publish to the web, it's time to find a place to publish it. If you want, you can use www.businesscatalyst.com by Adobe. Business Catalyst was designed for ecommerce businesses. It offers everything you need all under one platform, including marketing.
However, if you just want to publish your site to the web without all the extras, you can also buy a hosting plan. Hosting plans are sold by website hosting companies. GoDaddy and Host Gator are two well-recognized hosting companies, although there are hundreds of them to choose from.
A hosting company provides you with space to put your website on the Internet. It's the same as going camping with a camper. You need a place to park your camper, so you rent space in a campground. You'll essentially purchase space on the Internet. You'll either pay for that space annually or monthly in most situations.
Hosting plans can start out as little as a few bucks a month and skyrocket into hundreds of dollars per year, depending on what you need and want.
Buying a Domain Name
Before you need space (or hosting) to publish your website to the web, you need an address for your website. If we use the camping example again, your address is the lot number where your camper is parked. That way, people know where to find you.
You can buy a domain name from the company you are going to buy your hosting plan from. Choose the domain name that you want. For example: myprettybracelets. Then add .com, .net, .org, etc. If it's available, you'll be able to buy it.
This is the box on GoDaddy where you can start the process of searching for a domain name.

Enter in the domain name you want. For example: myprettybracelets.com. Click Go to see if it's available.
If it's not available, you can try .net or .org, or .co. If it is available, you can purchase it.
You purchase a domain name for at least a year. Prices average around $10 to $15 for one year.
Please keep in mind that this article is not recommending GoDaddy or any other hosting/domain company. Shop around. Ask your colleagues and friends. Choose the one you want.
Exporting Your Muse Files to HTML
Adobe Muse files are stored in Muse format. In order to upload them to the web, you need to first export them to HTML.
To do so, go to File>Export as HTML.
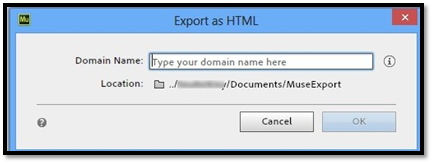
Enter in your domain name.
Now, tell Muse where to export the files by clicking the file icon next to Location.
Click OK.
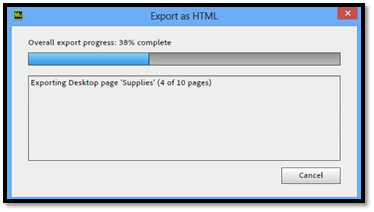
Muse will show you its progress as it exports your pages.
When it's finished, you'll see this message:

Click OK.
Understanding Your Files
Go to the exported files on your computer by finding the folder, then opening it.
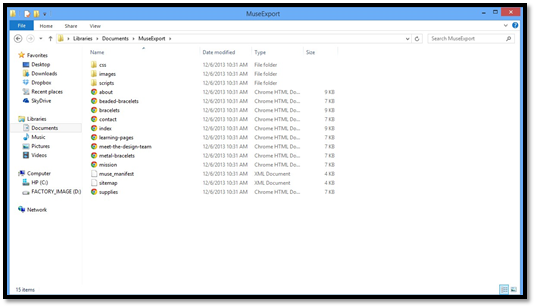
You can see your pages listed, plus folders. These folders contain your images and scripts. If you want to edit your Muse CC website later in a different website design program, you would use this export folder and the files contained in the folder.
Uploading Your Site
Now it's time to upload your website to the web. To do this, we're going to use an FTP program � or File Transfer Protocol.
Your host will provide instructions on uploading your site to the server. Have the instructions from the host in front of you before uploading your site.
That said, Windows provides an FTP utility as part of its operating system. You can use that, or you can download a free FTP program from the Internet. It's up to you. All FTP programs ask for the same information to upload your site.
- � The address of your host's FTP server.
- � Your username (with the host).
- � Your password.
If your FTP program asks you for additional information, it w
ill be information that you can find with your host.