Action Buttons
Action buttons are simply buttons that you can insert into your PowerPoint presentation that make it easier for you � or your audience � to navigate. They can especially be helpful if you're giving your presentation to a larger crowd. Some examples of action buttons are home, forward (next slide), pause (pause the slide show), information, and help.
To insert an action button into a slide, first click on the slide. Next, go to Slide Show on the menu bar. Select Action Buttons. You can then choose the action button that you want to insert from the menu.
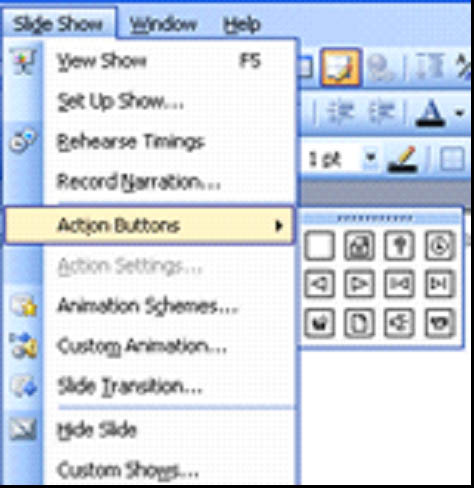
For this example, we've selected the Help button.
Now, click the spot on the slide where you want to insert the button.
The button will appear on your slide, and a dialogue box will appear just like the one below:
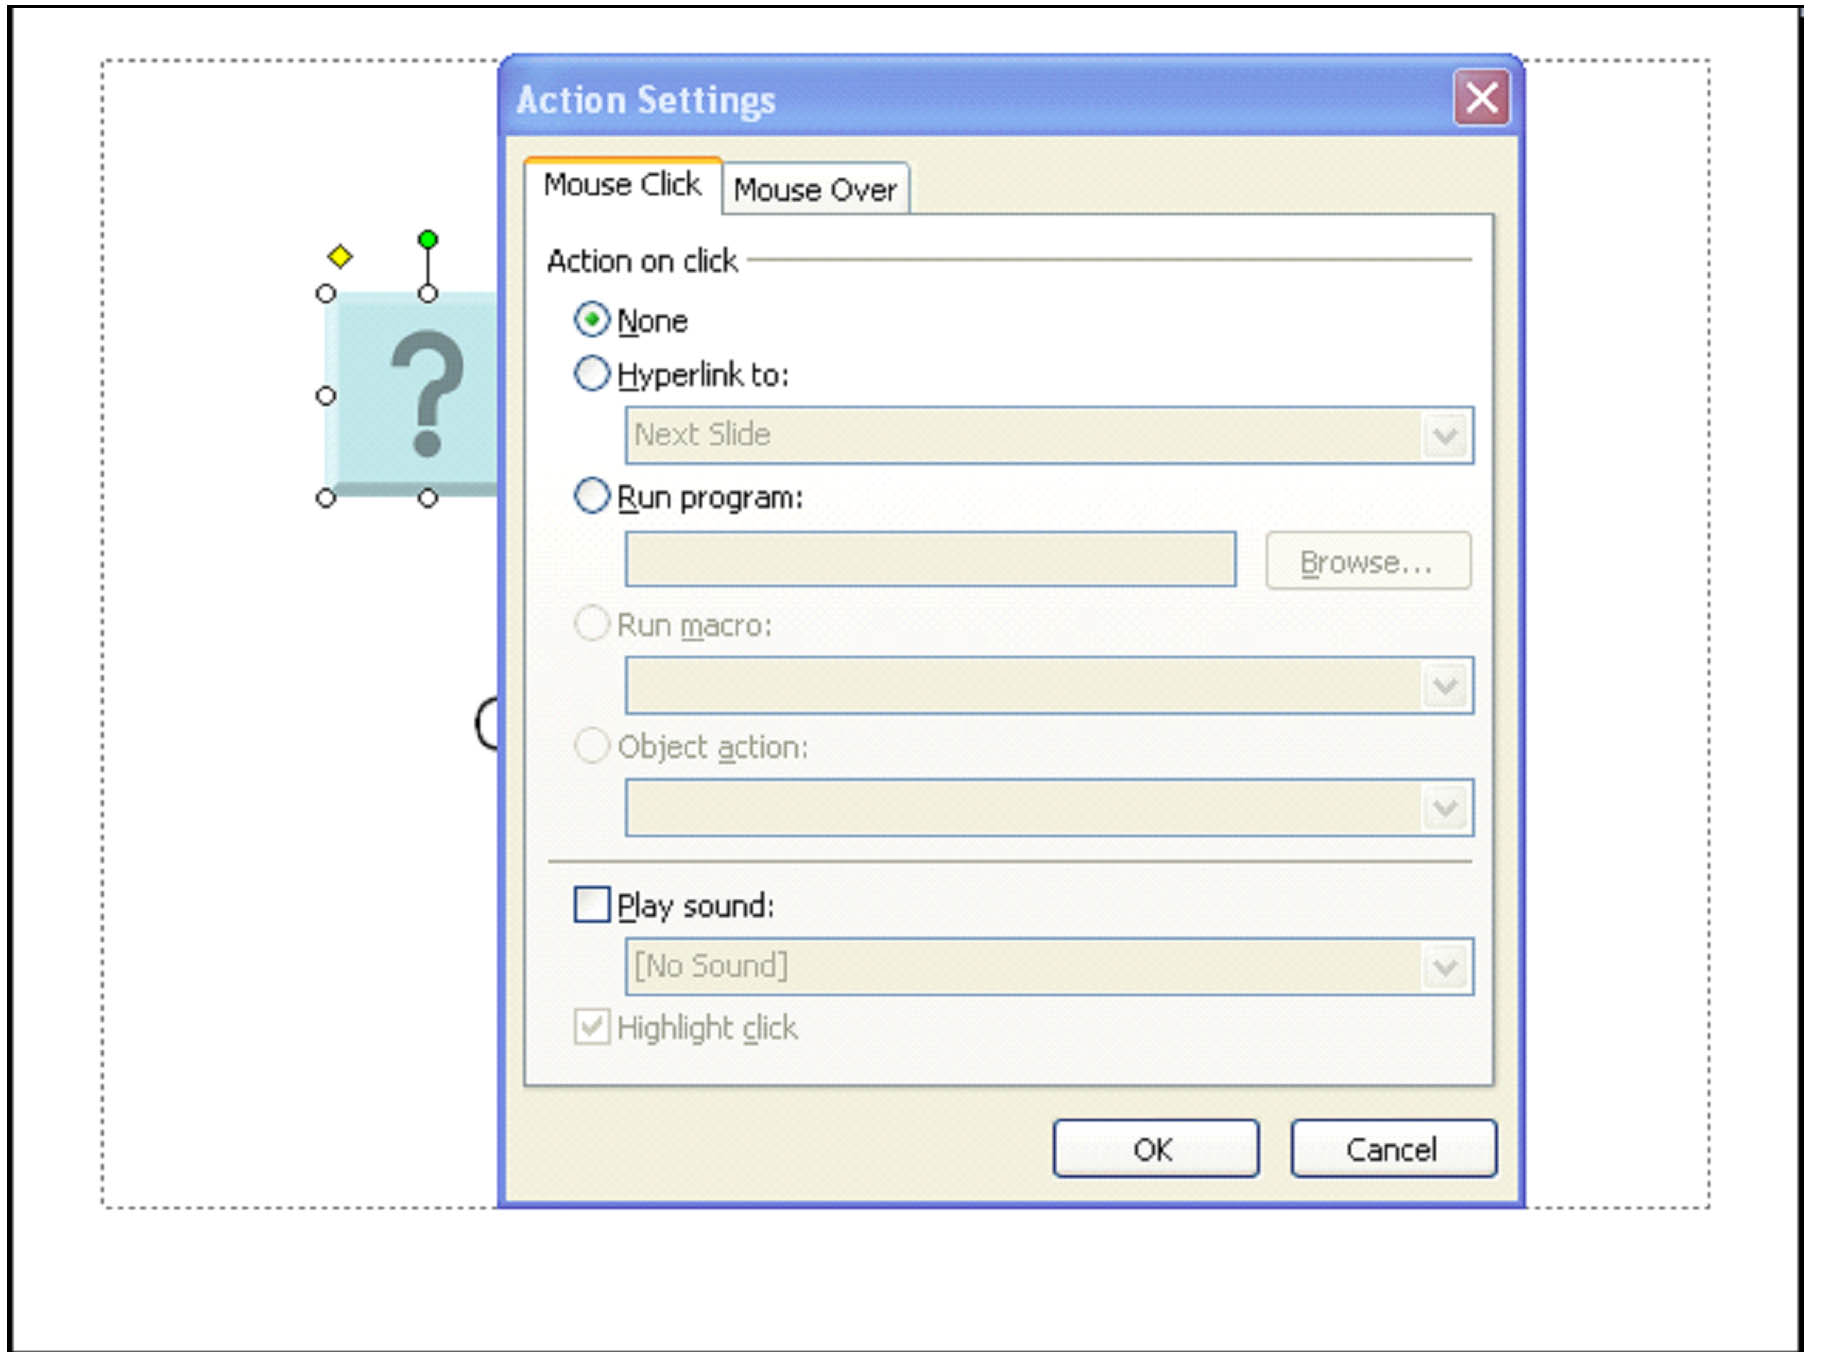
In the box above, you fill in what you want to happen when you � or a viewer � clicks on the Help button. They are all self explanatory and very easy to customize. The same thing applies to the Mouse Over tab in this dialogue box. However, instead of clicking on the Help button, the viewer would just have to mouse over it for the action to be taken.
Note: If the dialogue box does not appear when you place the button on your slide, right click on the button and select Action Settings.
Hyperlinks
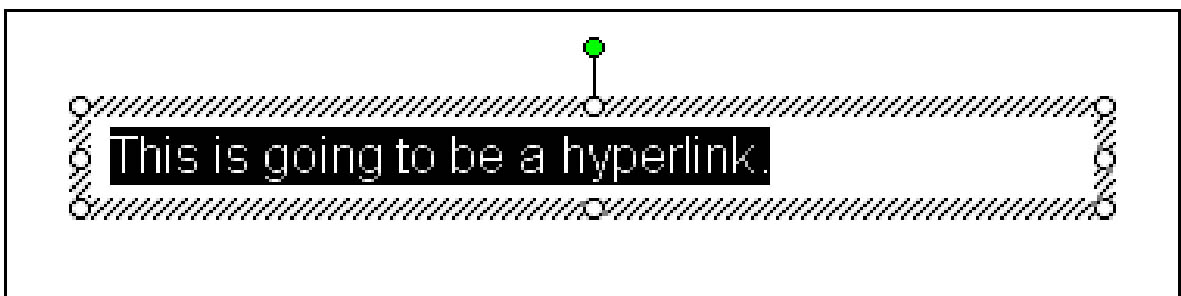
Hyperlinks are text or graphics that you can click on to be taken to a different location in the presentation, on the computer, or on the Internet. You click on hyperlinks every day when you surf the Internet; however, most people just refer to them as "links."
- To insert a hyperlink into your presentation, first select the text box, then the portion of text, or the graphic that you want to serve as the link.
- Go to Insert> Hyperlink.
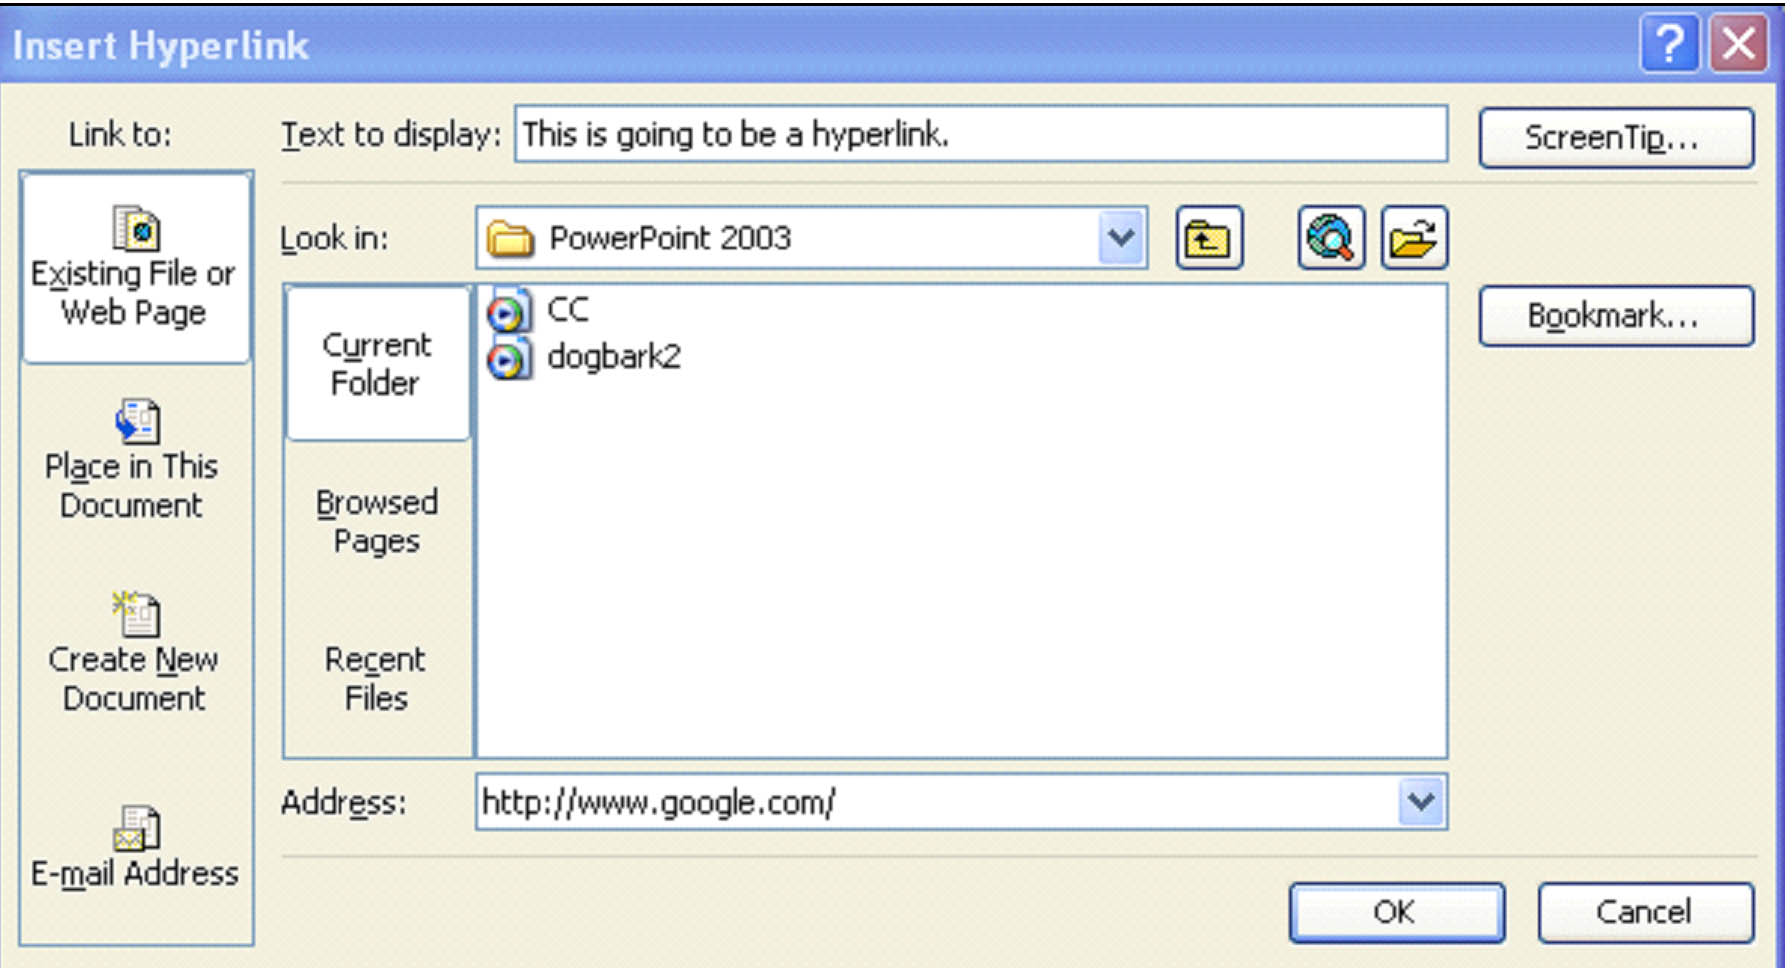
- In the Text to Display box, you can change the text that will become part of the link.
- Then, you can select the folder that contains the file you want to link to. You can also select browsed web pages or recent files. Also, you can just type the web address in the Address window.
- When you're finished, click OK.
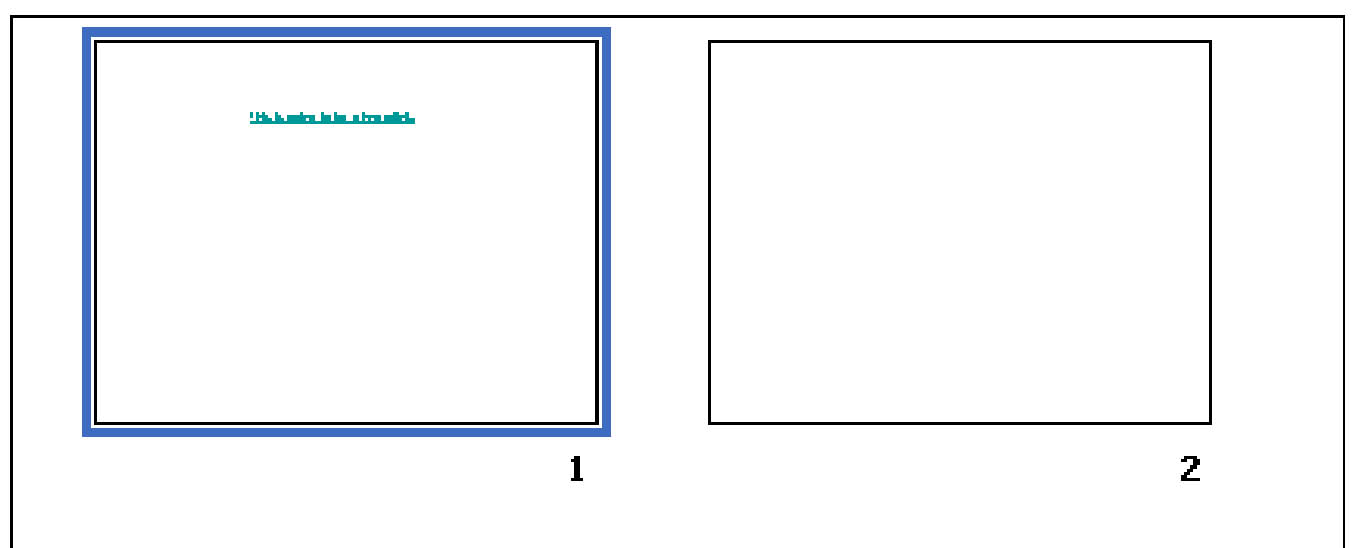
- The hyperlink is now inserted. It is defined by different colored text and the underline, as shown below.

Transitions and Slide Transition Speed
Transition effects add visual appeal and excitement to your work. They are effects that happen as one slide transitions into another and are very similar to the special effects you can apply to movies and sounds.
For example, let's say that you want to transition from slide 1 to slide 2. Without any transition effects, the slides would just switch from one to the other. However, if you add a transition effect, a curtain could appear over slide one and, when it lifts, slide two is visible.
Let's learn how to apply transition effects. By doing that, you'll understand more of what they are.
Go to View> Slide Sorter.
Choose the slide that you want to add a transition too. If you want to add a transition to more than one slide, press and hold the Shift key as you drag your mouse to select the slides.
The Slide Sorter toolbar should be in the toolbar area. It looks like this:

If it's not showing, make sure you have the view set to Slide Sorter. Also, go to View> Toolbars and place a check by it.
- Click the slide transition button
 .
.
- The Slide Transition menu will appear in the task pane.
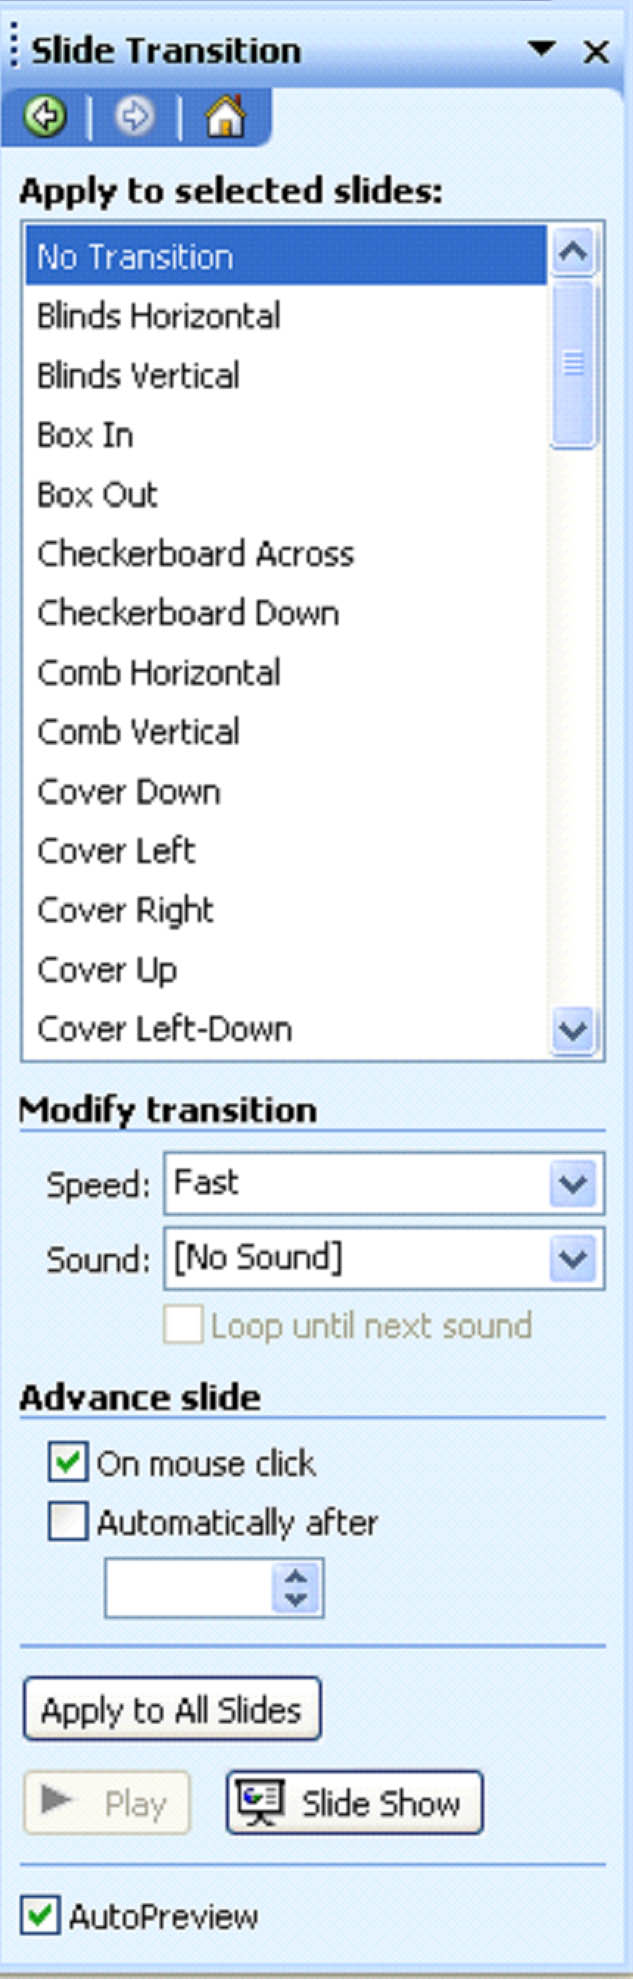
- In the Apply to Selected Slides, choose the transition effect that you want.
- Specify the speed and the sound that is to be played with the transition in the Modify Transition section.
- Choose whether the slides should advance on the click of the mouse or automatically after a specified period of time. If you want slide 1 to be on the screen for thirty seconds before slide 2 appears, you would enter :30 in the Automatically After box.
- Next, you can choose whether to apply these settings to all slides.
- You can then play the transition or view the presentation as a slide show.