Being able to enter tasks is critical, not only to your project, but to being able to use Project 2016 successfully. The tasks are what will track your project progress from start to finish. There are a few ways that you can create an enter tasks.
- You can enter task names in Gantt chart view.
- Enter task names in the Task Information dialogue box.
- Import tasks from Excel or Outlook
Let's start with the simplest.
Gantt Chart View
Gantt Chart view is the default view in Project 2016. This means whenever you open Project, it opens in Gantt Chart view. To enter a task in this view, you can simply start.
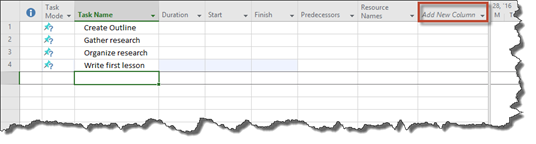
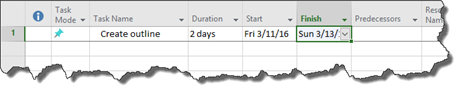
For our project example in this article, we are simply going to use the creation of this course as our project. In Gantt Chart view, we are going to enter "Create Outline" as our first task. We are going to add it in the Task Name Column, as shown below.
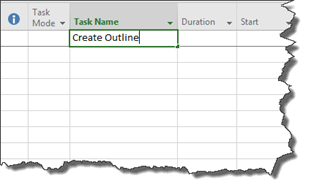
All you have to do to enter the task is click in the first available cell in the Task Name column, then type the name of the task.
Now, we can enter other information about this task such as the duration, start and finish, predecessors, and resource names. We've just entered "Create Outline".
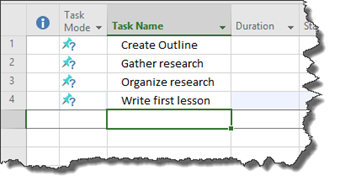
Once you've finished entering the task name, you can enter other tasks if you want. Use the down arrow on your keyboard to move down to the next Task Name cell or just click on another cell. Repeat these steps until you've entered all task names, as we did in the following snapshot.
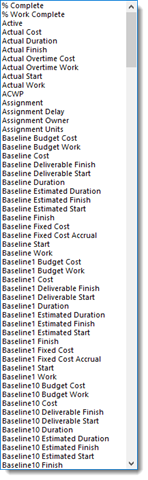
If you need to display more columns to add more information, simply go to Add New Column.
Then select the column name to display from the Field Name list.
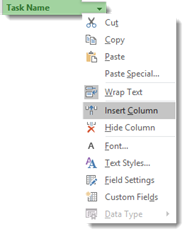
If you do not see a column called Add New Column, right click in any of the column headings and select Insert Column.
Entering Tasks Using the Task Information Dialogue Box
There are several ways to enter tasks into Project 2016, including using the Task Information dialogue box.
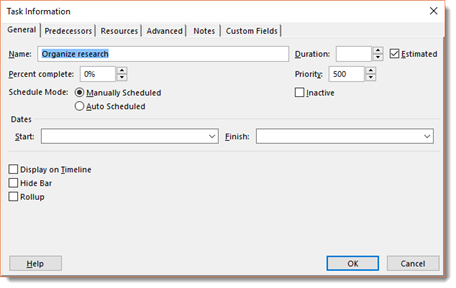
To create tasks using the Task Information dialogue box, simply double click a blank cell in the Task Name column.
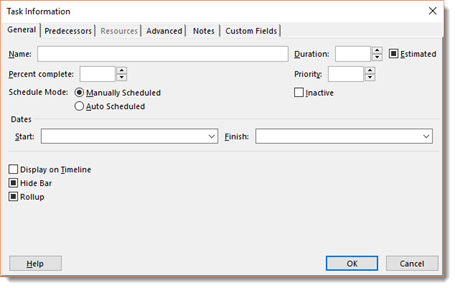
Enter a name in the Name Field.
Click OK. The task now appears in the empty box that you double clicked on. Use the arrows to navigate to the next cell and repeat these steps to add more tasks using this method.
Entering Tasks using Outlook
You can also import tasks from Outlook. This is a handy feature. Sometimes you have so many tasks in Outlook that they can turn into a project of their own. When this happens, you can use Project 2016 to manage your Outlook tasks by importing them into Project. You'll then have all the benefits of project management software instantly at your fingertips.
You can also insert tasks from Outlook into a project you've already created in Project 2016 if the Outlook tasks are part of the project.
To import tasks from Outlook:
- In Project 2016, either open the project or create a new project.
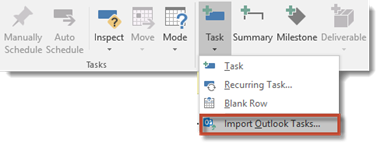
- Next, go to the Task tab. Click the Task button dropdown menu, and select Import Outlook Tasks.
- You will then see the Import Outlook Tasks dialogue box.
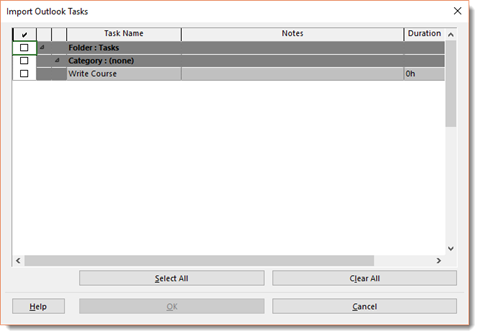
- Select the options for the task that you are going to import. You can also click Select All to import all tasks.
Click OK when you're finished.
Effort Driven Tasks
An effort-driven task means that it is a task where effort drives it to completion. If you adjust resources (or people or things used to accomplish a task), the duration of your task might change, but the hours of effort (or work) will stay the same. Whenever you add or delete a resource on an effort driven task, the work is divided equally among those resources.
The definition we gave you above will suffice for the time being to help you understand effort driven tasks.
That said, this is how an effort driven task works:
Let's say you have a task set up that will take two days. Two days is its duration. You have one resource assigned to this task working four hours a day. It will take eight hours to complete the work - or two 4 hour days. If you add another resource to this effort driven task, it will only take half the time because the work will be split between them. Effort driven can simply mean that effort drives the task to completion. The more resources that put in effort, the less time the task will take.
As we said, all tasks are effort driven by default. You can change a task so it is not effort driven (or make it effort driven again), by double clicking a task in the Task Name column to open the Task Information dialogue box, as we have done below.
Click on the Advanced tab.
Either check or uncheck the Effort Driven box.
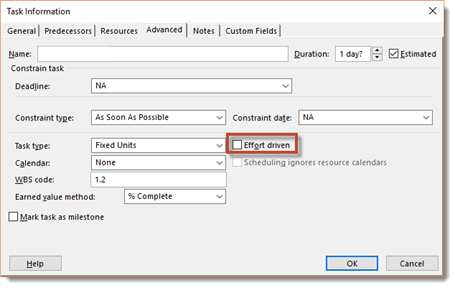
Click OK when you are finished.
NOTE: Notice that the Effort Driven box will be grayed out for manually scheduled tasks.
Task Notes
With every task that you create, you can also add notes about the task. You can use the note area to write about changes in timing, to list changes in vendor information, or any other information or changes relevant to the task.
To enter task notes:
Double click on a task in the Task Name column.
Select the Notes tab in the Task Information dialogue box as shown in the next snapshot.
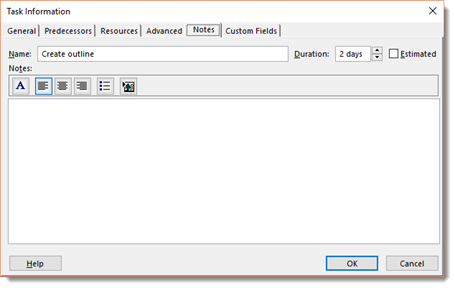
The task name will appear in the Name field. You can write your notes in the text field.
Project also gives you the ability to format your notes. You can left align, center align, or right align. Also, you can format text as a bulleted list or insert an object.
When you are finished, click OK to save your note.
Scheduling Tasks
Tasks that you enter into Project will obviously take place at a certain time. A task could take place upon completion of another task, or it could take place at a certain date with a specified duration.
In Project, you can manually schedule tasks. When you manually schedule tasks, you can enter the task duration and date. That said, you won't have to enter the task duration and dates right way. You can enter these later. When you do enter the duration and dates, Project will fix the schedule for the task. It won't move the task unless you do it manually.
However, you can also have tasks scheduled to start automatically, such as when another task reaches completion. If you choose Auto Schedule, Project 2016 will figure out the task schedule for you based on the start and finish date for the task, dependencies, calendars, and resource scheduling.
Let's learn how to manually schedule tasks, as well as to set them to start automatically.
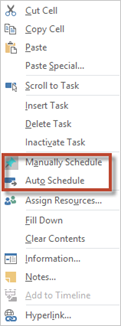
To set the scheduling for a task, right click on the task in the Task Name column, then choose Manually Schedule or Auto Schedule.
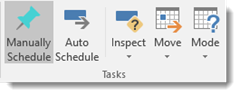
If you choose Manually Schedule, you will see that the Manually Schedule button under the Task tab is selected.
You will also see that it's a manually scheduled task by looking in the Task Mode column.
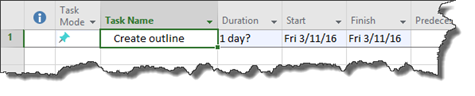
If you choose Auto Schedule, you will see the Auto Schedule icon in the Task Mode column to let you know it's an automatically scheduled task.

It's important to learn how to choose either manual or automatically scheduled tasks.
Splitting Tasks
Sometimes a scheduled task will start, and you will find that you need to put it on hold while you take care of another issue or complete another task. Or maybe you realize there will be a delay in the task when you create it, so you will need to structure it so that it takes a break and resumes later.
You can easily remedy either of those scenarios in Project by simply splitting a task. When you split a task, you create a break in it with no activity occurring for the task during the break. You can create as many splits in a task as you want.
To split a task:
Click on the task in the Task Name column.
Go to the Task tab. Click the Split Task button in the Schedule group.
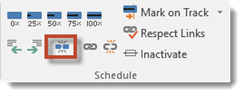
A box appears in the Entry Bar that guides you as you split a task.

In the snapshot below, you can see we have a scheduled task.
Let's say we want to split the task above. To do this, click the Split Task button on the Ribbon.
Click in the Gantt Bar in the area where you want the split to occur. The Gantt Bar is highlighted below.

Now, click the date where you want to split the task in the Gantt Bar and on the blue bar that represents the duration of the task.
The blue bar will split in two. Drag until the second blue bar shows the date where you want to begin the task again.

When you release the mouse, your task is split.
Project 2016 Views
A view in Project is simply the way that task and/or resource information is displayed. It gives you a way to view data in a worksheet, a way to enter data, or a way to view data in chart form. Throughout a lot of this article, we'll use Gantt Chart view. In fact, unless we tell you otherwise, when we work with tasks we will always be in Gantt Chart view. However, it is not the only view in Project.
The reason we will use Gantt Chart view is because it is one of the easiest ways to view and add task-related data in Project. But once you master that, there are several ways you can use to display that information.About ViewsViews organize data. It is that simple. They organize the data and present it in a certain way. Each view in Project organizes your data, then presents it to you. There are several views available in Project, which is helpful since you enter so much data into the program, such as tasks, resources, assignments, timing, progress, and even financial information. That's a lot of data! Views help you sort and view that data.Moving Between ViewsThere are several ways that you can move between view in Project 2016. The easiest way is probably using the Task tab on the ribbon. Go to the Gantt Chart button (as pictured below) and click the downward arrow, and you'll see the most commonly used views.
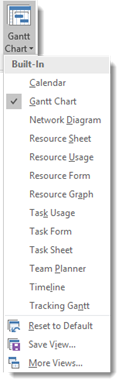
You can click on any view listed to display that view in your Project 2016 window.
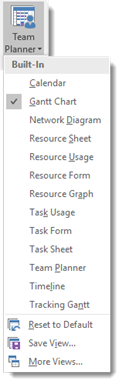
You can also see this list of views if you click the Resource tab, then the Team Planner button.
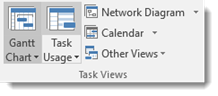
You can also access different views by going to the View tab on the ribbon. The Task Views group lets you select Gantt Chart, Task Usage, Network Diagram, Calendar, Task Sheet, or Timeline.
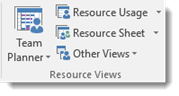
The Resource Views group lets you use the Team Planner, Resource Usage, Resource Sheet, or Resource Form view. The other groups under this tab let you sort data, change timescales, and zoom.
If you click the dropdown arrow below the Team Planner button in the Resource Views group, then select More Views, you can select views that aren't displayed on the ribbon (shown below).
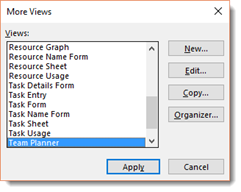
Select the view you want, then click the Apply button. The view is then applied to your workspace.
In this article, we will cover the views you will use the most to set up and manage your project. While there are several views that you can use to display your data, the ones will talk about more in-depth in this article are the ones you will need to use as you get started in Project and begin to add data. In fact, these views will populate some of the others with data in Project.Viewing the Data You WantLet's say that you need to look at some particular data in Project. You can use the F5 key on your keyboard to access the Go To feature. The Go To feature lets you find specific data in your project.
When you click F5, you'll see this dialog box:
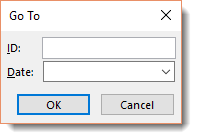 You can either search by a date by using the dropdown calendar or by task ID.Gantt Chart View
Gantt Chart view is the default view in Project 2016. It is the view you will see whenever you open a project file. Gantt Chart view contains both a spreadsheet and a chart. The spreadsheet displays your data. The chart gives a graphical view of your tasks (as pictured below).

While the Gantt Chart view looks simple, it contains a plethora of information. It is just so organized; it is easy on the eyes.
As we just said, this view has two sections, the worksheet on the left and the chart on the right.

You will use tables to tell Project which information you want displayed on the worksheet. By definition, a table is a combination of columns - or fields - which you can display by going to the View tab, then clicking the Tables dropdown menu in the Data group. This is the menu that you will see:
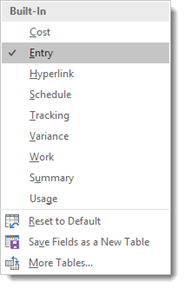
Currently, our worksheet shows us the tasks we've entered, and it allows us to enter more. We can also enter information about our tasks, such as the duration. This table is called the Entry table.
However, let's say we want to see the cost associated with the tasks in the worksheet. From the table dropdown menu (displayed above), we'd select Cost.

As you can see, the costs associated with each task are now displayed in the worksheet.
You can also click More Tables from the Tables dropdown menu to see more tables that are available.
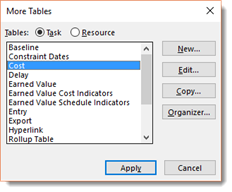 To see the data from any of these tables in your worksheet, select the table, then click Apply.The Resource Sheet View
Resources are things that you will use to complete tasks. For example, to write this article, we needed to use Microsoft Word. That makes Microsoft Word a resource. You'll enter resources into Project using Resource Sheet view.
Entering data in Resource Sheet view is a lot like entering data in Gantt Chart view - or even an Excel worksheet. You type data into the cells, then use the Tab and arrow keys to navigate around.
The Resource Sheet view is pictured below.
 The Team Planner View
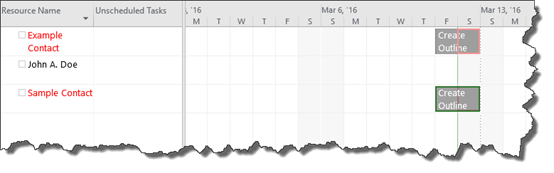
The Team Planner view displays how the work is distributed among your resources.
The Team Planner view is pictured below.
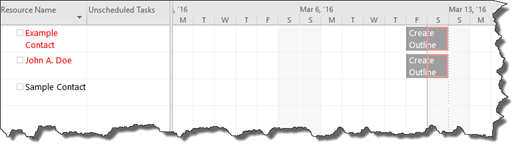
You can see that two of our team members were assigned the task of creating the outline. If we wanted to remove one of the team members from the task, we could drag the task and assign it to someone else.
 You don't have to worry about using the view right now. Instead, it's important to become familiar with why it's used.The Project Timeline
Timeline view gives you a simplified picture of your complete schedule. The Timeline view appears in its own pane with other views. In Gantt Chart view, it appears above the worksheet and chart:
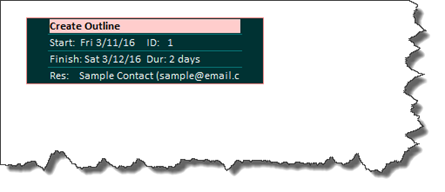
 Milestones can also be displayed on the timeline.The Network Diagram View
The Network Diagram view shows your workflow in task boxes. Dependency lines connect these task boxes to show you the sequence of the tasks in your project. The Network Diagram is read from left to right, meaning tasks that come first will be on the left. If tasks occur at the same time or within the same timeframe, the boxes are aligned vertically. If a task has an X on it, it means it has been completed.
Although Network Diagram View does not serve as a timeline, you can see timing information about each task in the task box, such as start date, finish date, and duration.
The Network Diagram View is pictured below.
Calendar View
The Calendarview looks like a regular monthly calendar. This view shows you your schedule.
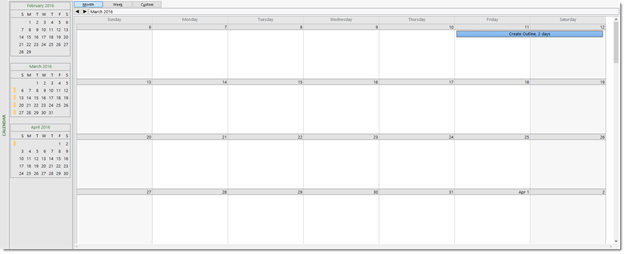
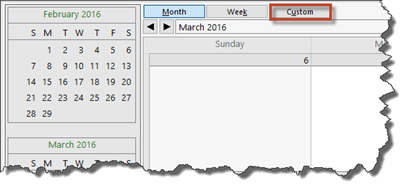
The calendar can display as many weeks at a time as you need. To change the time period displays, click the Custom tab at the top of the calendar.
You will then see the Zoom dialogue box.
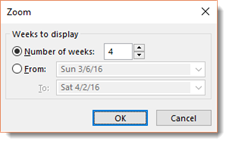
You can then set the number of weeks you want displayed. You can also set a period of time that you want displayed, such as if you want to see a certain time period.
Click OK when you are finished.