The three task types in Project 2016 are:
- Fixed Duration. Fixed duration tasks take a set amount of time to complete, no matter how many resources there are for the task.
- Fixed Units. These are the default task type. When you use this type, you assign resources to a task with a certain number of units or hours of work expressed as a percentage of the working day. The resource's assignments do not change even if you would change the duration of the task or the work amount.
- Fixed Work. This is where the number of resource hours assigned to a task effects its duration.
To set a task type, double click a task to see the Task Information dialogue box.
Click on the Advanced tab.
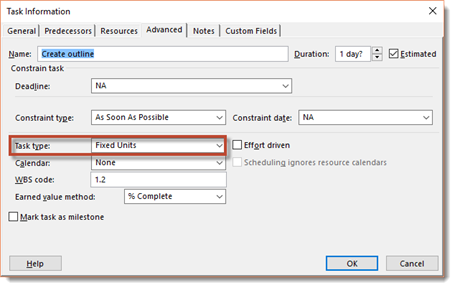
Now you can select the task type in the Task Type field.
NOTE: You can only assign task types to auto scheduled tasks. Also note that if you have a parent task followed by subtasks, you assign the task types to the subtasks.
Setting Task Duration
Setting a duration for a task means setting the amount of time it will take that task to complete. With all task information that you enter, you need to be in Gantt Chart view. Double click the task name to see the Task Information dialogue box. If your task has subtasks, you will have to click on each subtask and enter the duration of those individually. Project will then determine a total duration. The total duration will appear for the parent task.
Use the arrows to increase or decrease the duration. The measurement displayed by default is days (d). If you need to change the measure, enter'm for minutes, h for hours, w for weeks, and mo for months.
Click OK.
Recurring Tasks
Recurring tasks are tasks that are worked on and completed at regular intervals. To set a recurring task, go to the Task tab, then click the downward arrow below the Task button.
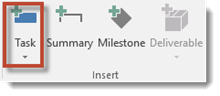
Select Recurring Task from the dropdown menu.
You will then see this dialogue box:
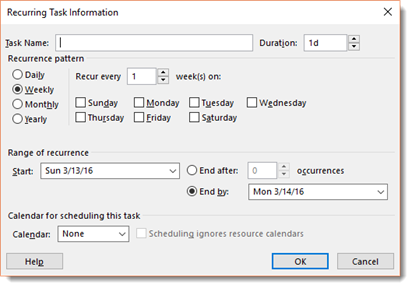
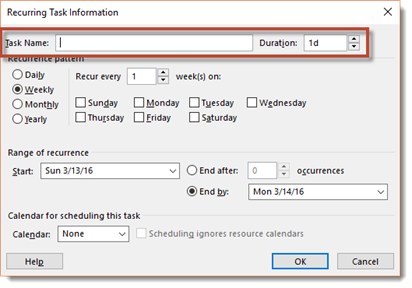
Enter a name for the task, then set the duration for the task.
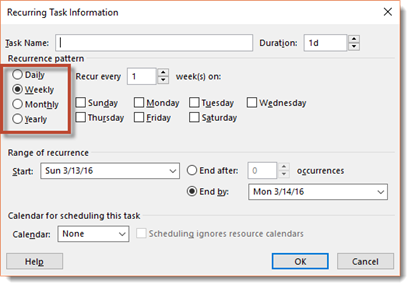
Next, set a recurrence pattern. You can choose Daily, Weekly, Monthly, or Yearly.
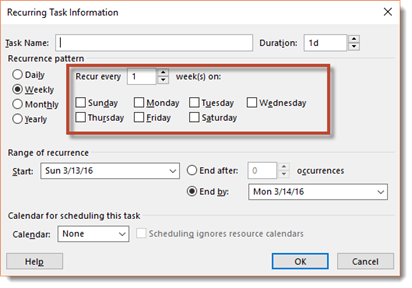
The pattern you select will determine the options you see. For weekly recurrences, you choose if you want it to recur every week, every two weeks, every three weeks, etc. Then, you choose the day of the recurrence.
Next, set the range of recurrence. This is to tell Project how long the project recurs. Does it recur for a month, a year, etc.? For example, perhaps your project recurs every week for six months. Your range of recurrence would be six months. You would set the start date in the Start field, then enter the end date (six months later) in the End By field. You can also set it so that the recurrence ends after X amount of occurrences by checking the End After Field.
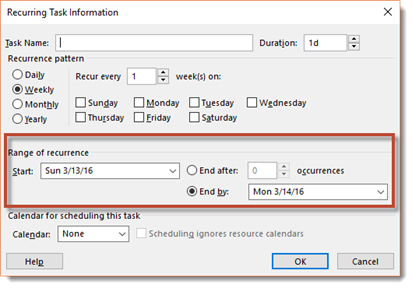
Choose the calendar you want to use, then click the OK button.
Task Start and Finish Dates
When you set a start and finish date for a task, it applies a constraint that can override any dependency (which we'll learn about later) or any other timing factors. We'll learn more about constraints later as well, but for now it is easy to learn how to set a start and finish date.
To set a start date, double click on a task name. In the Task Information dialogue box, click the General tab.
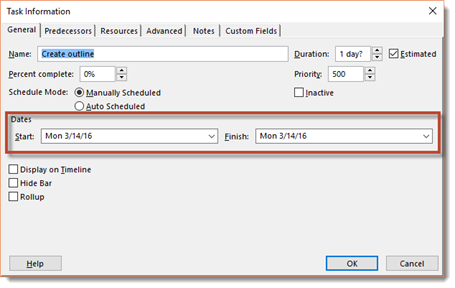
In the Dates section, select the start and finish dates. Click OK.
Estimating Task Duration
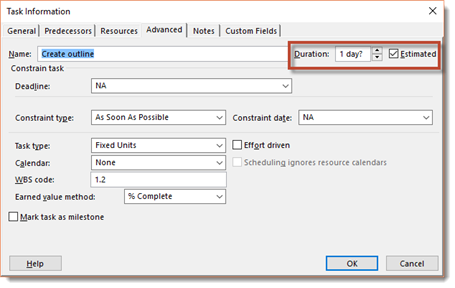
A few sections ago, we learned how to set duration. As in the snapshot above, you can see the Estimated check box to the right of where you set the task duration. When it is checked, a question mark appears after your duration.
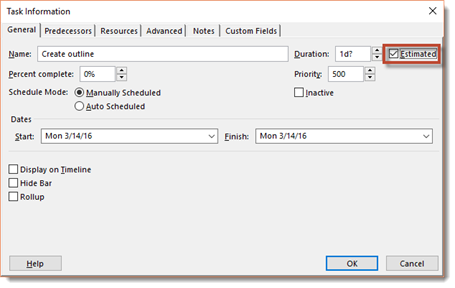
You check this box when you are unsure how long a task will take and want to let people know about your uncertainty or if you need a way to enter exact timing when you have more information.
Once you've checked the Estimated box, you need to apply a filter that will apply to all tasks with estimated durations.
Let's go ahead and click OK so we can show you how to apply a filter.
To apply a filter, select the Duration column in your task list by clicking the Duration column header once, then clicking the downward arrow to the right of it.
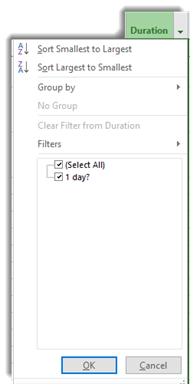
All filters are selected by default. To see just the tasks that have estimated durations, only check the box with question marks that follow the duration.
Setting Deadlines
Of course, when you have a project, you are going to need the project to be completed by a certain date. With that, you will have deadlines for tasks so that each aspect of the project runs smoothly and on time. In Project, a deadline is a date that you can assign to a task that does not constrain the task's timing. When you assign a deadline date to a task - and the task runs past the deadline - Project displays an indicator symbol by the task itself.
To someone that's never used Project before, this may seem a bit confusing, especially since we haven't even discussed constraints thus far. The good news is that we are going to devote the next section of this article to learning about constraints. In the meantime, we are going to go ahead and show you how to set a deadline for a task because it is so easy to do.
To set a deadline date, double click a task to make the Task Information dialogue box appear. Click on the Advanced tab.
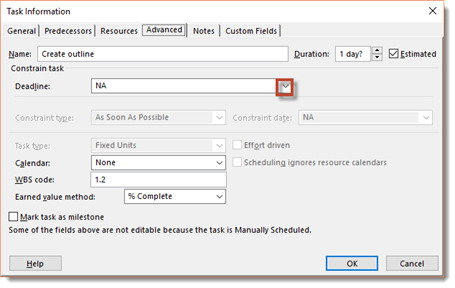
Click on the arrow in the deadline field. A calendar will appear.
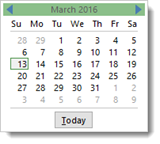
Select your deadline date by clicking on it.
Click OK to exit out of the Task Information dialogue box.
A little white downward arrow will appear on the deadline date in the chart area of Gantt Chart view, as shown in the following snapshot.

To modify a deadline, follow the steps above and simply change the date. It is that easy.
Now, let's move on to constraints.
Creating and Modifying Constraints
In our day to day lives, constraints are something we have to live with. A good example of this would be budget constraints that prohibit us from shopping as much as we'd like. In Project, constraints really are not much different, so do not be afraid of them. We haven't put off discussing them because they're that complicated. Instead, we just wanted to wait and introduce you to them at the proper time, when perhaps everything else about tasks no longer seems so daunting and confusing.
That said, in Project, a constraint is simply a timing condition that controls a task.
You already know that task start and finish times control the duration of a task and determine its timing. A constraint comes into play when the project starts to run late.
An example is when you set a constraint that a task must finish by a certain date. MS Project will shift around almost any other task in the schedule to recalculate timing before it will suggest that the particular task might finish on another date.
In other words, putting a constraint on a task means that everything else scheduled for your project might be shifted so that Project can meet the constraint that you've set. Because of this, you should only use constraints if there's no other option and you absolutely need to.
Before we teach you how to apply constraints, let's look at all the possible constraints that you can put on a task and the effects it will have on a task's timing.
Constraint
Effect on Timing
As Soon as Possible
This is the default constraint. The task will start as early as possible in the schedule based on dependencies and the project's start date.
As Late as Possible
The task will start as late as possible based on dependencies and the project's finish date.
Finish No Earlier Than
The end of the task cannot take place any earlier than the date you specify.
Finish No Later Than
The end of the task cannot take place any later than the date you specify.
Must Finish On
The task must finish by a specified date.
Must Start On
The task must start on a specified date.
Start No Earlier Than
The Task cannot start any earlier than the specified date.
Start No Later Than
The task cannot start any later than the specified date.
Only one constraint can be placed on a task. You will use the Task Information dialogue box to set any constraints that you want. Let's walk through and set our first constraint together.
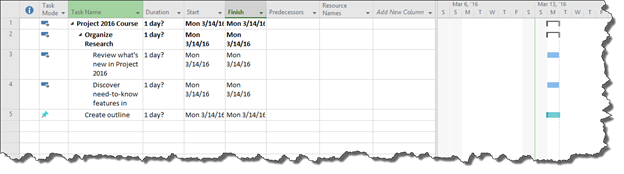
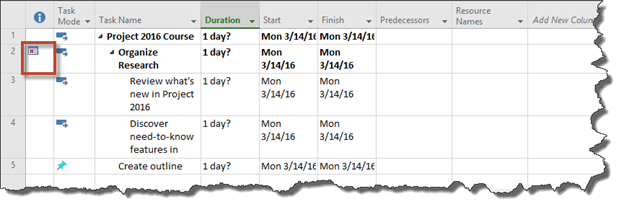
Before we do, let's take a look at our task list and graph as it exists now. This way, you can easily note changes that constraints will make. This may make it easier to understand, but it will definitely make navigating the workspace easier for you.
Here's the original task list and graph:
To start, we double click on the task that we want to apply a constraint to so that the Task Information dialogue box appears.
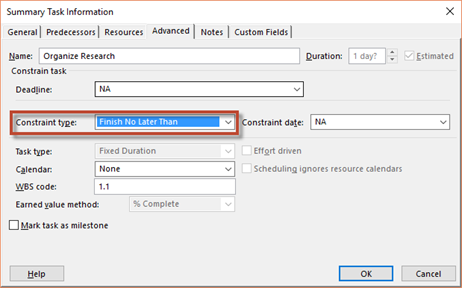
Click on the Advanced tab.
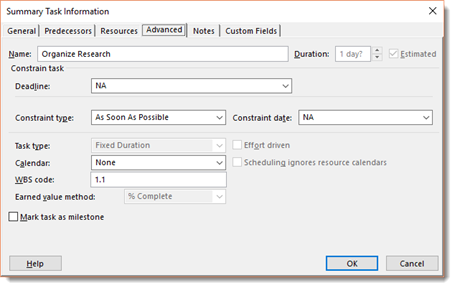
In the Constraint Type field, select the type of constraint that you want to apply. We are going to change the default constraint and instead select Finish No Later Than.
Select a date.
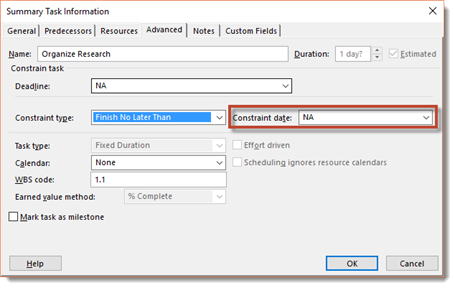
Click OK to save the settings.
In Gantt Chart view, we now see the constraint noted for the task. The start and finish dates are highlighted and there is a calendar icon in the Indicators column. In the graph, a task bar appears on earliest finish date we've specified for the constraint.
NOTE: In order to set constraints, tasks must be set to auto schedule.
Identifying Critical Tasks
Critical tasks, also known as a critical path, are series of tasks that must occur on time if your project is to meet its deadline. What you have to decide is how many tasks in your project are on the critical path and how many can be given some slack. There's not a formula or software program that can decide this for you, unfortunately. It is something you are going to need to figure out each time you run a new project.
Here are some identifiers to help you locate critical tasks:
- Tasks that are critical to the completion of the project.
- Tasks that are time consuming - and are maybe reliant on outside forces or perfect conditions. An example is having electric installed in a new building. All types of problems can arise. You need electricity, and you need to have the new building ready for occupancy by the deadline, but there's a chance it could take longer. Although you do not have time within the project for it to take longer, it very possibly could.
- Tasks that are critical to the project, but of which you aren't sure of the actual duration.
Since any critical tasks that you have in your project can push you past the deadline if they're not completed, you have to figure out which ones are not critical so you can add some slack to those. That way, if the critical tasks need additional time, you can use the slack from the other tasks without going past the deadline. This can be very important if you have a boss waiting for you to complete the project - and relying on you to complete it on time.
That said, some tasks already have slack build into them because they occur during the duration of a longer task. (They share a dependency.) You could delay the shorter task until the longer task gets closer to finishing.
Here's how you can build slack into non-critical tasks to accommodate critical tasks and still meet your deadline.
The first thing you can do is extend the duration of all tasks. Inflate them by two days or figure out the risk of delay with each task and pad them accordingly. The problem with this arises when changes occur. You may have to adjust durations on several tasks to accommodate a schedule that's running ahead or behind.
The better idea is building slack tasks into your project, or even into each phase of your project. Slack tasks could be simple tasks like approving proofs. This is a task that won't take but a few minutes, but you can build time into the project by creating this task. That way, if a critical task needs more time to complete, you have to the extra time created by the slack task that you can use.
However, if your project won't allow you to add slack tasks because there's not a minute to spare, there's also something else you can do. Check your dependencies. There may be some tasks that you have scheduled to start at the end of a predecessor task. Some of these tasks might be able to start during - or even with - the predecessor task. This will also help you build in some time to accommodate your critical tasks - or critical path.